High Point Farms CSA: Last Chance to Sign Up for the Fall

Our Fall CSA is currently underway with one pick-up out of 6 down.

Shares are still available to you lucky ducks who are salivating at the thought of grass-fed beef, pastured pork, free-range chickens and eggs!

Sign up now and pick up your share at one of two locations in the city:

http://highpointfarms.net/nyc-area-csa.html

Shares have been pro-rated to reflect the remaining pick-ups!

Asparagus with Chorizo and Croutons


Have you ever made something from memory, and then gone back to the original recipe to find that you mixed it all up?

That’s what happened here, but that is not to say that the results are not still delicious.

This is sort of one of Jacques Pépin’s Fast Food recipes. I’m sure that his is better, but the basic combination of chorizo, asparagus, and croutons is delicious — with or without the almonds.

I adore Jacques Pépin. If I had to pick anyone living or dead to have a meal with, it would be him. Famously frugal, I saw him once on PBS make adorable garnish mice out of basically garbage. He can do that and I would eat it because he’s Jacques Pépin. Unbelievably awesome.

The man is a walking legend.

Ingredients:

1/2 pound of chorizo, cut into 3/4-inch pieces

1/2 pound of asparagus, trimmed and cut into pieces

2 cups of day old bread, cubed

1/2 cup of Parmesan cheese, grated

Salt and pepper

Olive oil

How to prepare:

1. Place the cubes of bread in a large bowl. Drizzle them with olive oil, and season them with salt and pepper. Sprinkle them with the Parmesan and toss everything together again until the bread cubes are evenly coated.

2. Heat about 1 to 2 tablespoons of olive oil in a large skillet set over medium-high heat until it begins to shimmer. Add the chorizo, the asparagus, and the bread to the skillet. Toss and stir everything together for about 5 to 6 minutes. You want the chorizo to brown, the bread to toast, and the asparagus to cook through.

Adjust the seasoning and serve immediately.

Penne al Pomodoro Crudo (Penne with Raw Tomato Sauce)


Indian summer, that strange spike in temperature and humidity that occurs following the first frost. Okay, so maybe we haven’t had a first frost yet, but the weather in the Mid-Atlantic has been so screwy lately that it makes me feel like anything goes.

I just know that it has been pretty warm out, warm enough to make me still crave food that minimally requires use of my stove.

Pomodoro crudo is the simplest of sauces, and an excellent way to savor the very last of this season’s tomatoes. I used a big, fat heirloom tomato, the jolie-laide of summer fruit. A little gnarly, very misshapen, but incredibly full, flavorful, and delicious.

And it goes without saying that the better your core ingredients, the better the sauce will be.

Ingredients:

About 1 to 1 1/2 pounds of very good, very ripe tomatoes

1 clove of garlic, lightly crushed

About 2 tablespoons of excellent extra-virgin olive oil

Salt and pepper

Fresh basil

About 1/3 pound of dried penne

How to prepare:

1. Bring a large pot of water to boil.

2. Set up a large ice water bath.

3. When the water begins to boil, score an X on the bottom of each tomato. Drop the tomatoes gently into the boiling water and leave them in for about 20-30 seconds, depending on how big your tomatoes are. Remove them carefully from the boiling water, and slip them into the ice water bath. You should now be able to easily remove the skin of each tomato.

4. Once all the tomatoes are peeled, cut them in half and remove the seeds. Chop each tomato, and transfer everything to a medium-sized bowl. Season the tomatoes with salt and pepper to taste (you can salt liberally). Add the olive oil and the crushed clove of garlic. Stir everything together, and let the sauce sit covered and undisturbed on the counter for about 30 minutes.

5. Bring a large pot of salted water to boil. Add the penne and cook it until it is just slightly under-al dente. Drain the pasta and add it to the sauce. Toss everything together, and remove the garlic clove.

The pasta should begin to absorb some of the excess liquid in the sauce.

Hand-tear a handful of basil and add it to pasta. Toss again, and serve.

Maple-Bourbon Glazed Pork Tenderloin


Another freely-adapted recipe from Cook’s Illustrated. It takes a page from Korean fried chicken in terms of using corn starch to create a crispy, crackly exterior that the maple-bourbon glaze can adhere to.

The pastured pork tenderloin was also a birthday gift from dear Tina at High Point Farms. It went wonderfully with Bob’s Cabernet Franc!

Thank you, thank you, thank you!

More people should give meat for birthdays.

Ingredients:

1 pork tenderloin (about 1 1/4 to 1 1/2 pounds)

3/4 cup dark maple syrup (Grade B)

1/4 cup brown sugar, packed

2 tablespoons of bourbon

A pinch of ground cinnamon

A pinch ground cloves

Cayenne pepper to taste

Salt

1/4 cup of cornstarch

Kosher salt

Ground black pepper

2 tablespoons vegetable oil

Special equipment:

half-size sheet pan

wire rack to fit the sheet pan

leave-in meat thermometer

How to prepare:

1. Adjust the oven rack to the middle position, and heat the oven to 375°.

2. In a small bowl, combine the maple syrup, the bourbon, and the brown sugar together, stirring until you have an even slurry. Add the ground cinnamon, ground cloves, and cayenne pepper. Add a hefty pinch of salt. Set this aside to let the sugar dissolve a little bit.

Stir the cornstarch, salt, and black pepper together in another small bowl until well-combined. Feel free to increase or decrease the seasoning according to your personal taste. Transfer the cornstarch mixture to a rimmed baking sheet. Pat the tenderloin dry with paper towels, and then roll it in the cornstarch mixture until it is evenly coated on all sides.

Shake off the excess cornstarch mixture.

3. Heat the oil in a large cast-iron skillet over medium-high heat until it just begins to smoke. Reduce the heat to medium, and place the tenderloin in skillet. If the tenderloin is a little big for the pan, don’t worry; it will shrink a little bit while cooking. Brown the tenderloin well on all sides. Transfer it to a wire rack set in the rimmed baking sheet.

4. Pour off the excess fat from skillet, and return it to medium heat. Carefully add the sugar slurry to skillet. It might bubble a little violently depending on how hot your pan is, so take care to not stand too close. Scrape up the browned bits on the bottom of the pan with a wooden spoon. Cook the sauce until it has reduced to about ½ a cup, about 2 minutes.

Brush the tenderloin with approximately 1 tablespoon of glaze. Roast it until a thermometer inserted in thickest part of tenderloin registers 130 degrees. Brush it with another tablespoon of glaze, and continue to roast it until the thickest part of tenderloin reaches 135 to 140 degrees, about 2 minutes more.

Remove the tenderloin from oven, and brush it with the remaining glaze. Let it rest, uncovered, for about 10 minutes.

5. Transfer the meat to a cutting board, and slice it into thick pieces. Serve.

Congratulations to London’s Pitt Cue Co.


Congratulations to London’s Pitt Cue Co. crew on a wildly successful summer run! I hear that there are officially no more pigs in England because you smoked and sold them all!

Thank you for warmly welcoming a Yank into your ranks for your final weekend. It was a genuine pleasure to meet you all, and to be briefly be a part of the wonderful community that you have created.

And a special thanks to Jamie Berger, restauranteur extraordinaire, London mover-and-shaker, excellent host, and dear friend. I can’t tell you enough how proud I am of what you and Tom have accomplished, and how much I am looking forward to hearing about all the great things that await you in the future.

Good luck in KC!

London Calling: Pitt Cue Co.’s Last Four Days to Play

Am I allowed to shamelessly plug my friends’ food ventures?

Yes.

Especially when the reviews are as good as this, and this, and this.

If you’re in London and haven’t already been, the time to check it out is now. Go early, follow them on twitter.

And if you are Stateside, well, it is Labor Day Weekend, and London is only 7 hours away!

What I have learned about food photography so far

When I started this blog, I just had a point-and-shoot: a Canon Powershot with a wide-angle lens and 7.1 megapixels.
I was pretty happy with it considering that before I had it, I was lugging around a manual camera, a Canon A-1. Depending on the lens, that thing could weigh a ton. I always needed to have extra rolls of film on me. Sometimes I missed shots because I was busy loading film into my camera. Not very convenient!

When I got a digital point-and-shoot, it was liberating. I could run around without fear of warping my spine! I could slip it into my pocket, or clutch. No more bags of film either, only little SD cards the size of my thumbnail. Instant gratification too, as I could see each shot immediately after I took it. Total freedom.

That camera was great for vacation snaps and birthday parties, but when it came to photographing food, I started to see that, despite how well I knew my camera, it had limitations.

But I still wasn’t ready to give up on convenience. I also didn’t have enough cash to fork over for the DSLR I wanted. So, I upgraded to the Panasonic Lumix LX5.

And I love it.

I can still slip it into my pocket.

Okay, it has to be a much larger pocket, but it’s still pocket-sized.

The LX5 has a 24mm Leica lens. It has tons of features. It’s wonderful in low light. It’s macro autofocus rocks the casbah. It’s manual mode is, well, very awesomely manual. It can do a lot of what DSLRs can do. It can’t do everything, but it can do quite a bit. You can shoot in Total-Dummy mode, but that would defeat the purpose of getting the LX5 in the first place.

To get good shots, I had to relearn some photography basics. But it has been worth it, and I think that it gives me a good idea about what I want in a DSLR when I get to the point of being able to afford one.

I’m still learning, actually. My camera is relatively new, and I am still getting familiar with it. Hopefully, my shots will continue to improve as time goes along.

But I thought that I would just share with you some of the things that I have learned so far:

1. You don’t need a fancy DSLR to get a good shot, but it certainly does help.

Control. It’s all about control. That’s why you get a DSLR: to control EVERYTHING, from your aperture to your shutter speed, and everything in-between. But if you don’t have a DSLR, you can still get good pictures from your point-and-shoot camera. If you want to get better pictures, you just need to figure out what you do have control over.

How do you do that?

2. Study your camera’s manual.

Did you throw it away? Then go online and download it again. Skip the easy set-up pages in the front of the manual, and go straight to the nitty gritty. If you have a point-and-shoot without very many manual controls, you want to focus on three things: macro, ISO, and white balance.

3. Turn off the flash.

I hate the flashes that come on most point-and-shoots. Unless I am taking a group shot in almost total darkness, I find them absolutely useless. They make everyone look either startled, or ghastly white. And they make food have really unappetizing shadows. The LX5 has a hot shoe that I can mount a big ol’ flash on. A flash that you can angle up to the ceiling, or aim at a wall. A flash that will bounce light indirectly onto your subject.

If you can’t do that, for heaven’s sake, turn it off and learn how to fiddle with your camera’s ISO.

If you are old enough to remember film cameras, you might remember that you had choices: film was rated 100, 200, 400, 800, sometimes even 1600. The higher the rating, the more sensitive the film was to light. So more light — like a bright sunny day — would call for less sensitive film. Less light — like dinner indoors — would call for more sensitive film. When I was in high school taking action pictures in low light (like night football games), I wanted film with a really high rating.

ISO settings correspond to those film ratings. Most point-and-shoot cameras have a default of 200, but if you are able to increase the ISO, you can take shots in lower light without using the flash. The only drawback, and this is the same if you use faster film, is that the higher you set the ISO, the grainier the image will be (and your camera might make some harmless, yet disturbing noise).

But, I think that unless you are going to blow your images up really big, I will trade graininess for not using the flash.

The best thing to do would be to experiment with your camera’s ISO. If that is one of the only controls that you have on your point-and-shoot, it is worth seeing what kind of shots you can get without using the flash.

4. Set your white balance manually.

I cannot stress this enough. It is something that I recently figured out. If you cannot afford Adobe Photoshop or Lightroom (both freakishly expensive, though Lightroom less so), I find that setting the white balance is just as important as setting the exposure correctly.

Some cameras do come with a photo editor. Mine came with something called Silkypix — which really sounds more like a prophylactic manufacturing company than developing software . . .

Exposure is the amount light that is collected by your camera’s sensor. Exposure is dependent on three things: aperture, shutter speed, and ISO. Think of your lens like an eye. Notice that in really bright light, your pupils become small so you don’t let in a lot of light and go blind? And in low light, they open up big and wide to capture as much light as possible? That’s basically aperture.

You can play with the aperture, and that will affect your depth-of-field . . . but that is a lesson for another day.

The shutter speed determines how long your aperture is open. The longer the shutter speed, the more light you let in. The shorter the speed, the less light you let in. You want a fast shutter speed if you want to freeze motion. A longer shutter speed will make action look like a blur.

For those interested in learning more about aperture and depth-of-field, I would recommend the photography lessons on the Pioneer Woman’s blog. They’re really good. Even though she and her friends are talking primarily about DSLRs, the information is useful to know for all cameras.

Some point-and-shoots allow you to adjust the exposure, but a lot of them don’t. If you can’t change your exposure, you should be able to at least change the ISO and adjust the white balance.

Have you ever taken a picture and noticed that it comes out with a greenish cast? Or a yellowish cast? That means your camera is picking up wavelengths of light that your eyes are naturally compensating for. This is especially true when taking pictures in artificial light.

By adjusting the white balance, you will be able to correct the color of your shots so that they better reflect what you see/want to see.

Somewhere on your camera, there should be a kind of setting in the Menu for white balance. Sometimes it’s abbreviated AWB. This means auto white balance. You don’t want that. There will usually be other preset values that you can select, like “Daylight,” “Tungsten,” “Fluorescent,” “Cloudy.” But not everyone has the same lightbulbs; all artificial forms of lighting emit slightly different light.

You want to be able to set your own white balance, called “custom white balance,” sometimes abbreviated CWB.

How do you do that? Well, it’s different for every camera. It’s best to consult your camera’s manual to find out how to adjust it.

Some camera controls have a kind of grid on which you can maneuver a point around until you feel that you have it about right. Others let you set the white balance by taking a picture of something truly white. I use a Lastolite Ezybalance card, but you can just as easily use a white piece of paper or something else white in a pinch (like a starched dinner napkin). The most important thing about setting the white balance by using another white thing as a reference, is that the white object should have no shadows, and it should fill the frame of the shot in its entirety.

5. Compose your shot, but shoot fast.

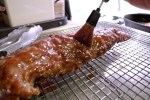
Food — unlike other subjects like trees for instance — has a very short window of time in which it looks appetizing. Food may look wonderful, glistening, and yummy right after you serve it. And then it looks dull and congealed minutes later. That’s why food stylists do nasty things like spray food with corn syrup to keep it looking fresh.

Hopefully you’re not doing that.

Learn how to compose your shots quickly, and shoot quickly.

6. Use the macro settting. Get close to your food, but . . .

7. . . . do not get too close to your food.

Or it will look gross. If you think about it, everything looks gross really, really close up.

And it also makes your food unidentifiable. So take a step back!

8. Try different angles.

Up, down, around! Don’t just take pictures of your food straight on. Try to see it from different perspectives. If I had as many arms as the Lord Shiva, I would take more pictures of stirring, or lifted forks. But I don’t. Sadness.

But that doesn’t mean that you shouldn’t try!

Or you could get a tripod — which I’m too lazy to do . . .

9. Today is my birthday.

Okay, so it’s not what I have learned about food photography so far . . . but it is still my birthday!

Breakfast Skillet


What a strange August we have been having! Temps in the low 80’s during the day, and cool breeziness at night. Maybe it’s not so strange after all. Maybe I have simply grown so accustomed to expecting oppressively hot and humid August weather over the years, that something nice and clement just blows my mind.

I would never have considered making a skillet breakfast last year, for instance, as it was too hot to make something that has to be baked in a cast-iron!

But this year, it didn’t feel out of place.  Plus, it was a great way to use the casing-less breakfast sausage from my CSA.

Ingredients:

1 to 1 1/2 pounds of Yukon Gold potatoes

1 pound of loose or bulk pork breakfast sausage

2-3 tablespoons of vegetable oil

8 eggs

2-3 tablespoons of green onions, chopped

Salt and pepper

1 cup of shredded Cheddar cheese

Special equipment:

A cast-iron skillet

A box grater

How to prepare:

1. Set your oven to 350°.

2. Bring a large pot of water to boil. Add the potatoes and parboil them for about 6 to 8 minutes, depending on how big they are. They shouldn’t totally raw, but the potatoes shouldn’t be completely cooked through either. Drain them, and set them aside until they are relatively cool enough to handle.

3. While the potatoes are boiling, brown the breakfast sausage in a large cast-iron skillet. Break up any lumps with a wooden spoon. When the sausage is done (you should no longer see any pink, and the meat should be browned in spots), remove it from the pan with a slotted spoon and set it aside.

4. Peel the potatoes. Using a box grater, coarsely shred each one.

5. Wipe out your cast-iron pan, and heat between 2-3 tablespoons of vegetable oil in it over medium heat. Add the potatoes. Season them with salt and pepper. Toss them in the oil until they are evenly coated. Press the shredded potatoes into an even cake against the bottom of the skillet. Let the potato cake brown slowly on the stove top.

6. Meanwhile, whisk together the 8 eggs with the green onions.

7. When the potato cake is starting to brown on the bottom, and the potato shreds are beginning to turn a little translucent, add the egg mixture to the pan. Scatter the shredded cheese on top of the eggs. Let the eggs set up for about a minute or two before putting the skillet in the oven. Bake it for about 15-20 minutes, until the top is golden and puffed. Let cool for about 10-15 minutes before slicing into wedges and serving.

Insalata Caprese (Tomato, Mozzarella, and Basil)

 
The whole summer has been building up to this moment.

Tomatoes.

Shiver.

It’s true that tomatoes, thanks to globalization and hothouse farming, are available year-round. But those tomatoes are wan in comparison to real, ripe field tomatoes. I’m talking about local tomatoes. Tomatoes that are juicy and complex, almost ambrosial. Not thin and mealy tomatoes.

With tomatoes this good, only the simplest preparation will do them justice.

Slice them into rounds. Top them with thick slices of mozzarella di bufala, if you can. Sprinkle them with flaky Maldon salt. Hand-tear heady leaves of basil, and scatter them over the top. Dribble the best extra-virgin olive oil that you have over everything. Have some good crusty bread ready to sop up the juices left on the plate in after the tomatoes are gone. A pleasant wake.

Balsamic vinegar, though trendy, does not belong in insalata caprese; it’s strong flavor overwhelms the delicate acidity of good, late summer tomatoes.