Young, Green Garlic Knots with Parmesan and Marinara Sauce


Well, I did it. I broke my oven.

After a week of intense pizza-making, my oven decided that it was having no more of this high-heat nonsense and promptly decided that it was going to go on strike.

The stovetop still works, but the oven just makes a clicking noise and stays as cold as my hopes and dreams for weekend baking 😦

If my landlord doesn’t fix it in the next day or so, this will certainly throw a wrench into my plan for this month’s Daring Kitchen challenge. It is strongly looking like I am going to have to get creative fast.

Thankfully, before my oven decided that it had lived through enough, I was able to crank out these awesome garlic knots using Patricia Wells‘ basic pizza dough recipe.

Since I used the rest of the green garlic I got at the Greenmarket, the garlic butter turned out to be more like a garlic spread. No matter, the results were still sloppily delicious. I inhaled about four in a row while standing in my kitchen. They were just so soft, pillowy and slathered with green garlicky goodness that I couldn’t eat just one or two . . . or, erm, three!

On another note, I passed that darned Spanish exam! Tequila para todos!!!

Ingredients:

For Patricia Wells’ Basic Pizza Dough:

1 teaspoon of active dry yeast

1 teaspoon of sugar

1 1/3 cups of lukewarm water (between 105°-115°)

2 tablespoons of olive oil

2 teaspoons of salt

3 3/4 cups of bread flour (thank you RubyandWheaky!) or all-purpose flour

For the Marinara Sauce:

2 tablespoons of olive oil

1 28-ounce can of crushed tomatoes (if you don’t live in the Tri-State area, you can order Jersey Fresh tomatoes here, or use the best San Marzano tomatoes that you can find)

Salt

For the Young, Green Garlic Spread:

2 bulbs of young, green garlic, white and green parts trimmed and thinly sliced

2 tablespoons of olive oil

2 tablespoons of butter

1 teaspoon of salt

Freshly grated Parmesan cheese for sprinkling

How to prepare:

1. In a large bowl, mix together the yeast, the warm water and the sugar. Let it stand for about 5 minutes before stirring in the olive oil and the salt.

2. Using a wooden spoon, stir in the flour, a little bit at a time, until most of the flour has been absorbed and the dough begins to pull together. Turn the dough out onto a lightly floured countertop and knead it until it is smooth and elastic, about 5 to 6 minutes. Shape the dough into a ball and transfer it to a large lightly oiled bowl. Cover the bowl tightly with plastic wrap and let the dough rise between 8-12 hours in the refrigerator, or until it has doubled or tripled in size.

3. When the dough has risen, remove it from the refrigerator and punch it down. Let the dough rise again until it has doubled in size.

4. While the dough is rising, heat two tablespoons of olive oil in a heavy-bottomed saucepan over medium heat. Add the tomatoes. Reduce the heat to medium-low and simmer the tomatoes, stirring frequently, until all the oil has been incorporated and the sauce has thickened. Adjust the seasoning.

5. Preheat the oven to 400°.

6. Divide the dough into 15 2-ounce portions. Use your hands to roll and stretch each portion into a 6-8 inch-long strip. Make a knot, and tuck the ends under the bottom of the knot. Arrange the knots on a parchment paper-lined sheet pan so that they are evenly spaced apart. Bake the knots for about 20-25 minutes, or until they are browned and golden.

7. While the knots are baking, soften the green garlic in the olive oil and butter over medium heat. When the garlic is soft, season it with about a teaspoon of salt. Transfer everything to a food processor and process it until you have a smooth purée.

8. When the knots are done, remove them from the oven and let them sit until they are just cool enough to handle. Spread the green garlic purée over the top of each knot. Let the knots cool and absorb the the melted butter and olive oil in the purée. Sprinkle each knot with Parmesan cheese and serve with marinara sauce on the side.

Advertisement

Young, Green Garlic Pizza


Have you seen Jim Lahey‘s new book? The one all about pizza? I have been a big fan of Lahey ever since I lived up the street from the Sullivan Street Bakery in Soho. Back then, I used to go over there almost daily for shots of Illy coffee and square slices of pizza, available in four varieties: Bianca, Potato and Rosemary, Tomato Sauce, and Mushroom and Thyme.

Since those years, Lahey has expanded the Sullivan Street Bakery and opened a pizza joint called Co. Co. is just about one of my favorite places for a pizza pie in the city. The dough is imperfectly perfect: lumpy, irregular, charred, crispy and toothsome, with just the right amount of salt and olive oil. When I saw that Lahey had published a book all about pizza, I got really, really excited.

Because I thought it would be really, really easy.

See, Lahey’s other book contained the über-recipe for no-knead bread. As long as you were willing to let the dough do its thing and rise overnight, you could have amazing bread with just about zero effort. You didn’t need a fancy oven, or a special starter, or a wooden paddle. You just needed a bowl and an oven-safe pot with a lid.

So of course, I assumed that his pizza would be just as simple.

In many ways, it is. You mix the ingredients, you let it rise overnight, you stretch it, you top it . . . and then you pull out your pizza stone, pizza paddle or pizza peel.

Insert screeching wheel sound here.

Lahey wants you to heat your pizza stone by positioning it about 8 inches from the broiler element before using your pizza paddle to slide your pie onto its hot surface. I have three problems with this:

A) I live in a tiny studio apartment and I don’t have any space left for any more pieces of specialized cooking equipment, no matter how “inexpensive” Lahey says they are.
B) My broiler has exactly three inches worth of clearance because the broiler unit is positioned underneath the actual oven. If I put a pizza stone in there, there will be no room for a pizza. If I do manage to wedge a pizza in there, chances are that I will set my apartment on fire.
C) I live in a rental.

I have no problem with letting dough proof overnight. Delayed gratification doesn’t bother me, but if there is one thing I abhor in terms of cooking it is being told that I can’t make X if I don’t have Y.

Especially when Y is a piece of equipment.

Pizza is pizza. It’s not molecular gastronomy, it’s peasant food — albeit very wonderful peasant food that has a cult following and official Italian government recognition.

Nevertheless, I refuse to be precious about pizza.

If you have a pizza stone, by all means use it. If you have a pizza peel, good for you. You are likely a more serious pizza aficionado than myself. If you have neither, you can still make a perfectly serviceable— and even an amazing pizza — without them.

I’ll worry about authenticity when I have the money, time and space to build a outdoor wood-burning oven just like they have in old Napoli.

Pizza dough is really easy to make at home. Generally, it consists of five ingredients: flour, yeast, olive oil, salt and water. Every time that I make pizza dough, I end up using a different recipe than I did before because I forgot to scribble down the proportions that I used. However, there is one dough that I keep coming back to consistently: Amy Scherber‘s “Push Button” Pizza Crust, published in The Chefs of the Times. Scherber’s dough is super easy to pull together; you just whizz all the ingredients together in a food processor for about 60 seconds total, and then let the dough rest for 60 minutes. You don’t have to toss it to stretch it, just use your fingertips to “press, prod, push and poke” the dough into place on a plain old cookie sheet. The crust gets wonderfully crispy in the oven, but it still has a little bit of give to it. It also has great flavor even though it has the same ingredients that every pizza dough has.

If you don’t have a food processor, you can just stir the ingredients together with a spoon, and then knead it until the dough feels elastic.

For the sauce, I make the simplest marinara ever using Jersey Fresh Crushed Tomatoes — which are amazing straight out of the can. All I do is heat about two tablespoons of olive oil in a heavy-bottomed saucepan, add the 28 ounces of crushed tomatoes, and simmer everything over low heat until the oil has been incorporated and the sauce has thickened. I love it. If the canned tomatoes are really good, it’s just the purest taste of tomato that you can imagine.

The #1 most important trick to perfect pizza at home is to go easy on the sauce and the toppings.

I know it’s hard to resist the urge to slather your dough with tons of sauce and cheese, but the more you pile on, the spongier your dough will be because all those toppings carry moisture. The more toppings you add, the less chance you will have of achieving a crispy crust.

And pizza really is all about the crust. So remember, less is more!

This is also the first post this year to feature spring vegetables. Green garlic is in! Whoo-hoo!!!

Ingredients:

For Amy Scherber’s “Push Button” Crust:

Olive oil

3/4 cup + 1 tablespoon of warm water (between 105-115°)

1 1/2 teaspoons of active dry yeast

2 cups of all-purpose flour

2 tablespoons of coarse cornmeal

2 1/2 teaspoons of salt

For the pizza sauce:

2 tablespoons of olive oil

1 28-ounce can of crushed tomatoes (if you don’t live in the Tri-State area, you can order Jersey Fresh tomatoes here, or use the best San Marzano tomatoes that you can find)

Salt

For the toppings:

1 ball of buffalo mozzarella

1 bulb of young, green garlic, thinly sliced on the bias along with some of the tender green stem

Special equipment:

1 half-sheet pan or a plain old cookie sheet

How to prepare:

For the dough:

1. Whizz together the water, the yeast and 2 teaspoons of olive oil in the food processor. Add the flour, the cornmeal and 2 1/2 teaspoons of salt. Process everything together until the dough comes together, about 10 seconds. Process the dough for about 5 seconds more before turning it out onto a lightly floured countertop. Knead the dough briefly for about 30 seconds. Shape the dough into a ball and place it in an oiled bowl. Cover it with plastic wrap and let it rest for about an hour.

If you don’t have a food processor, you can mix the water, the yeast and the olive oil together with your fingers, and then incorporate the dry ingredients a little bit at a time with a wooden spoon. Turn the dough out onto a lightly floured countertop, and knead the dough until it becomes elastic. Shape the dough into a ball and place it in an oiled bowl. Cover it with plastic wrap and let it rest for about an hour.

2. While the dough is rising, heat two tablespoons of olive oil in a heavy-bottomed saucepan over medium heat. Add the tomatoes. Reduce the heat to medium-low and simmer the tomatoes, stirring frequently, until all the oil has been incorporated and the sauce has thickened. Adjust the seasoning.

3. Preheat the oven to 450-475°.

4. When the dough has risen, divide it in half if you want to make two round personal pizzas, or leave it as one ball of dough if you want to make one big rectangular pizza. Line your sheet pan with a parchment paper. Lift the dough out the bowl and stretch it out slightly. Place it in the center of the sheet pan. Using lightly oiled fingertips, press the dough out from its middle to its edges. Continue to pat it out until it is thin and evenly covers the pan.

5. Spoon just enough sauce over the dough so that there is a thin, even layer. Hand tear the mozzarella over the top, half a ball per round if you are making two round pizzas instead of one large rectangular pizza. Scatter the thinly sliced green garlic evenly over the top. Bake the pizza until the crust is golden and the top is bubbly, about 10-15 minutes.

Cooking The Hunger Games: District 11’s Crescent Moon Rolls with Sesame Seeds and Katniss’s Favorite Lamb Stew with Dried Plums


The Hunger Games? Nope, don’t want to read it. Isn’t that for 14-year old girls?”

“You read Harry Potter!”

It’s true. I read every single Harry Potter book, but this wasn’t Harry Potter. That was about wizards, and good and evil, and growing up, and friendship, and butter beer! This was probably some kind of Twilight spin-off full of conflicted teenagers whining about how they shouldn’t be in love with vampires and werewolves.

“No, really” Joseph insisted, “You should read it.”

“Oh, yeah? What’s it about?”

“Well, it’s about this girl . . . And she hunts . . .”

It wasn’t the most persuasive thing he could have said, but Joseph must have been sure that once the seed was planted in my mind, curiosity would get the better of me.

The next time I saw him, I told Joseph that it was completely his fault that I went to bed at 4:45 AM and was raccoon-eyed and foggy-minded for the rest of the day.

“Ha ha!” he said, “You read The Hunger Games, didn’t you!”

I did. I read it cover to cover. In one night. Straight through.

And I loved it. I was completely hooked.

Yes, The Hunger Games series is clearly Young Adult Fiction. As befits the genre, sometimes the books can be a little repetitive (okay! I thought by Chapter 3 of the first book, I get it! She hunts!). They are also fast-paced and packed full of action. The narratives are straightforward, and the books are emotional and plot-driven. It’s the world from the perspective of kids.

But just because the target audience of The Hunger Games is young, doesn’t mean that any of the books in the series are simplistic. In fact, what makes the books so good is how they use food to illustrate complex ideas and to represent the complicated relationships between different characters, different people, and different social classes. I’ve even read some other things about how the story can be read as an allegory for our current food system and its potential unsustainability, how Katniss herself can be seen as a model of locavorism as a girl who is forced outside of her manufactured food system in order to survive, and how hunting, foraging and sometimes going without — as Katniss does — is a healthier model of eating than what is offered by the super-sized Capitol (thanks, Charlene!).

But I’m getting ahead of myself. For those of you who haven’t read the books, maybe a brief overview is necessary:

The Hunger Games takes place in a postapocalyptic future in roughly what is used to be North America. Now known as the dystopian Panem, the state is divided into 13 districts — one of which was annihilated after fomenting rebellion, leaving 12 under the rule of the Capitol. As a means to control the remaining districts, the Hunger Games were created as annual televised event reminding everyone of the power that the Capitol holds over them. Participation is mandatory and each year, each district must send one boy and one girl between the ages of 12-18 to participate in a gladiatorial-like game set in an artificially constructed arena that may or may not kill them if their fellow gladiators — called tributes — don’t get to them first. There can only be one survivor, and the child who manages to be survive earns precious food and oil for their starving district.

The book’s main protagonist is a 16-year old girl from Panem’s poorest district, District 12. Her name is Katniss Everdeen and, as explained so well by Joseph, she is a hunter. More than a hunter though, she is a survivor: tough, capable, resourceful, skilled, and lethal . . . to animals (but as another character points out, are kids really that different?). The story is told from her point of view, and hardly a page goes by without the mention of food.

Food is everywhere in The Hunger Games. It is what everyone in every district outside of the Capitol is obsessed with because just about everyone outside of the Capitol is starving. The decadent Capitol produces nothing. It is reliant on the outlying districts to provide everything from its food to its fuel to its manufactured goods. However, the Capitol’s citizens want for nothing, and what the districts produce is never meant for their own consumption.

Not only is this power dynamic illustrated through the difference between the kinds of food eaten in the Capitol (rich, elegant, sophisticated, refined, and luxurious) and what is eaten in the districts (rough, unrefined foods like ration grains, or things that people eat out of desperation like the pine wood and wild dog), but in sheer quantity as well. People in the Capitol have so much to eat (and eat so much it) that they enjoy making themselves sick just so they can empty their stomachs and continue eating more. This would be inconceivable to people in districts who have never had enough to eat.

If this all sounds very Roman to you, it is pretty obvious that author Suzanne Collins intends it to be. From the idea of a gladiatorial fight to the finish, or to the use of food as a way to symbolize the contrast between the decadence of the Haves in the Capitol and the Have-Nots in the districts, Rome overshadows everything in the series. Characters have Roman names (Seneca, Cato, Cinna, Plutarch). Even the name Panem derives itself, not from Pan-American, but from the Latin phrase panem et circenses which means bread and circuses — the Roman means of appeasing and controlling populations through food and entertainment.

Speaking of bread, every single district has its own, from the rough drop biscuits of District 12, to the ultra-refined rolls of the Capitol. Bread — like all food in The Hunger Games — is used to communicate all kinds of relationships. For example, when Katniss and her fellow tribute from District 12, Peeta Mellark, are transported to the Capitol for training before the games, every table is set to include a basket of bread with representative loaves from each of the 12 districts and from the Capitol. The inclusion of the Capitol’s bread is a symbolic reminder of its power and superiority among those rougher, unsophisticated loaves.

As you can see, there is a lot in the book to think about.

You probably also guessed that I had been very anxiously awaiting the The Hunger Games movie that just came out last week. I was so excited about it that I cooked a Hunger Games feast using recipes from, or adapted from The Unofficial Hunger Games Cookbook by Emily Ansara Baines before dragging my friends to the midnight IMAX showing of the film.

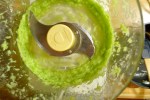
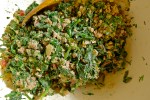
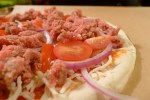
What did we eat? A “Caesar” salad consisting of chopped Romaine lettuce simply dressed in a lemon juice vinaigrette with lots of grated Parmesan and freshly ground black pepper. It was meant to be a nod to The Hunger Games‘s Roman roots even though Caesar salad has nothing to do with Rome (it was invented in Mexico by a guy named Caesar).

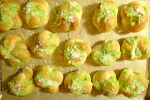
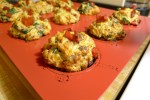
District 11’s Crescent Moon Rolls with Sesame Seeds, because how could a Hunger Games-themed dinner not include bread? Especially this bread, as those of you who have read the books know.

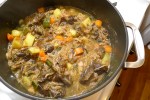
Katniss’s Favorite Lamb Stew with Dried Plums, the name says it all. But read further along to hear more about that story!

And Rum-macerated Strawberries with Prim’s Goat’s Milk Ice Cream, which was simply quartered strawberries tossed in sugar, a sprinkle of salt, and a few splashes of rum, served over goat’s milk ice cream.

It was so much fun. I can’t wait to do this for the second movie!

District 11’s Crescent Moon Rolls with Sesame Seeds

Ingredients:

2 .25-ounce packages of dry active yeast

3/4 cup of warm water (about 110°)

1/2 cup plus 2 tablespoons of white sugar

Salt

2 eggs

3/4 cup of unsalted butter at room temperature (divided into 1/2 cup and 1/4 cup)

2 cups of all-purpose flour

2 cups of whole wheat flour

For the egg wash:

1 egg

1 tablespoon of milk

2 tablespoons of sesame seeds

How to prepare:

1. Sift together the two flours into a large bowl.

2. In another large bowl, dissolve the yeast in the warm water. Using an electric mixer, add the sugar, the salt, 2 eggs, 1/2 cup of butter, and half of the flour mixture to the dissolved yeast. Beat everything together until it is smooth, about 5 minutes. Add the remaining flour mixture and beat everything together until it is smooth again.

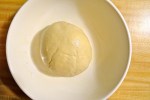
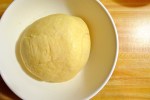
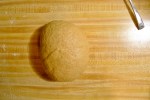
3. Scrape the dough out onto a lightly floured surface. Using your hands, knead the dough for about ten minutes. Place the dough in a lightly oiled bowl, cover it, and let it rise in a warm place until the dough has almost doubled in size. This can take anywhere between 1 1/2 to 2 hours.

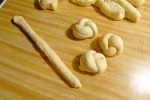
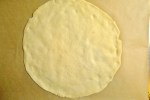
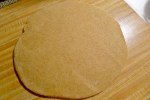
4. Line a cookie sheet with parchment paper. Punch down the dough and divide it roughly in half. Shape each half into a ball and roll each ball out into a 12-inch circle. Use a butter knife to spread half of the remaining 1/4 cup of butter evenly across the circle. Sprinkle with salt. Using a pizza cutter, cut each circle into 8 wedges. Starting at the wide end, roll each wedge up towards its point. Arrange the rolls, point-side down, about an inch apart from each other on the baking sheet. At this point, you can curve the ends inward to make more of a crescent shape. You may need to use more than one baking sheet. Cover the rolls again and let them rise until they are almost doubled, between 90 minutes to 2 hours.

5. Preheat the oven to 375°.

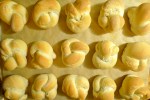
6. When the rolls have doubled again in size, brush them with an egg wash made from one beaten egg and a tablespoon of milk. Sprinkle each roll with sesame seeds. Bake the rolls in the over for about 12-15 minutes, or until they are golden brown.

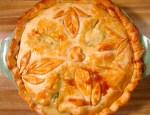
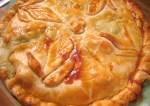
Katniss’s Favorite Lamb Stew with Dried Plums:

Out of all the dishes from the Capitol that Katniss eats during her training for the games, it is this stew that leaves the greatest impression on her. However, the stew kind of sounds better in concept than execution for the following reason:

If you ask for dried plums at the market, you will likely be pointed in the direction of the prunes. Because dried plums are a fancy way of saying prunes without the stigma associated to the word “prunes.”

Kind of how all bourbon is whisky, but not all whisky is bourbon, all prunes are plums, but not all plums are prunes. Prune plums are generally the plum variety that is almost always dried before eating.

And this recipe called for 5 cups of them. 5 cups of prunes.

Let us consider this for a moment:

For those of you who haven’t read the book, or are currently in the process of reading it, I apologize in advance if I give away a little bit of the story to you.

You know that when Katniss and Peeta are in the cave? When they’re starving the in the cave and they get sent a large tureen of this stew from their sponsors? I don’t know about you, but if I were Haymitch, I wouldn’t send my tributes a big pot of steaming lamb and prunes. Not a good idea.

I would send them something else, like that creamy chicken dish with oranges or some cookies. Because if the whole goal is to not get killed in the arena, I would try my best to not put my tributes in the position to literally be caught with their pants down.

Seriously. Not to be crude or anything, but I strongly think that this recipe should be renamed Katniss’s Favorite Natural Laxative with Stewed Lamb.

It was tasty, but I feel like it is my duty to warn you if you attempt this at home — especially if there are leftovers.

Despite halving the amounts of almost all the recipe’s ingredients (the original called for a insane 5 pounds of lamb), there was still so much stew that it completely filled up a 5-quart Dutch oven to the rim. I had to transfer the stew to an 8-quart stew pot, but even then, the pot was uncomfortably full. What would have happened if I made the recipe exactly as specified? Would I have had to have used a swimming pool?

Even after feeding myself and my friends, I was still left with unholy amounts of stew — enough to soften the stool of a small Roman army.

So if I were you, I would go ahead and halve the recipe again one step further.

Ingredients:

2 to 2 1/2 pounds of lamb stew meat

Kosher salt and freshly ground black pepper

2 tablespoons of olive oil

3 cloves of garlic, finely minced

1 large onion, chopped

1/2 of water

4 cups of beef stock

2 teaspoons of white sugar

3 teaspoons of brown sugar

3 medium carrots, peeled and cut into large dice

2 small zucchini, cut into large dice

3 Yukon Gold potatoes, peeled and cubed

5 cups of pitted prunes

2 teaspoons of fresh thyme, finely chopped

3 teaspoons of fresh rosemary, finely chopped

2 teaspoons of fresh basil, finely chopped

2 teaspoons of fresh parsley, finely chopped

1 cup of dry ginger ale

How to prepare:

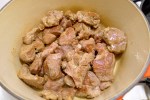
1. In a large mixing bowl, generously season the lamb with salt and pepper. Toss the meat to coat it evenly with the seasoning.

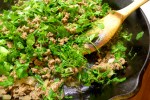
2. Heat the olive oil in a large cast-iron skillet over medium-high heat. Sear the lamb cubes on all sides, working in batches if you need to. Remove the lamb to a large stew pot or a lidded casserole.

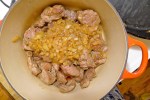
3. Spoon off all the fat except for about a tablespoon. Add the onion to the pan. Sauté it until it just begins to turn translucent. Add the garlic and continue to sauté everything together until the onion begins to turn golden. Carefully add about 1/2 cup of water to the pan. Cook to reduce the liquid by half. As the liquid reduces, gently scrape the bottom of the pan to release and dissolve the fond. Add the garlic-onion mixture to the lamb.

4. Dissolve the two sugars in the beef stock and add it to the lamb. The liquid should cover it completely. Bring everything to a boil, then cover the pot and simmer the lamb for about an hour.

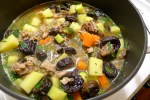
5. Add the vegetables, the prunes, the herbs, and the ginger ale to the pot. Cover the stew again and simmer it for about 30-45 minutes more. You may need to add more water or stock if the stew looks too thick. The meat should be falling apart, and the vegetables should be tender when the stew is done. Adjust the seasoning and serve.

Breakfast Sausage, Spinach and Roasted Red Pepper Muffins


Lately, I have been trying to get myself to eat breakfast more often. I actually love breakfast, but I regretfully have rarely made time to have it.

Breakfast muffins are a great thing to make. They are so easy to pull together. They look beautiful, and a nice big basket of them is always a hit for brunch. You can also make a batch the night before and toss one or two (three for me) in the oven to warm the following morning while you make coffee.

These muffins are a great way to use the pork breakfast sausage that I get from my CSA, but in all honesty, the recipe is fairly versatile. You can make them meatless, with broccoli, or any other vegetable that you like. You can use Parmesan or Asiago instead of Cheddar.

The tricks are to not over mix your batter, and to make sure that your vegetables have as little moisture as possible so that your muffins don’t turn out to be soggy.

I have been playing around with different combinations of ingredients and like the mix of roasted red peppers and spinach. I think it’s because I like the idea of starting the day with lots of color!

Ingredients:

1 pound of bulk breakfast sausage

1 large red bell pepper

6 ounces of baby spinach

1 cup of cheddar cheese, shredded

1 cup of whole milk

2 eggs

2 cups of all-purpose flour

4 teaspoons of baking powder

1 teaspoon of salt

Special equipment:

A 12-cup muffin pan, preferably non-stick

How to prepare:

1. Preheat the oven to 400°.

2. If you have a gas range, set the red bell pepper directly on the gas burner with the heat on high. Turn the pepper periodically to make sure that the skin chars evenly.

If you have an electric range, rub the bell pepper with olive oil and place it on a cookie sheet set underneath the broiler. You can also rub the pepper with olive oil and pop it into a 450° oven. Remove it when the skin is blistered and blackened.

When your pepper is nice and charred, put it in a clean plastic grocery bag or a small paper bag and wait for it to cool. When it is cool enough to handle, you should be able to gently rub off all the charred skin from the pepper. Seed the pepper, and discard the seeds and the stem. Dice the pepper and spread the pieces out onto paper towels to absorb any excess moisture.

3. In a large skillet, brown the breakfast sausage over medium to medium-high heat, breaking up any large pieces with the side of your wooden spoon or spatula. Remove the browned sausage to a large mixing bowl with a slotted spoon, leaving as much of the drippings behind as possible.

4. Wipe out the skillet and wilt the spinach in it over medium heat with a little bit of olive oil and about a tablespoon of water. When the spinach has wilted, remove it to a colander to drain. When the spinach is cool enough to handle, gently press as much liquid out of the leaves as you can without squeezing them.

5. Roughly chop the spinach leaves and add them to the browned sausage meat along with 2/3 of the roasted red pepper (reserve 1/3 of the peppers to top the muffins), the cheese, the milk and the eggs. Gently stir all the ingredients together until everything is well-mixed.

6. Sift together the flour, the baking powder and the salt. Gently fold the flour mixture, a little bit at a time, into the other ingredients until the batter just comes together. Do not over mix.

7. Divide the mixture evenly among all the muffin cups. Top each with a few pieces of roasted red pepper. Bake the muffins for about 20-25 minutes. The tops should be browned and golden. Let them cool in the tin for a couple of minutes before removing them to a cooling rack.

Individual Beef and Green Herb Pies with Yeasted Whole Wheat Crust


This recipe finds its origins in another recipe from Deborah Madison. As some of you know, when I was a vegetarian, I cooked my way through her Vegetarian Cooking for Everyone. I learned so much from that book: how to prep, how to cook vegetables (trickier, I think, than meat), how to not be afraid of trying things I had never eaten before (cardoons? sorrel anyone?), and how to improvise (the most important lesson of all).

In 2001, the Times released a collection of recipes gathered from its most popular chef contributors, including Madison. The Chefs of the Times is a great cookbook to have, not just because the dishes are all terrific, but because each one is prefaced by a short introduction in which the chefs talk about how they got to the final versions of the recipes found in the book, from inspiration to execution.

It was here that I found Madison’s interpretation of the traditional Tuscan torta d’erbe. A torta d’erbe is, in essence, a very rustic dish normally comprising of whatever greens or vegetables you have one hand, bound together with beaten eggs, ricotta, and/or parmesan, and baked in a pastry crust.

Madison does a different take on the traditional pastry by cutting the amount of fat in the dough, and using yeast to lighten it and make it flaky. In the published recipe, she had you make a covered pie in a tart tin. However, when I started making it, I would just divide the dough in two and make a great big free-form tart.

Now I go one step further and made individual hand pies. I also use just olive oil for the crust (instead of butter, or a mixture of butter and olive oil), and do a mix of whole wheat and all-purpose flour.

These hand pies are the year’s real first stab at something a little healthier to eat. They are full of good things that are good for you.

To turn the recipe back into a vegetarian one, simply omit the ground beef, and double the amount of ricotta. In either case, if you would like to make the pies a little richer, you can add about 3 ounces of grated parmesan, or crumbled feta cheese to the filling.

Ingredients:

1 package of active dry yeast (about 2 1/4 teaspoons)

1/2 teaspoon of sugar

1 cup of warm whole milk

Salt

3 eggs

8 tablespoons of olive oil

1 cup of all-purpose flour

2 cups of whole wheat flour

1 medium onion, chopped

1 pound of very lean ground beef

1 cup of fresh parsley, chopped

1/2 cup of fresh dill, chopped

1/2 cup of fresh cilantro, chopped

2 bunches (about 6 cups) of spinach, roughly chopped

1 bunch of trimmed chard (about 3 cups), roughly chopped

1/2 a cup of whole-milk ricotta

The zest of one lemon

Freshly ground black pepper

How to prepare:

1. In a small bowl, combine the yeast with the warm milk and the sugar.

2. In a large bowl, mix the 2 flours together with a hefty pinch of salt. Make a well in the center of the flour for the olive oil and just one of the eggs. Using your hands, combine the flour with the oil and the egg until the mixture is nice and crumbly. Add the yeast-milk mixture all at once, and knead the dough together by hand until it is relatively smooth. Place the dough in a lightly oiled bowl. Cover it with plastic wrap, and let the dough rise in a warm, dark place for about an hour.

3. In the meantime, sauté the onion in a large skillet with a little bit of olive oil over medium-high heat until it is no longer opaque. Once the onion begins to turn golden, crumble the ground beef into the skillet. Cook the meat until it is no longer pink. When the ground beef begins to brown, add the herbs to it. Continue to cook everything until most of the water has evaporated. The herbs should be softened, but still bright. Using a slotted spoon, transfer the meat mixture to large bowl, leaving behind as much liquid as possible. If there seems to be a lot of liquid, drain the beef mixture as best as you can. Adjust the seasoning.

4. To the same skillet, add the spinach. Cook it over medium heat until it wilts. Remove it to a colander. Repeat the process with the chard. When the spinach and the chard are cool enough to handle, use your hands to press as much liquid as possible out of the leaves to remove the moisture.

5. Combine the meat and herb mixture, the wilted greens, the lemon zest, the ricotta and one egg. Adjust the seasoning, and divide the mixture into 8 equal parts.

6. Preheat the oven to 375°.

7. When the dough is ready, divide it into 8 equal parts. Roll each part into a ball. Flatten out each ball of dough with your hands before rolling it out into a round about to an 1/8th of an inch thick, and about 6 to 7 inches in diameter. You can do this on a lightly floured surface if needed, but because of the olive oil, the dough shouldn’t be very sticky. Mound a portion of filling in the center of the dough. Fold the dough over the filling, making a half-moon shape. Lightly press the air out of the filling as you seal the pie around its edges. Trim the pie so that there is about a half-inch border all the way around. Use the tines of a fork to make impressions around the pie. Cut three even slits into the top. Repeat these steps for the remaining 7 pies.

8. Evenly position the hand pies on a large baking sheet lined with parchment paper. You may need more than one baking sheet. Beat the last remaining egg. Using a pastry brush, gently brush each pie with the beaten egg. Bake the pies for about 35 minutes.

Serve hot, room temperature, or cold.

Irish Bacon, Reserve Farmstead Cheese and Chive Drop Biscuits


Okay, I swear that I am going to start this new year right and get myself in the gym this week.

Many of my friends would be shaking their heads in disbelief mildly surprised to learn that I have a gym membership. I actually never talk about it because the last time that I went to the gym was in June. Yes, you read that correctly: June. My gym is open 24/7 during the week, and when I was going, I liked to slink in about 11pm or midnight when it was completely empty. That way, I could do as little as possible without feeling self-conscious about it.

But I digress . . .

I made these drop biscuits with the other wedge of CSA cheese (we get two different kinds at every pick-up), and the remaining Irish bacon from my CSA. The texture of home-made biscuits is always better than anything you could buy. Plus, they are so easy to pull together and so quick to bake, that you will want to make them all the time.

And I promise to get in better shape . . . as soon as I polish off these biscuits.

* This post was actually written the day after the Horseradish Cheddar and Irish Bacon Mac & Cheese one. However, in the whole hubbub following the Daring Cooks’ challenge, I haven’t had time to post it until today. In the meanwhile, amazingly awesome SweaterMeat posted her Cheesy Breakfast Biscuit Sandwiches on her blog, Ugly Food Tastes Better. If you haven’t already dropped by, check out blog and her biscuits!

The point being that there must be something in the air right now about drop biscuits!

Ingredients:

2 1/4 cups of all-purpose flour

2 1/2 teaspoons of baking powder

3/4 teaspoon of baking soda

1 teaspoon of salt

6 tablespoons of butter, cubed

6.5 ounces of reserve farmstead cheese (or really any kind of aged cheese), grated

1/2 cup of chives, chopped

1/2 pound of cooked Irish bacon, cut into 1/2-inch strips

1 1/2 cups of whole milk or buttermilk

How to prepare:

1. Preheat the oven to 450°.

2. Combine the flour, the baking powder, the baking soda, and the salt together in a large bowl. Add the cubes of butter. Using your fingertips, blend the butter into the dry ingredients until the mixture resembles a coarse meal.

3. Stir in the grated cheese, the chives, and the bacon. Add the milk or the buttermilk all at once. Continue to stir until all the ingredients are just combined.

4. Drop the dough in twelve equal mounds about an inch or two apart on a large baking sheet lined with parchment paper. Bake the biscuits until they are golden, about 18 to 20 minutes.

Andouille Pigs-In-A-Blanket


What’s cuter? Pigs-in-a-blanket, the name “pigs-in-a-blanket,” or real pigs in blankets?

Regardless, whoever came up with pigs-in-a-blanket is a complete genius!

Pigs-in-a-blanket can go upscale. You could use nice puff pastry, and nestle your “pigs” in flaky baskets of buttery goodness. But is that going too fancy?

When I think of pigs-in-a-blanket, what I want good ol’ uncomplicated nostalgia . . . okay, nostalgia with a twist.

So use that commercial tube of pop-out crescent rolls! Preheat your oven to 375°. Take about half a pound of excellent CSA andouille, and cut it into 1 1/2 to 2-inch sections. Cut each section into quarters. Separate the crescent roll dough into its pre-cut triangles. You will need to split each triangle kind of “in half.”

Wrap a triangle of crescent roll dough around each andouille sausage quarter. Spread them out evenly on a baking sheet lined with parchment paper. Bake your andouille pigs-in-blankets for about 12-15 minutes, or until golden and flaky. 

Hamburger, Grape Tomato, and Red Onion Pizza


I got this idea from Martha Stewart and it has become one of my favorite things to make with ground beef from our CSA. It’s quick, it’s easy, and it’s delicious. On the table in less than 20 minutes too.

Now that’s what I call good fast food!

Ingredients:

Pizza dough, about 1 pound of dough will make two 12-inch pizzas, or one really big pizza

Marinara sauce

Low-moisture mozzarella cheese or sliced provolone

1/2 pound of grass-fed, very lean ground beef

12-14 grape tomatoes, halved

1/2 a small red onion, thinly sliced into rings

Maldon salt

Special equipment:

A large baking sheet

Parchment paper

How to prepare:

1. Preheat the oven to 450°.

2. You can easily make your own pizza dough, but I rarely ever do it anymore since I can buy reasonably good, organic frozen dough at the market. In a hurry, I have also been known to run down to the nearest slice joint and buy their dough. Most pizzerias will sell it to you, you just have to ask.

I know. Gasp! I don’t make it from scratch? No. On special occasions, maybe. But if I’m tired and hungry, no. And that’s okay!

Once your dough ball is made, defrosted, or acquired, you need to stretch it out. Start by flattening your dough ball into a disk. By flouring both sides, you avoid having to flour your countertop. Any hard surface will do to stretch out the dough as long as it is flat, clean, and dry. Using your fingertips, start pushing down on the dough, roughly making the border that will become your crust. Now begin using the palm of your hand to pull the dough away from you and away from its center while turning it. At this point, you can try tossing it up in the air. But every time I try doing that, I end up looking like a fool with dough on the floor. Instead, you can position your knuckles under the dough and start stretching it out off of your flat surface. This super helpful video will give you a better idea what to do (contrary to the video, you don’t actually need a marble or stainless steel surface. And just flour is okay if you have no semolina lying around).

2. Now that your dough is nice and stretched out, position it on your parchment paper- lined baking sheet. Egads! No pizza stone? No tiles or bricks wrapped in aluminum foil lining your oven to achieve optimal heat?

No. When I can afford a real, wood-burning Neapolitan oven outside my villa then I will do things like they do in the old country.

3. Spread your marinara sauce around your stretched out dough. I buy this too. I really like the sauces from Sauces n’ Love. They’re wonderful. The pizza sauce is good. Very good.

4. Top the pizza with either the mozzarella or the provolone. I like the flavor of the provolone better with the ground beef, but I love the melty creaminess of mozzarella. Try one, or the other, or both. Maybe at the same time.

5. Scatter the onion rings, halved tomatoes, and RAW ground beef over the pizza.

6. Bake in the oven for 15 minutes, longer if you want a more browned crust. I kind of prioritize though: absent the hardware and capability to get a really excellent crust, I aim for just really excellently cooked beef. Shower your finished pie with Maldon salt, slice, and serve.

Chicken Pot Pie


This is one of my favorite recipes of all time, originally taken from The Dean and Deluca Cookbook. This recipe has been tinkered with many times over the years — so much so that the glue-bound spine of the cookbook has cracked, making it fall open to pages 496 and 497 every time I pick it up. Now when I look at those scribbled-on, stained, dog-eared and water-wrinkled pages, I feel that this version here is very much my own.

Though some might consider it not quite a pot pie — there is no bottom crust, only a top — the pastry blanketing the heavenly rosemary-scented filling is so flaky and satisfying that to quibble over nomenclature seems silly.

Lately I have been adapting the recipe slightly as a way to cook up tasty bits of Thanksgiving turkey leftovers. I do love getting my fingers into the turkey carcass, stripping and pulling away every moist morsel left on the bones. This recipe makes the most of those wonderful little bits and pieces, but is also amazing as is with its freshly browned chunks of juicy chicken breast.

Ingredients:

For the pastry crust:

1 1/2 cups of flour

1/2 teaspoon of salt

1/2 cup of unsalted butter (1 stick), chilled and cubed

About 1/4 cup of iced water

For the filling:

1-1 1/2 pounds of boneless, skinless chicken breast cut into 1-inch pieces*

2-3 tablespoons of olive oil, divided

2 teaspoons of finely minced garlic

2 celery ribs cut into 1/4 inch dice

2 medium carrots cut into 1/4 inch dice

1/2 cup of frozen peas

6 pearl onions, peeled

3 tablespoons of butter

1/4 cup of flour

1 1/2 cups of chicken stock

1/2 cup of milk

1/3 cup of heavy cream

2 1/2 tablespoons of freshly chopped rosemary

For the egg wash:

1 beaten egg

How to prepare:

For the pastry crust:

1. Put the flour, salt, and butter in a food processor and pulse until the mixture resembles coarse crumbs. Do not overprices as the chunks of butter cut into the flour is what makes the crust tender and flaky. While the food processor is running, add the water, a little bit at a time, until the dough begins to pull away from the side (do not let it form a ball). You might use less water than 1/4 cup, but probably not more.

2. Turn the dough out onto a lightly floured work surface. Working quickly and lightly, knead the dough with the ball of your hand until it comes together. Shape the dough into a ball and flatten it out into a disk. Wrap the disk in plastic wrap and refrigerate for at least 30 minutes, but no longer than an hour.

For the filling:

1. Season the chicken with salt and pepper. Heat 1- 1 1/2 tablespoons of olive oil in a heavy-bottomed pan over moderate heat. Add the chicken in batches, making sure all the sides are nicely browned. Set the chicken aside.

2. Add the remaining oil to the same pan along with the garlic, celery, and carrots. Sauté the vegetables until they are tender, about 6 minutes. Set the vegetable mixture aside.

3. In a small saucepan about halfway with water and bring the water to boil. Add the peeled pearl onions. Cook for about 5 minutes. Add the frozen peas to the boiling water and continue to cook for about 4 minutes more. Drain the vegetable and set them aside.

4. In a medium-sized saucepan, melt the butter over moderate heat. When melted, add the flour and mix quickly. Brown the flour lightly before adding about 1/2 cup of the stock. Whisk the stock into the flour, smoothing out any lumps before adding the rest of the stock, the milk, and the cream. Continue whisking while the mixture is brought up to a boil. Reduce the heat to low and continue to whisk while the sauce thickens to the right consistency. Turn off the heat and stir in the chopped rosemary. Adjust the seasoning.

To assemble:

1. Preheat the oven to 375°.

2. In a large casserole or deep pie dish, spread the chicken out over the bottom. Spread the vegetable evenly out over the chicken and then pour the sauce evenly over everything.

3. On a lightly floured surface, roll the dough out until you have a round that will hang about 1 to 1 1/2 inches off the side of the dish. Place the dough gently over the pie and slightly tuck it in around the edges of the dish. Trim off any excess that falls more than 1 to 1 1/2 inches over the edge. Pinch or crimp the edges to make a decorative border. Using a knife, make a few slashes on the top of the pastry. If you have some leftover dough, you can also make some decorative leaves to go on top.

4. Brush the beaten egg on top of the dough. Bake in the oven until the crust is golden brown, about 45 minutes. Let rest at least 5 minutes (or even better, 10) before serving.

Note:

For the filling, if you have any leftover roasted chicken or turkey, you could use that instead.

Fresh Sage and Onion Dressing

Every Thanksgiving, I try a new recipe for stuffing or dressing. I’ve done it all — wild rice, pears and butternut squash, pancetta and chanterelles, sausage and fennel — and every year I’m happy, but never thrilled with the result.

In pursuit of a recipe that I can love and look forward to making every year, I decided to go very traditional this Thanksgiving: sage and onion.

I adapted this recipe from one originally published in 1975, and republished in Gourmet Magazine (RIP) in 2002. It calls for a whopping cup of butter! That’s two whole sticks! As much as I love butter, I really thought the amount was excessive; I wanted light and fluffy dressing, not greasy, leaden bread.

I also swapped the requested amounts of bread. I like cornbread stuffings, so instead of the asked for 8 cups of white bread and 4 cups of cornbread, I opted for 8 cups of cornbread and 4 cups of white bread. Don’t worry so much if it ends up being something more like 7 and 5, or 6 and 6. As long as you have a total of 12 cups of bread crumbs, it will be fine.

Gourmet’s recipe calls for you to make your own buttermilk cornbread. I suppose you could just use store-bought cornbread, but the recipe they recommend is so easy and fool-proof that I strongly urge you to try it. It makes a tremendous difference in flavor.

I think that in assembling the dressing, you could even reduce the amount of butter even more without any reduction in luxury of taste. I ended up using more stock than specified in the original recipe. I would say add a cup, and then more stock a little bit at a time, until the dressing is as moist as you would like. The recipe didn’t call for the addition of any cheese, but I think a good cup of Parmesan would go well here.

Ingredients:

8 cups of coarsely crumbled buttermilk corn bread*

4 cups of coarse fresh bread crumbs (from a small white loaf, crust removed)

1/4 cup of finely chopped fresh flat-leaf parsley

3 tablespoons of finely chopped fresh sage

1 teaspoon of salt

1/2 teaspoon of black pepper

1 sticks (1/2 cup) of unsalted butter

2 medium onions, finely chopped (about 1 1/2 cups)

1 cup of chopped celery

2 large eggs, lightly beaten

1 cup of turkey or chicken stock

1/2 cup of heavy cream

How to prepare:

1. Preheat the oven to 325°F.

2. Spread all the bread crumbs out in 2 shallow baking pans and bake until dry, about 15 minutes total.

3. Briefly cool the crumbs in the pans and then transfer them to a large bowl. Stir in the parsley, sage, salt, and pepper.

4. Melt the butter in a large heavy skillet over moderate heat. Add the onions and cook until the onions are softened, about 8 to 10 minutes. Add the celery and cook for about 5 minutes. Transfer the vegetables to the bowl with the crumbs and toss well. Add the eggs, stock, and cream and toss well. Transfer the stuffing to a buttered, shallow baking dish. Bake, covered, in the middle of the oven for 30 minutes, then uncover and bake until browned, about 30 minutes more.

Note:

You can assemble the stuffing 2 days ahead. Chill it covered, unbaked. Bring it to room temperature before baking. If reheating or baking later, you might want to sprinkle some more stock over the stuffing before putting it in the oven.

Buttermilk Corn Bread

Ingredients:

1 cup of all-purpose flour

3/4 cup of yellow cornmeal

1 1/2 teaspoons of baking powder

1/2 teaspoon of baking soda

1/2 teaspoon of salt

1 cup of well-shaken buttermilk

2 large eggs

1/2 stick (1/4 cup) of unsalted butter, melted and cooled

1/2 teaspoon finely chopped fresh sage

How to prepare:

1. Preheat the oven to 425°F.

2. Whisk together the flour, cornmeal, baking powder, baking soda, and salt in a large bowl.

3. Whisk together the buttermilk, eggs, butter, and sage in another bowl. Add this mixture to the flour mixture. Stir everything until just combined. Spread the batter evenly in a buttered 8-inch square baking pan and bake in the middle of oven until golden, about 25 minutes.

4. Cool the pan on a rack. Once cooled, coarsely crumble the bread. The corn bread can be made and crumbled up to 3 days ahead, and kept in a sealed plastic bag at room temperature.