Esquites (Mexican Corn on the Cob in a Cup)

It's elote for people who don't like to eat with their hands!

Who doesn’t love elote, that roasted Mexican corn on the cob slathered with mayonnaise, chili powder, and cheese, spritzed with lime juice, and served on a stick? I’ve come to associate it with summertime, when sweet corn is in season and I have my pick of local food trucks to sit in front of, snacking away.

As much as I love it, I have to admit that the fastidious Virgo in me doesn’t always love how sloppy elote is to eat. I get annoyed with how the grated cheese smears all over my chin, how the corn inevitably sticks in my teeth, and how glops of mayo always end up on my dry clean-only shirts. It’s the kind of annoyance that makes me hang my head in foodie shame as I go back to the truck to ask politely for a steak knife to cut off the kernels so that I can eat them with spoon.

That is why I really love esquites, which are essentially elote in a cup (or, as I prefer, a large bowl or a trough). Here, the messy work is done ahead of time and all you have to do is eat it, calmly and neatly.

Both elote and esquites are essentially street food and like most street food, there isn’t really an official recipe per se. The general consensus seems to be that there must be corn, it can be boiled but it is better roasted, there should be some kind of fat like soft butter, crema Mexicana,  or — even better — mayonnaise (I like my street food a little on the trashy side so it’s mayo for me). There should be some heat, some lime juice, and some salty, crumbly cheese like Cotija, but grated Parmesan or aged feta does the trick too.

Unlike eloteesquites often includes some chopped epazote, a traditional Mexican herb whose flavor is hard to describe. If pressed, I would say it kind of tastes like what would happen if cilantro and tarragon romped in a dusty field and had a herb baby. Epazote is worth seeking out; a little is all you need to add a wonderful earthy dimension to the corn. If you can’t find it, chopped cilantro is a good substitute.

Ingredients:

2 ears of corn

1 serrano chili pepper, seeded and finely chopped

Olive oil

Butter

Salt

1 tablespoon of mayonnaise, crema Mexicana, or sour cream

The juice of half a lime

Cayenne pepper to taste

1 tablespoon of epazote, finely chopped

1 tablespoon of grates Cotija, Parmesan, or crumbled feta

Tajín Clásico Mexican chili seasoning (or you can experiment with a combination of Ancho chili powder, more lime juice, and salt)

How to prepare:

1. Remove the corn kernels from the cob. To do this with minimal mess, stand each ear of corn in a large shallow dish and slice down the length of each ear with a sharp knife. Keep the knife as close to the cob as possible. Rotate the ear and continue to slice down each exposed side until all the kernels are removed.

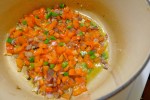
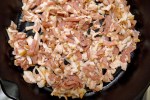
2. Sauté the kernels and the chopped serrano chili in a large skillet or cast iron pan with about 1 tablespoon of butter and 1 tablespoon of olive oil.

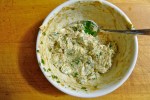
3. Once the kernels have started to brown, transfer them to a bowl and add the mayonnaise, lime juice, and enough cayenne pepper to suit your taste. Stir in the epazote and the grated cheese. Adjust the seasoning, dust with Tajín, and serve.

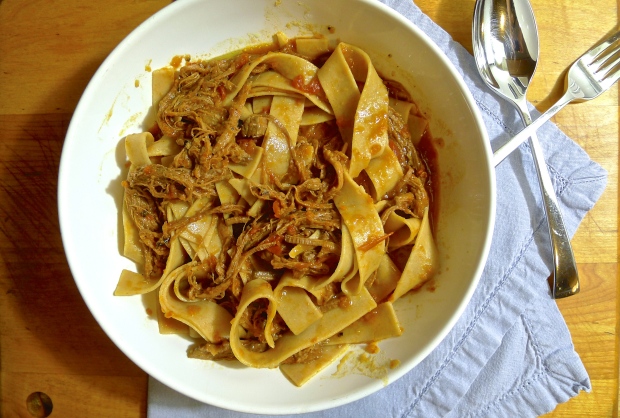
Shredded brisket and pappardelle

P1070430

Now this, I thought to myself as I dined at Rosette with a friend, is what you should eat in the summertime. I wasn’t referring to the glorious mess of shredded brisket and pappardelle that you see above. No, I was thinking about the crunchy, raw asparagus spears that I was dipping into dukkah-dusted walnut tahini.

I made that giant batch of shredded brisket back in February, when the weather was arctic and I continued to hope that I would finally ween myself off Seamless and cook for myself.  How little I cook during the academic year has become a common lament on this blog. This past semester, it was really close to zero unless you count putting slices of steak (leftovers from a dinner with my mother at BLT Steak) on top of stale Ritz crackers and eating them over the sink as cooking. From that same steak house dinner, there were also leftover hen-of-the-woods mushrooms that I scrambled with eggs and piled on top of of pasta because I had run out of bread.

Even though the semester has been over for about a month, there still hasn’t been much cooking. It hasn’t felt like much of a vacation either. First, my mother decided that the final exam period would be the perfect time to come to visit (it’s not; it never is). After she left, I was practically comatose for about a week from the visit and the end of the semester. Then, my almost 91-year old grandfather took a tumble in the garden and hit the back of his head (the sun’s fault, he claims). I had to stay with him for a couple of nights per the doctor’s (unnecessary, in Grandpa’s opinion) orders.

My dad: “How is Grandpa doing?”

Me: “Um, a little unstable on his feet.”

Dad: “Maybe be had a mini-stroke. Is he favoring one side more than the other?”

Me: “No. Doesn’t seem like it.”

Dad: “What is he doing now?”

Me: “He is using a pair of kitchen shears to pry open a key ring that he says is too small.”

Fall or no fall, Grandpa’s fine motor skills seem more or less intact. However, that does not mean that he has completely recovered. This summer, he seems frailer and more fragile. His legs get weak — which scares me. He forgets more things more often and is sometimes confused. It is to be expected at his age, but that doesn’t make it any less frustrating for him and emotionally draining for us.

Doctors’ appointments and follow-up appointments have been frequent, sometimes unexpected, and long. Thankfully, my friends have been wonderful at keeping me out of my apartment in the evenings so that I get to eat something decent and think about something else. I did desperately want to get away to Europe this summer, but unfortunately failed to get organized early enough to afford airfare. And although Grandpa continues to live on his own and be very independent, his health has put some restraint on any vacation plans. Still, it would be nice to get away somewhere like . . . Gourmandistan 😉

(Dearest Michelle and Steve, I promise you a visit! The summer isn’t over yet!)

Does this shredded brisket with pappardelle look good? It is damn good, but I would hold off on making a dish like this until the fall unless you have a very powerful air-conditioner and money is no object in terms of electric bills. For those dear readers south of the equator, this is the perfect late fall and wintertime warmer.

This recipe has been heavily adapted from one on Epicurious. You can find the original here.

Ingredients:

2 carrots, peeled and cut into 1/2-inch pieces

2 ribs of celery, cut into 1/2-inch pieces

1 red onion, roughly chopped

1 beef brisket (about 1.5 pounds), trimmed of excess fat and silver skin

Salt and freshly ground black pepper

Olive oil

4 cloves of garlic, finely minced

2 cups of veal or beef stock

1 16-ounce can of crushed tomatoes

2/3 of a cup of red wine

2 bay leaves

Pappardelle

Special equipment:

A large Dutch oven or another oven-safe casserole with a lid

How to prepare:

1. Preheat your oven to 325°. You may need to lower or adjust your oven racks so that you can fit your Dutch oven or casserole in it easily.

2. Using a food processor, pulse the carrots, celery, and onion together until they are finely chopped.

3.  Pat the brisket dry with paper towels and generously season it on all sides with salt and pepper. Heat about two tablespoons of olive oil in the bottom of a large Dutch oven or casserole over medium-high heat until it begins to just smoke. Sear the brisket on all sides. If your brisket is too large to sear at once, you may need to cut your brisket in half and sear each half individually.

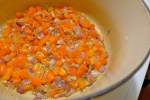
4. Remove the brisket to a plate. Lower the heat to medium and in the same Dutch oven or casserole, sauté the chopped vegetables and finely minced garlic until they give up their liquid and just begin to brown. Add the stock, the chopped tomatoes, the red wine, and the bay leaves. Stir to combine before adding the seared brisket back to the liquid. Make sure that the brisket is completely covered by the liquid before covering the Dutch oven with its lid and transferring it to the oven. Let the covered brisket cook slowly for about 3 hours. After 3 hours, the brisket should be fork-tender. Remove the pot from the oven and carefully skim off any fat from the top of the sauce.

5. Remove the brisket from the sauce and use two forks to gently shred it. Add the shredded brisket back to the sauce and stir to re-incorporate it. Adjust the seasoning.

6. In a large pot of salted water, cook the pappardelle to package directions. When the pasta is al dente, drain it but reserve some of the pasta cooking water. Add the pappardelle to the shredded brisket sauce along with some of the pasta cooking water if needed. Toss to combine, adjust the seasoning, drizzle with olive oil, and serve.

Scotch Eggs

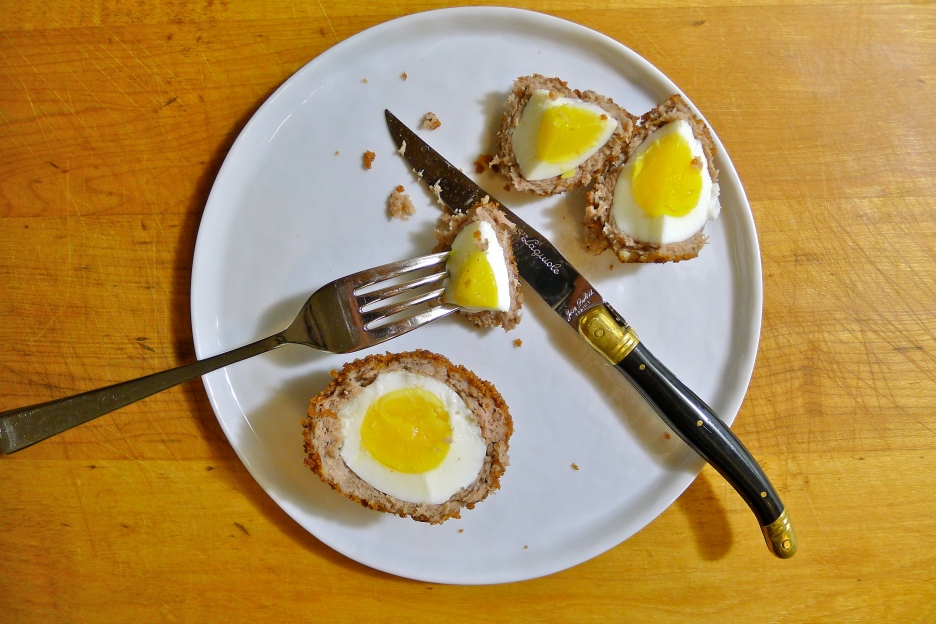
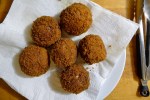
Go ahead. Eat like a Welsh rugby player.The first really, truly mind-blowing Scotch egg that I ever had was at The Breslin. The breading was shatteringly crisp, the sausage was moist and savory, and the yolk . . . oh the yolk! Just liquid enough, it oozed and spread over the plate like runny gold. I may have moaned. I most certainly peppered the server with questions: “But HOW???? How do they get the egg so PERFECT????? How do they possibly PEEL it so that the egg stays so intact????? The whites must be barely set! DO THEY HAVE THE DELICATE FINGERS OF ANGELS BACK THERE????” In response, I only got a coy smile.

Sous vide!” my friend Jason hissed, “It must be sous vide!

Possible, but doubtful. It was hard to imagine anyone going through the trouble of sous-videing the quantity of eggs that a restaurant would require every night. As we pondered and chewed, and pondered another round of Scotch eggs because anything good should always be ordered twice, I thought that this would be my deep-frying project. I will make this at home, I thought, and all the Scotch eggs will be mine!

As I must be the world’s worst egg peeler, I let the eggs boil until the yolks were firmer — about 5 minutes. Next time, I’ll let them be a little runnier as I found out that a layer of sausage hides a multitude of fingernail gouges and fingertip-sized divots.  The most important thing is that the oil remains hot — between 350-375° F — and the layer of sausage must remain reasonably thin.

All in all, it’s a pretty decadent affair for such a simple preparation. Deep-frying is messy business, but the final result is unbelievably satisfying.

Ingredients:

6 eggs + 2 eggs, beaten

1 pound of breakfast sausage

2 cups of panko bread crumbs

Vegetable oil (for frying)

To prepare:

1. Place 6 eggs in the bottom of a medium saucepan and add enough cold water to cover them. Over medium-high heat, bring the water to a boil. When the water begins to boil, cover the pan, remove it from the burner, and let it stand for 3.5-5 minutes, depending on how set you like to have your yolks (3.5 minutes for runny yolks, 4 minutes for just set yolks, 5 for perfectly set yolks) .

2. While the eggs are cooking, prepare an ice water bath. Carefully drain the water and gently roll the eggs around in the pan to crack the shells. Plunge the eggs into the ice water bath and let them sit there until they are cool enough to handle and peel. Once peeled, very gently pat them dry with paper towels.

3. Divide the sausage into six equal portions. Flatten and shape each portion into a thin disc about 1/4 of an inch thick.  Lay the patty in the palm of your hand and gently rest a soft-boiled egg in the center of it. Wrap and mold the sausage around the egg, pinching and sealing the seams shut as you go. Make sure that the sausage layer is no thicker than 1/4 of an inch, otherwise the sausage will not cook through before the outside of the Scotch egg begins to burn. Repeat with the remaining sausage and eggs.

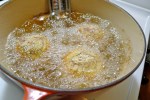
4. In a large, heavy pot, pour in enough oil so that you have a depth of about 2-2.5 inches. Insert the deep-fry thermometer and bring the oil up to 375°. While the oil is heating up, whisk the remaining 2 eggs in a shallow bowl. Keep the panko crumbs another shallow bowl.

5. Right before the oil reaches the right temperature, work quickly and dip each sausage ball in the beaten egg and roll it in the panko crumbs. While keeping an eye on the temperature, carefully place each Scotch egg in the hot oil. You will need to work in batches and the temperature should never drop below 350° F.

6. Turn the Scotch eggs occasionally so that they cook evenly. When they are golden and crisp — about 5-6 minutes — use a slotted spoon to remove them from the oil. Let them drain on a paper towel lined plate. Serve immediately.

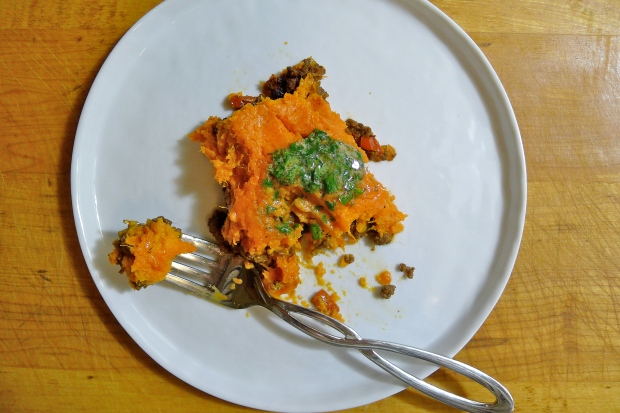
Texas-Style Cottage Pie with Roasted Sweet Potatoes and A.1. Compound Butter

Flavors are bolder in Texas.
Considering the extent of my bacon advocacy, most people are surprised to find out that I used to be a vegetarian. That was not a choice based on any kind of moral imperative. Instead, it was the best way that my 14-year-old self think of to annoy my mother. Now you would think that vegetarianism would have gotten old after a couple of weeks, but I was stubborn teenager and persisted in my gastronomic rebellion for twelve long and meatless years.

I didn’t just annoy my mother, I baffled my relatives who had never heard of Tofurkys until they were forced to procure them. My friends would collectively roll their eyeballs heavenward each time that I complained about the lack of vegetarian options on a restaurant menu. I irritated significant others to no end because it frankly sucks to not share food that you are really enjoying.

So it stands to reason that on the night before my undergraduate commencement ceremony, I would have my vegetarian graduation celebration at a barbecue restaurant.

Yes, you read that correctly.

What prompted such a paradoxical decision? You see, one of the last classes that I took at my alma mater was a cultural anthropology course on food — which ended up being a prescient choice since many of the books on that syllabus found their way into the bibliography of my dissertation. I had an amazing professor who had a number of terrific guest speakers come to talk to the class, one of first of which was Chris Schlesinger who was still at the East Coast Grill (he has since sold it to the former head chef, now chef/co-owner Jason Heard).

Until that class, I had never really thought that much about food apart from how much I liked to eat it. It never occurred to me that you could craft an approach to food that could be just as thoughtful, complicated, and elegant as any in literature, or that taste — both sensory and esthetic — could be a marker of identity, a beginning of a journey, or an end to one.

In any case, Schlesinger’s passion, dedication, and approach to big, bold American flavors made quite the impression. I also remember how he wasn’t adverse to vegetables being on a barbecue menu, which is how my friends and my family ended up at his restaurant graduation eve.

I don’t remember exactly what I ate that night (probably macaroni and cheese), but I do remember that the food was good and my dad was happy that he wasn’t forced to eat another avocado burrito in a New Age-y bookstore that smelled like patchouli, incense, and beans.

This recipe is adapted from Schlesinger’s How to Cook Meat, published the same year that I graduated. I bought the book to remember that night despite not cooking nor eating meat at the time. Who would have known how useful it would turn out to be a few years later when I was no longer a vegetarian and really did want to know how to cook meat!

I must admit that the first time that I made this dish, I wasn’t impressed; I found it too sweet and the flavors a little too weird. However, after years of vegetarianism, I probably just had no idea what I was doing. Now things are different (or back to “normal,” depending how you think about it). I find the combination of flavors to be complex, rich, and deeply satisfying on cold nights like the ones that we have been having here on the East Coast.

I’ve tinkered with the recipe over the years, making it a little less sweet (tomato paste substituted for ketchup; blackstrap for plain old molasses), and deepening the flavors a little more (roasting instead of boiling the sweet potatoes). The recipe easily doubles as the one given below is the proportions of the original halved.

Like any recipe that you have made your own, its evolution is indicative of where you come from and where you are going. In essence, that is the wonderful thing about recipes in general: they all tell a story and this is one of mine.

Ingredients:

For the compound butter:

1 stick of unsalted butter at room temperature

1 tablespoon of A.1. Steak Sauce

1 tablespoon of fresh parsley, finely chopped

Flaky salt and freshly ground pepper to taste

For the cottage pie:

2 large sweet potatoes

1/2-2/3 of a cup of half-and-half

1 tablespoon of butter

2 tablespoons of olive oil

1 large red onion, chopped

1 red bell pepper, cored, seeded, and diced small

2-3 garlic cloves, minced

1 small jalapeño pepper, seeded and minced

1/2 a tablespoon of ground cumin

1/2 a tablespoon of ground coriander

A scant pinch of ground cinnamon

1 pound of ground beef

1 tablespoon of tomato paste

1 tablespoon of blackstrap molasses

How to prepare:

1. Preheat the oven to 400°.

2. To make the A.1. compound butter, combine the room temperature butter, the steak sauce, and the chopped parsley in a small bowl. Season the butter with flaky salt and freshly ground pepper to taste. Spoon the butter onto a piece of parchment or waxed paper, roll it into a cylinder, and refrigerate it until firm.

3. Prick the sweet potatoes all over with a fork. Place them directly on the wire racks of your oven and roast them until they can be easily pierced with a knife, about 40 minutes.

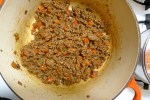
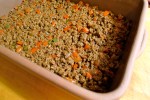
4. While the sweet potatoes are roasting, heat the olive oil in a large sauté pan or Dutch oven set over medium heat. Sauté the onions and diced bell pepper until the onions begin to turn golden, about 8 minutes. Add the garlic, the minced jalapeño, and the spices. Let them sizzle them for about 1 minute before adding the ground beef. Cook the ground beef until it is browned, crumbly, and no longer pink. Pour off any excess fat in the pan before stirring in the tomato paste and the blackstrap molasses. Adjust the seasoning.

5. When the sweet potatoes are cooked through, remove them from the oven and let them rest. Lower the temperature of the oven to 350°.

6. When the sweet potatoes are cool enough to handle, peel them and discard the skins. Mash them with a tablespoon of butter and 2/3 of a cup of half-and-half. As the mixture should be on the loose side, add more half-and-half if needed. Season with salt and pepper.

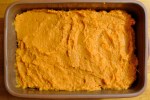
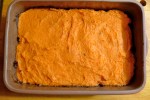
7. Spread an even layer of the ground beef mixture over the bottom of a casserole or baking dish. Gently top the ground beef mixture with the mashed sweet potatoes. Bake until the filling is bubbly, about 40 minutes.

8. Remove the casserole dish from the oven and let it rest for about 5-10 minutes. To serve, you can either dot the top of the casserole with the compound butter before dividing it into portions, or you can top each individual serving with a slice of the compound butter.

The Classic BLT and Where Has Daisy Been?

Bacon makes everything better.
No new post in ages! Where has Daisy been?!

This post was inspired by a recent one by the Perfumed Dandy in which he addressed his own hiatus/absence from the blogosphere.

Never fear, dear Readers! Like the Dandy, I am still here 🙂

However, I did have to put some things on the back burner for a bit. You see, after sweatily fretting that I would have no employment this fall, I seem to have found myself in a situation where I have more teaching than I can shake a stick it. And I can shake a stick at a lot of teaching 🙂

I have classes scheduled every night of the week, except for Monday. Instead of being on one campus, I am divided between two this semester. This means that after teaching one class, I have to run and hop on the train to get to my other one at the other school. Most of my classes finish after 8pm and two finish at 10pm. One of those 10pm classes is on a Friday night 😦

As you can imagine, when I get home, the last thing I feel like doing is cooking. One of the perks of living in Manhattan is that I have an embarrassment of places that will deliver just about anything I want, whenever I want, and at a relatively reasonable price. Pizza Napoletana? Tibetan tsampa? Spicy Szechuan lamb with cumin? Georgian khinkali and lobio? Korean tofu stew? Lobster rolls and shoestring fries? Cuban sandwiches? Isreali hummus? Shio ramen? Coconut curry chicken? Souvlaki? Indian dosas with mango chutney? Yes, please!

Best of all? I can order everything online to be delivered ASAP to Ms. Spoiled-New-Yorker on the fourth floor 😉

But how about the weekend, Daisy? You must have time to cook on the weekend!

In theory, yes. In practice? Well, let’s be honest. On the weekends, most of my meals have been liquid alcoholic insubstantial, augmented by the latest nibble at the next it-restaurant.

All of this might sound exciting, but it gets old really fast. After a few weeks, it’s probably the least satisfying way that I can imagine eating. When things get busy, it’s not that I don’t cook at all. It’s rather that my meals become simpler and generally not anything interesting enough to blog about.

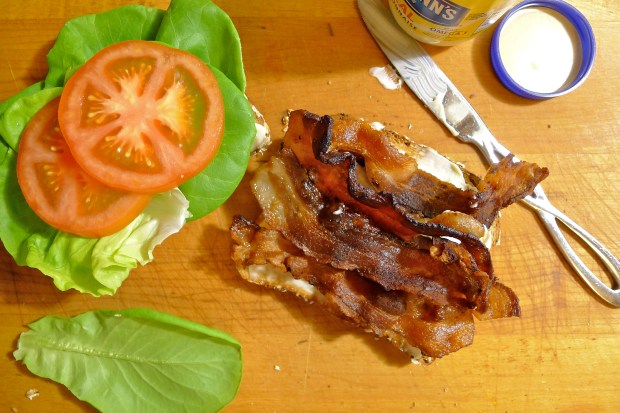
This is where the classic BLT comes in. When I get busy, I look for meals that I can put together quickly with stuff that is already in the fridge. In this case, beautiful bacon from my CSA that I cooked ahead of time, a loaf of bread, some nice lettuce, a good tomato (take advantage of them while you still can), and some mayonnaise. If the bacon and tomato are good, the lettuce is crisp, the bread nicely toasted, and the mayo (it must be Hellman’s) is slathered thickly, you really can’t go wrong.

The BLT is such a standby that sometimes I forget about it in my repertoire of meals. When I went up to visit my CSA farm back in July, I was reminded how good they are. I won’t even tell you how many of these I have had since then because a lady never reveals how much bacon she actually eats. I will say that it beats ordering in any day 🙂

Pan-Roasted Lamb Rib Chops with Mint Chimichurri

Ewe should come for dinner!
Several years ago, I spent an entire month in Argentina and I do not recall ever seeing chimichurri sauce on the table.

How could this have been possible? Was I blind? How could I have traveled from the grassy Pampas to the Bolivian border without once encountering this iconic sauce?

I have no idea.

Since that trip, I have yet to see a something about Argentinian steak-eating that doesn’t make reference to chimichurri — that fabulous amalgam of parsley, garlic, red pepper flakes, vinegar, and olive oil — as being the ever-present condiment. However, I can honestly and sadly say that I never had it until I returned home.

It’s not like I wasn’t eating meat over there. After a leisurely breakfast of sweet, flaky medialunas and large cafe con leche, I would wander out into the street and try to figure out where to have my next meal — which would always be steak.

Yes, this was the decadent month where I had steak for lunch and dinner every single day, washed down with gallons of highly-alcoholic Malbec. Did I get sick of the repetitiveness? No. Did I eat anything else? Yes. Empanadas (both the meat and the cheese-filled varieties) and dulce de leche-stuffed alfajores filled in the nooks and crannies in-between meals.

Was it healthy? Most definitely not! By the time that me and my travel companion ended our trip, our alcohol tolerance was through the roof and we could document how much we had swelled in pictures. Looking at them chronologically was like seeing time-lapse photographic evidence of weight-gain.

Was it one of the most delicious vacations of my life? Most definitely yes.

Perhaps if I had seen either a bottle or a bowl of chimichurri sauce, I would have foregone the pathetic green salads that we would order in an effort to ingest something healthy. Who were we kidding? Those little bowls of greens were only gestures, mere tokens of the balanced diets we left behind in favor of steak, steak, more steak, and llama carpaccio.

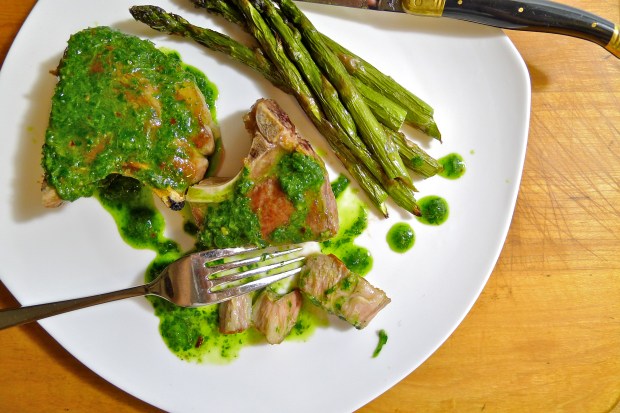
Chimichurri is an excellent accompaniment for grilled and roasted meats. It’s green, garlicky, and salty with a little heat from the pepper and a little tang from the vinegar. It is amazing and beyond easy to make.

This version of chimichurri is a twist on traditional chimichurri. Instead of oregano, I have substituted fresh mint leaves to complement the lovely lamb chops that I get from my CSA. My introduction to the combination of lamb and mint — the mind naturally conjures up images of adorably delectable baby lambs fattening themselves on tender sprigs of mint and other herbs as if to say, “Here I am and I am pre-seasoned!” — came when I was spending a lot of time in Wales. A slick of mint sauce, usually store-bought and straight from a jar, was used to coat salty little marsh lamb chops in a sheen of jelly. Looking back, those chops would have been much better served by something fresher and more spring-like.

In lieu of red or white wine vinegar, I have opted for unfiltered apple cider vinegar which adds a little bit of sweetness to the final result. I actually got the idea to swap vinegars from the wonderful Hannah over at Inherit the Spoon, whose recipe inspired this one. As you can tell, chimichurri is quite flexible; you can adjust it to your personal tastes as you go along. What is given below is a reflection of what I like to eat, namely more salt and less tart, but you should feel free to play around with it. If the sauce feels too chunky, add more olive oil or more vinegar. Too tangy? Too garlicky? Too spicy? Add more herbs.

As a useful gauge, the final consistency should be like fine pesto. That being said, you can leave the sauce rougher if you prefer. It will still taste wonderful.

Ingredients:

2 thick-cut lamb rib chops per person

Kosher salt

Rice bran oil

1/2 a bunch of Italian parsley, trimmed so that the longer stems are removed

1 handful of fresh mint leaves, stems removed

2 cloves of garlic

Red pepper flakes to taste

Salt and freshly ground black pepper to taste

3-4 tablespoons of apple cider vinegar

1-3-1/2 of a cup of good extra-virgin olive oil

How to prepare:

1. Generously salt both sides of the lamb chops and let them come up to room temperature while you prepare the sauce.

2. Combine the herbs, the garlic, the red pepper flakes, and the apple cider vinegar in a food processor with a hefty pinch of salt and a good grind of black pepper. As the processor is going, add the olive oil in a steady stream until you reach your desired consistency. Adjust the seasoning if needed. Keep the sauce covered in the fridge until you are ready to cook the chops.

3. Preheat the oven to 350°.

4. Once the lamb chops have come up to room temperature, pat them dry with paper towels. In a heavy-duty, oven-safe skillet large enough to hold the chops without crowding them, heat about 1-2 tablespoons of rice bran oil or another kind of oil with a high-smoke point until the surface of the oil begins to shimmer. Arrange the chops in a single layer and let them cook undisturbed until you have a nice sear on them. When properly seared, the chops should release easily from the pan if the pan was hot enough to begin with. Flip the chops and move the pan to the oven.  You want to aim for them to be medium-rare. An instant read thermometer should read 135° when inserted in the thickest part of the chop. This should take about 7-10 minutes depending on how thick your chops are (mine were about 1.5 inches thick) and how many are in the pan. When the chops have reached the appropriate level of doneness, remove the pan from the oven and transfer the chops to a plate to rest for 5 minutes.

5. When the meat is done resting, serve them along with the chimichurri. Any uneaten sauce can be kept in an air-tight container in the fridge for about a week. There will likely not be any uneaten sauce 🙂

Oven-Roasted Baby Back Ribs, Part II

Baby got back.
A couple of months ago, Edna at expatedna.com published a post about some of the strange search terms that have led to her blog. Some of the weirdest that she cited were: “German army uniform 2012,” “watered down biracial baby with mongolian spot,” and “if i’m part asian does it still make me racist?”

If only I were so lucky! In the entire time that I have maintained this blog, I have not had one strange search lead to me. Not. One. Single. Weird. Search.

You know what that means?

It means I’m boring.

To be more interesting, maybe I should have a plushie chase me across a Croatian nudist beach covered with technicolor Rastafarian Jesus squirrels wearing sequin pasties and rubber panties!

No, I’m not actually going to do that 🙂 I just wanted to up the chances of a strange search ending up here 🙂

Anyway, among the pedestrian search terms that led people to my blog were: “french breakfast radish recipe,” “juicy pork chops,” and “quick oven baked baby back ribs.”

I know. Very exciting.

Seriously though, this post on oven-roasted baby back ribs remains one of the most popular posts that I have ever done. However, for the number of times that it gets viewed, it has very few comments. I attribute this to one of two things: either my recipe is terrible, or the lead-up to the recipe is misleading.

The recipe is terrific, but the lead-up to the recipe is misleading because it is my mother’s recipe and she lied to me.

See, my mother told me that these ribs would take a mere 30 minutes in the oven. What she neglected to add was that they take about 30 minutes after the first hour

So I’m here to redress this wrong: oven-roasted ribs will take at least 1 hour and 30 minutes to cook. An hour and 30 minutes. You cannot cook ribs faster than that because there is too much connective tissue and collagen to break down. You just can’t. But you should still make these ribs because they are delicious, just plan accordingly.

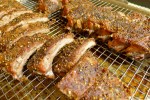
I had intended to make these ribs for a special occasion, but given the soaring temperatures last week, I was spurred to cook them ahead of time and meet my friends in a nice, air-conditioned restaurant instead. In my haste, I forgot to mix the seasoning with soft brown sugar. I simply rubbed them down with one of Lior Lev Sercarz‘s beautiful spice blends (Pierre Poivre No.7, if you’re interested), and threw them into a 350° oven for an hour and a half.

Done and delicious.

Ingredients:

1 or 2 racks of baby back pork ribs

1 heaping tablespoon of steak seasoning or rib rub per rack of ribs

Kosher salt

Special equipment:

One half-size sheet pan

One wire rack to fit the sheet pan

How to prepare:

1. Pre-heat the oven to 350°.

2. First remove the membrane on the back of the pork ribs. It’s super easy to do and allows your ribs to cook nice and flat, without curling up. It also makes them much nicer to eat. To do this, flip the ribs bone-side up. Using the flat handle of a spoon or a dull butter knife, loosen the membrane on one end of the rack of ribs. Grasp the loosened end with a paper towel and pull the membrane slowly in the direction of the opposite end. It should come off in one piece. If it doesn’t, you can just grab the torn end and continue. To help visualize, here is a how-to clip from BBQTalk.

3. After drying the ribs with paper towels, rub the seasoning mix into both sides of the rack. Sprinkle both sides with salt and arrange them on the wire rack.

4. Set the racks of ribs in the oven. Carefully pour about 2 1/2 to 3 cups of water into the bottom of the sheet pan. The water should not touch the bottom of the wire rack. Roast the ribs in the oven at 350° for an hour to an hour and a half until the ribs are tender and buttery. Remove the pan carefully from the oven. Let the ribs rest for 5 to 10 minutes before slicing and serving.


\

Sichuanese Pork Wontons in Chili-Soy Sauce

Plump dumplings rule!
I have inherited a lot from my mother. In addition to her dry sense of humor, her sarcasm, and her sly potty mouth, I am also the beneficiary of her glossy hair and poreless, flawless skin — which she reminds me, while comparing the four zits that I have had in my entire life to her NONE EVER, is actually less flawless than her own.

What I did not get from my mother was my taste for fiery, hot spice, gamy meat, and my willingness to put my overly-trusting ethnically Chinese-self in the hands of white people.

“Who is Fuchsia Dunlop?” my mother asked, “Is she Chinese?”

“Um, no. She’s British.”

“Like British-Chinese?”

“No . . . um, just British.”

Silence.

Asian-child fail!

But it’s really not my fault! My mother is an amazing cook, who has basically decided that she will be taking all her secrets to her grave so I will miss her more when she’s gone. In her kitchen, I am not even sous chef. I am relegated to the status of line-cook. Or bus-person.

Basically she lets me wrap things like egg rolls, dumplings, or leftovers with cling film.

These dumplings are not anything my mother would ever cook. First of all, they are spicy as heck! Secondly, the root of their spice comes from a nice, thick, orange slick of delicious grease! Finally, the recipe is from a white person.

But. They. Are. Delicious.

To the unintiated, Fuchsia Dunlop (who never seems to be known as just Fuchsia or just Dunlop) is a Chinese food phenomenon. Author of the best-selling Shark’s Fin and Sichuan Pepper: A Sweet-Sour Memoir of Eating in China, the book outlines her deep love for Chinese cookery which began as a student at Cambridge, culminated in a move to Chengdu and enrollment in a professional chef’s training course at the Sichuan Institute of Higher Cuisine — the first Westerner to ever do so.

Friends, both Asian and not, swear by her books and her recipes, both of which translate Sichuanese and Hunanese cuisine into something effortless, accessible, and authentic-feeling.

I adapted this recipe from one that appeared on Epicurious from Every Grain of Rice: Simple Chinese Home Cooking. I didn’t change parts of it because I had any kind of personal reference — apart from eating similar dumplings in restaurants, I don’t. Instead, I altered the recipe because I am apparently lazier than your average Chinese home cook 🙂

However, the results are still divine. Heritage schmeritage! These dumplings tick every single box in terms of a deeply soul-satisfying food experience. Did I mention that they are ridiculously easy to make too? 🙂

Ingredients:

For the sauce

3-4 tablespoons of dark Chinese soy sauce

1 1/2 teaspoons of sugar

3 cloves of garlic, finely minced

3 scallions, finely chopped

3 tablespoons of sesame chili oil with sediment

For the dumplings

1 knob of fresh ginger

1 pound of ground pork

1 egg, beaten

2 teaspoons of Shaoxing wine (a useful buying guide can be found here)

1 teaspoon of toasted sesame oil

3 scallions, finely chopped

Freshly ground white pepper

1 package of wonton wrappers

For garnish

2 tablespoons of roasted peanuts, chopped (Fuchsia Dunlop’s recipe does not call for them, but I think they would be an terrific addition. I would have added if I had them on hand!)

How to prepare:

1. First, prepare the sauce. In a small bowl, whisk together the soy sauce and the sugar. Let the mixture sit for about 5 minutes until all the sugar crystals have dissolved. Once the sugar has dissolved, add the finely minced garlic, the chili oil with sediment, and the finely chopped scallions.

2. Using a rolling pin or the bottom of a heavy coffee mug, crush the knob of unpeeled ginger. Place it in a small dish and cover it with about 2 tablespoons of water.

3. In a large bowl, combine the pork with one beaten egg, 2 teaspoons of Shaoxing wine, 1 teaspoon of roasted sesame oil, and 3 teaspoons of the ginger water. Mix well with your hands. Add the scallions and season the meat with white pepper to taste.

As the sauce is relatively salty, I opted to not salt the meat, but you can do so if you prefer.

4. Fill a small dish with cold water. Take one wonton wrapper and lay it on a flat surface. Place about a teaspoon of pork filling into the center of the wrapper. Dip a finger in the cold water and run it around the edges. Fold the wrapper in half diagonally and continue until all the pork filling is gone. You should use up about half of the package of wrappers, which you can save and freeze for another time. Lay the wontons out on a large cookie sheet to avoid crowding them onto a plate like I did.

5. While you are wrapping, set a large pot of water to boil. When the water has reached a rolling boil, salt it as if you would for pasta (wontons are essentially ravioli after all). Carefully drop the wontons in one-at-a-time. I only cooked 8-10 at once to ensure that they wouldn’t stick together. When the water has come back up to a boil, add another cup of cold water to the pot. When the water has come up to a boil again, gently scoop up each wonton with a slotted spoon and drain each well. Divide the wontons among however many bowls you want and generously spoon over the chili-soy sauce.

Sprinkle with crushed peanuts, put on a bib, and dive in.

Jonathan Benno’s Pasta e Fagioli

Don't be a fool, eat yo' pasta fazool!
Nigella does what?!”

Steve from Gourmandistan shook his head incredulously and made a face.

She tells you to put all the fresh herbs in the foot of a nylon stocking and to leave the whole thing in simmering stock for an hour!

“Doesn’t it melt?!”

“Yeah. You would think!”

“That is disgusting.”

Agreed.

A few weeks ago, Steve was in town for the Roger Smith Cookbook Conference and we were talking “food blogger shop” at Roberta’s over craft beer and aioli-coated fried sweetbreads.

Shop that night included pasta e fagioli,

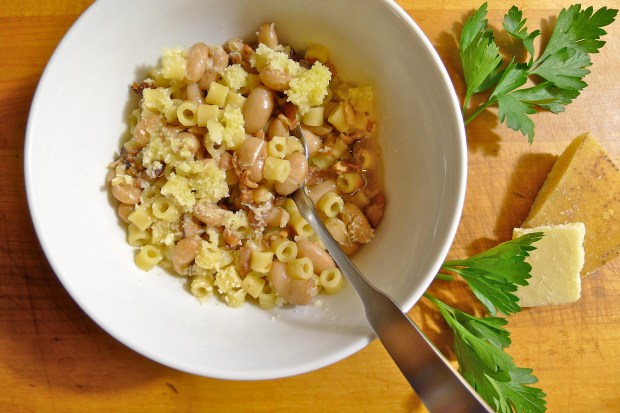
I love pasta e fagioli, affectionately known on these close-to-Jersey shores as pasta fazool. Translated simply as pasta and beans, the name of this humble Italian dish belies its power to soothe and satisfy. Pure alchemy occurs when the nuttiness of the beans Vulcan mind-melds with the pasta in rich rosemary and bay-scented broth. It is warm, wonderful comfort in a bowl and in these waning days of winter, it is the perfect dish.

My current favorite version of pasta e fagioli is from Mario Batali, who starts off his recipe by asking you to mash up a wad of fatback with the back of a spoon until you have a nice and smooth porky paste. Very Italian.

The subject of our mutual alarm was from British celebrity chef Nigella Lawson — not Italian at all. Although I like her writing, her recipes leave me cold . . . and extremely skeptical. Like this one for pasta e fagioli in which she asks you to use a “popsock” — also known as a knee-high nylon stocking — as a herb sachet instead of good, old-fashioned, food-safe, heat-resistant, and dependable cheesecloth.

Now I see the utility of bundling the aromatics used to perfume pasta e fagioli in a sachet; it makes it much easier to remove the spent herbs from the soup if you have them together. It saves you from the futilely fishing around for the gray and bitter spindles of rosemary leaves. However, I draw the line at rooting around in my sock drawer for kitchen essentials. Furthermore, Nigella includes the following sentence in her recipe: “Chuck out the corpsed popsock and its contents [after the beans are tender].”

Not yummy-sounding at all.

I am always on the lookout for a new variation on pasta e fagioli. Recently, New York Magazine published one from Jonathan Benno in which he solves the fresh-herb-removal problem by infusing the stock with Parmesan rinds and aromatics and then straining them all out before use. 

Brilliant!

Benno recommends soaking the dried beans for two days in the refrigerator instead of just one day on the countertop. I’m not sure if the additional day of soaking affects the taste, but I did notice that the beans cooked faster and more evenly. The beans were also creamier.

Heirloom beans are best, but regular old beans work just as well. Traditionally, borlotti beans — also called cranberry beans — are used in pasta e fagioli, but cannellini beans are a good substitute.

To Benno’s recipe, I have added bacon. Because I can never resist adding bacon to everything 🙂 You can omit it and the soup will still be delicious.

Ingredients:

2 cups of dried beans (preferably heirloom beans like borlotti beans or cannellini beans)

2 quarts of chicken stock (about 8 cups)

1 cup of Parmesan rinds

2 sprigs of fresh rosemary

2 sprigs of fresh thyme

2 sprigs of fresh sage

5 fresh or dried bay leaves

1 pound of bacon ends, chopped (optional)

1 teaspoon of dried oregano

1 teaspoon of crushed red pepper flakes

Salt and pepper to taste

1 1/2 cups of dried ditalini or another kind of small tubular pasta like macaroni

Extra-virgin olive oil

Freshly grated Parmesan

How to prepare:

This soup is not difficult to prepare. However, it does require some advanced planning. Be sure to read the recipe closely before beginning.

1. In a bowl large enough to fit the beans comfortably, cover them with about two inches of cold water. Soak the beans in the refrigerator for two days.

2. When the beans are done soaking, drain them.

3. Combine the chicken stock, the Parmesan rinds, the fresh herbs, and the bay leaves in a large pot. Simmer everything together for about an hour. Do not the let stock boil. Strain the stock and discard the Parmesan rinds and herbs.

4a. If using, brown the chopped bacon ends in a large skillet until most of the fat has rendered. Drain the bacon bits on paper towels.

4b. Add the soaked and drained beans, the bacon if desired, the dried oregano, and the crushed red pepper flakes to the strained stock. Gently simmer the beans for between 1-2 hours. When the beans are done, they will be creamy in the center. Do not let the liquid come to a boil or the skins can burst. Skim the surface of the soup if and when necessary. Adjust the seasoning.

5. When the beans are tender, add the dried pasta to them. You may need to add more stock or water if the level of the liquid in the pot is too low. When the pasta is al dente, turn off the heat.

To serve, heap a generous spoonful of freshly grated Parmesan on top and finish the soup with a drizzle of good extra-virgin olive oil.

♥ Happy Valentine’s Day ♥: Grilled Beef Heart with Celeriac Slaw

I Heart You!
The first time that I ever had beef heart was at St. John’s Bread and Wine in London. It was two summers ago and I was wandering around Spitalfields on a single-origin chocolate bar search. Suddenly, the skies opened up and down came the deluge. Soaked and woefully unprepared, I ducked into the empty restaurant right in the middle of the family meal.
Although I’m sure that the last thing the staff wanted to deal with was another guest, they were extraordinarily gracious as they served me a late-afternoon snack of oysters, Sauternes, grilled beef heart and celeriac slaw.

Sauternes and oysters, you say? Yes, the server was intrigued as well. I had ordered them together because I had just read an article about how the original pairing for oysters was Sauternes, not Champagne.

In any case, I assure you that the combination is divine.

So was the beef heart. Flavorful and surprising tender, it had a robust beefiness and was the perfect antidote to the grey, oily weather outside. As I enjoyed the last dregs of my wine, I remembered that I had a copy of Fergus Henderson’s Nose to Tail Eating: A Kind of British Cooking collecting dust at home.

When my CSA (shares are still available, by the way) began offering beef heart, I decided that I was going to bite the bullet and try to recreate that terrific snack.

The recipe is such that no actual measurements are necessary. Follow your instinct and taste as you go along. You will be fine.

(and a very belated thank you to the staff at St. John’s for making sure that I didn’t go back out in the storm without a large umbrella)

Happy Valentine’s Day!

Ingredients:

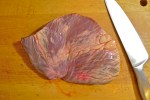
1 beef or calf’s heart

Coarse salt

Freshly ground pepper

Balsamic Vinegar

Olive oil

Thyme sprigs

1 celery root

Crème fraîche

Dijon mustard

How to prepare:

1. The first thing you will need to do is trim the heart. You basically want to remove all the fat, the membranes, and any and all vessels including the aorta. It may be a little disheartening (no pun intended) to have to discard all those trimmings, but you really only want the tasty bits. For this, you will need a very sharp knife.

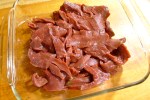
When you finish, you should be left with a pile of very lean beef slices that no longer resemble a heart at all. For an instructional video, I refer you to Michael Ruhlman here.

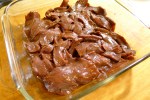
2. In a dish large enough to fit all the beef slices comfortably, drizzle them with olive oil. Add a healthy slug of balsamic vinegar. Sprinkle it generously with coarse salt and freshly ground pepper. Add a few sprigs of fresh thyme. Toss, cover, and let marinate in the fridge for 8-24 hours.

3. Before grilling the beef heart slices, set up the celeriac slaw. The first thing you will need to do is trim the root. You could use a vegetable peeler . . . if you want to have an accident! Or you could use a very sharp knife and be safer. You will have a lot of trimmings to discard as well, but trust me: you don’t want these trimmings either. If you must, you can put them in a bag and toss them in your freezer to use for stock.

First, slice off the top of the root and level off its bottom. This will ensure that it won’t rock around while you are trimming it. Holding your knife perpendicular to the root, shave or slice off the outer gnarled surface. You should be left with a clean, peeled root.

For another helpful video, I refer you to Gourmet Magazine.

Now you need to julienne the celery root. This can be accomplished most effectively by using a mandoline. If you don’t have one, or do have one but are too lazy to look for it like me, you can use a sharp knife again for the job. To julienne the celery root, cut very thin slices of it, stack the slices up and cut them into matchsticks.

Melissa Clark demos this here.

For the dressing, gently stir together 4 tablespoons of crème fraîche for every one tablespoon of Dijon mustard. That’s the ratio that I used, but you can increase the amount of mustard if you want your dressing to have more of a kick. Adjust the seasoning if necessary.

Using your hands, toss the julienned slices of celery root with the dressing.

5. Prepare the grill. Brush it with oil and get it nice and hot. Cook the beef heart slices until they are medium. Henderson says about 3 minutes per side, but mine cooked faster than that. I would say to just watch them and pull them off the grill when they are ready.

To serve, plate a few slices with a nice mound of celery root slaw.