A few weeks ago, I was possessed with the urge to buy an entire cheese pumpkin. Cheese pumpkin is somewhat of a misnomer as it is neither made of cheese, nor does it taste remotely cheese-like.
Cheese pumpkins actually have nothing to do with the cheese-making process.
Instead, the cheese in cheese pumpkin actually refers to its appearance as it resembles an old-fashioned cheese box. Okay, sure, boxes are square or rectangular, and cheese pumpkins are clearly not. But they are buff-colored, low and squat — just like unfinished wooden cheese boxes.
The cheese pumpkin is the classic Cinderella pumpkin. That wasn’t a sugar pumpkin that got turned into a carriage!
Cheese pumpkins are awesome. They have sweet, soft flesh that is hardly stringy at all when you cook them. They make amazing purées, soups, and smooth-as-buttah’ custards.
They are also huge. About 5 to 7 pounds for a small one, 6 to 10 pounds for a large one. Often at farmers’ markets, cheese pumpkins are cut up and sold in halves and quarters.
But I just had to have a whole one to myself.
So consider this Cheese Pumpkin Project #1, as I only used half of a small one for this recipe.
Ingredients:
For the chipotle chili purée:
1 7.5 ounce can of chipotle peppers in adobo sauce, reserving 2 peppers and 2 tablespoons of sauce
1 red bell pepper
1 teaspoon of sherry vinegar
1 tablespoon of honey
For the soup:
2 tablespoons of olive oil
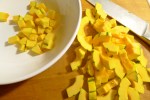
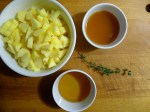
1/2 a small cheese pumpkin, seeded, peeled, and cut into 1-inch cubes
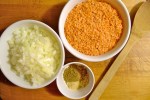
1 medium onion, diced
2 cloves of garlic, minced
2 sprigs of fresh thyme
2 bay leaves
1 quart of chicken stock
1/2 cup of heavy cream
The reserved pair of chipotle peppers + 2 tablespoons of sauce
Salt
Pumpkin seed oil
Special equipment:
A hand-held immersion blender
A fine-mesh sieve*
How to prepare:
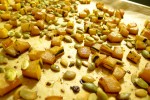
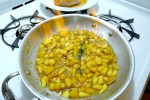
1. Heat the olive oil in a large Dutch oven over medium-high heat until the oil starts to shimmer. Add the onions. Sauté them until they lose their opacity and begin to turn translucent. Add the garlic and sauté everything together for about another minute. Toss the pumpkin cubes in the onion-garlic mixture for another minute or two until they are evenly coated. Add the stock to the vegetables. Tuck the thyme sprigs and bay leaves under the pumpkin cubes. Bring everything to a boil, and then reduce the heat so that the liquid is at a steady simmer. Cook the pumpkin until it is soft. You should easily be able to mash a pumpkin cube against the side of the pot with a wooden spoon.
2. Remove the thyme and the bay leaves. Add the 2 reserved chipotle peppers and 2 tablespoons of sauce. Using an immersion blender, blend everything together until smooth.
* If you, like me, prefer the look and mouthfeel of a perfectly creamy and even-colored soup unmarred by any specks of green from the thyme, or any red from the peppers, you can pass the soup quickly through a fine-mesh sieve. By sieving your soup, you improve the texture immensely. Cheese pumpkins are much less fibrous than other pumpkins, but they can still have some.
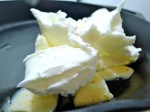
Stir in the heavy cream, and adjust the seasoning. While the soup is cooling a bit, prepare the chipotle pepper purée.
3. If you have a gas range, set the red bell pepper directly on the gas burner with the heat on high. Turn the pepper periodically to make sure that the skin chars evenly.
If you have an electric range, rub the bell pepper with olive oil and place it on a cookie sheet set underneath the broiler. You can also rub the pepper with olive oil and pop it into a 450° oven. Remove it when the skin is blistered and blackened.
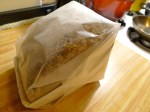
4. When your pepper is nice and charred, put it in a clean plastic grocery bag or a small pepper bag and wait for it to cool. When it is cool enough to handle, you should be able to gently rub off all the charred skin from the pepper. Seed the pepper, and discard the seeds and stem. Cut the pepper into 1/2 inch pieces.
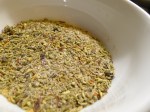
5. Using the immersion blender, combine the remaining chipotle peppers, adobo sauce, the roasted red pepper, the sherry vinegar, and the honey together until smooth.
6. To serve, top each bowl of soup with a dollop of chipotle purée and a drizzle of pumpkin seed oil.