Have you seen Jim Lahey‘s new book? The one all about pizza? I have been a big fan of Lahey ever since I lived up the street from the Sullivan Street Bakery in Soho. Back then, I used to go over there almost daily for shots of Illy coffee and square slices of pizza, available in four varieties: Bianca, Potato and Rosemary, Tomato Sauce, and Mushroom and Thyme.
Since those years, Lahey has expanded the Sullivan Street Bakery and opened a pizza joint called Co. Co. is just about one of my favorite places for a pizza pie in the city. The dough is imperfectly perfect: lumpy, irregular, charred, crispy and toothsome, with just the right amount of salt and olive oil. When I saw that Lahey had published a book all about pizza, I got really, really excited.
Because I thought it would be really, really easy.
See, Lahey’s other book contained the über-recipe for no-knead bread. As long as you were willing to let the dough do its thing and rise overnight, you could have amazing bread with just about zero effort. You didn’t need a fancy oven, or a special starter, or a wooden paddle. You just needed a bowl and an oven-safe pot with a lid.
So of course, I assumed that his pizza would be just as simple.
In many ways, it is. You mix the ingredients, you let it rise overnight, you stretch it, you top it . . . and then you pull out your pizza stone, pizza paddle or pizza peel.
Insert screeching wheel sound here.
Lahey wants you to heat your pizza stone by positioning it about 8 inches from the broiler element before using your pizza paddle to slide your pie onto its hot surface. I have three problems with this:
A) I live in a tiny studio apartment and I don’t have any space left for any more pieces of specialized cooking equipment, no matter how “inexpensive” Lahey says they are.
B) My broiler has exactly three inches worth of clearance because the broiler unit is positioned underneath the actual oven. If I put a pizza stone in there, there will be no room for a pizza. If I do manage to wedge a pizza in there, chances are that I will set my apartment on fire.
C) I live in a rental.
I have no problem with letting dough proof overnight. Delayed gratification doesn’t bother me, but if there is one thing I abhor in terms of cooking it is being told that I can’t make X if I don’t have Y.
Especially when Y is a piece of equipment.
Pizza is pizza. It’s not molecular gastronomy, it’s peasant food — albeit very wonderful peasant food that has a cult following and official Italian government recognition.
Nevertheless, I refuse to be precious about pizza.
If you have a pizza stone, by all means use it. If you have a pizza peel, good for you. You are likely a more serious pizza aficionado than myself. If you have neither, you can still make a perfectly serviceable— and even an amazing pizza — without them.
I’ll worry about authenticity when I have the money, time and space to build a outdoor wood-burning oven just like they have in old Napoli.
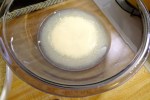
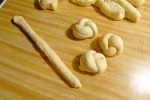
Pizza dough is really easy to make at home. Generally, it consists of five ingredients: flour, yeast, olive oil, salt and water. Every time that I make pizza dough, I end up using a different recipe than I did before because I forgot to scribble down the proportions that I used. However, there is one dough that I keep coming back to consistently: Amy Scherber‘s “Push Button” Pizza Crust, published in The Chefs of the Times. Scherber’s dough is super easy to pull together; you just whizz all the ingredients together in a food processor for about 60 seconds total, and then let the dough rest for 60 minutes. You don’t have to toss it to stretch it, just use your fingertips to “press, prod, push and poke” the dough into place on a plain old cookie sheet. The crust gets wonderfully crispy in the oven, but it still has a little bit of give to it. It also has great flavor even though it has the same ingredients that every pizza dough has.
If you don’t have a food processor, you can just stir the ingredients together with a spoon, and then knead it until the dough feels elastic.
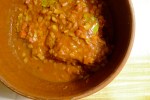
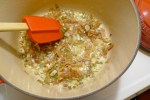
For the sauce, I make the simplest marinara ever using Jersey Fresh Crushed Tomatoes — which are amazing straight out of the can. All I do is heat about two tablespoons of olive oil in a heavy-bottomed saucepan, add the 28 ounces of crushed tomatoes, and simmer everything over low heat until the oil has been incorporated and the sauce has thickened. I love it. If the canned tomatoes are really good, it’s just the purest taste of tomato that you can imagine.
The #1 most important trick to perfect pizza at home is to go easy on the sauce and the toppings.
I know it’s hard to resist the urge to slather your dough with tons of sauce and cheese, but the more you pile on, the spongier your dough will be because all those toppings carry moisture. The more toppings you add, the less chance you will have of achieving a crispy crust.
And pizza really is all about the crust. So remember, less is more!
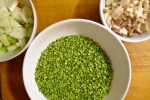
This is also the first post this year to feature spring vegetables. Green garlic is in! Whoo-hoo!!!
Ingredients:
For Amy Scherber’s “Push Button” Crust:
Olive oil
3/4 cup + 1 tablespoon of warm water (between 105-115°)
1 1/2 teaspoons of active dry yeast
2 cups of all-purpose flour
2 tablespoons of coarse cornmeal
2 1/2 teaspoons of salt
For the pizza sauce:
2 tablespoons of olive oil
1 28-ounce can of crushed tomatoes (if you don’t live in the Tri-State area, you can order Jersey Fresh tomatoes here, or use the best San Marzano tomatoes that you can find)
Salt
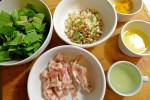
For the toppings:
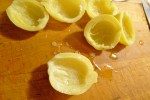
1 ball of buffalo mozzarella
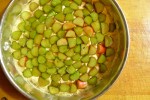
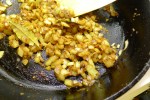
1 bulb of young, green garlic, thinly sliced on the bias along with some of the tender green stem
Special equipment:
1 half-sheet pan or a plain old cookie sheet
How to prepare:
For the dough:
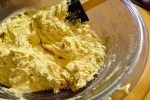
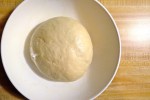
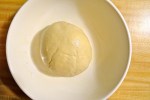
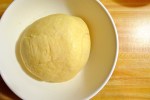
1. Whizz together the water, the yeast and 2 teaspoons of olive oil in the food processor. Add the flour, the cornmeal and 2 1/2 teaspoons of salt. Process everything together until the dough comes together, about 10 seconds. Process the dough for about 5 seconds more before turning it out onto a lightly floured countertop. Knead the dough briefly for about 30 seconds. Shape the dough into a ball and place it in an oiled bowl. Cover it with plastic wrap and let it rest for about an hour.
If you don’t have a food processor, you can mix the water, the yeast and the olive oil together with your fingers, and then incorporate the dry ingredients a little bit at a time with a wooden spoon. Turn the dough out onto a lightly floured countertop, and knead the dough until it becomes elastic. Shape the dough into a ball and place it in an oiled bowl. Cover it with plastic wrap and let it rest for about an hour.
2. While the dough is rising, heat two tablespoons of olive oil in a heavy-bottomed saucepan over medium heat. Add the tomatoes. Reduce the heat to medium-low and simmer the tomatoes, stirring frequently, until all the oil has been incorporated and the sauce has thickened. Adjust the seasoning.
3. Preheat the oven to 450-475°.
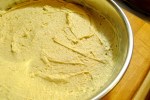
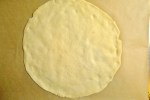
4. When the dough has risen, divide it in half if you want to make two round personal pizzas, or leave it as one ball of dough if you want to make one big rectangular pizza. Line your sheet pan with a parchment paper. Lift the dough out the bowl and stretch it out slightly. Place it in the center of the sheet pan. Using lightly oiled fingertips, press the dough out from its middle to its edges. Continue to pat it out until it is thin and evenly covers the pan.
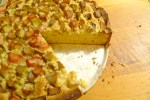
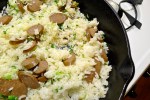
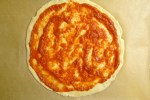
5. Spoon just enough sauce over the dough so that there is a thin, even layer. Hand tear the mozzarella over the top, half a ball per round if you are making two round pizzas instead of one large rectangular pizza. Scatter the thinly sliced green garlic evenly over the top. Bake the pizza until the crust is golden and the top is bubbly, about 10-15 minutes.