Pan-Roasted Lamb Rib Chops with Mint Chimichurri

Ewe should come for dinner!
Several years ago, I spent an entire month in Argentina and I do not recall ever seeing chimichurri sauce on the table.

How could this have been possible? Was I blind? How could I have traveled from the grassy Pampas to the Bolivian border without once encountering this iconic sauce?

I have no idea.

Since that trip, I have yet to see a something about Argentinian steak-eating that doesn’t make reference to chimichurri — that fabulous amalgam of parsley, garlic, red pepper flakes, vinegar, and olive oil — as being the ever-present condiment. However, I can honestly and sadly say that I never had it until I returned home.

It’s not like I wasn’t eating meat over there. After a leisurely breakfast of sweet, flaky medialunas and large cafe con leche, I would wander out into the street and try to figure out where to have my next meal — which would always be steak.

Yes, this was the decadent month where I had steak for lunch and dinner every single day, washed down with gallons of highly-alcoholic Malbec. Did I get sick of the repetitiveness? No. Did I eat anything else? Yes. Empanadas (both the meat and the cheese-filled varieties) and dulce de leche-stuffed alfajores filled in the nooks and crannies in-between meals.

Was it healthy? Most definitely not! By the time that me and my travel companion ended our trip, our alcohol tolerance was through the roof and we could document how much we had swelled in pictures. Looking at them chronologically was like seeing time-lapse photographic evidence of weight-gain.

Was it one of the most delicious vacations of my life? Most definitely yes.

Perhaps if I had seen either a bottle or a bowl of chimichurri sauce, I would have foregone the pathetic green salads that we would order in an effort to ingest something healthy. Who were we kidding? Those little bowls of greens were only gestures, mere tokens of the balanced diets we left behind in favor of steak, steak, more steak, and llama carpaccio.

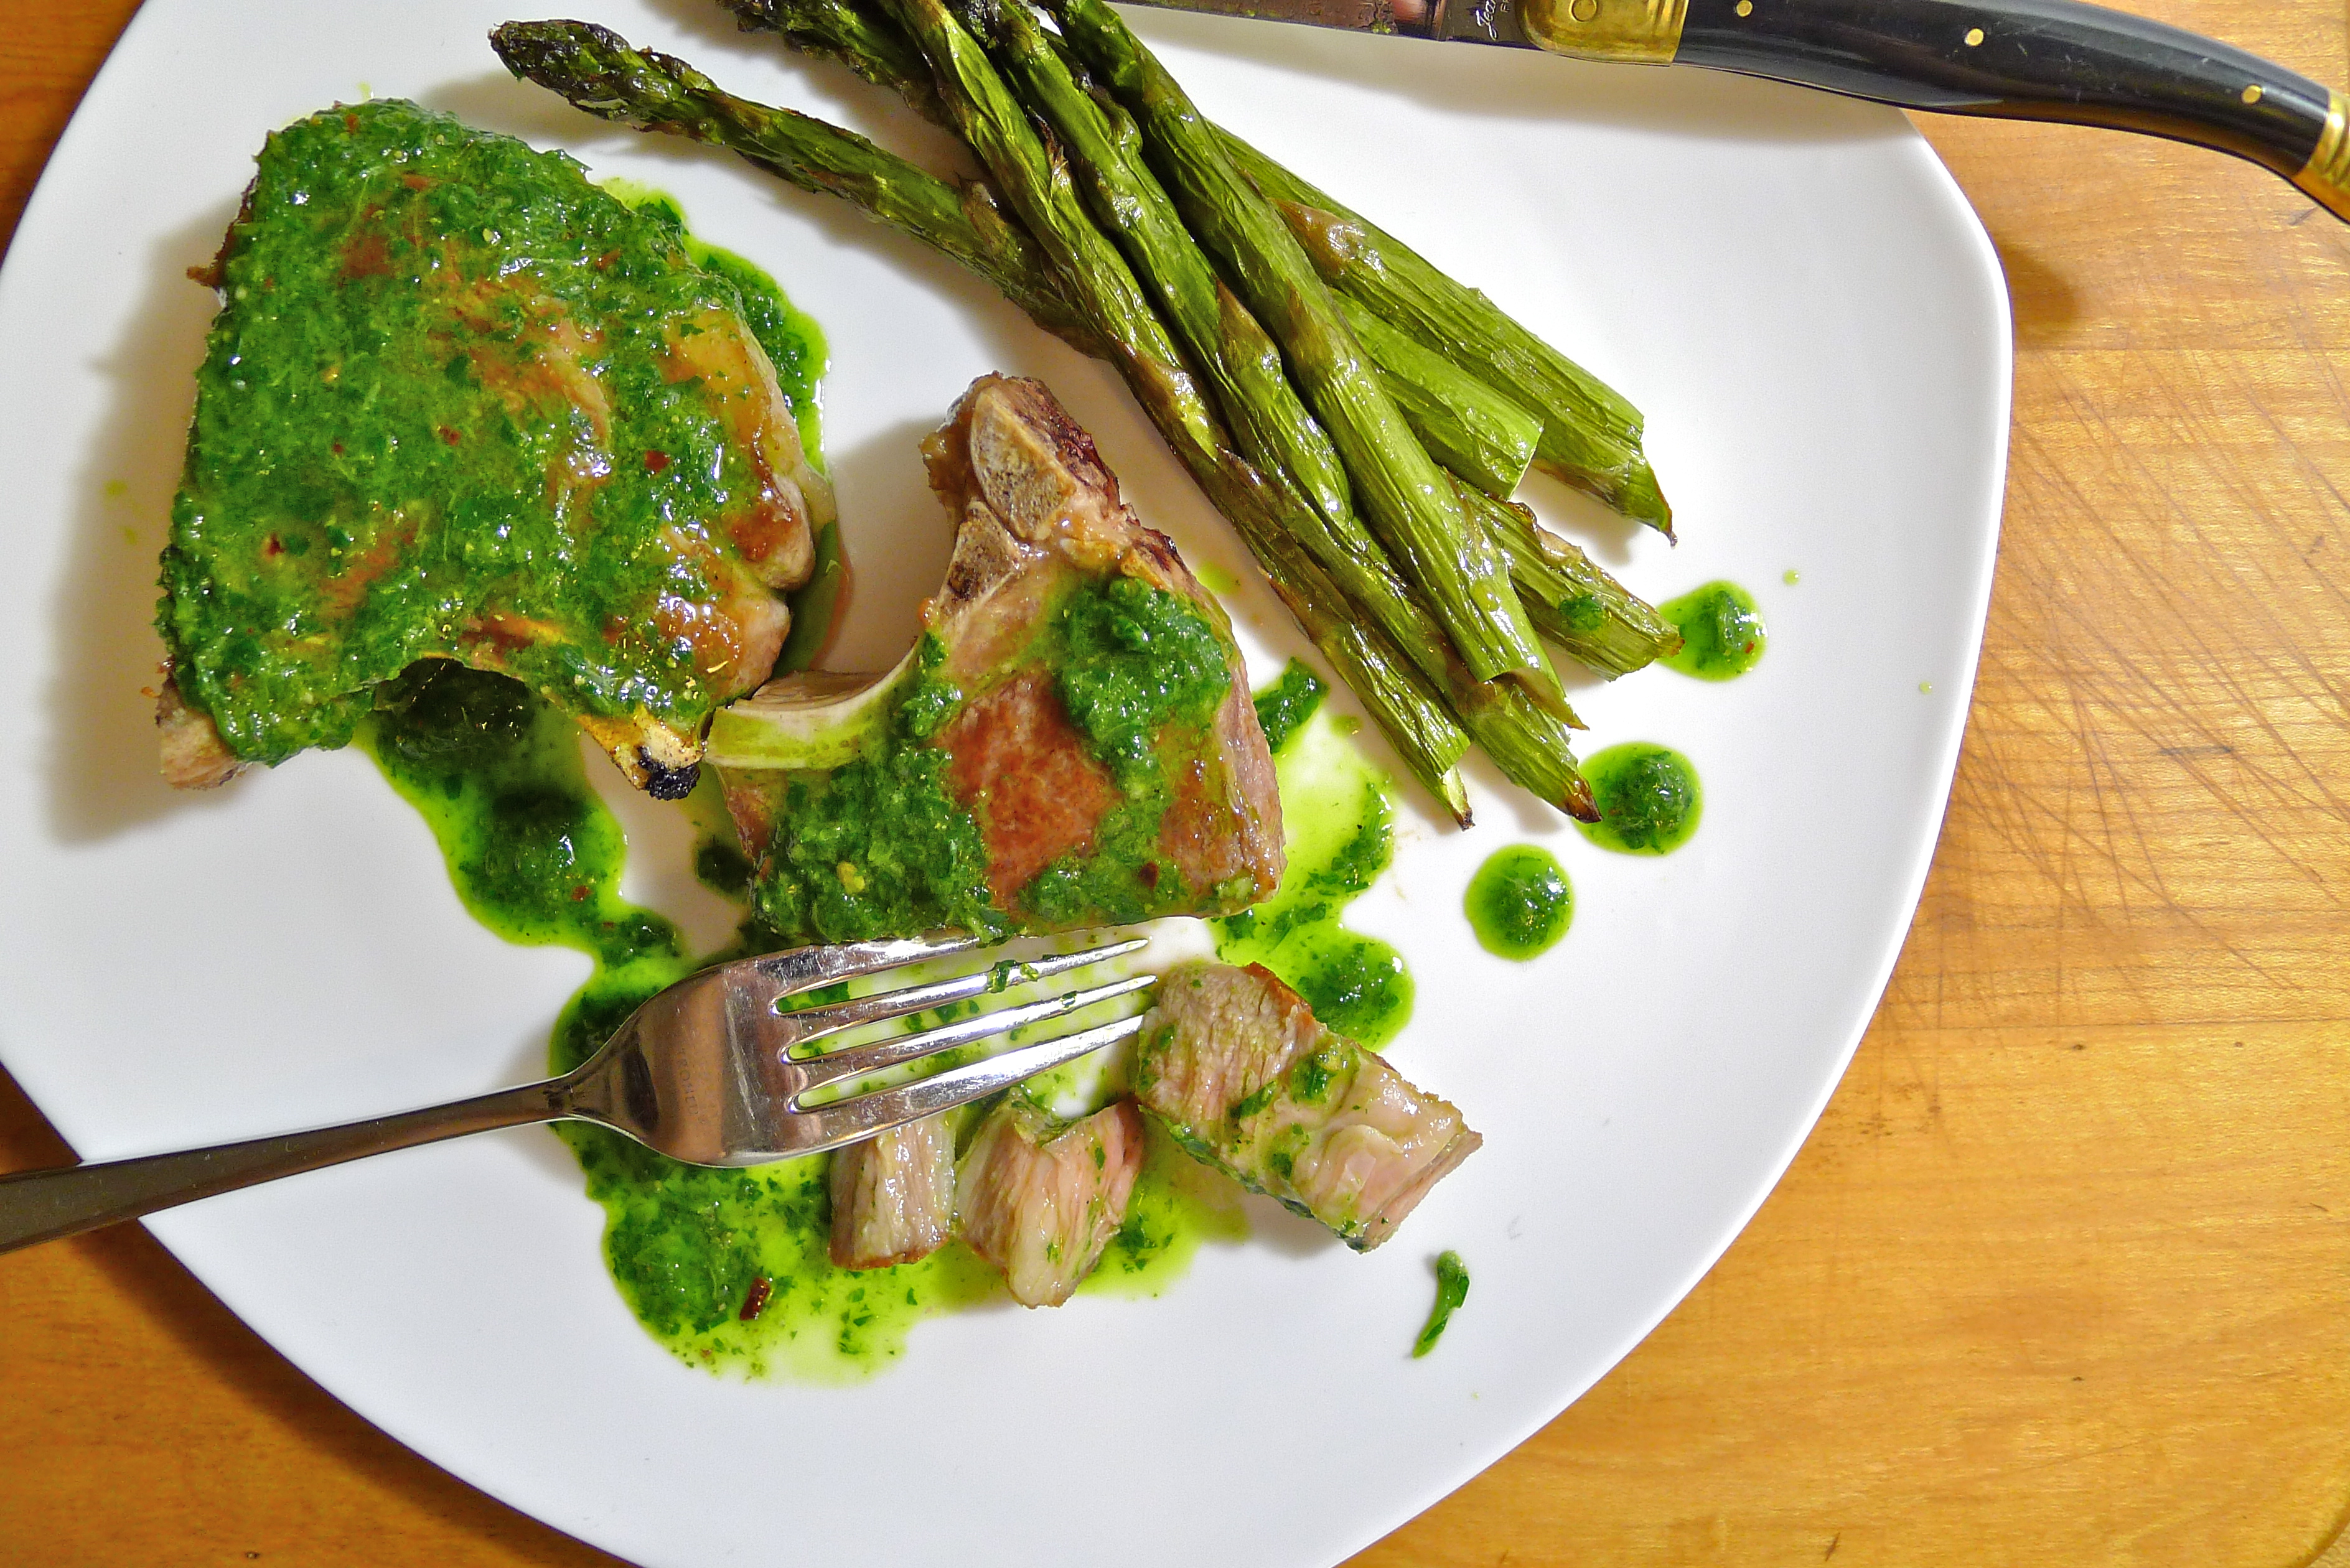
Chimichurri is an excellent accompaniment for grilled and roasted meats. It’s green, garlicky, and salty with a little heat from the pepper and a little tang from the vinegar. It is amazing and beyond easy to make.

This version of chimichurri is a twist on traditional chimichurri. Instead of oregano, I have substituted fresh mint leaves to complement the lovely lamb chops that I get from my CSA. My introduction to the combination of lamb and mint — the mind naturally conjures up images of adorably delectable baby lambs fattening themselves on tender sprigs of mint and other herbs as if to say, “Here I am and I am pre-seasoned!” — came when I was spending a lot of time in Wales. A slick of mint sauce, usually store-bought and straight from a jar, was used to coat salty little marsh lamb chops in a sheen of jelly. Looking back, those chops would have been much better served by something fresher and more spring-like.

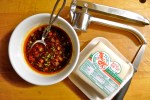
In lieu of red or white wine vinegar, I have opted for unfiltered apple cider vinegar which adds a little bit of sweetness to the final result. I actually got the idea to swap vinegars from the wonderful Hannah over at Inherit the Spoon, whose recipe inspired this one. As you can tell, chimichurri is quite flexible; you can adjust it to your personal tastes as you go along. What is given below is a reflection of what I like to eat, namely more salt and less tart, but you should feel free to play around with it. If the sauce feels too chunky, add more olive oil or more vinegar. Too tangy? Too garlicky? Too spicy? Add more herbs.

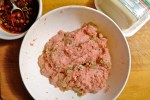
As a useful gauge, the final consistency should be like fine pesto. That being said, you can leave the sauce rougher if you prefer. It will still taste wonderful.

Ingredients:

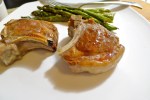
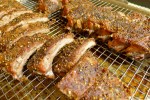
2 thick-cut lamb rib chops per person

Kosher salt

Rice bran oil

1/2 a bunch of Italian parsley, trimmed so that the longer stems are removed

1 handful of fresh mint leaves, stems removed

2 cloves of garlic

Red pepper flakes to taste

Salt and freshly ground black pepper to taste

3-4 tablespoons of apple cider vinegar

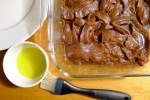
1-3-1/2 of a cup of good extra-virgin olive oil

How to prepare:

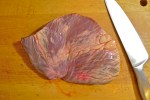
1. Generously salt both sides of the lamb chops and let them come up to room temperature while you prepare the sauce.

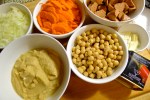
2. Combine the herbs, the garlic, the red pepper flakes, and the apple cider vinegar in a food processor with a hefty pinch of salt and a good grind of black pepper. As the processor is going, add the olive oil in a steady stream until you reach your desired consistency. Adjust the seasoning if needed. Keep the sauce covered in the fridge until you are ready to cook the chops.

3. Preheat the oven to 350°.

4. Once the lamb chops have come up to room temperature, pat them dry with paper towels. In a heavy-duty, oven-safe skillet large enough to hold the chops without crowding them, heat about 1-2 tablespoons of rice bran oil or another kind of oil with a high-smoke point until the surface of the oil begins to shimmer. Arrange the chops in a single layer and let them cook undisturbed until you have a nice sear on them. When properly seared, the chops should release easily from the pan if the pan was hot enough to begin with. Flip the chops and move the pan to the oven.  You want to aim for them to be medium-rare. An instant read thermometer should read 135° when inserted in the thickest part of the chop. This should take about 7-10 minutes depending on how thick your chops are (mine were about 1.5 inches thick) and how many are in the pan. When the chops have reached the appropriate level of doneness, remove the pan from the oven and transfer the chops to a plate to rest for 5 minutes.

5. When the meat is done resting, serve them along with the chimichurri. Any uneaten sauce can be kept in an air-tight container in the fridge for about a week. There will likely not be any uneaten sauce 🙂

Oven-Roasted Baby Back Ribs, Part II

Baby got back.
A couple of months ago, Edna at expatedna.com published a post about some of the strange search terms that have led to her blog. Some of the weirdest that she cited were: “German army uniform 2012,” “watered down biracial baby with mongolian spot,” and “if i’m part asian does it still make me racist?”

If only I were so lucky! In the entire time that I have maintained this blog, I have not had one strange search lead to me. Not. One. Single. Weird. Search.

You know what that means?

It means I’m boring.

To be more interesting, maybe I should have a plushie chase me across a Croatian nudist beach covered with technicolor Rastafarian Jesus squirrels wearing sequin pasties and rubber panties!

No, I’m not actually going to do that 🙂 I just wanted to up the chances of a strange search ending up here 🙂

Anyway, among the pedestrian search terms that led people to my blog were: “french breakfast radish recipe,” “juicy pork chops,” and “quick oven baked baby back ribs.”

I know. Very exciting.

Seriously though, this post on oven-roasted baby back ribs remains one of the most popular posts that I have ever done. However, for the number of times that it gets viewed, it has very few comments. I attribute this to one of two things: either my recipe is terrible, or the lead-up to the recipe is misleading.

The recipe is terrific, but the lead-up to the recipe is misleading because it is my mother’s recipe and she lied to me.

See, my mother told me that these ribs would take a mere 30 minutes in the oven. What she neglected to add was that they take about 30 minutes after the first hour

So I’m here to redress this wrong: oven-roasted ribs will take at least 1 hour and 30 minutes to cook. An hour and 30 minutes. You cannot cook ribs faster than that because there is too much connective tissue and collagen to break down. You just can’t. But you should still make these ribs because they are delicious, just plan accordingly.

I had intended to make these ribs for a special occasion, but given the soaring temperatures last week, I was spurred to cook them ahead of time and meet my friends in a nice, air-conditioned restaurant instead. In my haste, I forgot to mix the seasoning with soft brown sugar. I simply rubbed them down with one of Lior Lev Sercarz‘s beautiful spice blends (Pierre Poivre No.7, if you’re interested), and threw them into a 350° oven for an hour and a half.

Done and delicious.

Ingredients:

1 or 2 racks of baby back pork ribs

1 heaping tablespoon of steak seasoning or rib rub per rack of ribs

Kosher salt

Special equipment:

One half-size sheet pan

One wire rack to fit the sheet pan

How to prepare:

1. Pre-heat the oven to 350°.

2. First remove the membrane on the back of the pork ribs. It’s super easy to do and allows your ribs to cook nice and flat, without curling up. It also makes them much nicer to eat. To do this, flip the ribs bone-side up. Using the flat handle of a spoon or a dull butter knife, loosen the membrane on one end of the rack of ribs. Grasp the loosened end with a paper towel and pull the membrane slowly in the direction of the opposite end. It should come off in one piece. If it doesn’t, you can just grab the torn end and continue. To help visualize, here is a how-to clip from BBQTalk.

3. After drying the ribs with paper towels, rub the seasoning mix into both sides of the rack. Sprinkle both sides with salt and arrange them on the wire rack.

4. Set the racks of ribs in the oven. Carefully pour about 2 1/2 to 3 cups of water into the bottom of the sheet pan. The water should not touch the bottom of the wire rack. Roast the ribs in the oven at 350° for an hour to an hour and a half until the ribs are tender and buttery. Remove the pan carefully from the oven. Let the ribs rest for 5 to 10 minutes before slicing and serving.


\

Sichuanese Pork Wontons in Chili-Soy Sauce

Plump dumplings rule!
I have inherited a lot from my mother. In addition to her dry sense of humor, her sarcasm, and her sly potty mouth, I am also the beneficiary of her glossy hair and poreless, flawless skin — which she reminds me, while comparing the four zits that I have had in my entire life to her NONE EVER, is actually less flawless than her own.

What I did not get from my mother was my taste for fiery, hot spice, gamy meat, and my willingness to put my overly-trusting ethnically Chinese-self in the hands of white people.

“Who is Fuchsia Dunlop?” my mother asked, “Is she Chinese?”

“Um, no. She’s British.”

“Like British-Chinese?”

“No . . . um, just British.”

Silence.

Asian-child fail!

But it’s really not my fault! My mother is an amazing cook, who has basically decided that she will be taking all her secrets to her grave so I will miss her more when she’s gone. In her kitchen, I am not even sous chef. I am relegated to the status of line-cook. Or bus-person.

Basically she lets me wrap things like egg rolls, dumplings, or leftovers with cling film.

These dumplings are not anything my mother would ever cook. First of all, they are spicy as heck! Secondly, the root of their spice comes from a nice, thick, orange slick of delicious grease! Finally, the recipe is from a white person.

But. They. Are. Delicious.

To the unintiated, Fuchsia Dunlop (who never seems to be known as just Fuchsia or just Dunlop) is a Chinese food phenomenon. Author of the best-selling Shark’s Fin and Sichuan Pepper: A Sweet-Sour Memoir of Eating in China, the book outlines her deep love for Chinese cookery which began as a student at Cambridge, culminated in a move to Chengdu and enrollment in a professional chef’s training course at the Sichuan Institute of Higher Cuisine — the first Westerner to ever do so.

Friends, both Asian and not, swear by her books and her recipes, both of which translate Sichuanese and Hunanese cuisine into something effortless, accessible, and authentic-feeling.

I adapted this recipe from one that appeared on Epicurious from Every Grain of Rice: Simple Chinese Home Cooking. I didn’t change parts of it because I had any kind of personal reference — apart from eating similar dumplings in restaurants, I don’t. Instead, I altered the recipe because I am apparently lazier than your average Chinese home cook 🙂

However, the results are still divine. Heritage schmeritage! These dumplings tick every single box in terms of a deeply soul-satisfying food experience. Did I mention that they are ridiculously easy to make too? 🙂

Ingredients:

For the sauce

3-4 tablespoons of dark Chinese soy sauce

1 1/2 teaspoons of sugar

3 cloves of garlic, finely minced

3 scallions, finely chopped

3 tablespoons of sesame chili oil with sediment

For the dumplings

1 knob of fresh ginger

1 pound of ground pork

1 egg, beaten

2 teaspoons of Shaoxing wine (a useful buying guide can be found here)

1 teaspoon of toasted sesame oil

3 scallions, finely chopped

Freshly ground white pepper

1 package of wonton wrappers

For garnish

2 tablespoons of roasted peanuts, chopped (Fuchsia Dunlop’s recipe does not call for them, but I think they would be an terrific addition. I would have added if I had them on hand!)

How to prepare:

1. First, prepare the sauce. In a small bowl, whisk together the soy sauce and the sugar. Let the mixture sit for about 5 minutes until all the sugar crystals have dissolved. Once the sugar has dissolved, add the finely minced garlic, the chili oil with sediment, and the finely chopped scallions.

2. Using a rolling pin or the bottom of a heavy coffee mug, crush the knob of unpeeled ginger. Place it in a small dish and cover it with about 2 tablespoons of water.

3. In a large bowl, combine the pork with one beaten egg, 2 teaspoons of Shaoxing wine, 1 teaspoon of roasted sesame oil, and 3 teaspoons of the ginger water. Mix well with your hands. Add the scallions and season the meat with white pepper to taste.

As the sauce is relatively salty, I opted to not salt the meat, but you can do so if you prefer.

4. Fill a small dish with cold water. Take one wonton wrapper and lay it on a flat surface. Place about a teaspoon of pork filling into the center of the wrapper. Dip a finger in the cold water and run it around the edges. Fold the wrapper in half diagonally and continue until all the pork filling is gone. You should use up about half of the package of wrappers, which you can save and freeze for another time. Lay the wontons out on a large cookie sheet to avoid crowding them onto a plate like I did.

5. While you are wrapping, set a large pot of water to boil. When the water has reached a rolling boil, salt it as if you would for pasta (wontons are essentially ravioli after all). Carefully drop the wontons in one-at-a-time. I only cooked 8-10 at once to ensure that they wouldn’t stick together. When the water has come back up to a boil, add another cup of cold water to the pot. When the water has come up to a boil again, gently scoop up each wonton with a slotted spoon and drain each well. Divide the wontons among however many bowls you want and generously spoon over the chili-soy sauce.

Sprinkle with crushed peanuts, put on a bib, and dive in.

Jonathan Benno’s Pasta e Fagioli

Don't be a fool, eat yo' pasta fazool!
Nigella does what?!”

Steve from Gourmandistan shook his head incredulously and made a face.

She tells you to put all the fresh herbs in the foot of a nylon stocking and to leave the whole thing in simmering stock for an hour!

“Doesn’t it melt?!”

“Yeah. You would think!”

“That is disgusting.”

Agreed.

A few weeks ago, Steve was in town for the Roger Smith Cookbook Conference and we were talking “food blogger shop” at Roberta’s over craft beer and aioli-coated fried sweetbreads.

Shop that night included pasta e fagioli,

I love pasta e fagioli, affectionately known on these close-to-Jersey shores as pasta fazool. Translated simply as pasta and beans, the name of this humble Italian dish belies its power to soothe and satisfy. Pure alchemy occurs when the nuttiness of the beans Vulcan mind-melds with the pasta in rich rosemary and bay-scented broth. It is warm, wonderful comfort in a bowl and in these waning days of winter, it is the perfect dish.

My current favorite version of pasta e fagioli is from Mario Batali, who starts off his recipe by asking you to mash up a wad of fatback with the back of a spoon until you have a nice and smooth porky paste. Very Italian.

The subject of our mutual alarm was from British celebrity chef Nigella Lawson — not Italian at all. Although I like her writing, her recipes leave me cold . . . and extremely skeptical. Like this one for pasta e fagioli in which she asks you to use a “popsock” — also known as a knee-high nylon stocking — as a herb sachet instead of good, old-fashioned, food-safe, heat-resistant, and dependable cheesecloth.

Now I see the utility of bundling the aromatics used to perfume pasta e fagioli in a sachet; it makes it much easier to remove the spent herbs from the soup if you have them together. It saves you from the futilely fishing around for the gray and bitter spindles of rosemary leaves. However, I draw the line at rooting around in my sock drawer for kitchen essentials. Furthermore, Nigella includes the following sentence in her recipe: “Chuck out the corpsed popsock and its contents [after the beans are tender].”

Not yummy-sounding at all.

I am always on the lookout for a new variation on pasta e fagioli. Recently, New York Magazine published one from Jonathan Benno in which he solves the fresh-herb-removal problem by infusing the stock with Parmesan rinds and aromatics and then straining them all out before use. 

Brilliant!

Benno recommends soaking the dried beans for two days in the refrigerator instead of just one day on the countertop. I’m not sure if the additional day of soaking affects the taste, but I did notice that the beans cooked faster and more evenly. The beans were also creamier.

Heirloom beans are best, but regular old beans work just as well. Traditionally, borlotti beans — also called cranberry beans — are used in pasta e fagioli, but cannellini beans are a good substitute.

To Benno’s recipe, I have added bacon. Because I can never resist adding bacon to everything 🙂 You can omit it and the soup will still be delicious.

Ingredients:

2 cups of dried beans (preferably heirloom beans like borlotti beans or cannellini beans)

2 quarts of chicken stock (about 8 cups)

1 cup of Parmesan rinds

2 sprigs of fresh rosemary

2 sprigs of fresh thyme

2 sprigs of fresh sage

5 fresh or dried bay leaves

1 pound of bacon ends, chopped (optional)

1 teaspoon of dried oregano

1 teaspoon of crushed red pepper flakes

Salt and pepper to taste

1 1/2 cups of dried ditalini or another kind of small tubular pasta like macaroni

Extra-virgin olive oil

Freshly grated Parmesan

How to prepare:

This soup is not difficult to prepare. However, it does require some advanced planning. Be sure to read the recipe closely before beginning.

1. In a bowl large enough to fit the beans comfortably, cover them with about two inches of cold water. Soak the beans in the refrigerator for two days.

2. When the beans are done soaking, drain them.

3. Combine the chicken stock, the Parmesan rinds, the fresh herbs, and the bay leaves in a large pot. Simmer everything together for about an hour. Do not the let stock boil. Strain the stock and discard the Parmesan rinds and herbs.

4a. If using, brown the chopped bacon ends in a large skillet until most of the fat has rendered. Drain the bacon bits on paper towels.

4b. Add the soaked and drained beans, the bacon if desired, the dried oregano, and the crushed red pepper flakes to the strained stock. Gently simmer the beans for between 1-2 hours. When the beans are done, they will be creamy in the center. Do not let the liquid come to a boil or the skins can burst. Skim the surface of the soup if and when necessary. Adjust the seasoning.

5. When the beans are tender, add the dried pasta to them. You may need to add more stock or water if the level of the liquid in the pot is too low. When the pasta is al dente, turn off the heat.

To serve, heap a generous spoonful of freshly grated Parmesan on top and finish the soup with a drizzle of good extra-virgin olive oil.

♥ Happy Valentine’s Day ♥: Grilled Beef Heart with Celeriac Slaw

I Heart You!
The first time that I ever had beef heart was at St. John’s Bread and Wine in London. It was two summers ago and I was wandering around Spitalfields on a single-origin chocolate bar search. Suddenly, the skies opened up and down came the deluge. Soaked and woefully unprepared, I ducked into the empty restaurant right in the middle of the family meal.

Although I’m sure that the last thing the staff wanted to deal with was another guest, they were extraordinarily gracious as they served me a late-afternoon snack of oysters, Sauternes, grilled beef heart and celeriac slaw.

Sauternes and oysters, you say? Yes, the server was intrigued as well. I had ordered them together because I had just read an article about how the original pairing for oysters was Sauternes, not Champagne.

In any case, I assure you that the combination is divine.

So was the beef heart. Flavorful and surprising tender, it had a robust beefiness and was the perfect antidote to the grey, oily weather outside. As I enjoyed the last dregs of my wine, I remembered that I had a copy of Fergus Henderson’s Nose to Tail Eating: A Kind of British Cooking collecting dust at home.

When my CSA (shares are still available, by the way) began offering beef heart, I decided that I was going to bite the bullet and try to recreate that terrific snack.

The recipe is such that no actual measurements are necessary. Follow your instinct and taste as you go along. You will be fine.

(and a very belated thank you to the staff at St. John’s for making sure that I didn’t go back out in the storm without a large umbrella)

Happy Valentine’s Day!

Ingredients:

1 beef or calf’s heart

Coarse salt

Freshly ground pepper

Balsamic Vinegar

Olive oil

Thyme sprigs

1 celery root

Crème fraîche

Dijon mustard

How to prepare:

1. The first thing you will need to do is trim the heart. You basically want to remove all the fat, the membranes, and any and all vessels including the aorta. It may be a little disheartening (no pun intended) to have to discard all those trimmings, but you really only want the tasty bits. For this, you will need a very sharp knife.

When you finish, you should be left with a pile of very lean beef slices that no longer resemble a heart at all. For an instructional video, I refer you to Michael Ruhlman here.

2. In a dish large enough to fit all the beef slices comfortably, drizzle them with olive oil. Add a healthy slug of balsamic vinegar. Sprinkle it generously with coarse salt and freshly ground pepper. Add a few sprigs of fresh thyme. Toss, cover, and let marinate in the fridge for 8-24 hours.

3. Before grilling the beef heart slices, set up the celeriac slaw. The first thing you will need to do is trim the root. You could use a vegetable peeler . . . if you want to have an accident! Or you could use a very sharp knife and be safer. You will have a lot of trimmings to discard as well, but trust me: you don’t want these trimmings either. If you must, you can put them in a bag and toss them in your freezer to use for stock.

First, slice off the top of the root and level off its bottom. This will ensure that it won’t rock around while you are trimming it. Holding your knife perpendicular to the root, shave or slice off the outer gnarled surface. You should be left with a clean, peeled root.

For another helpful video, I refer you to Gourmet Magazine.

Now you need to julienne the celery root. This can be accomplished most effectively by using a mandoline. If you don’t have one, or do have one but are too lazy to look for it like me, you can use a sharp knife again for the job. To julienne the celery root, cut very thin slices of it, stack the slices up and cut them into matchsticks.

Melissa Clark demos this here.

For the dressing, gently stir together 4 tablespoons of crème fraîche for every one tablespoon of Dijon mustard. That’s the ratio that I used, but you can increase the amount of mustard if you want your dressing to have more of a kick. Adjust the seasoning if necessary.

Using your hands, toss the julienned slices of celery root with the dressing.

5. Prepare the grill. Brush it with oil and get it nice and hot. Cook the beef heart slices until they are medium. Henderson says about 3 minutes per side, but mine cooked faster than that. I would say to just watch them and pull them off the grill when they are ready.

To serve, plate a few slices with a nice mound of celery root slaw.

The Daring Kitchen December Cooks’ Challenge: Pâté Chinois

Looks good, eh?
As some of you know, I have been participating in The Daring Kitchen’s Challenges for about a year now. For those of you unfamiliar with the name, The Daring Kitchen is an online community of cooks and bakers who commit to making one dish — the month’s challenge — and posting their results on their blogs on the same day.

I took a hiatus from the Daring Cooks (there is a corresponding Daring Bakers group) during and following my dissertation. In the interim, I missed out on some pretty great challenges. I especially regretted missing the Brazilian Feijoada and the Paella challenges. In addition, there were many more that passed me by as I just watched and salivated on the sidelines. This month, after a period of decompression and relaxation, I finally felt ready to jump back in and cook something new.

So imagine my reaction when I pulled up December’s challenge PDF for a mysteriously named dish called Pâté chinois and saw that . . .

Pâté chinois is essentially shepherd’s pie with a layer of canned creamed corn in-between the meat and the mashed potatoes.

That’s it.

And its traditional accompaniment is ketchup.

Yes. That’s it.

As Pâté chinois generally calls for ground beef, it is perhaps more accurate to say that it is a variation of cottage pie not shepherd’s pie. However, the more pressing question is why is it called Pâté chinois considering there is not much in it that can be either construed as pâté (ground meat alone does not a pâté make) or Chinese.

According to Wikipedia, the origins of Pâté chinois are rooted in the assumption that the name refers to Chinese cooks who came to Canada to serve the workers who built the North American railroad system in the late 19th century. These cooks were instructed by their railway bosses to prepare and serve something that was not only inexpensive, but that the railway workers would recognize and therefore eat As wood ear fungus and black chicken soup was probably out of the question, the Chinese cooks put together a version of cottage pie using canned creamed corn in place of the more expensive gravy.

Of course, this is all anecdotal. Alternatively, the name Pâté chinois might also refer to a variation of hachis Parmentier, which is basically cottage pie too. This is a dish that French-speaking families in Maine would refer to as Pâté chinois in reference to the towns where they ate it: China and South China, Maine.

I also read somewhere that Pâté chinois could also be an allusion to the dish’s preparation. When I read about the possible connection to Chinese immigrants, this was actually my first thought. Much like how chop suey is inauthentically Chinese and refers instead to the chopped items in the dish, I imagined that Pâté chinois got its name from the chopped meat and corn kernels that could be commonly found in Chinese stir-fry.

Regardless of when, where, and how Pâte chinois came to be, it is one of those quintessential Québecois comfort foods that everyone is familiar with, yet it is unknown to outsiders as it is hardly ever served outside of the home.

If you understand French (or even if you don’t), this is an truly awesome Youtube clip about Pâté chinois in Québec. It is narrated by a man with the dang coolest Québecois accent ever.

Given that I have made cottage pie numerous times (and even blogged about it here), I thought this challenge would be a easy one.

Wrong! Can you believe it, dear Readers? My first attempt at Pâté chinois was a dismal failure!

First of all, my fancy schmancy neighborhood supermarket does not carry canned creamed corn. Oh the class warfare! Consequently, I was forced to improvise with frozen corn and fresh heavy cream. Although my homemade version of creamed corn looked and tasted superior, it completely separated while cooking. To my horror, my cottage pie had morphed into a cream of potato soup with little bits of hamburger floating in it.

In my defense, it tasted amazing, but anything that is more than 50% heavy cream is almost always guaranteed to taste amazing.

Back to the drawing board! Still no creamed corn in a can. This time, instead of blending the corn with heavy cream, I put some corn kernels with a little bit of milk in the food processor. Once puréed, I folded in more corn kernels for better texture. The result was a mass of corn about the same consistency of my mashed potatoes.

The final result yielded three distinct and yummy layers. Pâté chinois is still a fairly bland dish, which explains the predominant use of ketchup to kick it up a notch. However, since I find ketchup generally too sweet for my tastes, I substituted a healthy squeeze of Sriracha. Can’t go wrong with that 🙂

Many thanks to this month’s host, Andy of Today’s the Day and Today’s the Day I Cook!, for the challenge. I had a so much fun learning about Canadian comfort food. Your challenge was also a great reminder that it doesn’t matter how many times you make something, there is always something more to learn!

Blog-checking lines:

Our Daring Cooks’ December 2012 Hostess is Andy of Today’s the Day and Today’s the Day I Cook! Andy is sharing with us a traditional French Canadian classic the Paté Chinois, also known as Shepherd’s pie for many of us, and if one dish says comfort food.. this one is it!

Ingredients:

4 Yukon Gold potatoes (5 if they are small), peeled and cut into 1-inch cubes

2 tablespoons of butter

Milk

Salt and pepper

1 pound of frozen corn kernels, thawed and divided in half

Milk or heavy cream

One medium onion, finely chopped

1 pound of lean ground beef

1 teaspoon of paprika

1 pinch of cayenne pepper

Worcestershire sauce

1 cup of shredded Gruyère or Comté cheese

Sriracha or ketchup

How to prepare:

1. Preheat the oven to 350°.

2. Put the potatoes in a large saucepan and cover them with water. Generously add salt. Bring the water to a boil and cook the potatoes until they are tender. You will know that they are ready to mash when you can crush a potato piece easily against the side of the pan with a wooden spoon. Drain the potatoes. In the same pan, mash them with the butter. Add the milk a 1/4 cup at a time until you get the right consistency. You don’t want the potatoes to be dry, but you don’t want them to be soupy either. Aim for a texture that is loose enough to spoon out, but not so loose that the potatoes add a lot of excess water to your dish. Adjust the seasoning.

3. While the potatoes are cooking, purée half of the corn kernels in a food processor with about a quarter cup of milk. Add more milk if the mixture looks too dry, but not so much that you end up with a corn slurry. The texture of the puréed corn should match that of the mashed potatoes. Turn the puréed corn out into a large bowl and fold in the remaining whole kernels. Adjust the seasoning.

4. Heat some olive oil in a large skillet over medium-high heat. Sauté the onions until they are translucent and begin to brown. Add the ground beef to the pan, breaking up bigger chunks of ground beef with your wooden spoon as it cooks. Continue to cook the beef until there is no longer any visible pink. Sprinkle it with the paprika, cayenne pepper, Worcestershire sauce to taste. Cook everything until the sauce has thickened, about another two to three minutes.

5. In an oven-proof dish, spread the ground beef out in an even layer on the bottom. Carefully spread the corn mixture on top of the beef. Gently spoon the potatoes on top of the corn. Sprinkle the shredded cheese evenly over the top and bake until bubbly, about 20-30 minutes.

6. Let it rest for about 20 minutes before serving with Sriracha or ketchup.

Smoky Chorizo and Chickpea Soup


Have you ever looked outside your window at the overcast sky and realized that the weather has officially turned chilly? That’s how I felt today when the cold morning light began filtering through my shades.

I always think that this kind of weather inspires a taste for spices and hot liquids. This soup, adapted from Food & Wine, certainly satisfies those cravings.

There is something about Spanish food that feels perfect for this season. Maybe it’s the colors, or the strong flavors of garlic and sherry. Maybe it’s the liberal use of pimentón, whose rich and smoky heat seems to combat the gloom of gray skies.

Pimentón is basically the Spanish version of paprika and comes in three varieties of varying heat: dulce (sweet), agridulce (bittersweet), and picante (hot). For general cooking purposes, I find agridulce to be just perfect, neither too mild nor too bitter.

For this recipe, I used chorizo from my CSA. Given that most of the sausages from my CSA are fairly lean, I didn’t cook the chorizo beforehand. However, if you have particularly fatty links, you might wish to sauté the chorizo pieces and drain them before adding them to the soup.

I also love how the recipe uses puréed chickpeas as a thickener. Sometimes I find that using flour to thicken soups, stews, stocks, and gravies can lead to slightly gluey results, and using tapioca is just weird.

Ingredients:

Olive oil

1 large yellow onion, finely chopped

2 large carrots, peeled, halved lengthwise and thinly sliced

2 fat garlic cloves, thinly sliced

3 teaspoons of pimentón or smoked paprika

1/4 teaspoon of cayenne pepper

4 tablespoons of tomato paste

1 pound of fresh chorizo, cut into 1/2-inch pieces

3 cans of chickpeas, drained, rinsed, and divided into two equal portions

4 cups of beef broth

Lemon wedges

Fresh parsley sprigs

How to prepare:

1. Purée the half of the chickpeas in a food processor until they are smooth. They will act as a thickener in the soup and give the broth a wonderful nuttiness.

2. In a large Dutch oven, heat about two tablespoons of olive oil over medium heat. When the oil begins to shimmer, add the onions and cook them until they just start to turn translucent. Toss in the carrots and the garlic. When the garlic becomes fragrant, add the pimentón, cayenne pepper, and tomato paste to the vegetables. Combine everything together, taking care not to burn the spices. Once the vegetables are evenly coated with the tomato paste and the spices, add the chorizo, the puréed chickpeas, the remaining whole chickpeas, and the beef broth. Adjust the seasoning.

3. Simmer the soup until the whole chickpeas are nice and tender. You will want to skim the surface of the soup periodically. Adjust the seasoning for a final time. Serve the soup in warm bowls, topped with fresh sprigs of parsley and lemon wedges on the side.

The Daring Kitchen July Cooks’ Challenge: Papillotes de pêches et framboises à la vanille (Peaches and Raspberries Cooked in Parchment Paper with Vanilla Bean)


The dissertation has been pretty overwhelming lately. This is the big push before the defense so I haven’t had much time for all the things that I love like spending time with my friends, cooking, blogging, eating out and drinking.

I miss the drinking. I ran an errand the other day and saw some nice people drinking wine in the shade. I remember jealousy thinking, “I bet they don’t even appreciate that wine!” Suddenly, I was overcome with the desire to grab their glasses out of their hot little hands and go sprinting down the street.

I didn’t do it, but I sure wanted to.

No way did I think that I was going to be able to participate in the Daring Kitchen challenge this month either until I saw the challenge: cooking en papillote.

En papillote is a fancy schmancy way of saying that you cook something in a paper envelope. We’re not talking about any old paper here; we’re talking about parchment paper, also known as bakery release paper or greaseproof paper. Cooking in parchment is a terrific way to cook delicate things quickly without fear of them drying out. You can also roast food en papillote as the paper allows just enough steam to release so that potato skin, for example, gets nice and crispy while the insides gently steam to perfection.

You could use aluminum foil instead of parchment paper — also known as a hobo pack — but I find that the results lack the finesse and elegance of cooking in paper. I might also be too negatively affected by the word “hobo,” and too seduced by the phrase “en papillote“!

It’s true that this month’s Daring Kitchen assignment wasn’t really a challenge for me since cooking en papillote is one of my favorite cooking methods. On this blog, I have posted a recipe for roasted tiny potatoes en papillote and roasted salmon with mango and Bird’s Eye chiles. However, it was completely new for me to use this cooking method to make a something sweet instead of something savory.

This dessert recipe was inspired by one that I saw months ago on Elle à table, the companion cooking site of French Elle Magazine. I kept the primary components — parchment, peaches and raspberries — and changed the rest. The original recipe has you peel the peaches. However, if the peaches are nice and ripe, this step seems fussy. It also seems like it would be a big waste of precious juice. The Elle à table recipe also calls for lime zest and juice, whereas I only used the zest for fear that the extra juice would have made the dessert too watery. Instead of a lime, I used a lemon. I also swapped out the cinnamon for vanilla bean, and shortened the cooking time so that the fruit would stay more intact.

Just like there is more than one way to roast a chicken, there is more than one way to make a parchment paper packet. Traditionally, you take a large piece of parchment paper, fold it in half, and cut out a heart — just like how you did as a child. After you position your food on the paper, you seal up the packet by folding or crimping the edges shut. To give you an example of how to seal up a parchment paper packet, here is a video with Chef Paul Prudhomme — who can pronounce papillote any dang ol’ way he pleases in Cajun country.

Alternatively, you can arrange your food in the center of a square of parchment paper, pull two of the sides up, fold them down, and then tie off the ends with cooking string. For some more examples of parchment paper packets, I direct you to this month’s Daring Cooks’ Challenge PDF.

In the end, it doesn’t really matter how you seal up the parchment paper as long as you make sure that your packets are snug, but not too tight around your food.

I made two different kinds of packets for this challenge. You can see them both in the photo gallery below. This challenge didn’t take up too much of my time since I had the fruit already (it’s high peach season here). Most importantly, it reminded me of how valuable it is to not give up those things in life that give you pleasure at those moments in life when you feel most stressed out.

A big thank you to Sarah from All Our Fingers in the Pie for the terrific challenge 🙂 In terms of mandatory items, you only asked that we cook in parchment. As suggestions, you gave us some amazing savory ones like beef, lamb or rabbit. I chose a gourmand take on cooking en papillote, which I hope still keeps with the spirit of the challenge even though it might not have been as challenging!

Mandatory blog checking lines: Our July 2012 Daring Cooks’ host was Sarah from All Our Fingers in the Pie! Sarah challenges us to learn a new cooking technique called “Cooking En Papillote” which is French and translates to “cooking in parchment”.

* The reveal date for this month’s French cooking challenge happens to fall on Bastille Day: le 14 juillet 🙂 Bonne fête, tout le monde!

Ingredients:

4 beautifully ripe yellow peaches

1 vanilla bean pod, split into four pieces

1 punnet of raspberries*

Cane sugar

The zest of 1 lemon

Cold butter

How to prepare:

1. Pre-heat your oven to 400° F.

2. Defuzz the peaches by very gently rubbing as much of the peach fuzz off as you can under cold running water. Cut the peaches into slices that are a little more than a quarter-inch thick.

3. Evenly divide the peach slices between 4 parchment paper sheets. You will use about one peach’s worth of slices per packet. Tuck one split vanilla bean pod in-between the peach slices. The vanilla should perfume the fruit, but not overwhelm it. Arrange a small handful of raspberries over the peaches. Sprinkle the fruit with cane sugar. Grate a little lemon zest over the top. Dot the fruit with about a 1/2 tablespoon of cold butter cut into small pieces

4. Crimp or tie off your parchment paper parcels and arrange them on a large baking sheet. Bake them between 8-10 minutes. Remove them from the oven and carefully open them (they will be steamy). Find and discard the vanilla bean pods.

You can serve the peaches and raspberries straight from the paper, or you can transfer the fruit to a small bowl to top with a scoop of vanilla ice cream or gelato.

* Although punnet is a Britishism, but it’s a pretty useful word for those little plastic or molded paper baskets intended for berries. We don’t seem to have any equivalent in American English (the closest approximation is a pint basket). Furthermore, punnets for raspberries are generally smaller than the containers used for pints of strawberries . . .

Sugar Snap Peas with Sesame, Soy Sauce and Mirin


Sugar snap peas are here! When snap peas are in season, I like to prepare them as simply as possible so that their wonderful sweetness can shine.

I like my sugar snaps barely blanched so that the pods retain their crunch, but lose their rawness. This mixture of sesame oil, soy sauce and mirin is barely a dressing; it’s more like a very thin glaze or wash. Even though the dressing is thin, it is remarkably flavorful — but not so flavorful as to overpower the peas.

It goes without saying that if you shun cooking wine (that awful shelf-stable, salty, sugary stuff that you see in the supermarket) and avoid cooking sherry (equally as salty, sugary and awful), you should probably avoid the “mirin” that is typically found in the Asian section at most grocery stores. Tomoko calls it “fake mirin” and it is certainly as gross as cooking wine and cooking sherry: salty, sugary, harsh, unpleasant and full of MSG.

If you can, try to get your hands on some real mirin. Just like how you buy wine and sherry at the wine store, you should find mirin where sake is sold.

Tomoko says that she finds hers at the liquor store, but it seems like the liquor stores downtown aren’t nearly as Asian-conversant as the ones uptown (“Mirin? You mean Wild Turkey?”).

Following a recommendation from the New York Times, I placed an order at a Sakaya, a store that sells almost exclusively sake.

“It’s not so easy to find here,” the woman at the store explained when I told her that I had a little bit of a hard time. “Oh, if I can’t get real mirin, I don’t even bother!”

So what should you do if you can’t get real mirin? As a substitution, you can dissolve a pinch of sugar in sake. Ideally, you’re looking for about a 3-to-1 ratio of sake to sugar, but you can adjust the sweetness to your taste.

The woman at Sakaya agreed, ” Yeah, yeah. Sake and some sugar.”

“Mirin,” she said, “After you open it, they say to put it somewhere cool and dark, but you should put it in the refrigerator. It lasts a long time. I use one bottle of mirin, maybe every one or two years.”

Since I have never held onto a bottle of mirin for one to two years, I don’t know if I can vouch for that. However, I will definitely say that having a bottle around the house is an incentive to use it more often!

Ingredients:

1 pound of sugar snap peas, topped and tailed

2 tablespoons of mirin

2 tablespoons of Japanese soy sauce

1 tablespoon of sesame seed oil

Salt

Sesame seeds

Shichimi or Aleppo pepper

How to prepare:

1. Bring a large pot of water to boil. Add the sugar snap peas and cook them briefly for about two to three minutes, no more than four. You want them to be a little crunchy, but not raw.

2. While the snap peas are boiling, set out a large bowl of ice water. Scoop the peas out of the boiling water when they are done and plunge them into the ice water to stop the cooking and fix the color. Drain the sugar snap peas well.

3. In a small saucepan, heat together the mirin, the soy sauce and the sesame oil over low heat. Let the sauce simmer until it has reduced to a thin glaze. Adjust the seasoning if needed.

4. Toss the drained snap peas with the dressing in a large bowl. Sprinkle them with sesame seeds and shichimi to taste.

Kolpona Cuisine’s Muttar Paneer with Freshly-Shelled Peas


When Tahmina over at Kolpona Cuisine posted her recipe for muttar paneer, I knew that the minute shell peas came into season, I was going to make it. Before I started reading her blog, I always felt so intimidated by South Asian cooking. Long lists of spices — some ground, some whole — would freak me out so much that I would end up making something French or Italian-inspired instead.

But what I love about Tahmina is how accessible she makes Bengali, Indian and South Asian cooking. Don’t have a spice grinder for garam masala? No problem. Garam masala is better with whole spices anyway — just count how many of each thing you put in, and fish them out with your fingers while you eat. Don’t have paneer? Take that 2% milk you have lying around the house and make cheese!

This is the second recipe from Tahmina that I have cooked (the first being kale paneer), and I loved the results. The serrano peppers and chopped cilantro added near the end of cooking give the dish a wonderful freshness. The peas are also such a pretty contrast to the sunny yellow sauce. It’s really, really good.

I think that by the end of the summer, I will have succeeded in making everything that she posts!

I hardly changed Tahmina’s recipe with the exceptions of using freshly shelled peas, substituting ginger-garlic paste for actual ginger (I didn’t have any) and garlic, and using store-bought paneer. Tahmina recommends making your own paneer  something that I would totally do if I didn’t keep forgetting to watch the clock. I never seem to be able to factor in enough time to let the cheese drain! She also advocates making your own ghee, which is also on my cooking to-do list. I keep forgetting the fenugreek leaves too . . . I need to replace that Post-it pad in the kitchen!

I did have to French up this recipe a little bit by using some fancy crème fraîche in the place of heavy cream 🙂 Oh la la!

And the absolute best part about cooking from a friend’s blog? You feel like they are right in the kitchen with you, even when they are hundreds of miles away 🙂

For the her recipe, click here.

Ingredients:

For the tomato-onion base:

2 tablespoons of ghee or vegetable oil

1/4 cup of raw cashews

1 medium onion, chopped

1/2 teaspoon of ground turmeric

1/2 teaspoon of red chili powder

1 teaspoon of ground cumin

1 teaspoon of ground coriander

2 tablespoons of ginger-garlic paste

2 Roma tomatoes, chopped

Salt

For the Garam masala:

Ghee or vegetable oil

1/2 teaspoon of cumin seeds

5 green cardamom pods

5 whole cloves

2 bay leaves

1 cinnamon stick

For the final dish:

1 cup of freshly shelled peas

2 serrano peppers, chopped

8 ounces (about 1 1/2 cups) of paneer, cubed

1/2 cup of cilantro leaves, chopped

1/4 cup of crème fraîche

Salt

How to prepare:

1. In a large saucepan, toast the raw cashews in about two tablespoons of ghee or oil over medium heat. When the cashews begin to color, add the onion and sauté everything together until the onion begins to turn golden around the edges. Add the ground spices and fry them until they are nice and fragrant. Be sure to stir the onion mixture frequently so that the spices don’t burn. Add the ginger paste and the chopped tomatoes. Cook them until the tomatoes begin to break down. Adjust the seasoning.

2. Purée the tomato-onion mixture in a food processor or blender.

3. Using the same saucepan, heat the whole garam masala spices in about a tablespoon of ghee or vegetable oil over medium heat. When the spices are fragrant and the cumin seeds begin to pop, add the puréed tomato-onion base back to the pan. Let the it simmer for a few minutes so that the garam masala spices infuse the tomato-onion mixture. Add chili peppers and the peas and cook them until the peas are just start to become tender, about 4 minutes. Add the paneer, the chopped cilantro leaves and the crème fraîche. Continue to simmer everything together for 3-4 minutes more. Adjust the seasoning for a final time.

Serve with rice or, as Tahmina recommends, chapatis.