Japanese Baby Turnips Sautéed in Butter and Soy Sauce


I have a confession which really isn’t a confession since it’s pretty obvious : When it comes to Asian cooking, I haven’t a clue most of the time.

To this, I might add something possibly incendiary: although there are many people out there who are progressive, there are a lot of people who aren’t and it happens fairly often that I meet people who think that as someone of Asian descent, I eat rice like it’s going out of style, am quiet, reserved and demure, and have relatively little body hair.

Imagine their faces when they find out that I swear like a sailor, have no filter and can hold my liquor like a white divorcée.

The body hair part is true though 😉

In regards to the swearing, now that I’m older, I have made a concerted effort to swear less. Mostly because it makes the times when I do swear even better! Just kidding 😉 In all honesty, I think that I swore so much in my youth that I used up all of my swear words. I just don’t want to swear anymore. Can believe it? I can’t!

As for the filter? Visualize some big rusty grate with giant holes in it. The kind that lets almost everything through except for large, plastic soda bottles and shoes. I have worked hard on that too since I realized that speaking without thinking is best way to get misunderstood. I still think of my filter as that grate, but now it’s jerry-rigged with an intricate network of fishing line and wire. Some stuff still gets through, but much, much less than before. Thank goodness!

In terms of Asian food, I am not completely ignorant because I happen to know plenty about eating it. I have never met a sliced jellyfish, deep-fried octopus ball, bowl of noodles, dumpling (oooooh, dumplings), taro puff, sweet red bean fritter, bao, roll (spring and summer), lotus bean paste-stuffed pastry, chicken adobo, preserved egg, roast duck, suckling pig, hot-pot, under-cooked chicken meatball, wad of natto, head-on shrimp, whole fish, chili crab or Spam musubi that didn’t make my motor run.

However, when it comes to the nitty gritty of cooking, I am a babe in the woods.

The amount of times that I have stir-fried can be counted on one hand with fingers to spare. I did attempt a stir-fry about a week ago and it was an epic fail. I actually asked my mom right before I did it too.

“Mom, how do you stir-fry?”

Silence.

I pictured her putting the phone down and walking away in shame. Or maybe it wasn’t shame, but just a refusal to tolerate such a dumb question.

So after mangling that stir-fried chicken and bok choy dish (I wilted that poor bunch of greens into a pathetic nothing), I have decided that this summer, I am going to get in touch with my yellow-ness and make a good-hearted attempt to become a little more educated about how to cook some of that food over there. I know it’s kind of wrong to lump all the Southeastern and Far Eastern cultures together, but isn’t it much more efficient to refer to all peoples who use sticks as utensils as one group rather than many? I want to learn to cook a little Chinese, some Japanese, some Korean, some Filipino, some Indonesian, some Vietnamese, some Thai and more.

I’m going to try it all.

I’m almost completely new at this, so if I stick two things together that really don’t go, like using a sauce meant for fish on cheese, please do let me know. I bet you can all stir-fry circles around me, so I’m counting on you for help.

Because my mom won’t 😦

I’m also illiterate, so please make all comments or suggestions in English or in another Latinate language 🙂

Ingredients:

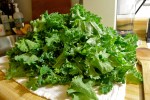
1 bunch of Japanese baby turnips (or regular baby turnips) and their greens, thoroughly washed

Butter

Sesame oil

Japanese soy sauce

Crushed Aleppo pepper or shichimi

How to prepare:

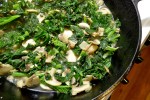
1. Separate the leaves from the baby turnips. Trim the turnips and cut them in half if they are too big. You want all the turnips and turnip pieces to be roughly the same size so that they cook evenly. Roughly chop the greens into 2-inch pieces.

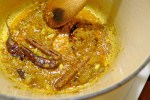
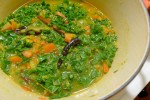
2. In a large saucepan, heat a knob of  butter and about a teaspoon of sesame oil together over medium heat. When the butter begins to foam, toss in the baby turnips. Carefully add a splash of soy sauce to the pan along with some Aleppo pepper or shichimi to taste. Sauté the turnips until they begin to lose their opacity and turn translucent. Add the greens and continue to cook everything until the greens are wilted and the turnips are cooked through. Adjust the seasoning and serve.

Cherry Clafoutis


Clafoutis is the classic dessert of the Limousin, the northwestern part of the Massif Central in the middle of France. Traditionally, it is baked in a buttered dish and is more or less a flan with ripe black cherries. Sometimes, other red fruits like prune plums, red plums or blackberries are used. Done correctly, it is lovely.

When I was doing my internship, the chef taught me a great recipe for clafoutis that was simple and foolproof. We would schedule it for days when we had cooking students who had little or no experience in the kitchen. Not to be trusted with knives, we knew that we could put cherry pitters in their sweaty little hands without fear of accidents. Better yet, since clafoutis tastes best when you leave the cherries unpitted (a little more onerous to eat, but worth it), sometimes the students wouldn’t even get cherry pitters, just whisks!

Try to take an eye out with those!

At home, I reliably depended on that recipe any time I needed to deliver a perfect clafoutis. It worked every time — even when I was a little short or too generous with the cherries, and even when I ran low on sugar, flour, milk or all three.

Then I moved back to New York. Suddenly, the recipe that worked so marvelously in Paris became a total dud. I can’t tell you how many heavy, lumpy, pathetic clafoutis I turned out. I was making clafoutis that tasted more like lightly sugared cherry omelets — every bit as unpleasant as it sounds.

I even inflicted them on friends, like poor Tomoko who had to pick her way around my rubbery pâte and gray (yes, gray) cherries last summer.

“What did you do to them?” she asked.

I had no idea. I could only think of something a friend in Paris repeated to me, something that she had overheard at a dinner party. Faced with the prospect of ingesting one more morsel of clafoutis after a lengthy and generous meal, one of the guests declared himself cla-foutu — a French play on words that roughly means cla-f***ked.

Well, my New York clafoutis were definitely their own kind of cla-foutus.

You always hear people who say that the definition of crazy is doing the same thing over and over again and expecting a different result. When I saw gorgeous cherries at the Greenmarket this week, I decided to get off the Crazy Train and stop trying to make my Parisian recipe. It was time to get back to Julia.

Julia Child, that is 🙂

Compared to what I was making, I think this clafoutis is a beauty. Sure, it rose much higher on one side than the other (I should have turned it halfway through cooking. Stupid un-calibrated oven). Yeah, it cracked (I over-cooked it. I should have taken it out of the oven sooner).

But I feel like I am getting my clafoutis-groove back on.

This recipe is adapted from Mastering the Art of French Cooking, Volume I. Julia calls for three cups of cherries, and if I had three cups, I would have used them 🙂

For the original recipe, click here.

Special equipment:

A stick immersion blender

Ingredients:

Butter

2-3 cups of ripe cherries, pitted . . . or not!

1/3 cup of sugar

1 and 1/4 cup of whole milk

5 pullet eggs or 3 large eggs

1 tablespoon of vanilla extract

A pinch of salt

2/3 cup of all-purpose flour

Powdered sugar

How to prepare:

1. Preheat the oven to 350°.

2. Butter a baking dish and arrange the cherries in a single layer on the bottom.

3. In a large bowl, use the immersion blender to blend together the milk, the eggs, the vanilla extract, the salt and the flour for 1 minute. The batter should be nice and frothy.

4. Set the baking dish on a baking sheet. Use a ladle to carefully pour the batter over the cherries. Bake for about an hour. The clafoutis will be done when the sides are puffed and golden, and when a knife or a skewer inserted in the center comes out clean. The clafoutis will be like a souffle when you remove it from the oven. Let it settle completely — it will sink down as it cools — before serving. Dust the clafoutis with powdered sugar right before cutting it into wedges.

Orecchiette Carbonara with Freshly-Shelled Peas


On a hot and sticky mid-August night several years ago, I boarded an overnight train from Paris to Milan. The cabin was filled with two sets of bunk-beds that were meant to accommodate four people. Instead, we were five because the couple sharing the cabin with us had a toddler.

The family asked if they could have the bottom bunks, which was fine by me because I wanted to bunk closest to the itty bitty window that cracked open at a woefully insufficient angle.

Insufficient because the father had removed his shoes and the smell was horrific.

It was so bad that I couldn’t sleep. I was finally forced to look in my Italian phrasebook and scan the pages by moonlight for something appropriate to say that would make the man put his darn shoes back on!

Unfortunately, my phrase book had nothing related to shoes, or putting on shoes or telling people that the smell of their feet was intolerable. However, I did manage this:

“Per fevore, signore. I vostri piedi, è violazione dei miei diritti umani!”

Which worked out roughly to mean, “Excuse me, sir. Your feet, this is a violation of my human rights!”

No response. So I tried these other phrases:

I vostri piedi, sto svenendo . . . Non riesco a respirare . . . !”

Which means: “Your feet, I’m passing out . . . I cannot breathe . . . !”

Then I repeated, “I vostri piedi,” pointed to his feet, crossed my eyes and pretended to die.

Nothing. Nada. Zilch.

He must have understood me because he refused to acknowledge my existence. I tried not to take it personally, even though I hated him more and more as we crawled south to Italy. Maybe, I thought, he was trying to incapacitate his over-active son. Or maybe he was angry at his wife and was trying to suffocate her with the smell of his feet.

Seriously. If that smell could be weaponized, the war on terror would be over.

So what does this have to do with carbonara, that amazing Italian dish that uses the residual heat of freshly boiled pasta to transform bacon, beaten eggs and Parmesan into a creamy sauce?

In that very same Italian phrase book was a recipe for spaghetti alla carbonara, a recipe that I still rely on to this day.

The idea to use orecchiette and peas actually comes from Suzanne Goin‘s Sunday Suppers at Lucques. Her description of how orecchiette are perfectly shaped to cup small bits of bacon and peas was irresistible to me, but I prefer to stick with my old phrasebook’s way of making carbonara because it only uses one pan — and who doesn’t prefer that?

These proportions will make enough for two, but can easily be adjusted for more. For something richer, you could add about a 1/3 of a cup of caramelized chopped onions to the mix. This recipe was also a great way to start using the wonderful shell peas that are at the market right now, as well as the bacon and pullet eggs from my CSA.

Pullet eggs are small eggs from young hens that have just started laying. They say that two pullet eggs are the equivalent of one regular chicken egg, but I find that it’s really more like 3 pullet eggs = 2 regular chicken eggs. Pullet eggs are wonderfully rich in both flavor and mouthfeel, just perfect for carbonara if you can get a hold of some.

I also used up the last of my CSA bacon ends to make my bacon bits, but you can use crumbled cooked bacon strips in this if bacon ends are not handy.

Ingredients:

1/3 pound of dried orecchiette

1/3 cup of bacon bits or crumbled cooked bacon

1/3 cup of freshly shucked green peas or frozen peas

5 pullet eggs or three regular eggs

1/2 cup of freshly grated Parmesan

Freshly grated black pepper

Olive oil

How to prepare:

1. Bring a medium saucepan of salted water to a boil. When the water has reached a rolling boil, add the pasta. While the pasta is cooking, set up the other ingredients. This recipe moves quickly near the end, so it is a good idea to have everything ready to go.

2. Combine the Parmesan and eggs in a small bowl with freshly ground black pepper.

3. When the pasta is not quite al dente, add the peas to the boiling water. Let the pasta and peas finish cooking together. Drain and pour the pasta and peas back into the saucepan. Add the bacon along with a quick drizzle of olive oil. Pour the beaten egg mixture over the pasta and begin stirring everything together quickly. When you add the eggs, the pasta should be warm enough to barely cook them. You want the sauce to be just thick enough to coat the pasta with a glossy sheen. If the sauce seems soupy instead of creamy, put the pan over a very low flame and continue to stir and toss the pasta quickly until the sauce turns smooth and creamy.

Don’t worry if you accidentally overcook the eggs and they scramble a little bit. It will still be delicious.

French Breakfast Radishes Sautéed in Butter


The idea for this side dish came from Susan over at Susan eats London. It’s hardly a recipe, just French breakfast radishes split in half and sautéed in butter and olive oil.

French breakfast radishes are elongated, rosy-colored radishes tipped with white at the root end. The French adore them. You see them everywhere, but I can’t recall ever hearing them called breakfast radishes in France. No “radis petit-déjeuner.” No “bweakfast wadeeesh” either.

The exact reason for why they are called French breakfast radishes is unclear. From what I can find out, their name has nothing to do with the French having them for breakfast. Instead, it comes from the Victorians who liked to eat them for breakfast or afternoon tea. “French breakfast radish” is the blanket term for any small, oblong, pink and white-tipped radish. These kinds of radishes were considered French because of their association to the French from the English perspective (the English observed that the French liked to eat a lot of them). They became known as those French radishes that you had while sipping your English breakfast tea.

French breakfast radishes are the quintessential radish for slathering with good soft butter and dunking in flaky sea salt. They are also delicious sautéed in butter. Cooked, the radishes lose their bitter bite and they turn into succulent butter bombs. During cooking, the radishes give up some of their essence and make the most beautiful pink-hued sauce. They are impossible to resist.

Susan calls them food crack, and who can resist food crack? Not me!

Ingredients:

Butter

Olive oil

1 bunch of French breakfast radishes, trimmed and halved lengthwise

Salt

Chives

How to prepare:

1. In a skillet large enough to accommodate all the radishes, melt a big knob of butter with a little bit of olive oil. When the butter begins to foam, add the radishes. Season them with salt and sauté them until the radishes lose their opacity and they all begin to turn translucent. Transfer the radishes to a serving dish and snip fresh chives over them before serving.

Welsh Rabbit with Radish Greens


You can admit it: the title of this blog post made you want to speak like Elmer Fudd.

Because what’s better than a post about Welsh rabbit?

A post about wascally Welsh wabbit with wadishes! Specifically, wadish gweens!

You’re vewy, vewy welcome.

I was buying even more radishes at the market on Friday when I noticed that my hands and arms were itchy. Why? Because radish leaves have little prickles. They don’t sting, but they can irritate if you have sensitive skin. So while I was waiting in line, rubbing my hands and arms, my mind naturally drifted to stinging nettles — whose short season I seem to have missed completely. Then I started thinking that maybe radish leaves would be a good substitution for them in recipes.

The inspiration for this dish came, not from Bugs Bunny, but from from Nigel Slater‘s recipe for Welsh rabbit with nettles.

Welsh rabbit (also known as rarebit) is basically cheese on toast. The best cheese on toast that you will ever have. I’m not entirely sure of the origins of the name. I read that it was a term coined in the 18th Century by the English to make fun of the Welsh who had lots of cheese but little meat. But there seems to also exist an English rabbit, a Scotch rabbit and an Irish rabbit — none of which have any rabbit in them either. They are all just cheese on toast.

Technically, this should probably be called American rabbit — specifically New Hampshire rabbit because the Welsh-style cheese that I used is made New Hampshire, USA at Landaff Creamery. Landaff Creamery is named after the Welsh hamlet of Llandaff, just to the north of Cardiff. I’m not quite sure why they lopped off the extra l. Maybe there was some kind of international branding issue. Or maybe it’s because the difficult to pronounce Welsh double l supposedly gets lopped off by Welsh capital dwellers, and the creamery’s owners figured that if it was too hard for them, it would be impossible for us. My cheesemonger didn’t seem to have any trouble pronouncing it as if it had double lWhere did he learn that?!

Ingredients:

About a cup of radish leaves, washed

Olive oil

2 tablespoons of crème fraîche

1 teaspoon of grainy mustard

1/2 cup of crumbled Caerphilly, Caerphilly-like cheese or Cheddar (see here for more alternatives)

Freshly ground black pepper

Freshly grated nutmeg

2 slices of sourdough bread, lightly toasted on both sides (you can also use multigrain bread)

How to prepare:

1. Heat some olive oil in a medium saucepan over medium heat. When the oil becomes fragrant, add the radish greens to the pan along with about a tablespoon of water. Sauté the greens until they just wilted. Remove the greens to a colander to drain.

2. When the greens are cool enough to handle, gently press as much liquid out of them as you can. Roughly chop the leaves.

3. In medium-sized bowl, mix together the chopped greens, the crème fraîche, the mustard and the crumbled cheese. Season the mixture with freshly ground black pepper and freshly grated nutmeg to taste. Divide the mixture in half and mound it evenly onto each slice of toast. Arrange them on a large sheet of aluminum foil and place the toasts under the broiler until browned and golden.

Wild Spinach and Radish Green Spanakopita


It used to always kill me to buy a bunch of radishes and discard the leafy tops. I have never had the space to compost, so all of that plant matter would go straight into the trash.

It killed me every time until I found out that you can eat those radish greens and they are delicious.

Yes, you can eat them! Raw, they have a nice, spicy bite. Cooked, their flavor mellows and they taste warm and wonderful. Like the best tasting, silkiest spinach ever. To think that I was throwing them away for all those years!

They are a bit of a pain to clean since you have to fastidiously wash all the dirt and grit from the leaves and stems. It is worth it though.

When I saw wild spinach (also known as lambsquarter) at the Greenmarket, I immediately thought that spanakopita would be a great way to use both greens. When I think about Greek food, I think about the Greek landscape: scrubby in parts, dotted with wild herbs and craggy olive trees. There is something a little rustic about the combination of wild spinach and radish greens that fits my little Mediterranean fantasy (never mind the fact that there is nothing rustic about the Greeks; they are as polished and well-turned out as the Milanese).

Spanakopita is wonderful mix of greens and feta wrapped up in flaky phyllo dough. You can make these little triangles, or alternately layer the phyllo dough sheets and the filling in a ceramic dish to bake as a giant pie.

Some might be disappointed to see that I didn’t make my own phyllo. Does anyone really make their own phyllo anymore? I think the oft-repeated saying goes that a woman is good Greek marriage material when she can roll phyllo thin enough for her prospective husband to be able to read a newspaper through it. I don’t plan on being anyone’s Hellenic housewife any time soon, so store-bought phyllo dough it is!

Ingredients:

6 cups of radish greens, washed

6 cups of wild spinach, washed

Olive oil

1/2 pound of feta, crumbled

The zest of one lemon

Salt and pepper

A pinch of nutmeg

1 egg, beaten

6 sheets of frozen phyllo dough, completely thawed

1 stick of butter, melted

How to prepare:

1. In a large pot, heat some olive oil over medium heat. When the oil becomes fragrant, add the wild spinach to the pot along with a few tablespoons of water. Sauté the spinach until it is just wilted. Remove the wilted spinach with tongs to a colander to drain. Repeat this process with the radish greens.

2. When the greens are cool enough to handle, use your hands to gently squeeze and press as much liquid as possible out of the leaves. You will be amazed how much liquid there is. Try to be thorough; the less moisture there is in the leaves, the better your filling will be.

3. Finely chop the greens and put them in a large bowl. To the bowl, add the feta and the nutmeg. Stir everything together until the cheese is evenly distributed throughout the greens. Adjust the seasoning before adding the beaten egg.

3. Preheat the oven to 375°.

4. Fold the phyllo sheets in half lengthwise and cut them in half. Fold each half lengthwise and cut them in half again. Each phyllo dough sheet will give you 4 long strips of dough. Cover the strips snugly in plastic wrap. Working one strip at a time, make the spanakopita. Gently brush each strip with melted butter. Starting at one end, put a dollop (about a scant tablespoon) of filling in the upper corner. Fold the phyllo dough down over the filling to make a triangle. Now fold the filled triangle up. Continue to fold the strip into triangles, like folding an flag (or at least how we Americans fold a flag). Don’t worry if the folds aren’t perfect. Working with phyllo can be very forgiving because you can always make the uneven edges stick to main triangle with more butter.

If you want crunchier spanakopita, you can layer two strips of phyllo dough together with brushed butter and then fold the triangles up as you would with one strip. Just remember that you will need double the number of phyllo dough sheets in this case.

Continue folding with the remaining strips of phyllo dough. Arrange the completed triangles in a single layer on a parchment paper-lined baking sheet. You should end up with 24 filled triangles total.

5. Brush the triangles with the remaining melted butter. Bake them for 20-25 minutes until they are golden and crisp. Serve hot.

Variation:

I had planned on adding about 1/4 cup of fresh dill, a 1/4 of a cup of fresh parsley and a 1/4 of a cup of freshly chopped green onions, but I got distracted by a terrible werewolf movie on television called Blood and Chocolate. I think lost brain cells! It wasn’t even corny, or cheesy or cool in a bad cult-movie kind of way. It was just bad.

Finnish Ruis Bread Topped with Sliced Radishes and Soft Butter


I ate my first radish after watching Shelley Duvall’s Faerie Tale Theater. Do you remember that series? Maybe it was a little dark for children, but I loved it and thought Shelley Duvall was the bomb as Rapunzel.

If you remember the story, it all starts when Rapunzel’s mother develops a serious pregnancy craving for radishes, specifically the radishes topped with blue leaves growing in her neighbor’s garden. Unfortunately, instead of just going next door and asking the neighbor for some radishes, or even offering to pay for the radishes, her husband decides that he is going to scale the garden wall in the middle of the night and steal them.

If it had been Texas or Florida, he would have just been shot on sight, but since it’s Faerie Tale-land, the neighbor just takes their first-born.

Did I mention that she’s a witch?

That really got my 7 year-old brain working. What food would be so good that it would cause you to ignore common sense (don’t break, enter and steal from witches)? I had to get one of these radish-things. They must, I thought, be amazing!

After pestering my parents, they finally came home from the market with a nice bunch of radishes. They were so pretty: bright red on the outside and snowy white on the inside. No blue leaves, but I could deal with the thought of that particular variety being unavailable at our local supermarket.

I put one in my mouth, chewed . . . and spat it right back out. Blech! Stupid fairy tale!

I pretty much avoided radishes after that until I was 14 and was served them in France. Not wanting to be impolite, I followed my host family’s lead and slathered the offensive root with butter before popping it in my mouth.

Imagine my shock: the radish wasn’t offensive at all. It was . . . delicious!

And I have loved them ever since.

These little toasts can hardly be considered a recipe; they are just something that I love to have for lunch when radishes are in season. I really like using Finnish Ruis bread made by NYC-based Nordic Breads (the best Ruis bread ever). Nordic Breads ships their rounds anywhere, but in a pinch, any good rye bread will do as long as it is sliced thinly.

I’m not paid to say this about Nordic Breads at all, I just think their bread is wonderful 🙂

Ingredients:

Finnish Ruis bread, or any thinly sliced good rye bread

Radishes, thinly sliced

Good soft butter

Good sea salt

How to prepare:

1. If using Finnish Ruis bread, cut each round into halves or quarters before splitting them through the middle. Toast the bread and let it cool completely.

2. When the bread is cool, spread the soft butter evenly over the top of each piece. Arrange the sliced radishes on top and sprinkle them with good, flaky sea salt. Eat immediately.

Kale Paneer


I can’t take credit for this recipe. That honor goes to the amazing Tahmina at Kolpona Cuisine whose recipe for Saag (Palak) Paneer gave me a delicious way to polish off the remainder of my giant pile of kale. The only changes that I made were to A) use fresh kale instead of spinach, and to B) forget to add the fenugreek leaves. I only realized that they were missing after I started eating 😦

Next time, I will follow Tahmina’s lead and make my own paneer. I bought it this time for the sake of convenience. I also didn’t think that fresh kale would release more liquid than fresh spinach when cooked. I should have compensated by reducing the amount of water that I added to the dish.

This was really, really good. So good that I ate it with piles of white rice! And Tahmina, you like it spicy! Thank goodness, because I like it spicy too 🙂

Thanks for the great recipe; I loved it!

Kale Pesto with Whole Wheat Fusilli


What’s a girl to do when faced with too much kale and too little time? Make pesto!

When it comes to something like pesto, it’s hard to say that anyone has proprietary claims to any one recipe. I did look at this recipe on Tastespotting and this recipe on Food 52 for nut-cheese-oil ratios. In all honesty, I have so much kale on hand that I threw those proportions right out of the window. I just kept tinkering and measuring until I had a sauce that was so good, I wanted to eat more and more of it.

Kale has a clean, bitter flavor that I think pairs better with walnuts than pine nuts. When using walnuts, I like to also use walnut oil. Some Meyer lemon zest keeps the sauce nice and fresh. You can also zest a regular lemon if Meyer lemons are not available to you. If you don’t want to emphasize kale’s refreshing bitterness, you can use just olive oil. It will still taste great.

Kale pesto has an earthier flavor than basil-based pestos, and that flavor demands a heartier pasta like whole wheat. Fusilli is always a good choice for pesto because the spirals catch and capture the sauce beautifully.

It’s always a good idea to toss pasta and pesto together in a separate bowl. You don’t want the Parmesan in the sauce to burn and stick to the bottom of a hot pot or pan. The warm pasta — plus a little of the hot pasta cooking water if needed— will loosen the sauce up without the need for any external heat.

I am looking forward to eating my kale pesto in other ways this week, like on pizza or in lasagna. I hope it freezes well too because I made a lot of it!

Ingredients:

1 pound of whole wheat fusilli

2/3 of a cup of walnuts

2 cloves of garlic

2/3 of a cup of freshly grated Parmesan

The zest of 1 lemon

5 cups of washed and torn kale leaves, no stems and no ribs

1/2 cup of olive oil

1/2 cup of walnut oil

Salt

How to prepare:

1. Preheat the oven to 350°.

2. Spread the walnuts out in an even layer on a baking tray. Bake the walnuts until they are nicely toasted. This can take between 6-8 minutes. Be very careful to not let the walnuts burn. Let them cool before making the pesto.

3. While the walnuts are cooling, bring a large pot of salted water to a boil. Cook the pasta until it is al dente, about 12 minutes.

4. While the pasta is cooking, combine the garlic and walnuts together in a food processor with some salt. Add the Parmesan and the lemon zest. Pack all the kale into the food processor bowl and with the processor running, slowly drizzle in the olive and walnut oils. Continue to process everything until you have a smooth and creamy sauce. Adjust the seasoning.

5. When the pasta is cooked, drain it and pour it into a large bowl. Add the pesto, a dollop at a time, until the pasta is nicely and evenly coated. Serve immediately.

Spicy Braised Kale and Mushroom-Topped Polenta with Poached Goose Egg


In a fit of health consciousness, I went a little crazy at the market and bought several large bunches of local kale. When washed, it amounted to more than 30 cups. Yes, you heard that right: 30 packed cups of kale!

I love kale, but this was a little much even for me. Kale has been going into everything lately from eggs to potatoes, from soup to salad. But no matter how much kale I use, the pile doesn’t seem to diminish much. It’s the neverending pile o’ kale!

I took advantage of this kale-pportunity to try out another way to make polenta. Polenta is one of those things that is just elemental, like roast chicken or omelets. There are a million ways to make polenta. You can make it in the oven, the slow-cooker, the microwave or on the stove. You can cook it for 15 minutes or hours. You can spread it out onto a sheet pan and cut the hardened polenta into squares. You can deep-fry leftover polenta. The smallest amount of corn meal seems to make mountains of polenta. It’s a polenta-palooza!

Great to pair with the neverending pile o’ kale, no?

This polenta-making technique is from those fiddly folks at Cook’s Illustrated. It only takes 30 minutes of minimal whisking to achieve creamy polenta perfection.

And, as you can see, my CSA has goose eggs! Which are big honking suckers 😉 The equivalent, more or less, of two chicken eggs. There are a million ways to poach eggs too, but lately I have been liking Food52’s Control-Freak Poaching Method.

Ingredients:

For the polenta:

6 cups of water or stock

Salt

1 1/2 cups of yellow corn meal

4 tablespoons of butter

1/3 – 1/2 of a cup of grated Pecorino Romano or Parmesan

For the Spicy Braised Kale and Mushrooms:

2 tablespoons of butter

Olive oil

2 garlic cloves, finely minced

8 ounces of white button mushrooms, sliced

Salt and pepper

Red chili pepper flakes

1/4 cup of dry white wine

6 cups of roughly chopped kale

For the poached eggs:

Water

Salt

1 goose egg per person

How to prepare:

1. In a large, heavy Dutch oven, bring the 6 cups of water or stock almost to a boil with the lid on. Uncover the pot and season the water or stock with salt. Vigorously whisk the corn meal into the liquid a little bit at a time. As you whisk, be sure to get in all the corners and edges of the pot with the whisk to ensure that there are no lumps. When all the corn meal has been added to the water, cover the pot again and reduce the heat to low. Let the polenta simmer, stirring every 5 minutes, for 30 minutes total.

2. In the meanwhile, melt 2 tablespoons of butter with a little bit of olive oil in a large skillet set over medium heat. When the butter begins to foam, add the minced garlic and the mushrooms. Sauté the mushrooms until they give up most of their liquid and begin to turn golden. Add the white wine and as many red chili pepper flakes as you like. Season the mushrooms with salt and pepper. When the liquid has reduced to almost a glaze, add the kale to the pan and cover the skillet. Let the leaves wilt completely before stirring the kale and mushrooms together. Adjust the seasoning for a final time and remove the pan from the heat.

3. After 30 minutes, your polenta should be done. Move the pot away from the burner and vigorously whisk in the butter, one tablespoon at a time, until it has all been well-incorporated and the polenta is creamy. Stir in the Pecorino or Parmesan and adjust the seasoning.

4. In a medium-sized saucepan, bring about 4 to 5 inches of salted water to a near simmer. Carefully crack a goose egg into a small fine-mesh strainer. You want to separate the yolk and the more solid part of the white from the more watery part of the white. Carefully pour the egg into a large, shallow spoon. Gently lower the spoon into the water. Use another spoon to catch any bits of white that try to escape. When the egg is perfectly poached, the white should be opaque and when you gently move the egg back and forth, the white and the yolk should move in sync. When the egg is done, lift it out of the water and very carefully roll it onto a paper towel-lined plate.

5. To assemble the dish, spoon out about half a cup of polenta into a large, shallow bowl. Top the polenta with about a third of a cup of the spicy braised kale and mushrooms. Carefully position the poached egg on top of the braised kale and drizzle everything with good olive oil. Serve immediately.