Guest Post from Lucas: Fresh Mint Tea, Chemist in the Bottle-Style

I Heart Tea!
A note from Daisy: For many of you, Lucas needs no introduction. For those who don’t know him yet, he is the wonderful Polish blogger and outstanding cosmetic chemistry student behind Chemist in the Bottle. Although he writes primarily about perfume, he is also a hardcore foodie. It has been meltingly hot and humid lately and to help beat the heat, I have asked him to share his refreshing recipe for mint tea. It is a bit different from how I prepare it here in the States (i.e., brew something potent, pour it over ice, add more ice), but I love learning about how people elsewhere keep cool via what they eat and what they drink.

As my parents are still visiting, I am very happy to hand the blog over to Lucas this week! I hope that you enjoy his post as much as I do. 

By Lucas

Summer is an amazing season. Once the school year is over and children begin enjoying their vacation, people become more relaxed and everyone seems to be much happier than just a few months ago. Clear skies and sunshine are what give us endorphins, the hormones of happiness. However, when the temperature rises to dangerous levels, summer is no longer so much fun. The constant heat is hard to enjoy — especially when you have to sit in an office building or you don’t have air conditioning (or even a fan).

To counter the heat, I’d like to share a couple variations on my recipe for fresh summer mint tea. It’s a really refreshing drink that is very easy and fast to make.
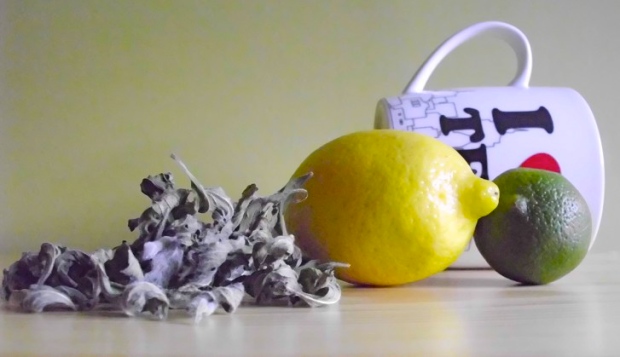
You will need:

  • Fresh mint leaves
  • Lemon
  • Lime
  • Salt

Let’s make a cold mint tea first! There are two methods to make it:

METHOD 1 – hot brew – cold drink

Take two fresh mint leaves if you’re making a single cup, or 5-6 leaves if you want to prepare a liter’s worth of tea. Put the mint leaves into your cup or pot. Boil some water. When the water is hot, pour in just enough to drown the leaves. You only want to cover the bottom of your cup or pot. Let it sit until the water is cool. During this time, the leaves will transfer their flavor and a little bit of their color to the water. Next, add enough cold water to fill your cup or pot and put it in the fridge to chill. After about 2-3 hours, your icy mint tea should be almost ready. Now you can add a slice of lemon and lime to add a citrus taste to your drink. Voilà! The tea is ready!

METHOD 2 – cold brew – cold drink

Take the same amount of fresh mint leaves and crush them with a mortar and pestle. If you don’t have a mortar and pestle in your kitchen, simply chop the leaves roughly with a knife or use scissors to cut them into smaller pieces. Fill the pot with the water and leave it in the fridge overnight. The next day, your water will have a light green tinge. The color will be more intense than if you had used the hot brew method, as cutting the leaves helps the pigment and flavor to transfer more easily to the water. Pouring hot water over cut or crushed leaves will cause your tea to taste more intense and be darker. This is called infusion. Add a slice of lemon and/or lime for an even more refreshing twist. For this cold beverage, ice cubes are optional. Please be aware that if you add a lot of them, the tea will be more diluted. I rarely add ice to my cup but when I do, it’s usually only 2 ice cubes. Neither of these methods (infusion or hot brew) make a very strong tea so you don’t want to lose the charming flavor of fresh mint by adding more frozen water to it.

METHOD 3 – hot brew – hot drink

Both of the methods above produce a cold drink. However, you must believe me when I say that it’s sometimes good to drink something hot when it’s hot outside. This might sound ridiculous and ridiculously unappealing (I mean, who wants to have a hot drink when it’s scorching outside?) but I have found that when it’s 35°C (that’s 95°F) outside, you can feel refreshed and less tired of the heat after you treat yourself to a hot liquid.

Once again, take 2 fresh mint leaves, 5 for a pot’s worth, and cover them with hot, but not boiling water. Wait about 10 to 15 minutes for the tea to be properly infused. Toss in a slice of lemon, lime, or both and enjoy your hot beverage. Did you notice that the heat isn’t so tiring now? 🙂

As a matter of taste, I have to mention something about lemons and limes: if you prefer your tea to be less bitter, cut off the rind of your slice before you add it into your mint tea. The limonene present in citrus fruits is at its highest concentration in the yellow, orange or green rinds. If you have nothing against tasting a refreshing bitterness, feel free to include the rind. Its limonene and tannins are responsible for the sensation that you are enjoying.

One more thing: did you notice sodium chloride, or salt in the ingredients? On super hot days, you should always add a tiny bit into your tea. We sweat more when it’s hot out and our bodies lose their necessary minerals faster. Just a few crystals of salt will help to keep the balance of chloride anions and sodium cations in your body. Cl- are especially important in our body cells. For just a cup of tea, a pinch is enough (that should be just a couple of grains, no more!) For a liter, add about a ¼ teaspoon salt. Regardless of how you brew your tea, the salt should be added at the end, either with lemon or lime, or right afterwards. Don’t forget to stir your tea to ensure that all the crystals are properly dissolved.

In Poland, mint is a pretty seasonal garden plant so when I get some leafy sprigs of mint, I like to keep some fresh and dry the rest on my balcony in the sun. If you have fresh mint, you can do this too and enjoy your mint tea made from fresh leaves even after the summer months are over. If you dry your own leaves, remember that you should use a hot brew preparation for them. A cold method will take ages for the dried leaves to infuse the water.

If you can’t get fresh mint, you can use regular mint tea packed in bags or sachets. Use one sachet for one cup and two for the pot. If using tea bags or sachets, the hot water method of making iced tea is better. The cold infusion method works well too, but it will take longer — around 24 hours — and will give a very light brew with gentle flavor. This is not a bad thing. In fact, it is ideal for summer evenings when you want something calming before going to sleep.

I hope you enjoyed this post and will enjoy your homemade fresh summer mint tea, which is delicious and all natural. Let me know in the comments if you decide to prepare it. I would also love to hear what you think after you drank a cup or two!

One last note from Daisy: All these photos are courtesy of Lucas! I’m sure you’ll agree with me that if he ever decides to drop out of school, he could be one heck of a great photographer and/or food stylist 🙂 Thank you so much, Lucas!

Puréed Fava Bean and Pecorino Spread

Viva la Fava!
I think that fava beans are one of those things that you need to prepare yourself in order to truly appreciate them. I’m sure that I came across them before I lived in France, perhaps randomly poking out of a spring ragoût or crushed and smeared on some olive oil-brushed toast. However, it wasn’t until that spring in Paris that I actually bought some of my own.

Fava beans appeared suddenly and seemed to overwhelm the markets overnight. They overflowed from round baskets made of thin slats of wood that were stapled together. To fill your flimsy paper bags, you had to first elbow your way through ruthless matrons who did not care if they knocked off your glasses as they pinched and squeezed each pod to see which had the biggest and juiciest beans.

They were ridiculously cheap, mere centimes for a kilo.

You needed kilos of them too. Given that one kilo equals roughly 2.2 pounds, 2.2 pounds of pods would yield slightly more than one cup of beans once shucked. That cup would be reduced again to a mere 2/3 of a cup after removing the waxy, unappetizing membranes from the beans.

Fava beans were so abundant and economical in France that I just assumed that they were as available and inexpensive everywhere else.

Wrong.

Priced somewhere between $2-3 per pound, fava beans in New York are not the budget treat they were in France. However, once I developed a taste for them, I began eagerly anticipating their springtime arrival. Given that a small 2/3 cup serving of fava beans tends to run me about $5-6, I tend to favor recipes that prepare them simply in order to let their earthy, nutty, slightly bitter flavor and buttery texture shine.

Fava beans are still available at the markets here in New York, but elsewhere the season may be ending or has already passed. If you can’t find them easily or find the price prohibitive, I imagine that shelled edamame makes a respectable substitute.

This is one of those recipes where I encourage you can feel your way through it and modify it to fit your tastes. I used Pecorino Romano, a sharp, tangy, and salty sheep’s milk cheese that traditionally partners up with fava beans in and around Rome. However, using grated Parmesan in place of the Pecorino Romano results in a very nice spread too. For a little more smoothness, you can add a soft dollop of good ricotta, or maybe even a spoonful of thick, creamy yogurt.

However you make it, this dip, spread, or whatever you want to call it, is a terrific thing to dunk vegetables in, particularly radishes. You can also slather it on crostini.

Ingredients:

About 2 pounds of fava beans in their pods

1/3 of a cup of freshly grated Pecorino Romano

1/3 of a cup olive oil

Freshly ground black pepper

How to prepare:

1. First of all, you will need to remove the beans from their pods. This is easy to do and is much like shelling peas. Once shucked, discard the empty pods, and blanch the beans in boiling water for about 2 minutes — any longer than that, and they will be mushy. Have an ice bath ready to shock the beans after draining them. By submerging the beans in ice water after cooking, you will retain their beautiful green color. When the beans are cool, remove the waxy outer-covering of each one by nicking the end of a bean with your finger nail and easily squeezing each one out of its peel. Discard the peels.

2. Combine the beans with the grated cheese in a food processor. While the machine is running, add the olive oil in a steady stream until the consistency is nice, smooth, and thick. Transfer the spread to a bowl and season it freshly ground black pepper to taste. You shouldn’t need to add any salt because the cheese should be salty enough.

The spread should keep covered in the fridge for 3-4 days.

Unrelated query to Readers: Had a problem where this recently published post reverted back to a much earlier draft and “unpublished” itself. Spooky! Has this ever happened to anyone else? 

Pan-Roasted Lamb Rib Chops with Mint Chimichurri

Ewe should come for dinner!
Several years ago, I spent an entire month in Argentina and I do not recall ever seeing chimichurri sauce on the table.

How could this have been possible? Was I blind? How could I have traveled from the grassy Pampas to the Bolivian border without once encountering this iconic sauce?

I have no idea.

Since that trip, I have yet to see a something about Argentinian steak-eating that doesn’t make reference to chimichurri — that fabulous amalgam of parsley, garlic, red pepper flakes, vinegar, and olive oil — as being the ever-present condiment. However, I can honestly and sadly say that I never had it until I returned home.

It’s not like I wasn’t eating meat over there. After a leisurely breakfast of sweet, flaky medialunas and large cafe con leche, I would wander out into the street and try to figure out where to have my next meal — which would always be steak.

Yes, this was the decadent month where I had steak for lunch and dinner every single day, washed down with gallons of highly-alcoholic Malbec. Did I get sick of the repetitiveness? No. Did I eat anything else? Yes. Empanadas (both the meat and the cheese-filled varieties) and dulce de leche-stuffed alfajores filled in the nooks and crannies in-between meals.

Was it healthy? Most definitely not! By the time that me and my travel companion ended our trip, our alcohol tolerance was through the roof and we could document how much we had swelled in pictures. Looking at them chronologically was like seeing time-lapse photographic evidence of weight-gain.

Was it one of the most delicious vacations of my life? Most definitely yes.

Perhaps if I had seen either a bottle or a bowl of chimichurri sauce, I would have foregone the pathetic green salads that we would order in an effort to ingest something healthy. Who were we kidding? Those little bowls of greens were only gestures, mere tokens of the balanced diets we left behind in favor of steak, steak, more steak, and llama carpaccio.

Chimichurri is an excellent accompaniment for grilled and roasted meats. It’s green, garlicky, and salty with a little heat from the pepper and a little tang from the vinegar. It is amazing and beyond easy to make.

This version of chimichurri is a twist on traditional chimichurri. Instead of oregano, I have substituted fresh mint leaves to complement the lovely lamb chops that I get from my CSA. My introduction to the combination of lamb and mint — the mind naturally conjures up images of adorably delectable baby lambs fattening themselves on tender sprigs of mint and other herbs as if to say, “Here I am and I am pre-seasoned!” — came when I was spending a lot of time in Wales. A slick of mint sauce, usually store-bought and straight from a jar, was used to coat salty little marsh lamb chops in a sheen of jelly. Looking back, those chops would have been much better served by something fresher and more spring-like.

In lieu of red or white wine vinegar, I have opted for unfiltered apple cider vinegar which adds a little bit of sweetness to the final result. I actually got the idea to swap vinegars from the wonderful Hannah over at Inherit the Spoon, whose recipe inspired this one. As you can tell, chimichurri is quite flexible; you can adjust it to your personal tastes as you go along. What is given below is a reflection of what I like to eat, namely more salt and less tart, but you should feel free to play around with it. If the sauce feels too chunky, add more olive oil or more vinegar. Too tangy? Too garlicky? Too spicy? Add more herbs.

As a useful gauge, the final consistency should be like fine pesto. That being said, you can leave the sauce rougher if you prefer. It will still taste wonderful.

Ingredients:

2 thick-cut lamb rib chops per person

Kosher salt

Rice bran oil

1/2 a bunch of Italian parsley, trimmed so that the longer stems are removed

1 handful of fresh mint leaves, stems removed

2 cloves of garlic

Red pepper flakes to taste

Salt and freshly ground black pepper to taste

3-4 tablespoons of apple cider vinegar

1-3-1/2 of a cup of good extra-virgin olive oil

How to prepare:

1. Generously salt both sides of the lamb chops and let them come up to room temperature while you prepare the sauce.

2. Combine the herbs, the garlic, the red pepper flakes, and the apple cider vinegar in a food processor with a hefty pinch of salt and a good grind of black pepper. As the processor is going, add the olive oil in a steady stream until you reach your desired consistency. Adjust the seasoning if needed. Keep the sauce covered in the fridge until you are ready to cook the chops.

3. Preheat the oven to 350°.

4. Once the lamb chops have come up to room temperature, pat them dry with paper towels. In a heavy-duty, oven-safe skillet large enough to hold the chops without crowding them, heat about 1-2 tablespoons of rice bran oil or another kind of oil with a high-smoke point until the surface of the oil begins to shimmer. Arrange the chops in a single layer and let them cook undisturbed until you have a nice sear on them. When properly seared, the chops should release easily from the pan if the pan was hot enough to begin with. Flip the chops and move the pan to the oven.  You want to aim for them to be medium-rare. An instant read thermometer should read 135° when inserted in the thickest part of the chop. This should take about 7-10 minutes depending on how thick your chops are (mine were about 1.5 inches thick) and how many are in the pan. When the chops have reached the appropriate level of doneness, remove the pan from the oven and transfer the chops to a plate to rest for 5 minutes.

5. When the meat is done resting, serve them along with the chimichurri. Any uneaten sauce can be kept in an air-tight container in the fridge for about a week. There will likely not be any uneaten sauce 🙂

Oven-Roasted Baby Back Ribs, Part II

Baby got back.
A couple of months ago, Edna at expatedna.com published a post about some of the strange search terms that have led to her blog. Some of the weirdest that she cited were: “German army uniform 2012,” “watered down biracial baby with mongolian spot,” and “if i’m part asian does it still make me racist?”

If only I were so lucky! In the entire time that I have maintained this blog, I have not had one strange search lead to me. Not. One. Single. Weird. Search.

You know what that means?

It means I’m boring.

To be more interesting, maybe I should have a plushie chase me across a Croatian nudist beach covered with technicolor Rastafarian Jesus squirrels wearing sequin pasties and rubber panties!

No, I’m not actually going to do that 🙂 I just wanted to up the chances of a strange search ending up here 🙂

Anyway, among the pedestrian search terms that led people to my blog were: “french breakfast radish recipe,” “juicy pork chops,” and “quick oven baked baby back ribs.”

I know. Very exciting.

Seriously though, this post on oven-roasted baby back ribs remains one of the most popular posts that I have ever done. However, for the number of times that it gets viewed, it has very few comments. I attribute this to one of two things: either my recipe is terrible, or the lead-up to the recipe is misleading.

The recipe is terrific, but the lead-up to the recipe is misleading because it is my mother’s recipe and she lied to me.

See, my mother told me that these ribs would take a mere 30 minutes in the oven. What she neglected to add was that they take about 30 minutes after the first hour

So I’m here to redress this wrong: oven-roasted ribs will take at least 1 hour and 30 minutes to cook. An hour and 30 minutes. You cannot cook ribs faster than that because there is too much connective tissue and collagen to break down. You just can’t. But you should still make these ribs because they are delicious, just plan accordingly.

I had intended to make these ribs for a special occasion, but given the soaring temperatures last week, I was spurred to cook them ahead of time and meet my friends in a nice, air-conditioned restaurant instead. In my haste, I forgot to mix the seasoning with soft brown sugar. I simply rubbed them down with one of Lior Lev Sercarz‘s beautiful spice blends (Pierre Poivre No.7, if you’re interested), and threw them into a 350° oven for an hour and a half.

Done and delicious.

Ingredients:

1 or 2 racks of baby back pork ribs

1 heaping tablespoon of steak seasoning or rib rub per rack of ribs

Kosher salt

Special equipment:

One half-size sheet pan

One wire rack to fit the sheet pan

How to prepare:

1. Pre-heat the oven to 350°.

2. First remove the membrane on the back of the pork ribs. It’s super easy to do and allows your ribs to cook nice and flat, without curling up. It also makes them much nicer to eat. To do this, flip the ribs bone-side up. Using the flat handle of a spoon or a dull butter knife, loosen the membrane on one end of the rack of ribs. Grasp the loosened end with a paper towel and pull the membrane slowly in the direction of the opposite end. It should come off in one piece. If it doesn’t, you can just grab the torn end and continue. To help visualize, here is a how-to clip from BBQTalk.

3. After drying the ribs with paper towels, rub the seasoning mix into both sides of the rack. Sprinkle both sides with salt and arrange them on the wire rack.

4. Set the racks of ribs in the oven. Carefully pour about 2 1/2 to 3 cups of water into the bottom of the sheet pan. The water should not touch the bottom of the wire rack. Roast the ribs in the oven at 350° for an hour to an hour and a half until the ribs are tender and buttery. Remove the pan carefully from the oven. Let the ribs rest for 5 to 10 minutes before slicing and serving.


\

I Made the Ratatouille from Ratatouille for My Students

Rémy's ratatouille!
Another semester has come and gone. At the end of each one, regardless what happens during the term, I am always overcome with wanting to hug each of my students and send them out into the world with a macaron. Maybe two.

This class was no exception. Despite a rough and rocky start, I finally learned to relax around them after Spring Break. The change was very welcome. I started spending less time freaking out planning my lessons and more time enjoying talking about some of the topics that interest me the most: history and process, food and memory, taste and identity, sustainability and individual responsibility,  inspiration and experimentation.

The first time that I taught a class on French food, it was the summer that the movie Ratatouille came out. I saw the movie by myself before accompanying two separate groups of students to the theater. Maybe it was the summer heat, or maybe my brain was addled from having seen the movie three times in a row, but I remember standing on the subway platform and cooing at a big, fat rat. “Oooooooh!!!” I squealed, “Look at the cutie pie! He’s got a . . . Subway sandwich!!!! Awwwwwww!!!”

Is it surprising to hear that people moved away from me?

For those of you who haven’t seen it, Ratatouille is a marvel of a movie, a treasure trove of tidbits that you can use to teach French food and culture. Want to explain a brigade by showing a kitchen hierarchy? Want to show the importance of technique and apprentissage? Want to begin a discussion about whether or not cuisine is an art form? Want to perfectly represent archetypal figures of French gastronomy like the stubborn chef, the restaurant critic, or the gastronome? Want to kick off a conversation about Proust? Want it in French and English?

Ratatouille is the movie for you!

As some of you might know, Thomas Keller was the consulting chef for the film. His reinterpretation of the classic ratatouille was also a re-imagining of a popular Turkish dish called İmam bayıldı, which literally means “the imam fainted (because it was so darn good).” Keller’s ratatouille was first published in The French Laundry Cookbook as an accompaniment to guinea fowl. This “crêpinette de byaldi” subsequently morphed into the confit byaldi featured in the film.

Unlike the traditional ratatouille for which all the vegetables are either stewed together or layered in the same pot and simmered until soft, Keller’s version has you make a simple pipérade over which you artfully layer very thin slices of eggplant, yellow squash, zucchini, and tomato. It takes a little bit more work, but the result is something much more elegant.

I deviated from the original recipe in order to keep the dish’s preparation more in line with the one seen in the movie. The recipe from The French Laundry Cookbook has you cover the confit with aluminum foil and tightly crimp it around the dish. However, I didn’t want a watery ratatouille, so I cut parchment paper to fit and laid it on top of the confit —  just like Rémy.

This single dish probably has the greatest carbon-footprint out of any that I have made this year. None of the vegetables are in season. All of them were grown in Peru, with the exception of the tomatoes which came from Holland. However, I wanted to serve my students something that they have been seeing and talking about all semester.

Unfortunately, they polished it off before I could even get a taste of the finished product. I assume it was good, but I have also seen students eat all kinds of weird stuff! In any case, I look forward to revisiting this recipe later in the summer when local eggplants, tomatoes, peppers, and squash are around.

Ingredients:

For the pipérade

Olive oil

1 large white onion, chopped

1 yellow bell pepper, cored, seeded and diced

1 orange bell pepper, cored, seeded and diced

1 herb sachet made from a sprig of fresh parsley, a sprig of fresh thyme, a sprig of rosemary, and a bay leaf tied up in a cheesecloth bundle.

Salt and freshly-ground white pepper

To assemble the final dish

4 Roma tomatoes, thinly-sliced

1 small eggplant, thinly-sliced

1 yellow squash, thinly-sliced into rounds

1 zucchini, thinly-sliced into rounds

3-4 cloves of garlic, finely minced

1 teaspoon of fresh thyme, minced

2-3 tablespoons of olive oil

Salt and freshly-ground white pepper

How to prepare:

1. Pre-heat the oven to 325°.

2. To prepare the pipérade, heat about 1-2 tablespoons of olive oil in a medium-sized sauté pan over medium heat. When the oil is hot, add the onions. Sauté them until they just begin to soften. Add the diced yellow bell peppers and the herb sachet. Continue to cook the vegetables until they are soft, but not browned. Remove and discard the sachet. Adjust the seasoning.

3. Spread the pipérade in an even layer in the bottom of an oven-proof baking dish. Begin arranging the sliced vegetables over it. You can either do this in rows like I did, or you can create a circular pattern by starting at the edges of the dish and moving towards the center. In any case, you want to alternate and overlap the vegetable slices so that they create a pleasing design.

4. Mix together the garlic, thyme, olive oil, and salt and pepper to taste in a small dish. sprinkle this mixture over the vegetables.

5. Cut a piece of parchment paper to lay on top of the confit. Press it down gently to adhere. Roast the confit until the vegetables have cooked through (the eggplant will take the longest). This should take between 45 minutes to an hour. It might even take over an hour. In all honesty, I can’t really remember since I was a couple of beers in by then. Just start checking it around the 45 minute mark!

6. Remove from the oven and let it cool. The confit can be served hot, warm, or cold.

Sichuanese Pork Wontons in Chili-Soy Sauce

Plump dumplings rule!
I have inherited a lot from my mother. In addition to her dry sense of humor, her sarcasm, and her sly potty mouth, I am also the beneficiary of her glossy hair and poreless, flawless skin — which she reminds me, while comparing the four zits that I have had in my entire life to her NONE EVER, is actually less flawless than her own.

What I did not get from my mother was my taste for fiery, hot spice, gamy meat, and my willingness to put my overly-trusting ethnically Chinese-self in the hands of white people.

“Who is Fuchsia Dunlop?” my mother asked, “Is she Chinese?”

“Um, no. She’s British.”

“Like British-Chinese?”

“No . . . um, just British.”

Silence.

Asian-child fail!

But it’s really not my fault! My mother is an amazing cook, who has basically decided that she will be taking all her secrets to her grave so I will miss her more when she’s gone. In her kitchen, I am not even sous chef. I am relegated to the status of line-cook. Or bus-person.

Basically she lets me wrap things like egg rolls, dumplings, or leftovers with cling film.

These dumplings are not anything my mother would ever cook. First of all, they are spicy as heck! Secondly, the root of their spice comes from a nice, thick, orange slick of delicious grease! Finally, the recipe is from a white person.

But. They. Are. Delicious.

To the unintiated, Fuchsia Dunlop (who never seems to be known as just Fuchsia or just Dunlop) is a Chinese food phenomenon. Author of the best-selling Shark’s Fin and Sichuan Pepper: A Sweet-Sour Memoir of Eating in China, the book outlines her deep love for Chinese cookery which began as a student at Cambridge, culminated in a move to Chengdu and enrollment in a professional chef’s training course at the Sichuan Institute of Higher Cuisine — the first Westerner to ever do so.

Friends, both Asian and not, swear by her books and her recipes, both of which translate Sichuanese and Hunanese cuisine into something effortless, accessible, and authentic-feeling.

I adapted this recipe from one that appeared on Epicurious from Every Grain of Rice: Simple Chinese Home Cooking. I didn’t change parts of it because I had any kind of personal reference — apart from eating similar dumplings in restaurants, I don’t. Instead, I altered the recipe because I am apparently lazier than your average Chinese home cook 🙂

However, the results are still divine. Heritage schmeritage! These dumplings tick every single box in terms of a deeply soul-satisfying food experience. Did I mention that they are ridiculously easy to make too? 🙂

Ingredients:

For the sauce

3-4 tablespoons of dark Chinese soy sauce

1 1/2 teaspoons of sugar

3 cloves of garlic, finely minced

3 scallions, finely chopped

3 tablespoons of sesame chili oil with sediment

For the dumplings

1 knob of fresh ginger

1 pound of ground pork

1 egg, beaten

2 teaspoons of Shaoxing wine (a useful buying guide can be found here)

1 teaspoon of toasted sesame oil

3 scallions, finely chopped

Freshly ground white pepper

1 package of wonton wrappers

For garnish

2 tablespoons of roasted peanuts, chopped (Fuchsia Dunlop’s recipe does not call for them, but I think they would be an terrific addition. I would have added if I had them on hand!)

How to prepare:

1. First, prepare the sauce. In a small bowl, whisk together the soy sauce and the sugar. Let the mixture sit for about 5 minutes until all the sugar crystals have dissolved. Once the sugar has dissolved, add the finely minced garlic, the chili oil with sediment, and the finely chopped scallions.

2. Using a rolling pin or the bottom of a heavy coffee mug, crush the knob of unpeeled ginger. Place it in a small dish and cover it with about 2 tablespoons of water.

3. In a large bowl, combine the pork with one beaten egg, 2 teaspoons of Shaoxing wine, 1 teaspoon of roasted sesame oil, and 3 teaspoons of the ginger water. Mix well with your hands. Add the scallions and season the meat with white pepper to taste.

As the sauce is relatively salty, I opted to not salt the meat, but you can do so if you prefer.

4. Fill a small dish with cold water. Take one wonton wrapper and lay it on a flat surface. Place about a teaspoon of pork filling into the center of the wrapper. Dip a finger in the cold water and run it around the edges. Fold the wrapper in half diagonally and continue until all the pork filling is gone. You should use up about half of the package of wrappers, which you can save and freeze for another time. Lay the wontons out on a large cookie sheet to avoid crowding them onto a plate like I did.

5. While you are wrapping, set a large pot of water to boil. When the water has reached a rolling boil, salt it as if you would for pasta (wontons are essentially ravioli after all). Carefully drop the wontons in one-at-a-time. I only cooked 8-10 at once to ensure that they wouldn’t stick together. When the water has come back up to a boil, add another cup of cold water to the pot. When the water has come up to a boil again, gently scoop up each wonton with a slotted spoon and drain each well. Divide the wontons among however many bowls you want and generously spoon over the chili-soy sauce.

Sprinkle with crushed peanuts, put on a bib, and dive in.

♥ Happy Valentine’s Day ♥: Grilled Beef Heart with Celeriac Slaw

I Heart You!
The first time that I ever had beef heart was at St. John’s Bread and Wine in London. It was two summers ago and I was wandering around Spitalfields on a single-origin chocolate bar search. Suddenly, the skies opened up and down came the deluge. Soaked and woefully unprepared, I ducked into the empty restaurant right in the middle of the family meal.

Although I’m sure that the last thing the staff wanted to deal with was another guest, they were extraordinarily gracious as they served me a late-afternoon snack of oysters, Sauternes, grilled beef heart and celeriac slaw.

Sauternes and oysters, you say? Yes, the server was intrigued as well. I had ordered them together because I had just read an article about how the original pairing for oysters was Sauternes, not Champagne.

In any case, I assure you that the combination is divine.

So was the beef heart. Flavorful and surprising tender, it had a robust beefiness and was the perfect antidote to the grey, oily weather outside. As I enjoyed the last dregs of my wine, I remembered that I had a copy of Fergus Henderson’s Nose to Tail Eating: A Kind of British Cooking collecting dust at home.

When my CSA (shares are still available, by the way) began offering beef heart, I decided that I was going to bite the bullet and try to recreate that terrific snack.

The recipe is such that no actual measurements are necessary. Follow your instinct and taste as you go along. You will be fine.

(and a very belated thank you to the staff at St. John’s for making sure that I didn’t go back out in the storm without a large umbrella)

Happy Valentine’s Day!

Ingredients:

1 beef or calf’s heart

Coarse salt

Freshly ground pepper

Balsamic Vinegar

Olive oil

Thyme sprigs

1 celery root

Crème fraîche

Dijon mustard

How to prepare:

1. The first thing you will need to do is trim the heart. You basically want to remove all the fat, the membranes, and any and all vessels including the aorta. It may be a little disheartening (no pun intended) to have to discard all those trimmings, but you really only want the tasty bits. For this, you will need a very sharp knife.

When you finish, you should be left with a pile of very lean beef slices that no longer resemble a heart at all. For an instructional video, I refer you to Michael Ruhlman here.

2. In a dish large enough to fit all the beef slices comfortably, drizzle them with olive oil. Add a healthy slug of balsamic vinegar. Sprinkle it generously with coarse salt and freshly ground pepper. Add a few sprigs of fresh thyme. Toss, cover, and let marinate in the fridge for 8-24 hours.

3. Before grilling the beef heart slices, set up the celeriac slaw. The first thing you will need to do is trim the root. You could use a vegetable peeler . . . if you want to have an accident! Or you could use a very sharp knife and be safer. You will have a lot of trimmings to discard as well, but trust me: you don’t want these trimmings either. If you must, you can put them in a bag and toss them in your freezer to use for stock.

First, slice off the top of the root and level off its bottom. This will ensure that it won’t rock around while you are trimming it. Holding your knife perpendicular to the root, shave or slice off the outer gnarled surface. You should be left with a clean, peeled root.

For another helpful video, I refer you to Gourmet Magazine.

Now you need to julienne the celery root. This can be accomplished most effectively by using a mandoline. If you don’t have one, or do have one but are too lazy to look for it like me, you can use a sharp knife again for the job. To julienne the celery root, cut very thin slices of it, stack the slices up and cut them into matchsticks.

Melissa Clark demos this here.

For the dressing, gently stir together 4 tablespoons of crème fraîche for every one tablespoon of Dijon mustard. That’s the ratio that I used, but you can increase the amount of mustard if you want your dressing to have more of a kick. Adjust the seasoning if necessary.

Using your hands, toss the julienned slices of celery root with the dressing.

5. Prepare the grill. Brush it with oil and get it nice and hot. Cook the beef heart slices until they are medium. Henderson says about 3 minutes per side, but mine cooked faster than that. I would say to just watch them and pull them off the grill when they are ready.

To serve, plate a few slices with a nice mound of celery root slaw.

Mustard-Butter Chicken and Roasted Savoy Cabbage

Thank you, Hannah!
I cannot take credit for this meal; that distinction belongs to the amazing Hannah over at Inherit the Spoon. For about a year now (or maybe it has been longer — I’m getting forgetful), I have been following this her adventures in life and in the kitchen. I have admired her commitment to eating local, and providing a nutritious and delicious table for her family.

Recently, she published recipes for roasted Savoy cabbage and mustard-butter chicken. The minute I read them, I knew that I had to make them soon.

The meal was incredible and incredibly easy. If I wasn’t smitten with Hannah’s blog before, I definitely am now!

As I cannot write better than Hannah herself, I will direct you to her post here for step-by-step instructions on how to prepare both the cabbage and the chicken. I agree with Hannah that you should take your time and let the cabbage get dark and crispy; it really is best that way.

Thank you, Hannah!

Mercimek köftesi (Turkish Red Lentil Balls)

Detox with me!
This is a recipe that was passed along to me as part of a French assignment created for my friend Ipek last summer. I held onto it for months and months, waiting for the perfect moment and time. Then, darling Siobhan from Garden Correspondent rolled through New York, bringing with her good cheer, high spirits, and a liter of delicious Turkish olive oil!

Which, of course, helped to push Ipek’s recipe to the top of the list of things to make.

Unfortunately, everything on that list languished while other parts of life took priority over blogging. However, following the overindulgence of the holidays, I thought something simple, healthful, and delicious was in order.

This recipe is so simple that I wondered if it would even be tasty. After forming the lentils and bulgur wheat-mixture into torpedo-shapes and balls,* I had additional doubts as to whether I would be able to finish eating them all. Then, something curious happened: each time I passed my fridge, I would dip into the quickly diminishing pile for a little fix of Turkish yumminess. Although initially dismissed as bland, I found myself craving the wholesome nuttiness of lentils gently accented with mild spice.

Ipek’s recipe states that you should serve Mercimek köftesi with lettuce. At first I was a little unsure what that meant. Was the lettuce mandatory garnish? Or were you supposed to wrap the köftesi in the lettuce?

My hunch was right: you are supposed to roll the köftesi in the lettuce and eat them like you would Vietnamese spring rolls. Without the fish sauce dipping sauce, of course.

Strangely, many recipes say to serve them on top of the lettuce with no mention of eating them together either.

So I suppose it is up to you!

Incidentally, Ipek tells me that there is an alternative version called Çiğ köfte. A peek at different recipes shows that it is fairly similar if not identical to Mercimek köftesi with the exception being that raw meat is used in place of red lentils. The meat is usually massaged by hand into the bulgur until the mixture is smooth enough to be shaped. Again, the lettuce appears to somewhat ornamental, especially in the case of this restaurant where the staff seems to have just stuck the leaves upright into a giant mound of raw meat and bulgur and called it a day.

For my money and food safety reasons, I will stick to the lentils!

* Or as Sharon put it, “Can I have some more turds and balls, please?” 🙂

Ingredients:

1 1/2 cups of red lentils, rinsed and drained

2 1/4 cups of water

1 1/2 cups of bulgur wheat

1 onion, finely chopped

1 tablespoon of tomato paste

1 teaspoon of ground cumin

1 teaspoon of Aleppo pepper flakes or red chili pepper flakes

4 tablespoons of olive oil

The juice of one lemon

1/3 of a cup of fresh parsley, chopped

Lettuce leaves

How to prepare:

1. In a large casserole or sauté pan, combine the rinsed lentils with 2 1/4 cups of water. Bring the lentils to a boil before lowering the heat to a simmer. Season the lentils while they cook.

2. Once the lentils are very soft, turn off the heat and add the raw, dry bulgur wheat. Stir very quickly to incorporate it into the lentils. Cover the mixture and let it sit for about 30 minutes.

3. Meanwhile, sauté the chopped onions in about a tablespoon of olive oil until they are golden.

4. After the bulgur wheat and the lentils have finished steaming, add the onions, the tomato paste, the remaining 3 tablespoons of olive oil, and the spices. Stir to combine well. Add the chopped parsley and the lemon juice to the mixture.

5. At this point, the lentil mixture should be cool enough to handle. Using your hands, form either small balls, or small torpedo-shaped logs. Let these rest in the refrigerator until cold.

Serve on top of lettuce leaves with lemon wedges on the side.

Miso Awesome Cookies

Who's so awesome? Miso awesome!
For my first post of the new year, I am going to wrap up the remainder of business from the last: my Miso Awesome Cookies!

Come to think of it, this post should actually be called:

Dr. Daisy or: How I Learned to Stop Worrying and Love the Cookie 🙂

(any Kubrick fans out there? anyone?)

When I entered the Brooklyn Cookie Takedown last month, my first thought was to make a truly trashy cookie packed with milk chocolate chips and Fritos. Doesn’t that sound awesome? Then Dave C. suggested the combination of dark chocolate and nori. Suddenly, the vision of an Asian cookie coalesced in my mind. I was unable to get the idea of an umami-amped chocolate chip cookie out of my head.

I went to the Japanese market that weekend and got shredded nori and white miso. I added them to a chocolate chip cookie recipe for which I swapped out the walnuts for soy sauce-roasted almonds. Et voilà!

I made inedible choco-chip seaweed hockey pucks 😦

That was my first attempt at baking cookies for the Brooklyn Cookie Takedown, one of nine.

Yes, dear Readers, it took me nine test batches to get the hang of this whole cookie business because I am really not a very good baker or cookie maker 😦

Actually, before the Takedown, I always took a pass on baking cookies because I was so bad at it! Once, I made a delicious double-chocolate chip cookie by accident. Unfortunately, in my excitement, I didn’t take notes on what I did. That experience will sadly never be replicated.

These are some of the reasons why almost all my cookie efforts prior to the Takedown did not work out:

• I never let the butter soften. That meant that whenever I tried to properly cream it, I would end up with butter blobs on the wall, on my glasses, in my hair, and sugar all over the floor.

• I never sifted the dry ingredients together because I was too lazy. I also never learned how to properly measure flour.

• I chronically overbaked because I could never shake the feeling that cookies had to be nice and golden on top. It works for chicken, why not cookies?!

• I would just use one cookie sheet, which meant that I was baking forever. Furthermore, I never let the sheet cool down before I plunked more cookie dough on top of it.

How did I improve?

After test batch #5, I decided to finally do it right. I started by hitting the cookbooks.

Here’s what I learned:

• Suck it up and sift 🙂 You don’t need to buy a fancy sifter, just a mesh strainer and a sheet of wax paper will do. You would never think it makes much of a difference, but it does.

• Instead of measuring flour by volume, weigh it. According to Cook’s Illustrated, one cup of all-purpose flour should weigh about 5 ounces.

• Cut cold, hard butter into small cubes. The butter will soften faster that way.

• Don’t overwork the butter. The longer you cream the butter and sugars together, the more air you beat into the fat. The more air that you have in your fat, the more your cookies will spread out while baking.

• Eggs blend better when they are at room temperature.

• Ideally, you should let your dough rest overnight in the refrigerator. Barring that, at least let the dough chill completely, about 3 hours. Properly chilled dough also helps ensure that your cookies don’t spread out too much.

• Do not overwork the flour. The longer you take combining the wet and the dry ingredients together, the tougher your cookies will be.

• Never arrange cookie dough on hot cookie sheets. The cookies will begin cooking on contact. Not. Good.

• Work with a minimum of 2 cookie sheets, that way you can have one cooling down while the other one is in the oven. To have four sheets is ideal because you can have two sheets cooling while two are baking in the oven.

• If you check the cookies and think that maybe you should leave them in a little longer, override your instinct and pull them out of the oven! They will continue to cook on their sheets for a few minutes more. (Thanks for the tip, Tomoko!)

• Like pancakes, be prepared to ruin the first batch as you adjust your baking times for your cookie size, cookie sheet material (light versus dark sheets), and oven (mine runs a little hot).

How I finally came up with my cookie recipe:

Now all this might sound elementary to you Awesome Cookie Bakers, but it was a revelation to me. Once I figured out what I was doing wrong from a technical standpoint, I made another batch of chocolate chip-nori cookies. You know what? They were disgusting! Now I know why there are no chocolate and roasted seaweed cookie recipes out there: they’re gross!

Back to the drawing board. Standing in the Japanese market again, I was trying to think about what else could go in a cookie. Wasabi peas? Why not! As wasabi is actually not a particularly strong taste, I swapped out the dark chocolate for white chocolate.

From the chocolate chip-nori hockey puck recipe, I kept the tamari almonds and the white miso paste.

From now on, I may always drop a dollop of white miso paste into my cookies. It doesn’t seem to add any noticeable miso flavor, but it definitely makes the taste of everything else in the cookie pop.

Even though this is the recipe for my not-award-winning cookies, I still feel like I won because I learned so much. I overcame my fear of baking, and I came up with something crazy that was also delicious!

Ingredients:

3 cups of all-purpose flour

1/2 teaspoon of baking powder

1/4 teaspoon of baking soda

2 sticks of butter (16 tablespoons), cut into cubes and at room temperature

1 1/4 cups of white granulated sugar

2/3 cup of light brown sugar, packed

2 eggs at room temperature

1/2 teaspoon of vanilla extract

4 tablespoons of white miso paste

4 teaspoons of wasabi paste

8 ounces of white chocolate chips

8 ounces of tamari almonds, roughly chopped

8-9 ounces of wasabi peas

How to prepare:

1. Sift together the dry ingredients.

2. In a large mixing bowl, cream the softened butter and the sugars together for no more than one minute.

3. Beat the eggs, one at a time, into the creamed butter-sugar mixture. Add the vanilla, the miso and wasabi pastes. Continue beating for another minute or two.

4. Using a stiff spatula, fold in the dry ingredients a little bit at a time.

5. Once all the dry ingredients have been incorporated, fold in the white chocolate chips, the chopped almonds, and the wasabi peas. Once the all the goodies are evenly distributed throughout the dough, cover the bowl with plastic wrap. Let it rest in the refrigerator for at least 3 hours, or overnight if you can.

6. If your heating element is on the bottom of your oven, move the oven racks to the top of it. Pre-heat the oven to 325°.

7. I used a melon baller to make smaller cookies for the competition, but if you want larger cookies, use a tablespoon or a small scoop. Drop the balls of dough about two inches apart on parchment paper-lined cookie sheets.

8. Bake the cookies for 4 minutes. Rotate the sheets 180°, moving the top cookie sheet to the lower rack, and the bottom cookie sheet to the upper rack. Bake the cookies for another 4 minutes. If your cookies are larger, you may need to bake them for a little longer. When the cookies are done, they should be just barely golden around the edges. The centers should be soft, but not raw. Take the cookies out of the oven and let them rest on the cookie sheet (they will continue to cook) for a minute or two before transferring them to a wire rack to cool completely.