Welsh Rabbit with Radish Greens


You can admit it: the title of this blog post made you want to speak like Elmer Fudd.

Because what’s better than a post about Welsh rabbit?

A post about wascally Welsh wabbit with wadishes! Specifically, wadish gweens!

You’re vewy, vewy welcome.

I was buying even more radishes at the market on Friday when I noticed that my hands and arms were itchy. Why? Because radish leaves have little prickles. They don’t sting, but they can irritate if you have sensitive skin. So while I was waiting in line, rubbing my hands and arms, my mind naturally drifted to stinging nettles — whose short season I seem to have missed completely. Then I started thinking that maybe radish leaves would be a good substitution for them in recipes.

The inspiration for this dish came, not from Bugs Bunny, but from from Nigel Slater‘s recipe for Welsh rabbit with nettles.

Welsh rabbit (also known as rarebit) is basically cheese on toast. The best cheese on toast that you will ever have. I’m not entirely sure of the origins of the name. I read that it was a term coined in the 18th Century by the English to make fun of the Welsh who had lots of cheese but little meat. But there seems to also exist an English rabbit, a Scotch rabbit and an Irish rabbit — none of which have any rabbit in them either. They are all just cheese on toast.

Technically, this should probably be called American rabbit — specifically New Hampshire rabbit because the Welsh-style cheese that I used is made New Hampshire, USA at Landaff Creamery. Landaff Creamery is named after the Welsh hamlet of Llandaff, just to the north of Cardiff. I’m not quite sure why they lopped off the extra l. Maybe there was some kind of international branding issue. Or maybe it’s because the difficult to pronounce Welsh double l supposedly gets lopped off by Welsh capital dwellers, and the creamery’s owners figured that if it was too hard for them, it would be impossible for us. My cheesemonger didn’t seem to have any trouble pronouncing it as if it had double lWhere did he learn that?!

Ingredients:

About a cup of radish leaves, washed

Olive oil

2 tablespoons of crème fraîche

1 teaspoon of grainy mustard

1/2 cup of crumbled Caerphilly, Caerphilly-like cheese or Cheddar (see here for more alternatives)

Freshly ground black pepper

Freshly grated nutmeg

2 slices of sourdough bread, lightly toasted on both sides (you can also use multigrain bread)

How to prepare:

1. Heat some olive oil in a medium saucepan over medium heat. When the oil becomes fragrant, add the radish greens to the pan along with about a tablespoon of water. Sauté the greens until they just wilted. Remove the greens to a colander to drain.

2. When the greens are cool enough to handle, gently press as much liquid out of them as you can. Roughly chop the leaves.

3. In medium-sized bowl, mix together the chopped greens, the crème fraîche, the mustard and the crumbled cheese. Season the mixture with freshly ground black pepper and freshly grated nutmeg to taste. Divide the mixture in half and mound it evenly onto each slice of toast. Arrange them on a large sheet of aluminum foil and place the toasts under the broiler until browned and golden.

Wild Spinach and Radish Green Spanakopita


It used to always kill me to buy a bunch of radishes and discard the leafy tops. I have never had the space to compost, so all of that plant matter would go straight into the trash.

It killed me every time until I found out that you can eat those radish greens and they are delicious.

Yes, you can eat them! Raw, they have a nice, spicy bite. Cooked, their flavor mellows and they taste warm and wonderful. Like the best tasting, silkiest spinach ever. To think that I was throwing them away for all those years!

They are a bit of a pain to clean since you have to fastidiously wash all the dirt and grit from the leaves and stems. It is worth it though.

When I saw wild spinach (also known as lambsquarter) at the Greenmarket, I immediately thought that spanakopita would be a great way to use both greens. When I think about Greek food, I think about the Greek landscape: scrubby in parts, dotted with wild herbs and craggy olive trees. There is something a little rustic about the combination of wild spinach and radish greens that fits my little Mediterranean fantasy (never mind the fact that there is nothing rustic about the Greeks; they are as polished and well-turned out as the Milanese).

Spanakopita is wonderful mix of greens and feta wrapped up in flaky phyllo dough. You can make these little triangles, or alternately layer the phyllo dough sheets and the filling in a ceramic dish to bake as a giant pie.

Some might be disappointed to see that I didn’t make my own phyllo. Does anyone really make their own phyllo anymore? I think the oft-repeated saying goes that a woman is good Greek marriage material when she can roll phyllo thin enough for her prospective husband to be able to read a newspaper through it. I don’t plan on being anyone’s Hellenic housewife any time soon, so store-bought phyllo dough it is!

Ingredients:

6 cups of radish greens, washed

6 cups of wild spinach, washed

Olive oil

1/2 pound of feta, crumbled

The zest of one lemon

Salt and pepper

A pinch of nutmeg

1 egg, beaten

6 sheets of frozen phyllo dough, completely thawed

1 stick of butter, melted

How to prepare:

1. In a large pot, heat some olive oil over medium heat. When the oil becomes fragrant, add the wild spinach to the pot along with a few tablespoons of water. Sauté the spinach until it is just wilted. Remove the wilted spinach with tongs to a colander to drain. Repeat this process with the radish greens.

2. When the greens are cool enough to handle, use your hands to gently squeeze and press as much liquid as possible out of the leaves. You will be amazed how much liquid there is. Try to be thorough; the less moisture there is in the leaves, the better your filling will be.

3. Finely chop the greens and put them in a large bowl. To the bowl, add the feta and the nutmeg. Stir everything together until the cheese is evenly distributed throughout the greens. Adjust the seasoning before adding the beaten egg.

3. Preheat the oven to 375°.

4. Fold the phyllo sheets in half lengthwise and cut them in half. Fold each half lengthwise and cut them in half again. Each phyllo dough sheet will give you 4 long strips of dough. Cover the strips snugly in plastic wrap. Working one strip at a time, make the spanakopita. Gently brush each strip with melted butter. Starting at one end, put a dollop (about a scant tablespoon) of filling in the upper corner. Fold the phyllo dough down over the filling to make a triangle. Now fold the filled triangle up. Continue to fold the strip into triangles, like folding an flag (or at least how we Americans fold a flag). Don’t worry if the folds aren’t perfect. Working with phyllo can be very forgiving because you can always make the uneven edges stick to main triangle with more butter.

If you want crunchier spanakopita, you can layer two strips of phyllo dough together with brushed butter and then fold the triangles up as you would with one strip. Just remember that you will need double the number of phyllo dough sheets in this case.

Continue folding with the remaining strips of phyllo dough. Arrange the completed triangles in a single layer on a parchment paper-lined baking sheet. You should end up with 24 filled triangles total.

5. Brush the triangles with the remaining melted butter. Bake them for 20-25 minutes until they are golden and crisp. Serve hot.

Variation:

I had planned on adding about 1/4 cup of fresh dill, a 1/4 of a cup of fresh parsley and a 1/4 of a cup of freshly chopped green onions, but I got distracted by a terrible werewolf movie on television called Blood and Chocolate. I think lost brain cells! It wasn’t even corny, or cheesy or cool in a bad cult-movie kind of way. It was just bad.

Finnish Ruis Bread Topped with Sliced Radishes and Soft Butter


I ate my first radish after watching Shelley Duvall’s Faerie Tale Theater. Do you remember that series? Maybe it was a little dark for children, but I loved it and thought Shelley Duvall was the bomb as Rapunzel.

If you remember the story, it all starts when Rapunzel’s mother develops a serious pregnancy craving for radishes, specifically the radishes topped with blue leaves growing in her neighbor’s garden. Unfortunately, instead of just going next door and asking the neighbor for some radishes, or even offering to pay for the radishes, her husband decides that he is going to scale the garden wall in the middle of the night and steal them.

If it had been Texas or Florida, he would have just been shot on sight, but since it’s Faerie Tale-land, the neighbor just takes their first-born.

Did I mention that she’s a witch?

That really got my 7 year-old brain working. What food would be so good that it would cause you to ignore common sense (don’t break, enter and steal from witches)? I had to get one of these radish-things. They must, I thought, be amazing!

After pestering my parents, they finally came home from the market with a nice bunch of radishes. They were so pretty: bright red on the outside and snowy white on the inside. No blue leaves, but I could deal with the thought of that particular variety being unavailable at our local supermarket.

I put one in my mouth, chewed . . . and spat it right back out. Blech! Stupid fairy tale!

I pretty much avoided radishes after that until I was 14 and was served them in France. Not wanting to be impolite, I followed my host family’s lead and slathered the offensive root with butter before popping it in my mouth.

Imagine my shock: the radish wasn’t offensive at all. It was . . . delicious!

And I have loved them ever since.

These little toasts can hardly be considered a recipe; they are just something that I love to have for lunch when radishes are in season. I really like using Finnish Ruis bread made by NYC-based Nordic Breads (the best Ruis bread ever). Nordic Breads ships their rounds anywhere, but in a pinch, any good rye bread will do as long as it is sliced thinly.

I’m not paid to say this about Nordic Breads at all, I just think their bread is wonderful 🙂

Ingredients:

Finnish Ruis bread, or any thinly sliced good rye bread

Radishes, thinly sliced

Good soft butter

Good sea salt

How to prepare:

1. If using Finnish Ruis bread, cut each round into halves or quarters before splitting them through the middle. Toast the bread and let it cool completely.

2. When the bread is cool, spread the soft butter evenly over the top of each piece. Arrange the sliced radishes on top and sprinkle them with good, flaky sea salt. Eat immediately.

Corn Meal-Crusted Soft-Shells Crabs


Do you like crab?

Would you like crab even more if it was easier to eat?

Do you like your food fried?

If you answered “yes,” soft-shell crabs are for you!

And from now until the end of summer is the time to go out and get some.

Soft-shell crabs are freshly-molted blue crabs that are plucked from the water and put on ice before their shells harden up. They are delicious. Blue crab meat is sugary sweet and you can eat the whole animal right after it molts, shell and all.

Admittedly, the first time that I cooked a soft-shell crab, I was a little squeamish. I mean, how can you not be? Ideally, you should bring the suckers home alive, but it’s pretty hard to determine if they are dead or not because freshly molted crabs never look alive . . . until they swivel one of their telescopic eyeballs in your direction. Aaaaah!

Ideally, you should clean and trim them yourself, but I don’t fault anyone for having their fishmonger do it for them. If your fishmonger trims and cleans your crabs for you, you should cook them the same day that you buy them.

To properly trim and clean a soft shell crab, first you need to snip off those swivelly eyeballs by removing its face with a good pair of scissors. Then, you need to trim the tail off its backside. Finally, you have to gently separate the top shell from the bottom shell on both sides of the crab to rip out its lungs. Why do you have to do this? Because the lungs taste disgusting, you don’t want to eat the gucky stuff in and around the tail, and if you don’t remove the eyeballs, they can explode during cooking and injure you.

I just sold you on them, didn’t I?

But prepping soft-shell crabs is really pretty simple and not as bad as I made it sound. The rewards far outweigh any ickiness. Soft-shell crabs taste wonderful and they are a quick, elegant meal to put together.

A word on frying them: make sure that your frying fat is nice and hot. Test it by sprinkling a little flour into the fat. If it sizzles and turns golden, you are ready to cook yourself some crab. Keep your frying fat hot by not overcrowding the pan. If the temperature of the oil drops, your crabs will be soggy and greasy instead of crispy and light. If you are making soft-shell crabs for a crowd, fry them in batches and keep them warm in a 300° oven on a wire rack-topped baking sheet.

Many people like to serve soft-shell crabs with a remoulade or some kind of spicy mayonnaise. If it’s prime soft-shell crab season, I like to let the sweet crab meat shine on its own with just a shower of good finishing salt and a spritz of lemon.

Ingredients:

1/4 cup of yellow corn meal

1/2 teaspoon of kosher salt

1 pinch of cayenne pepper

2 soft shell crabs, trimmed and cleaned (you can watch Bittman demo it here)

4 tablespoons of butter

2 tablespoons of olive oil

Lemon wedges

How to prepare:

1. Combine the corn meal, the salt and the cayenne pepper together in a large shallow bowl or plate.

2. Heat the butter and olive oil together over medium-high heat in a large cast-iron skillet. When the butter begins to foam, rinse each crab with water and dredge it through the corn meal mixture. Gently shake off any excess corn meal and add the crab — top side-down — to the pan. Repeat with the other crab.

3. Fry the crabs until they are browned and golden, about 3-4 minutes per side. They should be plumped up and firm when they are done. When the crabs are finished cooking (they will not take longer than 8 minutes total), remove them to a paper towel-lined plate to drain for a minute or two before serving.

Serve with a spritz of lemon and a sprinkle of good salt.

Kale Paneer


I can’t take credit for this recipe. That honor goes to the amazing Tahmina at Kolpona Cuisine whose recipe for Saag (Palak) Paneer gave me a delicious way to polish off the remainder of my giant pile of kale. The only changes that I made were to A) use fresh kale instead of spinach, and to B) forget to add the fenugreek leaves. I only realized that they were missing after I started eating 😦

Next time, I will follow Tahmina’s lead and make my own paneer. I bought it this time for the sake of convenience. I also didn’t think that fresh kale would release more liquid than fresh spinach when cooked. I should have compensated by reducing the amount of water that I added to the dish.

This was really, really good. So good that I ate it with piles of white rice! And Tahmina, you like it spicy! Thank goodness, because I like it spicy too 🙂

Thanks for the great recipe; I loved it!

Kale Pesto with Whole Wheat Fusilli


What’s a girl to do when faced with too much kale and too little time? Make pesto!

When it comes to something like pesto, it’s hard to say that anyone has proprietary claims to any one recipe. I did look at this recipe on Tastespotting and this recipe on Food 52 for nut-cheese-oil ratios. In all honesty, I have so much kale on hand that I threw those proportions right out of the window. I just kept tinkering and measuring until I had a sauce that was so good, I wanted to eat more and more of it.

Kale has a clean, bitter flavor that I think pairs better with walnuts than pine nuts. When using walnuts, I like to also use walnut oil. Some Meyer lemon zest keeps the sauce nice and fresh. You can also zest a regular lemon if Meyer lemons are not available to you. If you don’t want to emphasize kale’s refreshing bitterness, you can use just olive oil. It will still taste great.

Kale pesto has an earthier flavor than basil-based pestos, and that flavor demands a heartier pasta like whole wheat. Fusilli is always a good choice for pesto because the spirals catch and capture the sauce beautifully.

It’s always a good idea to toss pasta and pesto together in a separate bowl. You don’t want the Parmesan in the sauce to burn and stick to the bottom of a hot pot or pan. The warm pasta — plus a little of the hot pasta cooking water if needed— will loosen the sauce up without the need for any external heat.

I am looking forward to eating my kale pesto in other ways this week, like on pizza or in lasagna. I hope it freezes well too because I made a lot of it!

Ingredients:

1 pound of whole wheat fusilli

2/3 of a cup of walnuts

2 cloves of garlic

2/3 of a cup of freshly grated Parmesan

The zest of 1 lemon

5 cups of washed and torn kale leaves, no stems and no ribs

1/2 cup of olive oil

1/2 cup of walnut oil

Salt

How to prepare:

1. Preheat the oven to 350°.

2. Spread the walnuts out in an even layer on a baking tray. Bake the walnuts until they are nicely toasted. This can take between 6-8 minutes. Be very careful to not let the walnuts burn. Let them cool before making the pesto.

3. While the walnuts are cooling, bring a large pot of salted water to a boil. Cook the pasta until it is al dente, about 12 minutes.

4. While the pasta is cooking, combine the garlic and walnuts together in a food processor with some salt. Add the Parmesan and the lemon zest. Pack all the kale into the food processor bowl and with the processor running, slowly drizzle in the olive and walnut oils. Continue to process everything until you have a smooth and creamy sauce. Adjust the seasoning.

5. When the pasta is cooked, drain it and pour it into a large bowl. Add the pesto, a dollop at a time, until the pasta is nicely and evenly coated. Serve immediately.

Spicy Braised Kale and Mushroom-Topped Polenta with Poached Goose Egg


In a fit of health consciousness, I went a little crazy at the market and bought several large bunches of local kale. When washed, it amounted to more than 30 cups. Yes, you heard that right: 30 packed cups of kale!

I love kale, but this was a little much even for me. Kale has been going into everything lately from eggs to potatoes, from soup to salad. But no matter how much kale I use, the pile doesn’t seem to diminish much. It’s the neverending pile o’ kale!

I took advantage of this kale-pportunity to try out another way to make polenta. Polenta is one of those things that is just elemental, like roast chicken or omelets. There are a million ways to make polenta. You can make it in the oven, the slow-cooker, the microwave or on the stove. You can cook it for 15 minutes or hours. You can spread it out onto a sheet pan and cut the hardened polenta into squares. You can deep-fry leftover polenta. The smallest amount of corn meal seems to make mountains of polenta. It’s a polenta-palooza!

Great to pair with the neverending pile o’ kale, no?

This polenta-making technique is from those fiddly folks at Cook’s Illustrated. It only takes 30 minutes of minimal whisking to achieve creamy polenta perfection.

And, as you can see, my CSA has goose eggs! Which are big honking suckers 😉 The equivalent, more or less, of two chicken eggs. There are a million ways to poach eggs too, but lately I have been liking Food52’s Control-Freak Poaching Method.

Ingredients:

For the polenta:

6 cups of water or stock

Salt

1 1/2 cups of yellow corn meal

4 tablespoons of butter

1/3 – 1/2 of a cup of grated Pecorino Romano or Parmesan

For the Spicy Braised Kale and Mushrooms:

2 tablespoons of butter

Olive oil

2 garlic cloves, finely minced

8 ounces of white button mushrooms, sliced

Salt and pepper

Red chili pepper flakes

1/4 cup of dry white wine

6 cups of roughly chopped kale

For the poached eggs:

Water

Salt

1 goose egg per person

How to prepare:

1. In a large, heavy Dutch oven, bring the 6 cups of water or stock almost to a boil with the lid on. Uncover the pot and season the water or stock with salt. Vigorously whisk the corn meal into the liquid a little bit at a time. As you whisk, be sure to get in all the corners and edges of the pot with the whisk to ensure that there are no lumps. When all the corn meal has been added to the water, cover the pot again and reduce the heat to low. Let the polenta simmer, stirring every 5 minutes, for 30 minutes total.

2. In the meanwhile, melt 2 tablespoons of butter with a little bit of olive oil in a large skillet set over medium heat. When the butter begins to foam, add the minced garlic and the mushrooms. Sauté the mushrooms until they give up most of their liquid and begin to turn golden. Add the white wine and as many red chili pepper flakes as you like. Season the mushrooms with salt and pepper. When the liquid has reduced to almost a glaze, add the kale to the pan and cover the skillet. Let the leaves wilt completely before stirring the kale and mushrooms together. Adjust the seasoning for a final time and remove the pan from the heat.

3. After 30 minutes, your polenta should be done. Move the pot away from the burner and vigorously whisk in the butter, one tablespoon at a time, until it has all been well-incorporated and the polenta is creamy. Stir in the Pecorino or Parmesan and adjust the seasoning.

4. In a medium-sized saucepan, bring about 4 to 5 inches of salted water to a near simmer. Carefully crack a goose egg into a small fine-mesh strainer. You want to separate the yolk and the more solid part of the white from the more watery part of the white. Carefully pour the egg into a large, shallow spoon. Gently lower the spoon into the water. Use another spoon to catch any bits of white that try to escape. When the egg is perfectly poached, the white should be opaque and when you gently move the egg back and forth, the white and the yolk should move in sync. When the egg is done, lift it out of the water and very carefully roll it onto a paper towel-lined plate.

5. To assemble the dish, spoon out about half a cup of polenta into a large, shallow bowl. Top the polenta with about a third of a cup of the spicy braised kale and mushrooms. Carefully position the poached egg on top of the braised kale and drizzle everything with good olive oil. Serve immediately.

Mascarpone-Polenta Cake with Rhubarb and Meyer Lemon


I wish that I was more of a baker. Unfortunately, my baking past is littered with all kinds of baking misfortunes: lumpy cakes, leaden cakes, cracked cakes, dry cakes, lopsided cakes, burned cakes, burned cakes with runny centers, runny cakes with charred tops. The list is unfortunately long!

I think it must be related to the fact that, when it comes to recipes, I am incorrigible: I rarely follow them to the letter. It doesn’t help that I am generally inclined to eyeball amounts instead of dirtying up another measuring cup or spoon. This is fine for regular cooking, but kind of disastrous when it comes to baking.

So when I decided to try to come up with my own recipe for a polenta cake with mascarpone that would make use of the first of this season’s rhubarb, I was pretty nervous.

Thankfully, it came out beautifully. The cake had a wonderfully moist and tangy crumb that beautifully complemented the rhubarb’s tartness. The idea of arranging the fruit (or vegetable? I guess rhubarb actually a vegetable) on the top of the cake batter comes from Nigel Slater’s Blueberry-Pear Cake from his Kitchen Diaries.

One more thing: be sure to remove any leaves from your rhubarb stalks before cooking. Only the stems are edible. The leaves contain oxalic acid that can make you pretty sick. It goes without saying to keep your animals away from rhubarb. More for you, I say. What a delicious way to live dangerously!

Ingredients:

About 2 1/2 cups of rhubarb, washed, trimmed and sliced into 1/2 inch pieces

1 cup of brown sugar, plus an additional 1/4 cup

8 tablespoons of butter (1 stick), softened

1 egg

3/4 cup of mascarpone

The zest and juice of one Meyer lemon

1 cup of all-purpose flour

1 cup of yellow corn meal

3/4 teaspoon of salt

1 teaspoon of baking powder

1/4 teaspoon of baking soda

How to prepare:

1. Line the bottom of a 9-inch springform pan with parchment paper. Butter the sides.

2. In a medium-sized bowl, toss the rhubarb with 1/4 cup of brown sugar. Let the rhubarb sit for about 30 minutes.

3. Preheat the oven to 350°.

4. Sift the dry ingredients (the flour, the corn meal, the salt, the baking powder and the baking soda) together into a large bowl.

5. In another large bowl, cream together the remaining cup of brown sugar and the softened butter. Add the egg, followed by the mascarpone, the lemon zest and the lemon juice. Continue beating the mixture until it is nice and fluffy. Beat in the dry ingredients, a little bit at a time, until they are well-incorporated into the batter.

6. Spread the batter out as evenly as possible onto the bottom of the springform pan. It will be thick. Arrange the rhubarb by pressing each piece into the batter in concentric circles. Bake the cake for about 1 hour and 30 minutes, until the top is golden and the center has set.

Let cool before slicing and serving.

Moroccan-Style Brisket with Green Olives and Preserved Lemons


When I was an undergraduate, I had friends who could subsist on Cheerios and skim milk for the whole semester. I could never do that. First of all, I didn’t want to contract scurvy, beriberi or any other kind of disease caused by a vitamin deficiency. Secondly, the combo of cold cereal and low-fat milk remains heartbreakingly depressing and just plain unsatisfying to this day. Even after eating a big bowl of it, I still feel hungry.

Of course, those friends grew up and graduated to slightly more mature versions of “quick” meals like spaghetti and jarred sauce, or something with boneless, skinless chicken breast.

I don’t consider those to be very appealing either.

I like a meals. Real meals with real foods and real fats.

Having never been much of a snacker, I look forward to my two big square meals a day. I say two only because I still struggle to fit breakfast into my daily routine.

Believe me, if I were to have breakfast, it would be a square meal too!

What is a real meal to me? It doesn’t necessarily have to be a hot meal, but it has to be satisfying in a way beyond filling my empty stomach. I’m not looking for just the sensation of fullness. I want to feel fulfilled.

Lately, work has been overwhelming. My dissertation deadline is pretty much set for early August, which leaves me little time for much else but my good friends, weekly dim sum with my grandfather, and my parents.

But I will always make time for good food, cooking and even some blogging. Food is my passion. Cooking is how I decompress. Blogging keeps me social. Without it, I fear that I will start slinking around corners, stroking my pages and covetously purring, “MY PRECIOUS!”

Any LOTR fans out there 😉

In this period, I see nothing wrong with making something big and elaborate just for me. I can eat it for a week and feel nourished in both body and soul. This Moroccan-style brisket fit the bill this week. Preserved lemons give the brisket’s crowning sauce a distinctly delicious North African flavor. Preserved lemons can be a strong, but their strength mellows over time. This is why I would recommend that you make the sauce a day before serving the brisket. That way, the ingredients have time to meld together and their flavors can become rounder. Preserved lemons can now be found in many supermarkets and specialty stores. You can also order them online, but they are also ridiculously easy and inexpensive to make. Just remember to budget between 1-3 weeks of preservation time before they are usable. There are many recipes available online. This one and this one are good places to start.

Also, like any braised or stewed meat, brisket gets better over time. If you can resist the temptation of eating it straight out of the oven, let it cool and sit overnight in the fridge. It is also much easier to remove any fat from the surface of the sauce the next day.

This recipe is freely adapted from Joan Nathan‘s Foods of Israel Today. Her original recipe can be found more or less in its entirety here. It includes another recipe for preserved lemons.

Ingredients:

For the brisket:

1 3-3 1/2 pound beef brisket

3 cloves of garlic, thinly sliced into slivers

Salt and pepper

Olive oil

2 small onions, finely diced

1/2 teaspoon of ground turmeric

1/2 teaspoon of ground cinnamon

1 tablespoon of freshly grated ginger

2 bay leaves

1/2 cup of red vermouth

1 14.5-ounce can of crushed tomatoes

2 tablespoons of honey

1/2 cup of water

For the green olive-preserved lemon sauce:

2 small onions, finely diced

Olive oil

1 14.5-ounce can of crushed tomatoes

1/2 cup of water

6 ounces of pitted green olives

2 tablespoons of parsley, finely chopped

2 tablespoons of cilantro, finely chopped

2-3 preserved lemons, rinsed, flesh discarded, and peels finely chopped

Salt and pepper

How to prepare:

1. Blot the brisket dry with paper towels. If needed, trim the brisket of any excessive fat. Using the sharp point of a small paring knife, make shallow cuts all around the brisket and push slivers of garlic into the slits. Let the brisket sit uncovered on a wire rack for about 30 minutes.

2. Preheat the oven to 350°.

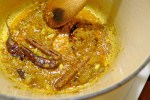
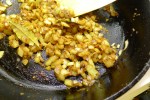
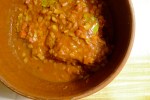
3. Season the brisket on both sides with salt and freshly ground black pepper. Heat about two tablespoons of olive oil over medium-high heat in a very large skillet. When the oil begins to shimmer, sear the brisket well on both sides. Remove the brisket to a large casserole or baking dish. Reduce the heat to medium and add the two finely diced onions to the skillet. While sautéing the onions, be sure to scrape up any tasty brown bits stuck to the bottom of the pan. When the onions begin to turn translucent, stir in the turmeric, the cinnamon, the ginger and the bay leaves. Cook the spices until they are fragrant (be careful to not let them burn). Deglaze the pan with red vermouth. Wait until most of the alcohol has cooked off before adding the tomatoes, the honey and half a cup of water. Let everything simmer together until it has thickened into a sauce. Adjust the seasoning and pour it over the brisket.

4. Cut a piece of parchment paper to just fit your casserole or baking dish. Completely cover the brisket with it and make a tight seal by pressing the paper down onto the meat and onions. Roast the brisket for about 3 hours, or until the meat is tender.

5. When your brisket is tender, remove it from the oven and let it cool completely in its sauce. If you can delay gratification, let it sit in the fridge overnight. This will make it much easier to remove any fat from its surface the next day. If that isn’t a possibility, try to skim as much fat as you can before moving forward.

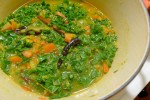
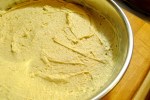
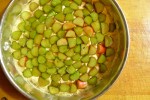
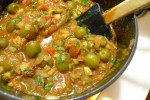
6. While the brisket is cooling, make the green olive-preserved lemon sauce. In a large saucepan, heat about two tablespoons of olive oil over medium-high heat until the oil begins to shimmer. Sauté the onions until they begin to turn translucent. Add the tomatoes and half a cup of water. Reduce the heat and simmer the sauce until it has thickened. Add the olives, the chopped herbs and the preserved lemons to the sauce. Let everything simmer together until the flavors begin to come together, about 5-6 minutes. Adjust the seasoning.

7. When the brisket has cooled completely, slice it thinly on a diagonal against the grain. Return the sliced meat to its casserole or baking dish and recover it with its sauce. Before serving, heat your oven to 350°. Cover the casserole or baking dish with aluminum foil and bake the sliced brisket for about 30 minutes, or until warmed through.

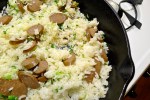
Serve the brisket on couscous and topped with the green olive-preserved lemon sauce.

Kimchi Fried Rice


“I never see you eat rice,” Laura said, “Ever.”

“That’s not true! I eat risotto! and paella! and biryani . . .”

But despite my protestations, it is true though: I am not a fan of plain, steamed white rice.

I am so un-Asian.

When people find out I don’t really like plain white rice, I generally get two reactions:

• From non-Asian people, they look at me as if I just told them I was born with six fingers on one hand and the extra digit was removed at birth. At this point, they usually tell me how much they love rice.

• From Asian people, they just ignore me. I don’t even think they hear the “don’t,” they just hear the “like white rice.” Because what Asian doesn’t like white rice? Inconceivable!

Plain white rice was the bane of my young existence. As a child, it was always just giant piles of tasteless filler stacked in sticky, unswallowable heaps in front of me. My parents used to make me finish all of my rice before I was allowed to leave the dinner table. I used to drive them crazy by eating my rice grain-by-grain until they finally gave up and sent me to my room — which is all I really wanted in the first place.

As I have gotten older, I have learned to eat it. Partly because it gives me something to chew on as I contemplate all the dishes spinning around the Lazy Susan. After really strong flavors, I have come to appreciate white rice as a palate cleanser. Also, a Chinese meal just feels incomplete without rice on the table, regardless whether I eat any or not.

There is one way to always get me to eat my rice: fry it.

But let’s be honest, I’ll eat just about anything so long as it’s fried 😉

Kimchi fried rice is a particularly good way to get me to eat rice because not only is it fried, it’s so far removed from bland, steamed white rice that I will happily accept it on my plate. For this, I threw in some amazing all-beef hotdogs from my CSA. I know that there are a lot of people who don’t like hotdogs, but I never wonder what is in the ones that I get from my farmer. If you are a vegetarian, or just don’t like hotdogs, you can leave them out. Or replace them with Spam 😉

It’s also traditionally topped with a fried egg, and who can resist fried food topped with more fried food?!

Kimchi fried rice calls for a nice dollop of Korean red pepper paste, or gochujangGochujang is one of the most common condiments/ingredients in Korean cooking and as such, is fairly easy to find in Asian supermarkets. I think the problem is that there are so many brands of commercially-made gochujang that it can be a little overwhelming as to which one to pick. This is why I love this post from One Fork, One Spoon. As Diane and Grace point out, it’s hard to shop for Korean ingredients if you don’t speak Korean! I certainly don’t, and really appreciated their tasting notes and photographs of labels and brand logos.

Ingredients:

1 tablespoon of butter

1 tablespoon of vegetable oil

2-3 hot dogs, cut into pieces

2-3 green onions, chopped

2 cups of cooked (preferably day old) rice, japonica variety preferred

1 tablespoon of sesame oil

2 cups of napa cabbage kimchi, roughly chopped

1 tablespoon of gochujang

Salt

1 egg per person

How to prepare:

1. In a large skillet, heat the butter and oil over medium-high heat until the oil begins to shimmer. Add the sliced hot dogs and the green onions. Cook the hot dogs until they are heated through and the green onions have softened.

2. Add the rice to the pan, breaking up any clumps with the side of a wooden spoon or a spatula. Evenly drizzle the sesame oil over the top of the rice and let it cook undisturbed for about a minute before stirring it.

3. Add the chopped kimchi and the gochujang to the skillet. Stir everything together until red pepper paste has been well-incorporated and the kimchi has been evenly distributed throughout the rice.  Adjust the seasoning. Lower the heat and spread the rice and kimchi out in an even layer over the bottom of the pan. Let it cook for a few minutes until the rice has become nice and crispy on the bottom. Stir the pan again, scraping the browned rice off the bottom of the skillet. Adjust the seasoning for a final time and divide the fried rice into bowls.

4. In a separate pan, fry up one egg per person. Top each bowl of kimchi fried rice with an egg. Scatter some chopped green onions on top and serve.