This recipe is not for the faint-of-heart.
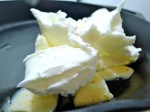
Your mission, should you choose to undertake it, will require Crisco. Lots of it. More, probably, than you have ever felt comfortable using. Gobs. Of. Crisco.
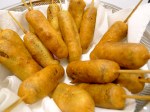
But the payoff is huge: the crispiest fried chicken you could possibly imagine. Chicken so shatteringly good, it explodes and leaves a healthy dribble of juice running down your chin.
Prior to this endeavor, I had never fried with Crisco. Previous experiences with hydrogenated soybean oil were either a scant quarter cup here and there while baking, or a light smear to periodically re-season my cast-iron pans.
That was before getting James Villas‘ amazing cookbook, The Glory of Southern Cooking, in which he makes a very cogent and convincing argument for Southern Cooking being one of the great regional cuisines of the world.
The book is a wonderful introduction to Southern charm and Southern hospitality, portraying the American South as a world of genteel manners and local thrift where casseroles are always given, silver chafing dishes abound, and Crisco is used liberally.
Very liberally.
This is not meant to diminish the value nor underestimate the diversity of Southern cooking, but simply to point out that at its heart, the bottom-line is that good food has nothing to do with calorie-counts or percentages of saturated fats. Good food is food that tastes good, like light and fluffy cakes, gooey and melty macaroni and cheese, and Crisco-fried chicken.
Villas’ recipe is less a recipe and more a series of guidelines to perfect frying. To attain perfection, you must:
1. Cut up your own bird (on High Point Farms’ website, there is a link to a Gourmet Youtube clip that must be the best one I have seen for teaching you how to do this).
2. Use cast-iron.
3. Use Crisco.
4. Never crowd the skillet.
5. Maintain the heat of the fat, except when the chicken is obviously burning (in which case, turn down the heat).
6. Never, never, never cover fried chicken after it is drained, unless you want soggy chicken.
And though frying an all-natural, pasture-raised chicken in fully-hydrogenated fat may outwardly appear to negate all the health benefits of eating free-range in the first place, at least you have the comfort of knowing that your chickens lived very happy lives before becoming crazy good and super delicious fried chickens.
Ingredients:
1 whole chicken, cut into pieces
Buttermilk
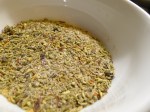
2 cups of flour
1 teaspoon of salt
Freshly ground black pepper to taste
Crisco
1 tablespoon of bacon fat
How to prepare:
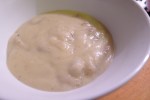
1. Place the chicken pieces in a large bowl, and add enough buttermilk to just cover them. Let the pieces soak for about 30 minutes.
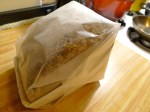
2. In a heavy brown bag, or a large Zip-loc bag, combine the flour, the salt, and the pepper together. Add the chicken pieces to the bag, one or two at a time depending on the size of your bag, and shake the bag vigorously so that all the pieces are evenly-coated with flour. Tap the excess flour off of each piece, and stack the pieces on a large plate.
3. Place a large cast-iron skillet over moderate heat. Melt together the bacon fat and a huge amount of Crisco. You want the skillet to be about half-full of melted fat. Continue to heat the oil until it comes up to temperature, about 350-375°, or when a drop of water flicked into the pan sputters loudly.
4. Start frying the dark meat pieces first. Arrange them in a single layer, making sure not to overcrowd the pan. Fry them until they are golden brown and crisp, about 15 minutes per side. You should turn the pieces only once. Drain the pieces on paper towels, and fry the white meat pieces last.
5. Transfer the pieces to a large serving platter (how Southern!). Do not cover the chicken pieces at all. Serve them warm, or at room temperature.