Jonathan Benno’s Pasta e Fagioli

Don't be a fool, eat yo' pasta fazool!
Nigella does what?!”

Steve from Gourmandistan shook his head incredulously and made a face.

She tells you to put all the fresh herbs in the foot of a nylon stocking and to leave the whole thing in simmering stock for an hour!

“Doesn’t it melt?!”

“Yeah. You would think!”

“That is disgusting.”

Agreed.

A few weeks ago, Steve was in town for the Roger Smith Cookbook Conference and we were talking “food blogger shop” at Roberta’s over craft beer and aioli-coated fried sweetbreads.

Shop that night included pasta e fagioli,

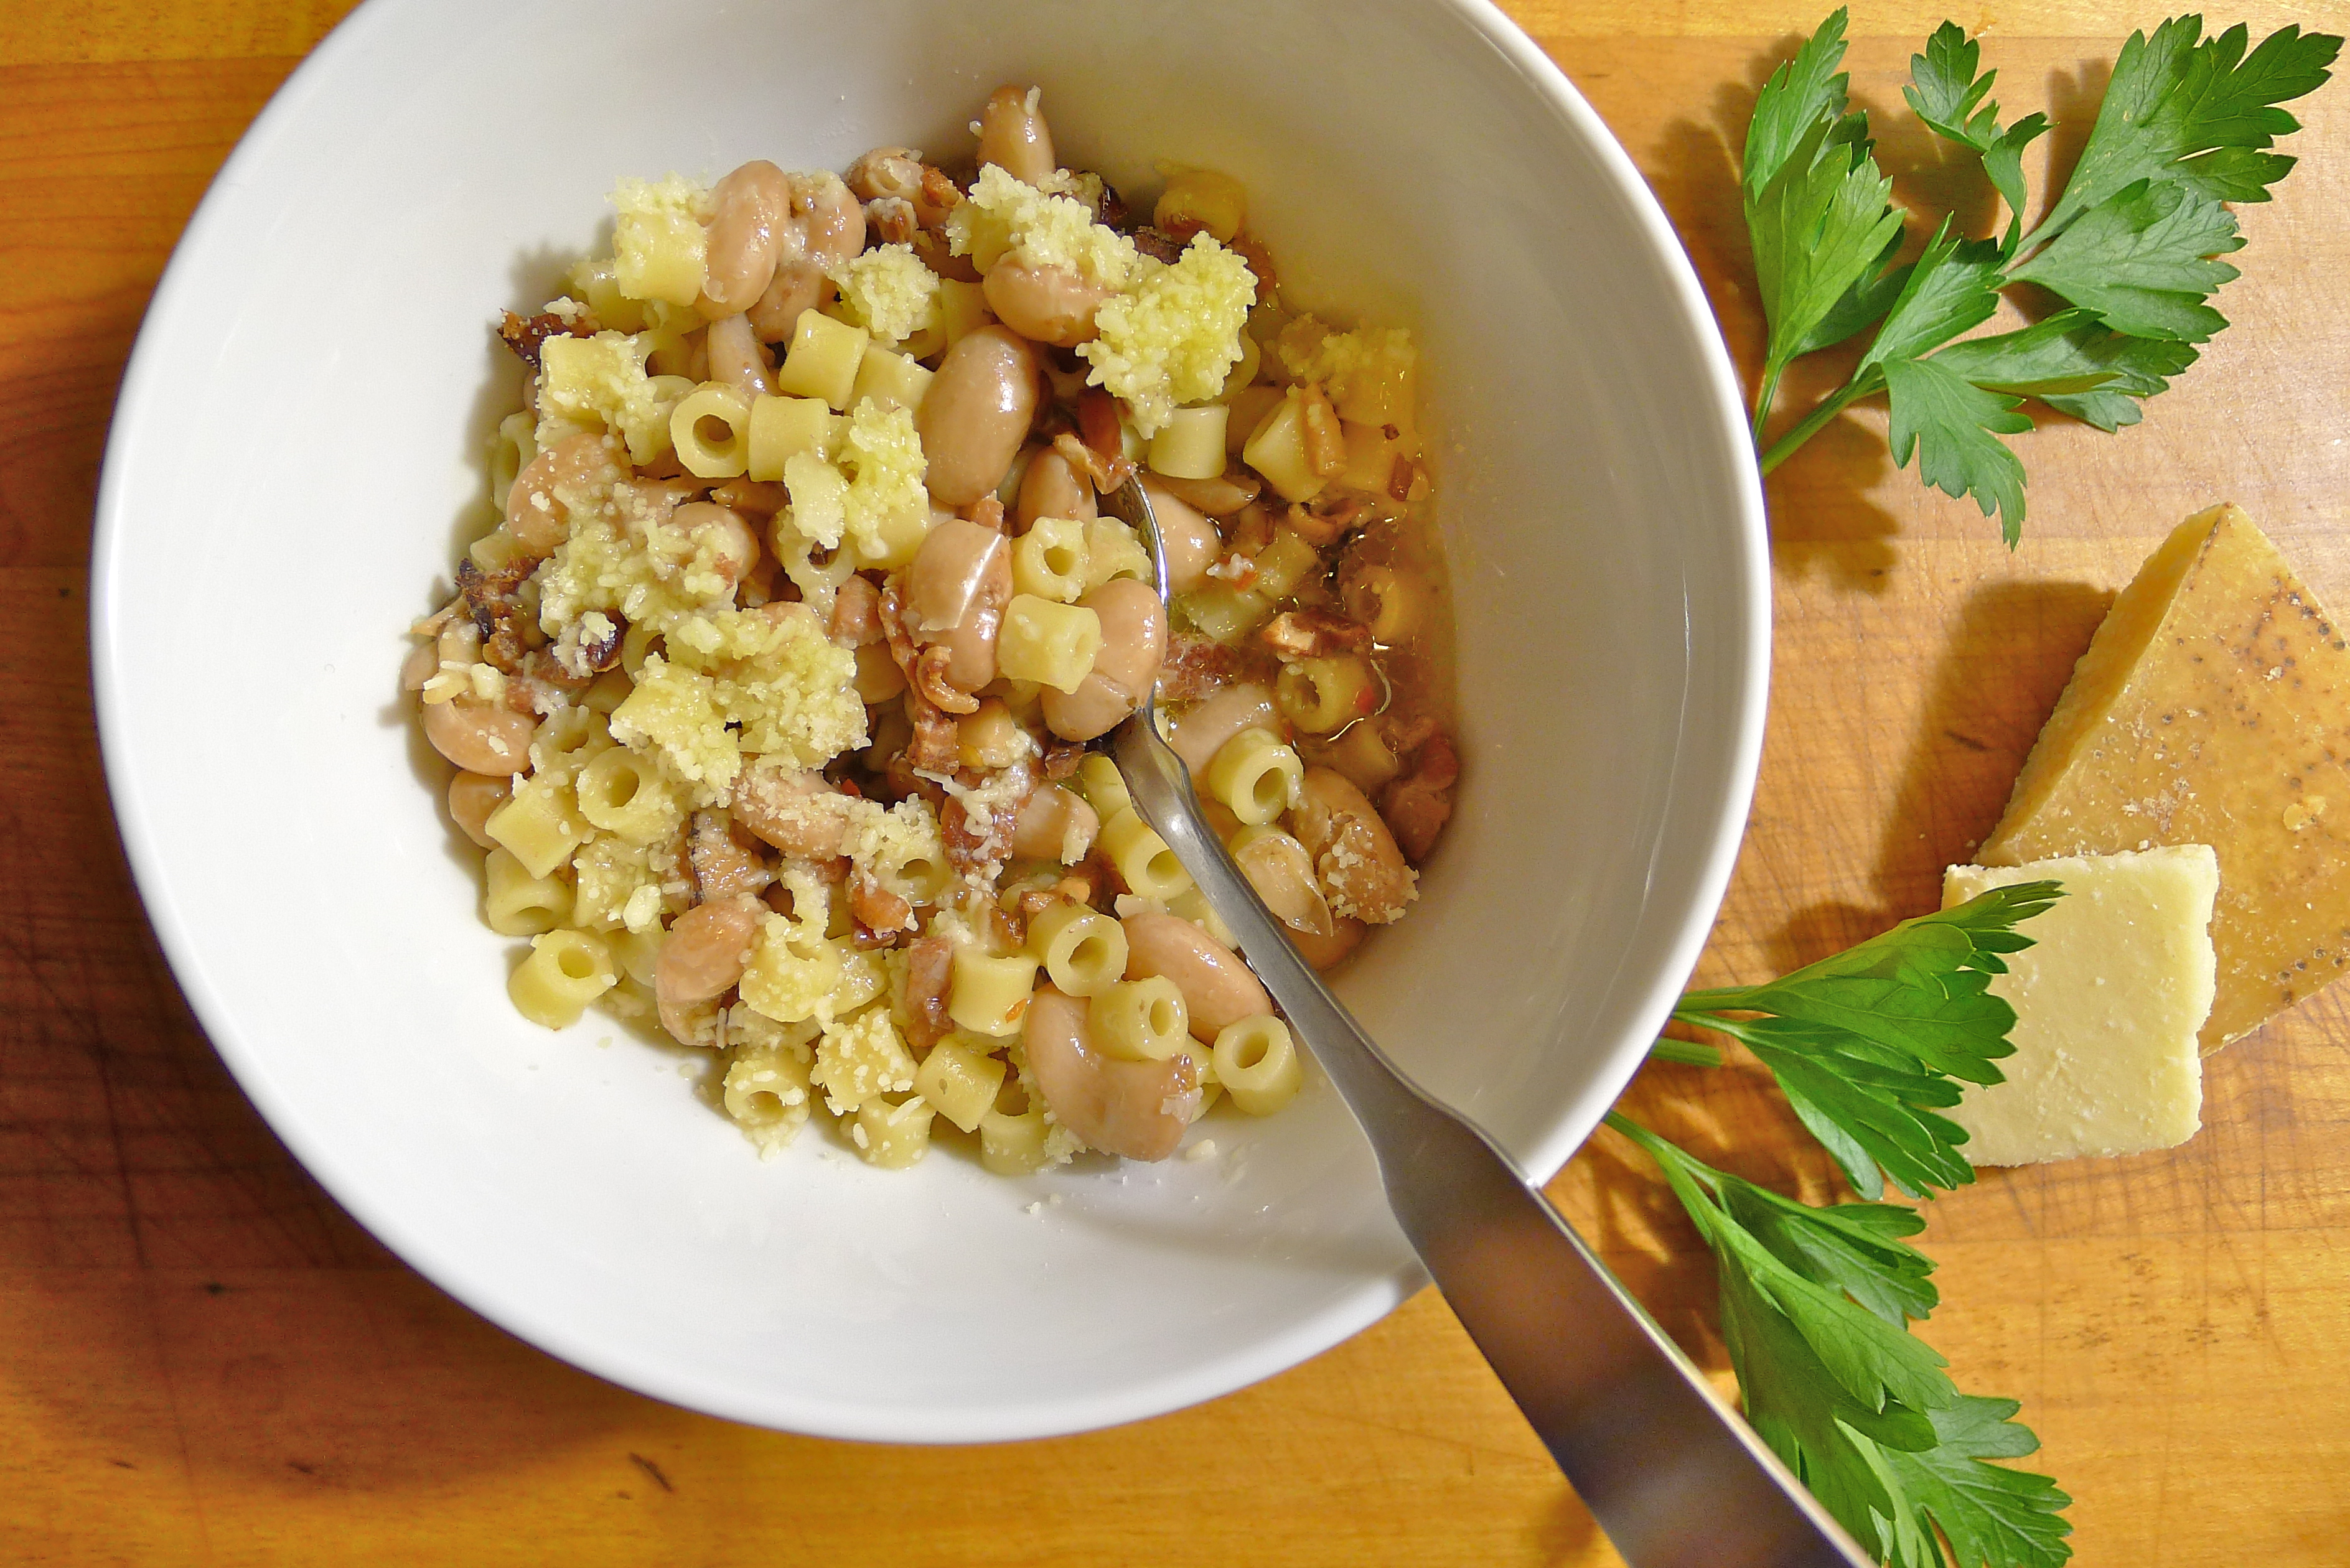
I love pasta e fagioli, affectionately known on these close-to-Jersey shores as pasta fazool. Translated simply as pasta and beans, the name of this humble Italian dish belies its power to soothe and satisfy. Pure alchemy occurs when the nuttiness of the beans Vulcan mind-melds with the pasta in rich rosemary and bay-scented broth. It is warm, wonderful comfort in a bowl and in these waning days of winter, it is the perfect dish.

My current favorite version of pasta e fagioli is from Mario Batali, who starts off his recipe by asking you to mash up a wad of fatback with the back of a spoon until you have a nice and smooth porky paste. Very Italian.

The subject of our mutual alarm was from British celebrity chef Nigella Lawson — not Italian at all. Although I like her writing, her recipes leave me cold . . . and extremely skeptical. Like this one for pasta e fagioli in which she asks you to use a “popsock” — also known as a knee-high nylon stocking — as a herb sachet instead of good, old-fashioned, food-safe, heat-resistant, and dependable cheesecloth.

Now I see the utility of bundling the aromatics used to perfume pasta e fagioli in a sachet; it makes it much easier to remove the spent herbs from the soup if you have them together. It saves you from the futilely fishing around for the gray and bitter spindles of rosemary leaves. However, I draw the line at rooting around in my sock drawer for kitchen essentials. Furthermore, Nigella includes the following sentence in her recipe: “Chuck out the corpsed popsock and its contents [after the beans are tender].”

Not yummy-sounding at all.

I am always on the lookout for a new variation on pasta e fagioli. Recently, New York Magazine published one from Jonathan Benno in which he solves the fresh-herb-removal problem by infusing the stock with Parmesan rinds and aromatics and then straining them all out before use. 

Brilliant!

Benno recommends soaking the dried beans for two days in the refrigerator instead of just one day on the countertop. I’m not sure if the additional day of soaking affects the taste, but I did notice that the beans cooked faster and more evenly. The beans were also creamier.

Heirloom beans are best, but regular old beans work just as well. Traditionally, borlotti beans — also called cranberry beans — are used in pasta e fagioli, but cannellini beans are a good substitute.

To Benno’s recipe, I have added bacon. Because I can never resist adding bacon to everything 🙂 You can omit it and the soup will still be delicious.

Ingredients:

2 cups of dried beans (preferably heirloom beans like borlotti beans or cannellini beans)

2 quarts of chicken stock (about 8 cups)

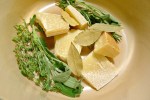
1 cup of Parmesan rinds

2 sprigs of fresh rosemary

2 sprigs of fresh thyme

2 sprigs of fresh sage

5 fresh or dried bay leaves

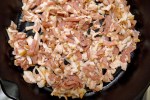
1 pound of bacon ends, chopped (optional)

1 teaspoon of dried oregano

1 teaspoon of crushed red pepper flakes

Salt and pepper to taste

1 1/2 cups of dried ditalini or another kind of small tubular pasta like macaroni

Extra-virgin olive oil

Freshly grated Parmesan

How to prepare:

This soup is not difficult to prepare. However, it does require some advanced planning. Be sure to read the recipe closely before beginning.

1. In a bowl large enough to fit the beans comfortably, cover them with about two inches of cold water. Soak the beans in the refrigerator for two days.

2. When the beans are done soaking, drain them.

3. Combine the chicken stock, the Parmesan rinds, the fresh herbs, and the bay leaves in a large pot. Simmer everything together for about an hour. Do not the let stock boil. Strain the stock and discard the Parmesan rinds and herbs.

4a. If using, brown the chopped bacon ends in a large skillet until most of the fat has rendered. Drain the bacon bits on paper towels.

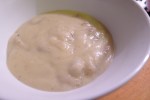
4b. Add the soaked and drained beans, the bacon if desired, the dried oregano, and the crushed red pepper flakes to the strained stock. Gently simmer the beans for between 1-2 hours. When the beans are done, they will be creamy in the center. Do not let the liquid come to a boil or the skins can burst. Skim the surface of the soup if and when necessary. Adjust the seasoning.

5. When the beans are tender, add the dried pasta to them. You may need to add more stock or water if the level of the liquid in the pot is too low. When the pasta is al dente, turn off the heat.

To serve, heap a generous spoonful of freshly grated Parmesan on top and finish the soup with a drizzle of good extra-virgin olive oil.

Advertisement

Smoky Chorizo and Chickpea Soup


Have you ever looked outside your window at the overcast sky and realized that the weather has officially turned chilly? That’s how I felt today when the cold morning light began filtering through my shades.

I always think that this kind of weather inspires a taste for spices and hot liquids. This soup, adapted from Food & Wine, certainly satisfies those cravings.

There is something about Spanish food that feels perfect for this season. Maybe it’s the colors, or the strong flavors of garlic and sherry. Maybe it’s the liberal use of pimentón, whose rich and smoky heat seems to combat the gloom of gray skies.

Pimentón is basically the Spanish version of paprika and comes in three varieties of varying heat: dulce (sweet), agridulce (bittersweet), and picante (hot). For general cooking purposes, I find agridulce to be just perfect, neither too mild nor too bitter.

For this recipe, I used chorizo from my CSA. Given that most of the sausages from my CSA are fairly lean, I didn’t cook the chorizo beforehand. However, if you have particularly fatty links, you might wish to sauté the chorizo pieces and drain them before adding them to the soup.

I also love how the recipe uses puréed chickpeas as a thickener. Sometimes I find that using flour to thicken soups, stews, stocks, and gravies can lead to slightly gluey results, and using tapioca is just weird.

Ingredients:

Olive oil

1 large yellow onion, finely chopped

2 large carrots, peeled, halved lengthwise and thinly sliced

2 fat garlic cloves, thinly sliced

3 teaspoons of pimentón or smoked paprika

1/4 teaspoon of cayenne pepper

4 tablespoons of tomato paste

1 pound of fresh chorizo, cut into 1/2-inch pieces

3 cans of chickpeas, drained, rinsed, and divided into two equal portions

4 cups of beef broth

Lemon wedges

Fresh parsley sprigs

How to prepare:

1. Purée the half of the chickpeas in a food processor until they are smooth. They will act as a thickener in the soup and give the broth a wonderful nuttiness.

2. In a large Dutch oven, heat about two tablespoons of olive oil over medium heat. When the oil begins to shimmer, add the onions and cook them until they just start to turn translucent. Toss in the carrots and the garlic. When the garlic becomes fragrant, add the pimentón, cayenne pepper, and tomato paste to the vegetables. Combine everything together, taking care not to burn the spices. Once the vegetables are evenly coated with the tomato paste and the spices, add the chorizo, the puréed chickpeas, the remaining whole chickpeas, and the beef broth. Adjust the seasoning.

3. Simmer the soup until the whole chickpeas are nice and tender. You will want to skim the surface of the soup periodically. Adjust the seasoning for a final time. Serve the soup in warm bowls, topped with fresh sprigs of parsley and lemon wedges on the side.

Mission Chinese Food New York


I have to admit to having something of a double standard when it comes to snapping pics of restaurant food and posting them on my blog.

On vacation, I will happily — nay, gleefully — take pictures of food. I will obnoxiously angle for the perfect shot, shoo away the anxious fingers of my dining companions, and blatantly ignore the wide-eyed stares of other patrons. The staff is generally stoic about my behavior. I find that they tolerate it even though I wonder if, when they talk among themselves, they wish that I wouldn’t do it.

I don’t care. I’m on vacation, gosh darn it!

However, I do care when it is in my own backyard. Taking photos of food in NYC turns shameless vacation-me into sheepish, overly apologetic local-me. When I take pictures of what I eat in New York, I always cringe a little inside.

Oh the hypocrisy!

Maybe the double standard comes from the fact that I will probably return to these restaurants. Or that wait staff seem to appear at one restaurant, and then they magically pop up at other ones, so that you end up seeing the same faces again and again. Or maybe it is because New York City is a mecca for photo-snapping foodies and like every other snooty local, I don’t want to be associated with a bunch of Yelpers.

What is it that they say about not peeing in the pool you swim in? Or not pooping where you eat? Something like that feeling.

However, I do make two exceptions. Like when friends are in town. “Take a picture!!!!” I will squeal. “I’ll take one for you!!!!! Let’s get the server to take a picture of us!!!!!!”

I just get so excited about their visit that I want to immortalize the moment in digital form, food included.

And sometimes, I just can’t resist taking pictures of what I eat when the food is exceptional. Really, truly exceptional.

Like it was at the newly opened Mission Chinese Food New York. This eagerly anticipated restaurant took over the cursed space left by Bia Garden, Michael “Bao” Huyn’s ill-conceived Vietnamese beer garden (note to prospective restaurant investors: don’t open a beer garden dedicated to a country that has no craft beer).

Mission Chinese New York is the first branch of Danny Bowien‘s famed and acclaimed San Francisco food destination Mission Chinese Food.

He was also in the house the day that I had lunch with my friend Kelly.

That lunch? Phenomenal. Just wow. Wow. It was . . . oh, man. It was good. Really, really good.

It was so good that I broke my no-photos-in-NYC rule.

In the words of the Mouse over at the blog, Live2EatEat2Live, the socks came off 😉

And for Mike over at testerfoodblog, this post is for you!

What we ate:

Szechuan pepper corn Micheladas

Fresh tofu poached in soy milk with broad bean paste, soy beans and sesame leaves

Thrice-cooked bacon with Shanghainese rice cakes, tofu skin, bitter melon and chili oil

Kung-Pao pastrami with peanuts, celery, potato and explosive chili

Wild pepper leaves with pressed tofu and pumpkin in salted chili broth

Where we ate:

Mission Chinese Food New York, 154 Orchard Street (between Rivington and Stanton), New York, NY 10002

* Mission Chinese Food also donates $0.75 of every main course to the Food Bank of New York City. So not only is Mission Chinese super good for getting your om noms on, but it’s good for the community too!

** Just a quick note to my dear readers, the dissertation has been a little overwhelming lately, so I might not be posting or commenting as frequently! Many apologies!

Split Pea Soup with Bacon Ends


A while ago, I was gifted a giant tub of bacon ends from a member of a different CSA. They languished in the back of my freezer until a deep spring clean last week.

Bacon ends are a terrific thing to have in the house — even if you’re like me and fall into the “out of sight, out of mind” camp. Just make sure that you have them somewhere you can see them at all times, a visual reminder that every dish is better with bacon.

Not only are bacon ends a good thing to always have on hand, but they are also much more economical than buying bacon strips. Chopped up and slowly browned, they make wonderful bacon bits. The rendered fat can be used in the place of oil or butter, or in anything that could be enhanced by some smoky porcine flavor.

And let’s be honest, what wouldn’t benefit from added porkiness?

People can sometimes be a little skeeved out by cooking with animal fat. However, so long as the pigs are pasture-raised by a farmer who follows organic practices, there should be no fear of needing Lipitor. Bacon fat from pasture-raised pork even has the added benefit of being a good source of vitamin D, making bacon fat certainly as good as butter!

I’m not saying that you should sit around the house and chow down on scoops of it, but a little bacon fat is much healthier for you than all those omnipresent, heavily-processed vegetable oils. My rule of thumb is that the more steps in processing it takes to get the food to your mouth, the less healthy it is for you. I would even go as far as to argue that it’s not even food at that point. This is why I always shake my head at people who buy low-fat foods because in order to make up for the taste and flavor deficit, those items are generally bulked up with tons of sugar — which might be worse for you than the fat.

Plus low-fat foods taste bad.

Anyway, no more ranting. Back to the soup!

Dried split peas scream for bacon! But if animals are not your thing, you can leave the bacon out and make the soup with smoked paprika instead.

Ingredients:

About 3 or 4 ounces of bacon or bacon ends, cut into small dice

1 small onion, chopped

1 large carrot, peeled and diced

2 stalks of celery, diced

1 pound (16 ounces) of dried split peas, picked over for small stones

2 bay leaves

4 cups of chicken or vegetable stock + 1 cup of water

Salt and pepper

Smoked paprika

Special equipment:

A hand-held immersion blender (optional)

How to prepare:

1. In a large Dutch oven, cook the bacon or bacon ends over medium heat with a little bit of olive oil until most of the fat has rendered. Reserve a few bits of bacon for garnish. Spoon off all but one tablespoon of bacon fat. Keep the bacon fat in a clean container in your freezer, and use it for other things like roasting potatoes, eggs, roasting chickens, anything really.

2. Add the vegetables to the pot. Let them cook until the vegetables have softened and the onion is translucent, about 5-7 minutes. Add the split peas and toss them with the vegetables until they are evenly coated with bacon fat. Add the bay leaves, the stock and the water. Bring everything up to boil, and then reduce the heat. Let the peas simmer until they are tender, about 45 minutes to an hour. Periodically skim the top of the soup of scum and grease. If the soup seems too thick, thin it out by adding more stock or water.

3. When the peas are tender, you can leave the soup alone if you like a chunky soup. I like to partially purée the soup so that it is creamier, but still has some interesting bits of vegetables and peas in it. This is super easy to do with an immersion blender. Just insert the stick blender into the soup and blend as much as you like. You can also transfer half of the soup to a regular blender or a food processor, then add the blended soup back to the unblended half. If you use a blender, keep your hand smacked tight onto the blender lid lest it go flying off, leaving your kitchen covered in pea soup spray. Adjust the seasoning for a final time, and thin the soup with stock or water again if it seems too thick.

Serve topped with a few of the reserved bacon bits, a dusting of smoked paprika and with some good, hearty bread.

Anthony Bourdain’s Mushroom Soup from the Les Halles Cookbook


I am always puzzled when I see bloggers declaim against those who try out and post recipes from other sources. It just feels kind of snobbish to me. Most, if not all food people read recipes. Food people tend to read a lot of recipes. Food people tend to own a lot of cookbooks too. A lot of food people also watch a lot of food TV.

This is not uncommon, and it strikes me as strangely inauthentic when people deny it. Furthermore, what’s so bad about it? Trying recipes from other people is a good way to learn different cooking techniques. Blogging about your experience lets others learn from you, just like you learned from them. Don’t you like the feeling that you are joining and contributing to the larger conversation? I do.

Also, there are a lot of recipes out there. What’s wrong with bringing some of those to the attention of another audience? I mean, don’t go out and plagiarize. Don’t pass off recipes that are not yours as your own. But why look down on people who properly attribute and discuss their results?

We all blog and write because we generally want to share our knowledge and experience. I personally would be thrilled if someone made and wrote about something that I posted so long as they did it respectfully — and I think that most bloggers would be pretty darn chuffed too.

Yeah, I know. I just used a British-ism.

More importantly, if you are trying your hand at writing recipes, looking at other sources is a great way to learn how to order ingredients and write directions in a way that is clear, concise, and consistent. Recipe writing is like any other kind of writing: you get better the more you do it, and the more you read.

To those who think that their recipes are completely original, well, please excuse my bluntness, but hardly any recipes are really original nowadays unless you are some molecular gastronomist making perfectly good food into weird foamy, jellied things.

Furthermore, no one I know who cooks ever sticks to any recipe as published anyway. I’ll confess: most of the time, I don’t. I’ll breezily skim the ingredients list, and cockily cook them in the order and manner that I feel works best, passing on anything that sounds untasty to me, and adding anything that I feel was an egregious omission.

How’s that for food snobbery?

For example, I remember the first time that I read this recipe from the Les Halles Cookbook. I remember poo-pooing Anthony Bourdain‘s admonition to blend carefully. I cavalierly shrugged off his archly written, “Do I have to remind you to do this in stages, with the blender’s lid firmly held down, and with the weight of your body keeping that thing from flying off and allowing boiling hot mushroom purée to erupt all over your kitchen?

Pshaw, I remember thinking. Not quite hogwash, but I had blended tons of thick soups, all at once without incident. I certainly wasn’t going to alter my MO now.

Then I remember the blender’s lid flying off — just like TV Tony said it would — and the kitchen being sprayed with hot soup and spongy bits of mushroom.

I remember having to google, “martha stewart how to clean hot mushroom soup off the ceiling.”

After cleaning everything up, I made a mental note to always read recipes straight through before cooking, and always respect any warnings the recipe writer may give.

I learned the messy way that recipe writers do not write warnings for their benefit, but ours. If Bourdain was making a point to tell me to keep a tight lock on the blender, it’s because he very likely sprayed his kitchen with mushroom soup too, cursing the other cookbook writer who failed to mention in their recipe to keep a hold on the blender lid while blending.

If you love mushrooms, this soup is not only super easy, but very, very delicious. The original recipe calls for onions, but I always prefer the ultimate combo of butter, shallots, and booze — which is one of the ways I adapted his recipe. Be sure to use a good sherry, not a cooking sherry for the soup. If you have time, you can roast a couple shitake mushrooms in the oven for garnish. I accidentally left mine in the oven for too long, ending up with mushroom chips that taste (amazingly) just like bacon. No complaints here!

I also use an immersion blender now, so no more flying blender lids for me!

Ingredients:

4 tablespoons of butter

2 shallots, thinly sliced

14-15 ounces of mixed mushrooms (you can even use all white button mushrooms if you want), cleaned, trimmed, and sliced

4 cups of chicken stock

2-3 sprigs of thyme

2 ounces of good quality sherry (I used a dry oloroso)

Special equipment:

A hand-held immersion blender

How to prepare:

1. In a large Dutch oven, melt two tablespoons of the butter with a little bit of olive oil over medium heat. Add the shallots and thyme. Keep track of how many sprigs of thyme you add so you know how many stems you need to remove before puréeing the soup. Sauté the shallots until they begin to turn translucent.

2. Add the mushrooms and the remaining 2 tablespoons of butter. Let the mixture sweat for about 6-8 minutes. The mushrooms should begin to give up most of their liquid at this point. Be careful to not let the shallots brown. Season with salt and pepper. Add the stock, and bring everything up to a boil. Reduce the temperature, and simmer the soup covered for about an hour.

3. After an hour, remove the stems of the thyme sprigs. Using an immersion blender, carefully purée the soup. Adjust the seasoning. Bring the soup back up to a simmer and mix in the sherry. You want to just simmer the soup long enough enough to cook off the alcohol in the sherry. Serve immediately with some good bread.

Dean & Deluca’s Middle Eastern Red Lentil Soup with Yogurt and Lemon


Lentil soups are great this time of year when the season is lean, and fresh local produce consists mostly of tubers and squash. Lentils are extremely economical. Added bonuses: they cook up quickly, and have a wholesome, delicious nuttiness.

This soup is adapted from one in the Dean and Deluca Cookbook. If you keep the spices and lentils on hand, you can quickly pull it together after school or work.

Start to finish, the soup should take you about 30 minutes to make.

Actually, it will take you about 20 minutes (I added an extra 10 minutes for you to enjoy a glass of wine).

Ingredients:

1 tablespoon of olive oil

1 tablespoon of butter

1 medium onion, finely chopped

1 1/2 teaspoons of ground coriander

1 1/2 teaspoons of ground cumin

1/2 teaspoon of ground ginger

1/2 teaspoon of mustard powder

9 ounces of red lentils

4 cups of chicken or vegetable stock + 1 cup of water

The juice and the zest of one lemon

1 cup of whole milk Greek yogurt, divided

1/4 cup of fresh parsley, chopped

Aleppo pepper for garnish (you can also use sweet paprika as a substitution)

How to prepare:

1. In a large Dutch oven, melt together the butter and the olive oil over medium heat. Add the onion and cook it until it begins to turn translucent. Add the spices to the onions, stirring frequently to make sure that the spices toast, but do not burn. Continue to cook the onion until it begins to turn golden.

2. Toss the lentils with the onions and the spices. Add the stock, the extra cup of water, and a heavy pinch of salt. Bring everything to a boil, and then reduce the heat to a simmer. Simmer the lentils until they are tender, about 15 to 20 minutes. Once the lentils are tender, add the lemon zest and half of the yogurt to the soup. Continue to simmer everything together until the consistency is nice and smooth. Adjust the seasoning.

3. In a small bowl, combine the remaining yogurt with the lemon juice and the parsley. Stir everything together until the consistency is smooth and silky.

4. Ladle the soup into bowls. Top each serving with a swirl of the yogurt mixture and a sprinkle of Aleppo pepper.

Avgolemeno Soup with Mini-Meatballs


After a few weeks of holiday food, I feel ready for a detox. I want light food, but since the weather remains kind of chilly, I want that “something light” to still be warm and nourishing.

This avgolemeno soup with mini-meatballs fits the bill perfectly. The broth is bright and punchy from the lemon. The texture is silky smooth from the egg yolks and the blended rice. The toothsome meatballs are delightfully dill-scented. And the soup is also a cinch to make — which feels refreshing after all those complex holiday recipes.

This recipe is adapted from one by Grace Parisi that appeared in Food and Wine.

Ingredients:

1/2 cup of long grain white rice

3 cups of water

Salt

1 pound of very lean ground beef

Freshly ground pepper

1/3 cup of white onion, finely chopped

1 tablespoon of fresh parsley, finely chopped

2 tablespoons of fresh dill, finely chopped

All-purpose flour

5 cups of chicken broth

2 large egg yolks

1/2 cup of fresh lemon juice

Special equipment:

A hand-held immersion blender

How to prepare:

1. In a large Dutch oven, cover the rice with 3 cups of water. Season with salt. Bring everything up to a boil. Lower the heat and simmer the rice until it is tender — about 15 minutes.

2. In the meanwhile, use your hands to combine the ground beef with the onion, the parsley, and the dill. Season liberally with salt and pepper. Form the mixture into 1-inch meatballs.

3. When the rice is done, drain the grains in a colander. Return the Dutch oven to the stove top. Heat the chicken broth in it over medium-high heat. When the broth starts to simmer, lower the heat to medium-low. Add the lemon juice to the chicken broth.

4. In a separate bowl, temper the egg yolks by whisking them together with a ladleful of hot broth. Whisk the tempered yolks into the rest of the chicken broth. Using a hand-held immersion blender, blend about half of the drained rice into the broth until the soup is smooth and frothy. Adjust the seasoning.

5. Raise the heat so that the soup comes back up to a simmer. Carefully skim off any foam that rises to the surface.

6. Dust the meatballs with flour. Knock off any excess flour before adding them to the soup. Simmer the meatballs until they are cooked through, about 8 minutes or so. You may need to continue to skim the surface while the meatballs cook. When the meatballs are done, add the remaining rice to the soup. Adjust the seasoning again.

Serve with sprigs of dill.

Pumpkin Soup with Chipotle Chili Purée and Pumpkin Seed Oil


A few weeks ago, I was possessed with the urge to buy an entire cheese pumpkin. Cheese pumpkin is somewhat of a misnomer as it is neither made of cheese, nor does it taste remotely cheese-like.

Cheese pumpkins actually have nothing to do with the cheese-making process.

Instead, the cheese in cheese pumpkin actually refers to its appearance as it resembles an old-fashioned cheese box. Okay, sure, boxes are square or rectangular, and cheese pumpkins are clearly not. But they are buff-colored, low and squat — just like unfinished wooden cheese boxes.

The cheese pumpkin is the classic Cinderella pumpkin. That wasn’t a sugar pumpkin that got turned into a carriage!

Cheese pumpkins are awesome. They have sweet, soft flesh that is hardly stringy at all when you cook them. They make amazing purées, soups, and smooth-as-buttah’ custards.

They are also huge. About 5 to 7 pounds for a small one, 6 to 10 pounds for a large one. Often at farmers’ markets, cheese pumpkins are cut up and sold in halves and quarters.

But I just had to have a whole one to myself.

So consider this Cheese Pumpkin Project #1, as I only used half of a small one for this recipe.

Ingredients:

For the chipotle chili purée:

1 7.5 ounce can of chipotle peppers in adobo sauce, reserving 2 peppers and 2 tablespoons of sauce

1 red bell pepper

1 teaspoon of sherry vinegar

1 tablespoon of honey

For the soup:

2 tablespoons of olive oil

1/2 a small cheese pumpkin, seeded, peeled, and cut into 1-inch cubes

1 medium onion, diced

2 cloves of garlic, minced

2 sprigs of fresh thyme

2 bay leaves

1 quart of chicken stock

1/2 cup of heavy cream

The reserved pair of chipotle peppers + 2 tablespoons of sauce

Salt

Pumpkin seed oil

Special equipment:

A hand-held immersion blender

A fine-mesh sieve*

How to prepare:

1. Heat the olive oil in a large Dutch oven over medium-high heat until the oil starts to shimmer. Add the onions. Sauté them until they lose their opacity and begin to turn translucent. Add the garlic and sauté everything together for about another minute. Toss the pumpkin cubes in the onion-garlic mixture for another minute or two until they are evenly coated. Add the stock to the vegetables. Tuck the thyme sprigs and bay leaves under the pumpkin cubes. Bring everything to a boil, and then reduce the heat so that the liquid is at a steady simmer. Cook the pumpkin until it is soft. You should easily be able to mash a pumpkin cube against the side of the pot with a wooden spoon.

2. Remove the thyme and the bay leaves. Add the 2 reserved chipotle peppers and 2 tablespoons of sauce. Using an immersion blender, blend everything together until smooth.

* If you, like me, prefer the look and mouthfeel of a perfectly creamy and even-colored soup unmarred by any specks of green from the thyme, or any red from the peppers, you can pass the soup quickly through a fine-mesh sieve. By sieving your soup, you improve the texture immensely. Cheese pumpkins are much less fibrous than other pumpkins, but they can still have some.

Stir in the heavy cream, and adjust the seasoning. While the soup is cooling a bit, prepare the chipotle pepper purée.

3. If you have a gas range, set the red bell pepper directly on the gas burner with the heat on high. Turn the pepper periodically to make sure that the skin chars evenly.

If you have an electric range, rub the bell pepper with olive oil and place it on a cookie sheet set underneath the broiler. You can also rub the pepper with olive oil and pop it into a 450° oven. Remove it when the skin is blistered and blackened.

4. When your pepper is nice and charred, put it in a clean plastic grocery bag or a small pepper bag and wait for it to cool. When it is cool enough to handle, you should be able to gently rub off all the charred skin from the pepper. Seed the pepper, and discard the seeds and stem. Cut the pepper into 1/2 inch pieces.

5. Using the immersion blender, combine the remaining chipotle peppers, adobo sauce, the roasted red pepper, the sherry vinegar, and the honey together until smooth.

6. To serve, top each bowl of soup with a dollop of chipotle purée and a drizzle of pumpkin seed oil.

Balsamic-Roasted Butternut Squash and Apple Soup

This is a neat little twist on butternut squash soup. Roasting the squash concentrates its flavor. Roasting it in a buttery syrup accented with balsamic vinegar adds a little bit of bite, and a whole lot of interest.

Ingredients:

1 butternut squash, seeded, peeled and cut into 1-inch pieces

1 tablespoon of butter

1 tablespoon of olive oil

1 packed tablespoon of dark brown sugar

1 tablespoon of balsamic vinegar

2 teaspoons of salt

1 pinch of cayenne pepper

1 large shallot, minced

Olive oil

1 Gala apple, cored, peeled and cut into 1-inch pieces

3 cups of chicken stock

1 cup of apple cider

3 tablespoons of maple syrup

1/3 cup of heavy cream

Salt

crème fraîche to serve

Special equipment:

A hand-held immersion blender

How to prepare:

1. Preheat your oven to 400°.

2. In a small saucepan, heat the butter and the olive oil together over very gentle heat. When the butter has melted, add the brown sugar, balsamic vinegar, cayenne pepper and salt. Stir everything together until everything is well-incorporated. Continue to heat everything for a minute or two more. The mixture will become syrupy, and the harshness of the vinegar will soften a little bit.

3. In a large bowl, toss the butternut squash and the butter mixture together. Spread the squash out evenly on a parchment paper-lined cookie sheet. Roast the squash until it is tender, about 15-20 minutes. When the squash is done, transfer it from the hot pan to a bowl.

4. Heat some olive oil in a large casserole or Dutch oven over medium heat. When the oil starts to shimmer, add the shallots. Sauté them until they begin to soften. Add the apples to the shallots, and heat them together for about a minute or two. Add the butternut squash, and stir everything together. Add the chicken stock and the apple cider. Let everything simmer for about 20 minutes, skimming any foam that rises to the surface.

5. When the apples are tender, blend everything together with an immersion blender until smooth. Adjust the seasoning. Add the maple syrup and heavy cream. Stir everything together, and adjust the seasoning for a final time. Garnish with a dollop of crème fraîche and serve.

Irish Bacon and Cabbage Soup


From the archives!

As I am currently a little out-of-commission, I decided to revisit some meals that I have made in the recent past, but haven’t blogged about yet.

This soup is one of them. A few months ago, I got some Irish bacon in my CSA. What is the difference between Irish bacon and regular ol’ streaky bacon? Well, according to Wikipedia — the be-all, end-all arbiter of everything — regular bacon is made from pork belly (which is why it’s so nice and streaked with fat). Irish bacon, on the other hand, is made from center-cut pork loin — which is along the backside of the pig. Because this kind of bacon is not from the belly, it tends to be much leaner. There is usually a narrow band of fat that rings the edge, but each slice is generally more pork than fat. Similar to Canadian bacon, Irish bacon isn’t supposed to get crispy like belly bacon. It still has incredible flavor though, and holds up well to things like thick soups and stews. This recipe, adapted from Epicurious, makes a warm, wonderful, and traditional stick-it-to-your ribs kind of meal. Perfect for the rain and newly arrived cold weather. Ingredients: 1 pound of sliced Irish bacon 3 tablespoons of butter 1 medium onion, chopped 2 large Yukon Gold potatoes, peeled and diced 1 quart of chicken stock 2 bay leaves 1/2 of a small head of Savoy cabbage, cored and thinly sliced Salt and pepper Special equipment: 1 hand-held immersion blender How to prepare: 1. Place the bacon in a medium saucepan, and cover it with about two inches of cold water. Bring the water to a boil. Reduce the heat so that the water is at an even simmer, skimming any foam that rises to the surface. Cook the bacon for about 7 minutes. Drain the bacon, and when it is cool enough to handle, cut it width-wise into 1/2-inch strips. 2. In a large casserole, melt the butter over moderate heat. When the butter begins to bubble, add the chopped onions. Sauté the onions, stirring often, until they begin to soften and turn slightly translucent. Add the potatoes to the onions, and sauté everything together for about 2-3 minutes more. Add the stock and the bay leaves. Adjust the seasoning, and bring everything to a boil. Reduce the heat and simmer everything together until the potatoes are soft and tender, about 8 to 10 minutes. 3. When the potatoes are ready, add the cabbage to the pot. Simmer the cabbage until it is soft too, about 5 minutes. Fish out the bay leaves and discard them. Don’t forget . . . like I did! 4. Once you find and remove the bay leaves, blend the soup together until it is smooth. If the soup is really thick, you may want to add some water to it to thin it out a little. If you don’t have an immersion blender, you can use a regular blender or a food processor, working in batches if necessary. Once the soup is puréed, stir in the bacon. Adjust the seasoning for the final time, and rewarm the soup if needed before serving.