The Daring Kitchen December Cooks’ Challenge: Pâté Chinois

Looks good, eh?
As some of you know, I have been participating in The Daring Kitchen’s Challenges for about a year now. For those of you unfamiliar with the name, The Daring Kitchen is an online community of cooks and bakers who commit to making one dish — the month’s challenge — and posting their results on their blogs on the same day.

I took a hiatus from the Daring Cooks (there is a corresponding Daring Bakers group) during and following my dissertation. In the interim, I missed out on some pretty great challenges. I especially regretted missing the Brazilian Feijoada and the Paella challenges. In addition, there were many more that passed me by as I just watched and salivated on the sidelines. This month, after a period of decompression and relaxation, I finally felt ready to jump back in and cook something new.

So imagine my reaction when I pulled up December’s challenge PDF for a mysteriously named dish called Pâté chinois and saw that . . .

Pâté chinois is essentially shepherd’s pie with a layer of canned creamed corn in-between the meat and the mashed potatoes.

That’s it.

And its traditional accompaniment is ketchup.

Yes. That’s it.

As Pâté chinois generally calls for ground beef, it is perhaps more accurate to say that it is a variation of cottage pie not shepherd’s pie. However, the more pressing question is why is it called Pâté chinois considering there is not much in it that can be either construed as pâté (ground meat alone does not a pâté make) or Chinese.

According to Wikipedia, the origins of Pâté chinois are rooted in the assumption that the name refers to Chinese cooks who came to Canada to serve the workers who built the North American railroad system in the late 19th century. These cooks were instructed by their railway bosses to prepare and serve something that was not only inexpensive, but that the railway workers would recognize and therefore eat As wood ear fungus and black chicken soup was probably out of the question, the Chinese cooks put together a version of cottage pie using canned creamed corn in place of the more expensive gravy.

Of course, this is all anecdotal. Alternatively, the name Pâté chinois might also refer to a variation of hachis Parmentier, which is basically cottage pie too. This is a dish that French-speaking families in Maine would refer to as Pâté chinois in reference to the towns where they ate it: China and South China, Maine.

I also read somewhere that Pâté chinois could also be an allusion to the dish’s preparation. When I read about the possible connection to Chinese immigrants, this was actually my first thought. Much like how chop suey is inauthentically Chinese and refers instead to the chopped items in the dish, I imagined that Pâté chinois got its name from the chopped meat and corn kernels that could be commonly found in Chinese stir-fry.

Regardless of when, where, and how Pâte chinois came to be, it is one of those quintessential Québecois comfort foods that everyone is familiar with, yet it is unknown to outsiders as it is hardly ever served outside of the home.

If you understand French (or even if you don’t), this is an truly awesome Youtube clip about Pâté chinois in Québec. It is narrated by a man with the dang coolest Québecois accent ever.

Given that I have made cottage pie numerous times (and even blogged about it here), I thought this challenge would be a easy one.

Wrong! Can you believe it, dear Readers? My first attempt at Pâté chinois was a dismal failure!

First of all, my fancy schmancy neighborhood supermarket does not carry canned creamed corn. Oh the class warfare! Consequently, I was forced to improvise with frozen corn and fresh heavy cream. Although my homemade version of creamed corn looked and tasted superior, it completely separated while cooking. To my horror, my cottage pie had morphed into a cream of potato soup with little bits of hamburger floating in it.

In my defense, it tasted amazing, but anything that is more than 50% heavy cream is almost always guaranteed to taste amazing.

Back to the drawing board! Still no creamed corn in a can. This time, instead of blending the corn with heavy cream, I put some corn kernels with a little bit of milk in the food processor. Once puréed, I folded in more corn kernels for better texture. The result was a mass of corn about the same consistency of my mashed potatoes.

The final result yielded three distinct and yummy layers. Pâté chinois is still a fairly bland dish, which explains the predominant use of ketchup to kick it up a notch. However, since I find ketchup generally too sweet for my tastes, I substituted a healthy squeeze of Sriracha. Can’t go wrong with that 🙂

Many thanks to this month’s host, Andy of Today’s the Day and Today’s the Day I Cook!, for the challenge. I had a so much fun learning about Canadian comfort food. Your challenge was also a great reminder that it doesn’t matter how many times you make something, there is always something more to learn!

Blog-checking lines:

Our Daring Cooks’ December 2012 Hostess is Andy of Today’s the Day and Today’s the Day I Cook! Andy is sharing with us a traditional French Canadian classic the Paté Chinois, also known as Shepherd’s pie for many of us, and if one dish says comfort food.. this one is it!

Ingredients:

4 Yukon Gold potatoes (5 if they are small), peeled and cut into 1-inch cubes

2 tablespoons of butter

Milk

Salt and pepper

1 pound of frozen corn kernels, thawed and divided in half

Milk or heavy cream

One medium onion, finely chopped

1 pound of lean ground beef

1 teaspoon of paprika

1 pinch of cayenne pepper

Worcestershire sauce

1 cup of shredded Gruyère or Comté cheese

Sriracha or ketchup

How to prepare:

1. Preheat the oven to 350°.

2. Put the potatoes in a large saucepan and cover them with water. Generously add salt. Bring the water to a boil and cook the potatoes until they are tender. You will know that they are ready to mash when you can crush a potato piece easily against the side of the pan with a wooden spoon. Drain the potatoes. In the same pan, mash them with the butter. Add the milk a 1/4 cup at a time until you get the right consistency. You don’t want the potatoes to be dry, but you don’t want them to be soupy either. Aim for a texture that is loose enough to spoon out, but not so loose that the potatoes add a lot of excess water to your dish. Adjust the seasoning.

3. While the potatoes are cooking, purée half of the corn kernels in a food processor with about a quarter cup of milk. Add more milk if the mixture looks too dry, but not so much that you end up with a corn slurry. The texture of the puréed corn should match that of the mashed potatoes. Turn the puréed corn out into a large bowl and fold in the remaining whole kernels. Adjust the seasoning.

4. Heat some olive oil in a large skillet over medium-high heat. Sauté the onions until they are translucent and begin to brown. Add the ground beef to the pan, breaking up bigger chunks of ground beef with your wooden spoon as it cooks. Continue to cook the beef until there is no longer any visible pink. Sprinkle it with the paprika, cayenne pepper, Worcestershire sauce to taste. Cook everything until the sauce has thickened, about another two to three minutes.

5. In an oven-proof dish, spread the ground beef out in an even layer on the bottom. Carefully spread the corn mixture on top of the beef. Gently spoon the potatoes on top of the corn. Sprinkle the shredded cheese evenly over the top and bake until bubbly, about 20-30 minutes.

6. Let it rest for about 20 minutes before serving with Sriracha or ketchup.

Advertisement

The Daring Kitchen July Cooks’ Challenge: Papillotes de pêches et framboises à la vanille (Peaches and Raspberries Cooked in Parchment Paper with Vanilla Bean)


The dissertation has been pretty overwhelming lately. This is the big push before the defense so I haven’t had much time for all the things that I love like spending time with my friends, cooking, blogging, eating out and drinking.

I miss the drinking. I ran an errand the other day and saw some nice people drinking wine in the shade. I remember jealousy thinking, “I bet they don’t even appreciate that wine!” Suddenly, I was overcome with the desire to grab their glasses out of their hot little hands and go sprinting down the street.

I didn’t do it, but I sure wanted to.

No way did I think that I was going to be able to participate in the Daring Kitchen challenge this month either until I saw the challenge: cooking en papillote.

En papillote is a fancy schmancy way of saying that you cook something in a paper envelope. We’re not talking about any old paper here; we’re talking about parchment paper, also known as bakery release paper or greaseproof paper. Cooking in parchment is a terrific way to cook delicate things quickly without fear of them drying out. You can also roast food en papillote as the paper allows just enough steam to release so that potato skin, for example, gets nice and crispy while the insides gently steam to perfection.

You could use aluminum foil instead of parchment paper — also known as a hobo pack — but I find that the results lack the finesse and elegance of cooking in paper. I might also be too negatively affected by the word “hobo,” and too seduced by the phrase “en papillote“!

It’s true that this month’s Daring Kitchen assignment wasn’t really a challenge for me since cooking en papillote is one of my favorite cooking methods. On this blog, I have posted a recipe for roasted tiny potatoes en papillote and roasted salmon with mango and Bird’s Eye chiles. However, it was completely new for me to use this cooking method to make a something sweet instead of something savory.

This dessert recipe was inspired by one that I saw months ago on Elle à table, the companion cooking site of French Elle Magazine. I kept the primary components — parchment, peaches and raspberries — and changed the rest. The original recipe has you peel the peaches. However, if the peaches are nice and ripe, this step seems fussy. It also seems like it would be a big waste of precious juice. The Elle à table recipe also calls for lime zest and juice, whereas I only used the zest for fear that the extra juice would have made the dessert too watery. Instead of a lime, I used a lemon. I also swapped out the cinnamon for vanilla bean, and shortened the cooking time so that the fruit would stay more intact.

Just like there is more than one way to roast a chicken, there is more than one way to make a parchment paper packet. Traditionally, you take a large piece of parchment paper, fold it in half, and cut out a heart — just like how you did as a child. After you position your food on the paper, you seal up the packet by folding or crimping the edges shut. To give you an example of how to seal up a parchment paper packet, here is a video with Chef Paul Prudhomme — who can pronounce papillote any dang ol’ way he pleases in Cajun country.

Alternatively, you can arrange your food in the center of a square of parchment paper, pull two of the sides up, fold them down, and then tie off the ends with cooking string. For some more examples of parchment paper packets, I direct you to this month’s Daring Cooks’ Challenge PDF.

In the end, it doesn’t really matter how you seal up the parchment paper as long as you make sure that your packets are snug, but not too tight around your food.

I made two different kinds of packets for this challenge. You can see them both in the photo gallery below. This challenge didn’t take up too much of my time since I had the fruit already (it’s high peach season here). Most importantly, it reminded me of how valuable it is to not give up those things in life that give you pleasure at those moments in life when you feel most stressed out.

A big thank you to Sarah from All Our Fingers in the Pie for the terrific challenge 🙂 In terms of mandatory items, you only asked that we cook in parchment. As suggestions, you gave us some amazing savory ones like beef, lamb or rabbit. I chose a gourmand take on cooking en papillote, which I hope still keeps with the spirit of the challenge even though it might not have been as challenging!

Mandatory blog checking lines: Our July 2012 Daring Cooks’ host was Sarah from All Our Fingers in the Pie! Sarah challenges us to learn a new cooking technique called “Cooking En Papillote” which is French and translates to “cooking in parchment”.

* The reveal date for this month’s French cooking challenge happens to fall on Bastille Day: le 14 juillet 🙂 Bonne fête, tout le monde!

Ingredients:

4 beautifully ripe yellow peaches

1 vanilla bean pod, split into four pieces

1 punnet of raspberries*

Cane sugar

The zest of 1 lemon

Cold butter

How to prepare:

1. Pre-heat your oven to 400° F.

2. Defuzz the peaches by very gently rubbing as much of the peach fuzz off as you can under cold running water. Cut the peaches into slices that are a little more than a quarter-inch thick.

3. Evenly divide the peach slices between 4 parchment paper sheets. You will use about one peach’s worth of slices per packet. Tuck one split vanilla bean pod in-between the peach slices. The vanilla should perfume the fruit, but not overwhelm it. Arrange a small handful of raspberries over the peaches. Sprinkle the fruit with cane sugar. Grate a little lemon zest over the top. Dot the fruit with about a 1/2 tablespoon of cold butter cut into small pieces

4. Crimp or tie off your parchment paper parcels and arrange them on a large baking sheet. Bake them between 8-10 minutes. Remove them from the oven and carefully open them (they will be steamy). Find and discard the vanilla bean pods.

You can serve the peaches and raspberries straight from the paper, or you can transfer the fruit to a small bowl to top with a scoop of vanilla ice cream or gelato.

* Although punnet is a Britishism, but it’s a pretty useful word for those little plastic or molded paper baskets intended for berries. We don’t seem to have any equivalent in American English (the closest approximation is a pint basket). Furthermore, punnets for raspberries are generally smaller than the containers used for pints of strawberries . . .

The Daring Kitchen April Cooks’ Challenge: Whole Wheat Flatbread with Grilled Eggplant, Goat Cheese Ricotta, Sundried Tomatoes and Maple-Chili Pistachios


This was the Daring Kitchen challenge that almost didn’t happen. After a few weeks of thinking, toying with ideas and brainstorming, the challenge got put on hold and then was quickly buried under a sea of other priorities. When I finally got around to making a grocery list and buying ingredients, my oven promptly decided that it was no longer participating in my kitchen adventures 😦

I thought about changing direction and doing something else, but my heart had been set on making a flatbread. I went as far as to contemplate doing the flatbread in a cast-iron pan on top of the stove (the stovetop was still working) and using a mini-blowtorch to char the top of it.

“Daisy,” Laura said, “I think that’s a bad idea.”

I even went out and bought pressurized butane despite having doubts that my newly acquired mini-torch — meant for itty bitty crèmes brûlées — would probably melt or malfunction if used on something as big as a 12 or 14-inch pizza . . .

“Daisy. It’s just a bad idea.”

Sigh.

Thankfully, my oven got fixed a lot sooner than anticipated — which just goes to show that you can get anything fixed in this town so long as you utter three magic words:

I smell gas . . .

I thought that was pretty smart of me 😉

Once the oven was fixed, I was back on track, though given the chance, I would have tinkered with the recipe more before posting. To make up for how rough the recipe is, I have written the recipe based what I would do it if I were to make it again — like use a lot more eggplant!

Also, I would suggest that you tinker a little bit with your cooking times and temperatures as it appears that when they fixed my oven, they also re-calibrated it so that it seems to run hotter that it did before.

This month, David and Karen from Twenty-Fingered Cooking challenged us to come up with our own recipes using the three lists of challenge ingredients. The recipe must include at least one item from each list, and if we fail, we must order a pizza.

The challenge lists were:

List 1: Parsnips, Eggplant, Cauliflower
List 2: Balsamic Vinegar, Goat Cheese, Chipotle Pepper
List 3: Maple Syrup, Instant Coffee, Bananas

When I first saw the challenge, I was thinking of a balsamic, instant coffee and maple syrup-glazed steak on top of a parsnip-goat cheese purée.

Then I thought about using the eggplant and cauliflower to make a vegetarian chili with chipotle peppers and instant coffee.

Then I thought that it would be fun to try to challenge myself to make the most inedible dish possible. Some kind of cauliflower-instant coffee banana cream pie, or a banana-chipotle baba ghanoush, but I felt like that might be a violation of the challenge’s good spirit.

To save me from myself, I threw the idea out to amazing Heather over at Ruby and Wheaky (one of my favorite blogs and one of my favorite bloggers — do check her site out when you get the chance! She is a phenomenal writer). She suggested a “maple syrup and chipotle-glazed cauliflower dish,” “an instant coffee dusted baked/fried eggplant dish with a goat cheese topping,” “an eggplant, goat cheese sandwich with a side dish of coffee-infused banana chips,” or “a crazy sort of eggplant, goat cheese pizza topped with maple- glazed pistachio nuts.”

As you can see, her ideas were way better than mine!

A giant thank you to David and Karen for the great challenge! I had a ton of fun dreaming up different recipes. Your challenge made me feel like an Iron Chef!

Blog-checking lines:
Our April 2012 Daring Cooks hosts were David & Karen from Twenty-Fingered Cooking. They presented us with a very daring and unique challenge of forming our own recipes by using a set list of ingredients!

Ingredients:

For the flatbread:

1 packet of active, dry yeast (about 2 1/4 teapoons)

1 cup of lukewarm water (between 105°-115°)

1 teaspoon of salt

2 tablespoons of olive oil

2 cups of bread or all-purpose flour

1 cup of whole wheat flour

For the toppings:

2 medium eggplants or one large eggplant, cut into 1/4-inch thick slices

Olive oil

2 tablespoons of balsamic vinegar

1 teaspoon of salt

1/2 cup of sundried tomatoes, cut into thin strips

6 ounces of goat milk ricotta (or another kind of soft and crumbly goat cheese)

1/3 of a cup of shelled pistachios

1 teaspoon of maple sugar (or one tablespoon of maple syrup)

1/4 teaspoon of chipotle pepper powder

1/2 teaspoon of salt

How to prepare:

1. In a large bowl, mix together the yeast and the warm water. Let the yeast bloom undisturbed for about 10 minutes.

2. In a separate bowl, mix the two flours together. Once the yeast has bloomed, add the salt and two tablespoons of olive oil. Stir in the flour, a little bit at a time, with a wooden spoon until it has all been incorporated. Turn the dough out onto a lightly floured countertop and knead it for about 6-8 minutes until the dough is soft and satiny. Shape the dough into a ball and place it in a lightly oiled bowl. Cover the bowl tightly with plastic wrap and let it rise until it has doubled, about 1 1/2 to 2 hours.

3. In the meanwhile, prepare the eggplant. In a small bowl, whisk together the balsamic vinegar and 1 teaspoon of salt. Let sit for a minute or two to let the salt dissolve. Whisk in about four tablespoons of olive oil. Brush both sides of each eggplant slice with the balsamic-olive oil mixture.

4. Brush a grill pan lightly with olive oil and heat it over medium-high heat. When the oil just begins to smoke, lay a few slices of eggplant on the grill. Grill the slices for a minute or two on each side. If you want, you can give the slices a quarter turn on the grill so that they have some nice grill marks. Remove the slices to a plate as you finish them.

5. Preheat the oven to 350°. In a small bowl, toss the shelled pistachios with the maple sugar or maple syrup, the chipotle pepper powder and a drizzle of olive oil until they are evenly coated. Toast the nuts for no more than 5 minutes, checking them frequently to make sure that they don’t burn. Remove the nuts from the oven and let them cool before roughly chopping them.

6. Turn the oven up to 425°. Punch the risen dough down and stretch it out to cover the bottom of a half-sheet pan. Lightly brush the surface with olive oil and evenly arrange the grilled eggplant slices over the top. Scatter the sun-dried tomatoes and the goat cheese evenly over the eggplant. Bake the flatbread in the oven for about 10-15 minutes. The dough should be crisp and the edges should be browned. Remove it from the oven and scatter the chopped pistachios over the top. Drizzle the flatbread with olive oil and cut into squares to serve.

The Daring Kitchen March Cooks’ Challenge: Braised Short Ribs with Braised Root Vegetables


For last month’s Daring Kitchen Cooks’ Challenge, Lis and Audax Artifex (whose parents must be congratulated for giving him the best name on the planet) gave us a very technical challenge and dared us to make patties.

This month, Carol from Newfoundland, Canada, has given us another technical challenge: braising.

When most people consider braising, they think of tougher cuts of meat that generally have a lot of muscle or connective tissue — think lamb shanks, oxtails, short ribs, or stew beef. Braising is a very easy way to cook these economical cuts of meat, transforming them into meals that are the embodiment of pure comfort and elemental nourishment.

Braising can also be used for certain kinds of vegetables — carrots, celery and parsnips, for example — that take a long time to cook to mouthwatering tenderness.

To attain braised perfection, you really only need three things:

1. Low and steady heat
2. Liquid
3. Time.

In Carol’s challenge PDF, she gave us several recipes for ideas, including one for braised short ribs from Michael Ruhlman. Ruhlman’s recipe jazzes up short ribs with a snazzy gremolata. However, whenever I think of braised short ribs, I think of the traditional French bonne femme: pure, simple, and uncomplicated . . .

. . . which is of course why I chose a recipe from Thomas Keller‘s Ad Hoc at Home cookbook — ha ha! there goes the uncomplicated bit!

Reproduced in Food and Wine Magazine, this recipe from Keller and his brother Joseph is really quite simple. Though there seem to be like a lot of steps, they are all dead easy. The difficulty comes in just waiting to eat as your house fills with the wonderful smells of braised meat. The absolute most difficult thing is delaying gratification for a day, if you can, in order to be able to remove the fat rendered from the ribs and deepen the flavors of the braise.

I can only say that though it is hard, waiting is not impossible so long as you chant like a mantra, “It will be better tomorrow, it will be better tomorrow”!

And order a pizza 😉

A big thank you to Carol for the great challenge! I encourage everyone to take a look at her challenge PDF. She includes so many more ideas for braising (fennel, duck, pork belly and oxtail), and it is a great way to learn more about braising!

Blog-checking lines: 
The March, 2012 Daring Cooks’ Challenge was hosted by Carol, a/k/a Poisonive – and she challenged us all to learn the art of Braising! Carol focused on Michael Ruhlman’s technique and shared with us some of his expertise from his book “Ruhlman’s Twenty”.

Special equipment:

2 large Zip-loc bags

A large Dutch oven with a lid, or any enameled cast-iron casserole

(please do note though that if you do not have an enameled cast-iron pot, it is still possible to braise. Keller’s recipe calls for the short ribs to be braised in a either a large baking dish or roasting pan covered tightly with aluminum foil)

Ingredients:

4 beef short ribs (about 2 pounds)

1 bottle of full-bodied red wine like a Côtes du Rhône, minus one glass (because I drank that)

2 medium carrots, peeled and cut into 1-inch pieces

1 large leek, white and tender green parts only, roughly chopped

5 garlic cloves, minced

4 sprigs of parsley

2 sprigs of thyme

1 bay leaf

Salt and freshly ground black pepper

1/2 cup of all-purpose flour for dredging

2 tablespoons of vegetable oil

3 cups of veal stock (or one 1.5 ounce package of demi-glace + 3 cups of water)

2 tablespoons of grainy Dijon mustard

1 bunch of baby carrots, peeled

1 small turnip, peeled and cut into 1 1/2-inch pieces

2 medium parsnips, peeled and cut into 1 1/2-inch pieces

1 cup of chicken stock

2 tablespoons of butter

How to prepare:

1. In a large saucepan or Dutch oven, bring the wine to boil over medium-high heat. Remove the wine from the heat and add the vegetables, the parsley, the thyme and the bay leaf. Cover the saucepan and let the marinade cool completely.

2. When the marinade has cooled, season the short ribs with salt and pepper and arrange them in a single layer in a large Zip-loc bag. You may want to double up the Zip-loc bags, just in case they leak. Pour the marinade over the ribs. Squeeze any air out of the bags and seal them. Let the ribs marinate in the refrigerator overnight, turning the bag over every once in a while to make sure that the ribs marinate evenly.

3. Preheat the oven to 300°. Remove the short ribs from the marinade. Strain the marinade, and reserve the liquid and the vegetables in separate bowls. In a large skillet, heat two tablespoons of vegetable oil until almost smoking. Dredge the ribs in flour, knocking off any excess, and add them to the skillet. Brown them over medium-high heat on all sides, about 4 minutes per side. Arrange them in a single layer in the bottom of a large Dutch oven.

4. Spoon off all but 1 tablespoon of fat. Add the strained vegetables and cook them until they begin to brown. Add them to the short ribs. Tip the reserved liquid to the skillet and bring it to a boil. Pour the hot liquid, along with the stock, over the ribs and the vegetables. Cover the pot with its lid and bake the ribs for about 3 hours. The meat should be very tender and almost falling off the bone.

If proceeding to step 5a, leave the oven on. Turn the oven off if proceeding to step 5b.

5a. Transfer the meat to a large bowl. Skim off as much fat as you can from the surface of the cooking juices. Bring the liquid to boil over medium-high heat until it has reduced to about two cups of sauce. Whisk in two tablespoons of grainy mustard. Adjust the seasoning. Return the meat to the pot, cover, and bake for another 30 minutes.

5b. Braised short ribs are notorious having a deep layer of rendered fat floating on top of the braising liquid. If you can delay gratification for one day, let the ribs cool in their braising liquid overnight in the refrigerator. Remove and discard the layer of solidified fat from the top before preparing the ribs to be reheated. The beauty of this is that it easily allows you to get rid of all that fat. Secondly, as with all stews and braises, flavors meld together and become richer the longer the stew or the braise has to sit.

So by waiting, not only will your braise not be swimming in grease, but it will have more depth of flavor. Good things come to those who wait!

After removing the top layer of solidified fat, let the short ribs return to almost room temperature before preheating your oven to 300°. Scoop out the short ribs and transfer them to a large bowl as you finish the sauce. Set the Dutch oven with the braising liquid over medium-high heat. Reduce the liquid until you have about 2 cups of sauce. Whisk in two tablespoons of coarse mustard. Adjust the seasoning. Add the short ribs back to the sauce, cover the Dutch oven with its lid, and bake everything in the oven for about 30 minutes.

6. In the meanwhile, prepare your root vegetables. In a large deep-sided skillet, arrange the parsnips, the baby carrots and the turnips in an even layer. Add the chicken stock and the butter to the vegetables. Season with salt and pepper, and bring the liquid up to a lively simmer. Reduce the temperature to low and cover the skillet. Cook the vegetables until they are tender, about 15 minutes. Remove them from the braising liquid with a slotted spoon.

Let the short ribs cool slightly before serving them with the braised vegetables.

The Daring Kitchen February Cooks’ Challenge: Patties


Last month, when I opened up the Daring Kitchen‘s Chefs’ Challenge for February, I remember thinking, “Oh. Patties.”

As you can surmise, my initial enthusiasm was less than palpable.

It was a long PDF too, delving somewhat into the history of the patty:

“Irish chef Patrick ‘Patty’ Seedhouse is said to have come up with the original concept and term as we know it today with his first production of burgers utilizing steamed meat pattys – the pattys were ‘packed and patted down,’ and called pattys for short, in order to shape a flattened disc that would enflame with juices once steamed.”

And offering a somewhat of a basic definition:

“Technically patties are flattened discs of ingredients held together by (added) binders (usually eggs, flour or breadcrumbs) usually coated in breadcrumbs (or flour) then fried (and sometime baked).”

I would hesitate to say that anyone “invented” the patty. Flattened discs of pan-fried food seem to be commonly found everywhere, and I imagine that the technique goes as far back to when humans started smushing things together to eat. Maybe it didn’t get codified until much later, but I’m not sure that really matters much as this is the case for a lot of foods.

What kept my attention was that the hosts of this month’s challenge, Lisa and Audax, went into great detail about the technical aspects of patties, providing a kind of matrix for making them:

Main ingredient(s): some kind of ground protein (meat, poultry, seafood, beans or nuts) and/or vegetables.

Binders: eggs, flour, breadcrumbs (fresh or packaged), bran, tofu, mashed potatoes or any kind of mashed vegetable or legume.

Moisteners: water, milk, sour cream, mayonnaise, sauces, mustard, chopped spinach, shredded carrots or zucchini, shredded apples, anything that would add extra moisture if needed.

Technique: shallow pan-frying or baking.

Frying fat: butter, rice bran oil, canola, olive oil, ghee, or any other kind of oil with a relatively high smoking point.

Can you believe that I am such a food nerd that it was actually the 3.5 single-spaced pages of technical patty construction talk that sold me on the idea?

And as tempting (and easy) it would have been to have come up with a recipe on my own — ideas that I had? shrimp, chili pepper, and cilantro patties with some kind of scotch bonnet relish, or something Cantonese-ish like shrimp, corn, and egg whites — the fact is that I have been so overwhelmed with work and school lately that I haven’t had much time to devote to fun things like cooking challenges.

So, dear Readers, please do forgive my inability to milk any extra creative juice out of my brain right now!

These wonderful little quinoa patties are from Heidi Swanson‘s Super Natural Everyday cookbook. They are great for lunch or a light supper. I only made half of the recipe because I just had a cup and a half of leftover quinoa, but you should certainly make the full recipe by doubling the amounts that I list below. The patties keep exceptionally well, and reheat easily in the oven.

One thing I learned from the challenge? My strong suspicion that my stove sits on uneven flooring is once and for all confirmed: all the oil slid to one side of the cast-iron pan while cooking, resulting in patties that were darker on one side than the other.

As soon as I get the time, I’m going to get in there and stick some little wooden wedges under the stove to even it out.

Thank you again Lis and Audax for the technical exercise and great challenge.

And isn’t Audax just the best name ever?

Mandatory blog-checking lines: 

The Daring Cooks’ February 2012 challenge was hosted by Audax & Lis and they chose to present Patties for their ease of construction, ingredients and deliciousness! We were given several recipes, and learned the different types of binders and cooking methods to produce our own tasty patties!

Ingredients for Heidi Swanson’s Little Quinoa Patties:

1 1/2 cups of cooked quinoa (you might also use leftover cooked bulgur wheat, millet, rice, or lentils)

2 eggs

Salt

2 tablespoons of chives, chopped

1 small onion, finely chopped

3 tablespoons of freshly grated Parmesan

1 fat garlic clove, very finely chopped

About 1/2 cup of Panko breadcrumbs, plus more if needed

1-2 tablespoons of olive oil or clarified butter

Special equipment:

A 3-inch ring mold

A cast-iron skillet

A lid to fit the skillet

How to prepare:

1. In a large bowl, combine the quinoa and the eggs together with a good pinch of salt. Add the chives, the onion, the Parmesan, and the garlic. Stir in the Panko, and let the mixture sit for a few minutes so that the breadcrumbs can absorb some of the moisture.

2. After a few minutes, you should be able to easily shape the mixture. If it seems a little wet, you can add more Panko to firm up the mixture. Conversely, if you find the mixture too dry, you can add a little water to loosen it up.

Swanson recommends erring on the moist side so that the patties won’t be overly dry — which is what I would recommend as well. As I left the quinoa mixture on the moist side, I found that it was easier to use a ring mold to make the patties instead of using my hands to shape them.

Set a ring mold on a plate and fill it with about three heaping spoonfuls of the quinoa mixture. Spread the mixture out evenly in the mold. Lightly compress each one by pressing on the top of the patty with the bottom of a spoon. Carefully remove the mold. Continue until you have used up all of the quinoa mixture. You should have about 6-7 patties total (or about 12 if you make the full recipe).

3. Heat the olive oil in a large cast-iron skillet over medium-low heat until it begins to shimmer slightly. Using a thin, flexible spatula, carefully transfer the patties to the skillet. You should be able to fit in all six with a little room in-between each one. Cover the skillet and let the patties cook for about 7-10 minutes. The bottoms should be deeply browned, but not burnt. Carefully flip the patties and cook them on the other side for about 7 more minutes. When both side are evenly colored, transfer the patties to a paper towel-lined plate.

Serve warm with a nice green salad.

The Daring Kitchen January Cooks’ Challenge: Red Chili Pork and Poblano and Cheese Tamales

As many of you know, I signed up a few months ago to participate in the The Daring Kitchen‘s monthly challenges. The basic premise of the Daring Kitchen is that you sign up for one of two groups: The Daring Bakers or The Daring Cooks. Once confirmed, you will be tasked with either a baking or a cooking challenge (depending on which group you joined), and given one month to complete the challenge. All members upload their completed dishes to their blogs on the same day.

Well, today is the day, and this month’s challenge was tamales.

I love tamales. I have always wanted to try them at home, but never have because I was always intimidated by how much work everyone said they were to make.

“Pain in the ass,” said one friend.

“Why don’t you just buy them?” asked another.

“You don’t have enough room to make tamales!” exclaimed yet another friend.

Well, now I can tell you that you can make tamales in a studio apartment kitchen without an army of willing friends and family to help.

I know because I just did it!

This blog post is a little different from my normal recipe posts. First of all, I am going to show you the recipe step-by-step with photos. This will make the post a lot longer, but I hope that it will also give me a chance to walk you through the challenge and show you what I did, why I did it, what I thought worked, and what I would have done differently knowing what I know now.

But before we get started, I need to include the monthly challenge’s mandatory blog-checking lines: “Maranda of Jolts & Jollies was our January 2012 Daring Cooks hostess with the mostess! Maranda challenged us to make traditional Mexican Tamales as our first challenge of the year!”

For Maranda’s challenge, a lot of freedom was given to us to choose our own tamale recipe and improvise as we saw fit. This was a little different from some other cooks’ challenges that I have seen, but after making tamales, I see that it made a lot of sense. For me, some ingredients were not that easy to find. I can imagine for others that a lot of substitutions would be pretty much necessary. Also, like a lot of people, I didn’t want to buy any special equipment. Thankfully, as I found out, there are as many ways to steam a tamal as there are ways to roast a chicken.

Tamales are not difficult to make, but they are very time-consuming. You will probably need to set aside a whole day to pull them together. Be sure to read the recipe ahead of time. What takes the most time is just waiting for different components of the tamales to cook, soak, rest, etc.

That being said, let’s get on with it.

Ingredients:

For the red chili pork filling (adapted from Rick Bayless):

1/3 of a cup of good-quality chili powder, preferably without salt

3/4 teaspoon of salt if the chili powder has no salt (omit this if salt is included in the spice powder)

1 pound of boneless pork shoulder

2 tablespoons of masa harina

1/4 cup of golden raisins, chopped

1/4 cup of pitted green olives, chopped

Salt

For the poblano chili and cheese filling (adapted from Diana Kennedy):

3 fresh poblano peppers

10 ounces of Queso Chihuahua, or Monterey Jack if Chihuahua cheese is not available

About 1/2 cup of salsa verde

For the rest:

2 to 3 3-ounce packages of dried corn husks

10 ounces of rendered leaf lard, or vegetable shortening if lard is unavailable, softened but not runny

1 1/2 teaspoons of baking powder

3 1/2 cups of dried or instant masa harina for tamales

2 1/4 cups of hot water

1 to 1 1/2 cups of chicken broth

Salt

How to prepare:

1. Find all your ingredients.

This alone took about a day of calling around town and shopping. You would think that living in New York City would make it relatively easy to procure ingredients for tamales, but the truth is that though the size of the Mexican community is growing, it is still not particularly sizable compared to other ethnic populations in the city.

I could have gone all the way up to Corona to the very excellent Tortilleria Nixtamal for fresh masa, but Corona is super far from the East Village. So dried, or instant, masa it was going to be.

Luckily, I do live relatively close to Zaragoza Mexican Deli and Grocery on Avenue A. If you have never been to Zaragoza, I would highly recommend it. Outside, it looks like any other deli. Let’s admit it: inside it doesn’t look like much either. “Deli and Grocery” is a bit of a generous statement too given that when you walk in, the “deli” part consists of a two-foot long counter packed with cigarettes and lottery tickets. The “grocery” looks like a crammed wall of dimly lit cans. You would totally be amazed, though, at what they have. It’s almost like magic; rarely have I asked for something that they didn’t stock.

In the back of the deli, there are a few tables set up for food. Zaragoza does homemade tacos, sandwiches, rice and beans, and soup. It’s all very fresh and really delicious — which is why I opted to buy a quart each of their salsa roja and salsa verde instead of making my own.

Tamales are enough work on their own without my having to worry about making sauces too. Plus, Zaragoza’s salsas are really fantastic.

The other challenge was procuring the lard. Lard is relatively easy to find, but I always think that if there is any animal product that reveals most distinctively what the animal ate and how the animal was treated, it’s the animal’s fat. So I wanted to buy good lard.

And I wanted someone else to render it for me because I don’t like rendering fat very much.

Yeah, I’m a pussy like that.

That took me to Dickson’s Farmstand Meats in Chelsea Market. They stock rendered leaf lard — the highest quality lard you can get, made from the soft, visceral fat that surrounds kidneys and loins of the pig. It is pure, pillowy, snowy whiteness, and smells like the cleanest, most pristine pork rind ever.

While I was there, I picked up a pound of pork shoulder. Had I more time, I would have defrosted some awesome pork shoulder from my CSA. Unfortunately, I didn’t plan ahead so I had to buy it. Not only did the butcher at Dickson’s cut me .8 of a pound instead of a full pound, but about half of that was fat and connective tissue. After cooking, I think that I had less than half a pound of pork for tamal filling.

And no, the butcher did not show me the meat before wrapping it up. I know. I should have asked, but I was in a hurry.

To Dickson’s Farmstand Meats: BOO! #BUTCHERFAIL!

To Manhattan Fruit Exchange, also in Chelsea Market, thank you for stocking Chihuahua Cheese and poblano peppers.

To any Daring Cooks out there: did anyone use bacon fat instead of lard?

2. Soak your corn husks.

For my tamales, I was torn between using the eminent Diana Kennedy’s recipe, or Rick Bayless’ recipe. In the end, I used a little bit from both, with sprinkles of tricks and suggestions from a bunch of Youtube clips.

But the tamal dough recipe that I used is Bayless’ because Kennedy’s recipe frankly scared me: she asks for you to take the wide, white corn used for pozole, soak it overnight, use your fingers to rub the skin off each individual kernel, let the kernels dry in the sun for two days, grind the corn in a mill, sift it, and then grind and sift it again.

No joke. That is seriously hard core.

So Bayless it was.

His recipe is for 26 tamales, and he suggests buying about 8 ounces of corn husks. I bought 3 packages of corn husks that weighed 3 ounces each. I had a ton of corn husks left over, but I reasoned that it was better to be on the safe side and have too many than too few.

Bayless recommends soaking the corn husks in hot water for a couple of hours, but I would recommend doing it for much longer if not overnight. I soaked mine for about 4, and some were still not completely pliable.

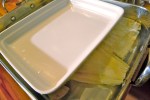
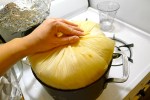
• Take a large roasting pan and arrange the corn husks in it. Cover them with hot water until they are completely submerged. Weight them down with a heavy plate or dish for about 4 hours, or even overnight.

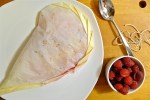
3. Make the red chili pork filling.

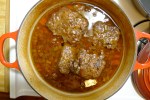
• In a medium sauce pan, whisk the chili powder and the salt if needed with about 3 cups of water. Add the pork shoulder to the pan and bring the liquid up to a boil. When the liquid is boiling, reduce the heat to medium-low and simmer the pork, partially covered, for about an hour. The meat should be falling-apart tender. Let the meat cool slightly in the broth before removing it to a plate. Do not get rid of the cooking liquid.

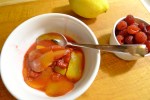
• In a separate bowl, mix 2 tablespoons of masa harina with about 1/2 a cup of water to make a slurry. Bring the remaining cooking liquid to a simmer over medium-high heat. Strain the masa slurry. Discard the solids, and whisk the strained liquid into the remaining cooking liquid. Continue to simmer the sauce until it has reduced by about half and has thickened. Be sure to skim the surface of any fat or foam as the sauce cooks down.

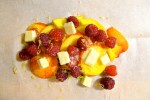
• As the chili sauce reduces, use two forks to break up the pork shoulder into shreds. In a bowl, toss the pork with the chopped raisins and olives. Add the reduced sauce, little by little, until the pork is well-moistened and evenly coated. The pork should not be swimming in liquid. You can use any leftover sauce to serve your tamales.

• Adjust the seasoning.

4. Prep the poblano chilies and the cheese.

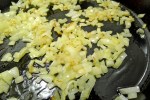
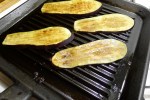
• If you have a gas range, set the poblano peppers directly onto the gas burners with the heat on high. Turn the peppers periodically to make sure that their skins char evenly. Poblano peppers have relatively thin skins compared to bell peppers, so watch them carefully as they will char quickly.

If you have an electric range, rub the peppers with olive oil and place them on a cookie sheet set underneath the broiler. You can also rub the peppers with olive oil and pop them into a 450° oven. Remove them when their skins are blistered and blackened.

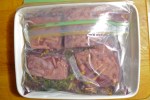
• When your peppers are nice and charred, put them in a clean plastic grocery bag or a small paper bag and wait for them to cool. When they are cool enough to handle, you should be able to gently rub off all the charred skin from the pepper using a paper towel. Seed the peppers, and discard the seeds and stems. Cut the peppers into strips.

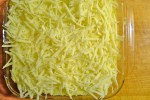
• Cut the cheese into small bars, about 1/2 an inch thick and about 2 1/2 inches long.

5. Prepare the tamal dough.

The first thing you need to do if you do not have fresh masa is to reconstitute dried or instant masa harina for tamales. Bayless recommends 3 1/2 cups of masa harina to 2 1/4 cups of hot water.

I did this by stirring in the water with a wooden spoon, which I really feel was a mistake because the dough was so stiff and hard to manipulate that I felt it three days later.

I think I have tennis elbow now.

Only after I made the tamales did I see that someone had suggested mixing the hot water into the masa flour with your hands, like bread dough.

Now they tell me!

So even though I haven’t tried it myself, it is what I would suggest that you do.

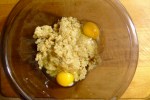
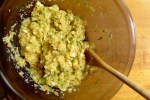
• In a large bowl, using your hands, mix the masa harina with the hot water until the dough begins to pull together into a large mass.

Now it takes a lot of lard to make tamales. However, in lard’s defense, it is probably much better for you than vegetable shortening. Furthermore, Diana Kennedy points out that despite the scary amount of lard needed to make tamal dough, “it is absorbed by the husk and transpires into the water.”

So it just disappears?! All that lard just disappears?!?! Oh my gosh. It’s FREAKIN’ MAGIC!!!

Regardless whether or not you believe Kennedy, for the absolute best tasting tamales, you should use lard.

I suppose that there are some people out there who like their tamales dense as rocks. I prefer the masa soft and airy. The best way to achieve this is to really whip that lard until it is light and fluffy, like creaming butter for a cake.

I would not recommend you do this by hand.

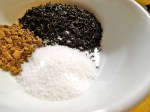
• If you have a Kitchenaid mixer, use that. If not, use a hand blender. Cream together the softened lard, the baking powder, and the salt on high speed until it is light in texture.

• When the lard is fluffy, keep the mixer running and add the reconstituted masa a handful at a time. Once all the masa is incorporated, add about 1 cup of chicken broth. Continue beating the mixture for about another minute or two. Bayless says that the texture should be like a soft, but not runny, cake batter, but I think it’s more like a super fluffy cookie dough.

Ideally, a dollop of tamal dough it will float in a glass of water when you have achieved tamal dough perfection. This didn’t happen to me the first time that I tested it, and I figured out it was because I had added too much water to the reconstituted masa. It was only after I added more masa flour, a little bit at a time to compensate for the extra moisture, that I got it right.

• Cover the bowl with plastic wrap, and let the tamal dough rest in the refrigerator for about an hour. After an hour, rebeat the tamal dough, adding a little more chicken broth if it needs it. Retest it by seeing if a dollop of the dough floats.

• Adjust the seasoning.

6. Form the tamales.

Now we’re in the home stretch!

I must say that I watched a lot of Youtube clips to get this right. Most recipes that I read said to use a spoon or a spatula to spread the dough over the corn husks. That is what Zarela Martinez did, and well, she’s Zarela Martinez!

However, I proved to be some kind of tamale-making flunky and couldn’t manage to spread the dough thinly across the corn husks without tearing them. After a few ruined attempts, I checked out this brilliant Youtube clip that showed how to lay a piece of plastic wrap over the masa to smooth it out gently without any tearing.

Whoever you are in Youtube land, you are amazing.

• Rinse the soaked corn husks (there might be some dead bugs stuck to them), and shake them dry before rolling your tamales.

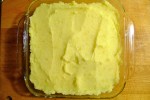
• Lay a corn husk out so that it fans away from you. Drop a dollop of about 1/4 cup of tamal dough in the middle of the upper center of the husk. Lay a piece of plastic wrap over the top of it, and use your hands to smooth the dough out in a thin layer. Make sure the dough goes all the way to the top edge, but be sure to leave a “border” of corn husk on either side. The spread-out dough should be roughly in a 4-inch square shape.

I watched a several different ways to fold tamales. I tried two ways, one of which I would recommend, and the other one I wouldn’t. The most common way that I saw online was to start on one side of the corn husk and roll the tamal like you would a jelly roll. This is what Zarela Martinez shows in her Youtube clip.

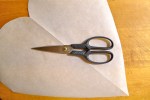
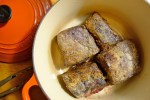
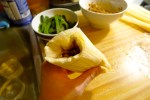
Rolling a tamal like a jelly roll is just a terrible idea because when you unwrap the tamal after it has steamed, instead of a nice compact shape, you have the potential for a sloppy mess. The tamales shown in the picture above were rolled this way. These two held their shape a little better than some of the others, but not nearly as well as the ones I rolled in the way recommended by Bayless (which are shown in the first picture of this blog post).

I kind of wish I had done them all Bayless’ way.

Bayless recommends that you after you spread the tamal dough over the upper center of the corn husk, you pick the tamal up by its two long edges to bring the sides in together. Tuck one edge in under the dough, and wrap the other edge around the tamal.

To help visualize this, here is a handy Youtube clip.

Instead of piecing two smaller corn husks together, as you might have to do if you had bought just enough, Bayless asks that you buy extra corn husks so that you can pick out the biggest and prettiest ones to roll.

• Once the dough is smoothed out in a thin layer that extends all the way to the edge of the top of the husk, it is time to fill the tamal. For the pork tamales, mound a good spoonful of filling along the center of the dough. For the chili and cheese tamales, Put about a teaspoon of salsa verde down the center of the dough. Lay 3 poblano chili strips down on top of the salsa, followed by a piece (or two) of cheese.

• Now bring the two long edges of the corn husk together. This will cause the tamal dough to surround the filling. Gently pinch or push together the opposite sides of the dough so that you make a good seam. Tuck one edge of the corn husk under the tamal, and wrap the other side over the whole thing — kind of like swaddling a baby. Finally, fold up the empty “tail” of the tamal, leaving the top open.

7. Steam your tamales.

Bayless’s recipe should make about 16 red chili pork tamales, but given that I didn’t have much meat to work with, I ended up with only twelve. His tamal dough recipe should be enough for 26 tamales. As I had to add more flour to make up for the extra liquid that I added, I ended up with 29 tamales. Pretty accurate, Rick!

You can buy tamale steamers, which are pretty darn inexpensive (about $20), but I certainly don’t have the room to store any more specialized cookware. Moreover, I didn’t want to spend money for what is basically just a stock pot and a metal insert.

There are many different ways to steam tamales. You could use those Chinese bamboo steamers, or one of those fancy electric steamers. I even saw some Youtube clips of people steaming them in rice cookers.

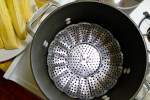
I used a tall stock pot and one of those inexpensive pop-open steamer baskets, about $7. If you don’t have a steamer basket, you can improvise by coiling up a kitchen towel or crumpling up a large piece of aluminum foil into a flattened sphere, placing that on the bottom of your pot, and leaning your tamales up against it.

To visualize this, here are two handy Youtube clips:

Steaming Tamales: Louis D. Garcia explains his way
Zarela Martinez’s Tamales 1, 2, 3

The only disadvantage to doing it this way is that the bottom of your tamales will be submerged in water. But at least you didn’t have to buy anything!

• Place your stainless steel basket steamer in the bottom of a large stock pot. Add about two to three cups of water. The water should come up about an inch from the bottom of the pot, but it should not touch the bottom of the basket. Most steamer baskets have little “feet,” but if yours doesn’t, you can rest the steamer basket on either a ring of aluminum foil, or on little balls of aluminum foil to keep it elevated.

• Set the tamales in the pot vertically. To make this easier, you can tie three to four tamales together (folded tails facing in) with kitchen string, and then set them in the steamer in groups. Or you can just be stubborn like me and fiddle around with them until you get all the tamales in there. If you find that there is a lot of space between your tamales, you can ball up more aluminum foil and insert the balled up foil in-between the tamales and the sides of the pot.

• Tuck some leftover corn husks in-beween the pot and the tamales. Fold them over the top of the tamales like flower petals.

• At this point, if you are able to cover your pot with its lid, do so. If you cannot put the lid on the pot, improvise by wrapping a few large pieces of aluminum foil over everything and very tightly around the pot. Make sure there are no gaps or holes.

• Turn the heat on medium-low. Steam the tamales for about 1 hour and 15 minutes. Some recipes suggest only about 40 to 45 minutes of steaming time. However, I think with tamales, the extra time is needed so that the super-absorbent masa swells in the steamer and not in your stomach. After an hour and 15 minutes, your tamales will not be overcooked or mushy. They will be perfect.

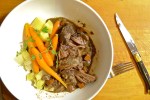
8. Invite friends over to eat your tamales.

• When your tamales are done steaming, carefully remove the lid or the aluminum foil. Beware of hot steam. Peel the corn husks away from the center. Let the tamales stand in the steamer for about 15 minutes to firm up before serving.

I made these tamales on New Year’s Eve. Start to finish, they took me roughly 7 hours. Most of that time was spent just waiting for things to finish soaking, cooking, resting, etc.

Thank you to Joseph and Sharon for being my tamale guinea pigs, and for ringing in the New Year with me! Here’s to 2012!

9. Eat leftover tamales the next day with fried eggs on top.

Tamales for breakfast lunch late lunch are the best ever. You can reheat them by either steaming them until they are heated through, or throwing them in the microwave for a minute or two if you are super hungover lazy like me. Serve them with a couple of fried eggs on top for a very delicious meal.

And that is how I made tamales for New Year’s. Thank you Maranda at Jolts & Jollies for the amazing challenge. I loved the idea, as well as being able to start the new year by cooking something new.

Now onto the next one!

The Daring Kitchen November Cooks’ Challenge: Chinese Tea Eggs

About a month or so ago, I heard about the Daring Kitchen from another blogger who writes Live the London Life. The basic premise is this: The Daring Kitchen comprises of two groups, The Daring Bakers and the The Daring Cooks. You can sign up for one or both (I am just signed up for The Daring Cooks). Once you sign up, you will be tasked with cooking one recipe each month from what the monthly host has selected as the cooking or baking challenges. Everyone posts their dishes on their blogs on the same day (also known as the reveal day).

So today is the big reveal day for my first challenge: Cooking with Tea.

I’ve never cooked with tea before, with the exception of maybe duck breast a long, long time ago. So long ago that it doesn’t count anymore. Of the three dishes I could have chosen from, I perhaps chose the easiest (the other options were a green tea noodle soup, and a beef and sweet potato stew made with rooibos).

But hey, I made the decision right after I whacked into my thumb with that folding knife!

And sometimes the simplest recipes are the most challenging . . . or at least that is what I am telling myself 😉

So here are the blog-checking lines: 

Sarah from Simply Cooked was our November Daring Cooks’ hostess and she challenged us to create something truly unique in both taste and technique! We learned how to cook using tea with recipes from Tea Cookbook by Tonia George and The New Tea Book by Sara Perry.

Ingredients:

6 eggs

2 tablespoons of loose black tea, or four tea bags (I used loose Keemun)

2 teaspoons of Chinese Five-Spice Powder

1 tablespoon of coarse salt

Sesame seeds for garnish

How to prepare:
(taken from The Daring Cooks’ November Challenge PDF)

1. In a large enough pot to avoid overcrowding, cover the eggs with cold water. Bring to a boil over medium heat and simmer for twelve minutes.

2. Remove the eggs with a slotted spoon and keep the cooking water.

3. With a spoon, tap the eggs all over until they are covered with small cracks. This can also be done by tapping and rolling the eggs very gently on the counter.

4. Return the eggs to the pan and add the tea leaves or bags, Chinese five spice powder, and salt. Cover the pan.

5. Heat gently and simmer, covered, for one hour.

6. Remove the pan from the heat and let the eggs cool down in the liquid for 30 minutes.

7. Remove the eggs from the liquid. Peel one egg to check how dark it is; the others can be returned to the liquid if you wish to have the web-like pattern darker. Allow the eggs to cool fully.

8. To serve, peel and slice the eggs in halves or quarters. Sprinkle with toasted sesame seeds.