French Breakfast Radishes Sautéed in Butter


The idea for this side dish came from Susan over at Susan eats London. It’s hardly a recipe, just French breakfast radishes split in half and sautéed in butter and olive oil.

French breakfast radishes are elongated, rosy-colored radishes tipped with white at the root end. The French adore them. You see them everywhere, but I can’t recall ever hearing them called breakfast radishes in France. No “radis petit-déjeuner.” No “bweakfast wadeeesh” either.

The exact reason for why they are called French breakfast radishes is unclear. From what I can find out, their name has nothing to do with the French having them for breakfast. Instead, it comes from the Victorians who liked to eat them for breakfast or afternoon tea. “French breakfast radish” is the blanket term for any small, oblong, pink and white-tipped radish. These kinds of radishes were considered French because of their association to the French from the English perspective (the English observed that the French liked to eat a lot of them). They became known as those French radishes that you had while sipping your English breakfast tea.

French breakfast radishes are the quintessential radish for slathering with good soft butter and dunking in flaky sea salt. They are also delicious sautéed in butter. Cooked, the radishes lose their bitter bite and they turn into succulent butter bombs. During cooking, the radishes give up some of their essence and make the most beautiful pink-hued sauce. They are impossible to resist.

Susan calls them food crack, and who can resist food crack? Not me!

Ingredients:

Butter

Olive oil

1 bunch of French breakfast radishes, trimmed and halved lengthwise

Salt

Chives

How to prepare:

1. In a skillet large enough to accommodate all the radishes, melt a big knob of butter with a little bit of olive oil. When the butter begins to foam, add the radishes. Season them with salt and sauté them until the radishes lose their opacity and they all begin to turn translucent. Transfer the radishes to a serving dish and snip fresh chives over them before serving.

Welsh Rabbit with Radish Greens


You can admit it: the title of this blog post made you want to speak like Elmer Fudd.

Because what’s better than a post about Welsh rabbit?

A post about wascally Welsh wabbit with wadishes! Specifically, wadish gweens!

You’re vewy, vewy welcome.

I was buying even more radishes at the market on Friday when I noticed that my hands and arms were itchy. Why? Because radish leaves have little prickles. They don’t sting, but they can irritate if you have sensitive skin. So while I was waiting in line, rubbing my hands and arms, my mind naturally drifted to stinging nettles — whose short season I seem to have missed completely. Then I started thinking that maybe radish leaves would be a good substitution for them in recipes.

The inspiration for this dish came, not from Bugs Bunny, but from from Nigel Slater‘s recipe for Welsh rabbit with nettles.

Welsh rabbit (also known as rarebit) is basically cheese on toast. The best cheese on toast that you will ever have. I’m not entirely sure of the origins of the name. I read that it was a term coined in the 18th Century by the English to make fun of the Welsh who had lots of cheese but little meat. But there seems to also exist an English rabbit, a Scotch rabbit and an Irish rabbit — none of which have any rabbit in them either. They are all just cheese on toast.

Technically, this should probably be called American rabbit — specifically New Hampshire rabbit because the Welsh-style cheese that I used is made New Hampshire, USA at Landaff Creamery. Landaff Creamery is named after the Welsh hamlet of Llandaff, just to the north of Cardiff. I’m not quite sure why they lopped off the extra l. Maybe there was some kind of international branding issue. Or maybe it’s because the difficult to pronounce Welsh double l supposedly gets lopped off by Welsh capital dwellers, and the creamery’s owners figured that if it was too hard for them, it would be impossible for us. My cheesemonger didn’t seem to have any trouble pronouncing it as if it had double lWhere did he learn that?!

Ingredients:

About a cup of radish leaves, washed

Olive oil

2 tablespoons of crème fraîche

1 teaspoon of grainy mustard

1/2 cup of crumbled Caerphilly, Caerphilly-like cheese or Cheddar (see here for more alternatives)

Freshly ground black pepper

Freshly grated nutmeg

2 slices of sourdough bread, lightly toasted on both sides (you can also use multigrain bread)

How to prepare:

1. Heat some olive oil in a medium saucepan over medium heat. When the oil becomes fragrant, add the radish greens to the pan along with about a tablespoon of water. Sauté the greens until they just wilted. Remove the greens to a colander to drain.

2. When the greens are cool enough to handle, gently press as much liquid out of them as you can. Roughly chop the leaves.

3. In medium-sized bowl, mix together the chopped greens, the crème fraîche, the mustard and the crumbled cheese. Season the mixture with freshly ground black pepper and freshly grated nutmeg to taste. Divide the mixture in half and mound it evenly onto each slice of toast. Arrange them on a large sheet of aluminum foil and place the toasts under the broiler until browned and golden.

Wild Spinach and Radish Green Spanakopita


It used to always kill me to buy a bunch of radishes and discard the leafy tops. I have never had the space to compost, so all of that plant matter would go straight into the trash.

It killed me every time until I found out that you can eat those radish greens and they are delicious.

Yes, you can eat them! Raw, they have a nice, spicy bite. Cooked, their flavor mellows and they taste warm and wonderful. Like the best tasting, silkiest spinach ever. To think that I was throwing them away for all those years!

They are a bit of a pain to clean since you have to fastidiously wash all the dirt and grit from the leaves and stems. It is worth it though.

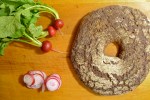
When I saw wild spinach (also known as lambsquarter) at the Greenmarket, I immediately thought that spanakopita would be a great way to use both greens. When I think about Greek food, I think about the Greek landscape: scrubby in parts, dotted with wild herbs and craggy olive trees. There is something a little rustic about the combination of wild spinach and radish greens that fits my little Mediterranean fantasy (never mind the fact that there is nothing rustic about the Greeks; they are as polished and well-turned out as the Milanese).

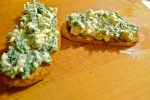
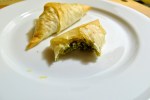
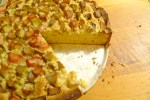
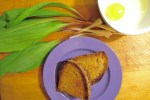
Spanakopita is wonderful mix of greens and feta wrapped up in flaky phyllo dough. You can make these little triangles, or alternately layer the phyllo dough sheets and the filling in a ceramic dish to bake as a giant pie.

Some might be disappointed to see that I didn’t make my own phyllo. Does anyone really make their own phyllo anymore? I think the oft-repeated saying goes that a woman is good Greek marriage material when she can roll phyllo thin enough for her prospective husband to be able to read a newspaper through it. I don’t plan on being anyone’s Hellenic housewife any time soon, so store-bought phyllo dough it is!

Ingredients:

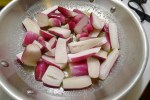
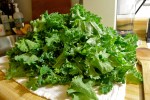
6 cups of radish greens, washed

6 cups of wild spinach, washed

Olive oil

1/2 pound of feta, crumbled

The zest of one lemon

Salt and pepper

A pinch of nutmeg

1 egg, beaten

6 sheets of frozen phyllo dough, completely thawed

1 stick of butter, melted

How to prepare:

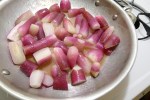
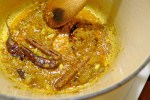
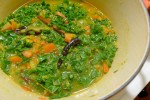
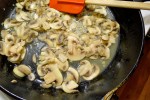
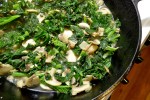
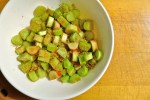
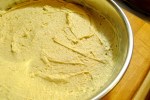
1. In a large pot, heat some olive oil over medium heat. When the oil becomes fragrant, add the wild spinach to the pot along with a few tablespoons of water. Sauté the spinach until it is just wilted. Remove the wilted spinach with tongs to a colander to drain. Repeat this process with the radish greens.

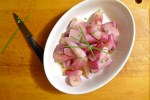
2. When the greens are cool enough to handle, use your hands to gently squeeze and press as much liquid as possible out of the leaves. You will be amazed how much liquid there is. Try to be thorough; the less moisture there is in the leaves, the better your filling will be.

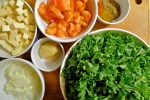
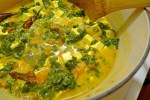
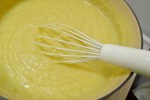
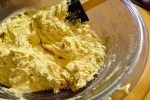
3. Finely chop the greens and put them in a large bowl. To the bowl, add the feta and the nutmeg. Stir everything together until the cheese is evenly distributed throughout the greens. Adjust the seasoning before adding the beaten egg.

3. Preheat the oven to 375°.

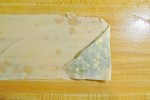
4. Fold the phyllo sheets in half lengthwise and cut them in half. Fold each half lengthwise and cut them in half again. Each phyllo dough sheet will give you 4 long strips of dough. Cover the strips snugly in plastic wrap. Working one strip at a time, make the spanakopita. Gently brush each strip with melted butter. Starting at one end, put a dollop (about a scant tablespoon) of filling in the upper corner. Fold the phyllo dough down over the filling to make a triangle. Now fold the filled triangle up. Continue to fold the strip into triangles, like folding an flag (or at least how we Americans fold a flag). Don’t worry if the folds aren’t perfect. Working with phyllo can be very forgiving because you can always make the uneven edges stick to main triangle with more butter.

If you want crunchier spanakopita, you can layer two strips of phyllo dough together with brushed butter and then fold the triangles up as you would with one strip. Just remember that you will need double the number of phyllo dough sheets in this case.

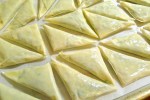
Continue folding with the remaining strips of phyllo dough. Arrange the completed triangles in a single layer on a parchment paper-lined baking sheet. You should end up with 24 filled triangles total.

5. Brush the triangles with the remaining melted butter. Bake them for 20-25 minutes until they are golden and crisp. Serve hot.

Variation:

I had planned on adding about 1/4 cup of fresh dill, a 1/4 of a cup of fresh parsley and a 1/4 of a cup of freshly chopped green onions, but I got distracted by a terrible werewolf movie on television called Blood and Chocolate. I think lost brain cells! It wasn’t even corny, or cheesy or cool in a bad cult-movie kind of way. It was just bad.

Finnish Ruis Bread Topped with Sliced Radishes and Soft Butter


I ate my first radish after watching Shelley Duvall’s Faerie Tale Theater. Do you remember that series? Maybe it was a little dark for children, but I loved it and thought Shelley Duvall was the bomb as Rapunzel.

If you remember the story, it all starts when Rapunzel’s mother develops a serious pregnancy craving for radishes, specifically the radishes topped with blue leaves growing in her neighbor’s garden. Unfortunately, instead of just going next door and asking the neighbor for some radishes, or even offering to pay for the radishes, her husband decides that he is going to scale the garden wall in the middle of the night and steal them.

If it had been Texas or Florida, he would have just been shot on sight, but since it’s Faerie Tale-land, the neighbor just takes their first-born.

Did I mention that she’s a witch?

That really got my 7 year-old brain working. What food would be so good that it would cause you to ignore common sense (don’t break, enter and steal from witches)? I had to get one of these radish-things. They must, I thought, be amazing!

After pestering my parents, they finally came home from the market with a nice bunch of radishes. They were so pretty: bright red on the outside and snowy white on the inside. No blue leaves, but I could deal with the thought of that particular variety being unavailable at our local supermarket.

I put one in my mouth, chewed . . . and spat it right back out. Blech! Stupid fairy tale!

I pretty much avoided radishes after that until I was 14 and was served them in France. Not wanting to be impolite, I followed my host family’s lead and slathered the offensive root with butter before popping it in my mouth.

Imagine my shock: the radish wasn’t offensive at all. It was . . . delicious!

And I have loved them ever since.

These little toasts can hardly be considered a recipe; they are just something that I love to have for lunch when radishes are in season. I really like using Finnish Ruis bread made by NYC-based Nordic Breads (the best Ruis bread ever). Nordic Breads ships their rounds anywhere, but in a pinch, any good rye bread will do as long as it is sliced thinly.

I’m not paid to say this about Nordic Breads at all, I just think their bread is wonderful 🙂

Ingredients:

Finnish Ruis bread, or any thinly sliced good rye bread

Radishes, thinly sliced

Good soft butter

Good sea salt

How to prepare:

1. If using Finnish Ruis bread, cut each round into halves or quarters before splitting them through the middle. Toast the bread and let it cool completely.

2. When the bread is cool, spread the soft butter evenly over the top of each piece. Arrange the sliced radishes on top and sprinkle them with good, flaky sea salt. Eat immediately.

Kale Paneer


I can’t take credit for this recipe. That honor goes to the amazing Tahmina at Kolpona Cuisine whose recipe for Saag (Palak) Paneer gave me a delicious way to polish off the remainder of my giant pile of kale. The only changes that I made were to A) use fresh kale instead of spinach, and to B) forget to add the fenugreek leaves. I only realized that they were missing after I started eating 😦

Next time, I will follow Tahmina’s lead and make my own paneer. I bought it this time for the sake of convenience. I also didn’t think that fresh kale would release more liquid than fresh spinach when cooked. I should have compensated by reducing the amount of water that I added to the dish.

This was really, really good. So good that I ate it with piles of white rice! And Tahmina, you like it spicy! Thank goodness, because I like it spicy too 🙂

Thanks for the great recipe; I loved it!

Kale Pesto with Whole Wheat Fusilli


What’s a girl to do when faced with too much kale and too little time? Make pesto!

When it comes to something like pesto, it’s hard to say that anyone has proprietary claims to any one recipe. I did look at this recipe on Tastespotting and this recipe on Food 52 for nut-cheese-oil ratios. In all honesty, I have so much kale on hand that I threw those proportions right out of the window. I just kept tinkering and measuring until I had a sauce that was so good, I wanted to eat more and more of it.

Kale has a clean, bitter flavor that I think pairs better with walnuts than pine nuts. When using walnuts, I like to also use walnut oil. Some Meyer lemon zest keeps the sauce nice and fresh. You can also zest a regular lemon if Meyer lemons are not available to you. If you don’t want to emphasize kale’s refreshing bitterness, you can use just olive oil. It will still taste great.

Kale pesto has an earthier flavor than basil-based pestos, and that flavor demands a heartier pasta like whole wheat. Fusilli is always a good choice for pesto because the spirals catch and capture the sauce beautifully.

It’s always a good idea to toss pasta and pesto together in a separate bowl. You don’t want the Parmesan in the sauce to burn and stick to the bottom of a hot pot or pan. The warm pasta — plus a little of the hot pasta cooking water if needed— will loosen the sauce up without the need for any external heat.

I am looking forward to eating my kale pesto in other ways this week, like on pizza or in lasagna. I hope it freezes well too because I made a lot of it!

Ingredients:

1 pound of whole wheat fusilli

2/3 of a cup of walnuts

2 cloves of garlic

2/3 of a cup of freshly grated Parmesan

The zest of 1 lemon

5 cups of washed and torn kale leaves, no stems and no ribs

1/2 cup of olive oil

1/2 cup of walnut oil

Salt

How to prepare:

1. Preheat the oven to 350°.

2. Spread the walnuts out in an even layer on a baking tray. Bake the walnuts until they are nicely toasted. This can take between 6-8 minutes. Be very careful to not let the walnuts burn. Let them cool before making the pesto.

3. While the walnuts are cooling, bring a large pot of salted water to a boil. Cook the pasta until it is al dente, about 12 minutes.

4. While the pasta is cooking, combine the garlic and walnuts together in a food processor with some salt. Add the Parmesan and the lemon zest. Pack all the kale into the food processor bowl and with the processor running, slowly drizzle in the olive and walnut oils. Continue to process everything until you have a smooth and creamy sauce. Adjust the seasoning.

5. When the pasta is cooked, drain it and pour it into a large bowl. Add the pesto, a dollop at a time, until the pasta is nicely and evenly coated. Serve immediately.

Spicy Braised Kale and Mushroom-Topped Polenta with Poached Goose Egg


In a fit of health consciousness, I went a little crazy at the market and bought several large bunches of local kale. When washed, it amounted to more than 30 cups. Yes, you heard that right: 30 packed cups of kale!

I love kale, but this was a little much even for me. Kale has been going into everything lately from eggs to potatoes, from soup to salad. But no matter how much kale I use, the pile doesn’t seem to diminish much. It’s the neverending pile o’ kale!

I took advantage of this kale-pportunity to try out another way to make polenta. Polenta is one of those things that is just elemental, like roast chicken or omelets. There are a million ways to make polenta. You can make it in the oven, the slow-cooker, the microwave or on the stove. You can cook it for 15 minutes or hours. You can spread it out onto a sheet pan and cut the hardened polenta into squares. You can deep-fry leftover polenta. The smallest amount of corn meal seems to make mountains of polenta. It’s a polenta-palooza!

Great to pair with the neverending pile o’ kale, no?

This polenta-making technique is from those fiddly folks at Cook’s Illustrated. It only takes 30 minutes of minimal whisking to achieve creamy polenta perfection.

And, as you can see, my CSA has goose eggs! Which are big honking suckers 😉 The equivalent, more or less, of two chicken eggs. There are a million ways to poach eggs too, but lately I have been liking Food52’s Control-Freak Poaching Method.

Ingredients:

For the polenta:

6 cups of water or stock

Salt

1 1/2 cups of yellow corn meal

4 tablespoons of butter

1/3 – 1/2 of a cup of grated Pecorino Romano or Parmesan

For the Spicy Braised Kale and Mushrooms:

2 tablespoons of butter

Olive oil

2 garlic cloves, finely minced

8 ounces of white button mushrooms, sliced

Salt and pepper

Red chili pepper flakes

1/4 cup of dry white wine

6 cups of roughly chopped kale

For the poached eggs:

Water

Salt

1 goose egg per person

How to prepare:

1. In a large, heavy Dutch oven, bring the 6 cups of water or stock almost to a boil with the lid on. Uncover the pot and season the water or stock with salt. Vigorously whisk the corn meal into the liquid a little bit at a time. As you whisk, be sure to get in all the corners and edges of the pot with the whisk to ensure that there are no lumps. When all the corn meal has been added to the water, cover the pot again and reduce the heat to low. Let the polenta simmer, stirring every 5 minutes, for 30 minutes total.

2. In the meanwhile, melt 2 tablespoons of butter with a little bit of olive oil in a large skillet set over medium heat. When the butter begins to foam, add the minced garlic and the mushrooms. Sauté the mushrooms until they give up most of their liquid and begin to turn golden. Add the white wine and as many red chili pepper flakes as you like. Season the mushrooms with salt and pepper. When the liquid has reduced to almost a glaze, add the kale to the pan and cover the skillet. Let the leaves wilt completely before stirring the kale and mushrooms together. Adjust the seasoning for a final time and remove the pan from the heat.

3. After 30 minutes, your polenta should be done. Move the pot away from the burner and vigorously whisk in the butter, one tablespoon at a time, until it has all been well-incorporated and the polenta is creamy. Stir in the Pecorino or Parmesan and adjust the seasoning.

4. In a medium-sized saucepan, bring about 4 to 5 inches of salted water to a near simmer. Carefully crack a goose egg into a small fine-mesh strainer. You want to separate the yolk and the more solid part of the white from the more watery part of the white. Carefully pour the egg into a large, shallow spoon. Gently lower the spoon into the water. Use another spoon to catch any bits of white that try to escape. When the egg is perfectly poached, the white should be opaque and when you gently move the egg back and forth, the white and the yolk should move in sync. When the egg is done, lift it out of the water and very carefully roll it onto a paper towel-lined plate.

5. To assemble the dish, spoon out about half a cup of polenta into a large, shallow bowl. Top the polenta with about a third of a cup of the spicy braised kale and mushrooms. Carefully position the poached egg on top of the braised kale and drizzle everything with good olive oil. Serve immediately.

Mascarpone-Polenta Cake with Rhubarb and Meyer Lemon


I wish that I was more of a baker. Unfortunately, my baking past is littered with all kinds of baking misfortunes: lumpy cakes, leaden cakes, cracked cakes, dry cakes, lopsided cakes, burned cakes, burned cakes with runny centers, runny cakes with charred tops. The list is unfortunately long!

I think it must be related to the fact that, when it comes to recipes, I am incorrigible: I rarely follow them to the letter. It doesn’t help that I am generally inclined to eyeball amounts instead of dirtying up another measuring cup or spoon. This is fine for regular cooking, but kind of disastrous when it comes to baking.

So when I decided to try to come up with my own recipe for a polenta cake with mascarpone that would make use of the first of this season’s rhubarb, I was pretty nervous.

Thankfully, it came out beautifully. The cake had a wonderfully moist and tangy crumb that beautifully complemented the rhubarb’s tartness. The idea of arranging the fruit (or vegetable? I guess rhubarb actually a vegetable) on the top of the cake batter comes from Nigel Slater’s Blueberry-Pear Cake from his Kitchen Diaries.

One more thing: be sure to remove any leaves from your rhubarb stalks before cooking. Only the stems are edible. The leaves contain oxalic acid that can make you pretty sick. It goes without saying to keep your animals away from rhubarb. More for you, I say. What a delicious way to live dangerously!

Ingredients:

About 2 1/2 cups of rhubarb, washed, trimmed and sliced into 1/2 inch pieces

1 cup of brown sugar, plus an additional 1/4 cup

8 tablespoons of butter (1 stick), softened

1 egg

3/4 cup of mascarpone

The zest and juice of one Meyer lemon

1 cup of all-purpose flour

1 cup of yellow corn meal

3/4 teaspoon of salt

1 teaspoon of baking powder

1/4 teaspoon of baking soda

How to prepare:

1. Line the bottom of a 9-inch springform pan with parchment paper. Butter the sides.

2. In a medium-sized bowl, toss the rhubarb with 1/4 cup of brown sugar. Let the rhubarb sit for about 30 minutes.

3. Preheat the oven to 350°.

4. Sift the dry ingredients (the flour, the corn meal, the salt, the baking powder and the baking soda) together into a large bowl.

5. In another large bowl, cream together the remaining cup of brown sugar and the softened butter. Add the egg, followed by the mascarpone, the lemon zest and the lemon juice. Continue beating the mixture until it is nice and fluffy. Beat in the dry ingredients, a little bit at a time, until they are well-incorporated into the batter.

6. Spread the batter out as evenly as possible onto the bottom of the springform pan. It will be thick. Arrange the rhubarb by pressing each piece into the batter in concentric circles. Bake the cake for about 1 hour and 30 minutes, until the top is golden and the center has set.

Let cool before slicing and serving.

Asparagus with Fried Egg and Parmesan


It’s asparagus season! Which means it’s time for my favorite fast lunch: sweet local asparagus topped with a fried egg and sprinkled with Parmesan. To anyone who thinks that making yourself lunch takes too much time, I challenge them to find something quicker than this meal.

But, Daisy, don’t you have to steam asparagus? Or boil it? That takes time!

Oh no no, young Padawan. You can . . . microwave it!

This idea comes from Andrew Carmellini‘s Urban Italian. In the book, he recommends microwaving asparagus as a quick and terrific way to perfectly cook it without sullying up another pot. I just have to quote him on this:

“Asparagus in the microwave is awesome. Yup. You read that right. I’m sure some food snob somewhere is recoiling in horror and throwing this book across the room, but I don’t care.”

I don’t care either. I love Carmellini’s food. He’s got a Michelin star and two James Beard Awards. If microwaving asparagus is good enough for him, it’s good enough for me.

This is one of those no recipe-recipes that can be multiplied by as much as you need. I give you the recipe for one but obviously, if you are cooking for more people, you will need to punch an extra minute or two into the microwave.

Ingredients:

6-7 asparagus spears, rinsed clean and trimmed of their woody ends

Olive oil

1 egg

Butter

Salt and freshly ground black pepper

Grated Parmesan cheese

How to prepare:

1. Spread out the asparagus in a single layer on a microwave-safe plate. Season the asparagus with salt and sprinkle on a little bit of water. Drizzle it with some olive oil. Cover the plate tightly with plastic wrap and nuke it for 1 minute and 30 seconds.

2. In the meanwhile, fry up an egg in butter.

3. Carefully remove the plastic wrap from the plate and arrange the asparagus spears on a clean plate. Top the asparagus with the fried egg. Season everything with salt and black pepper. Sprinkle on as much grated Parmesan as you like.

Serve with a good, crusty bread.

Fried Egg with Sautéed Ramps and Garlic-Rubbed Toast


Ramps. Just the thought of them at the Greenmarket makes me really excited. Ramps taste like the essence of spring given that they are the first greens to come up after a long winter of tubers and root vegetables.

I’m not the only one with ramp-mania either. Unfortunately, the dramatic rise in their popularity over the past few years has been raising concerns that foragers are over-harvesting to meet demand.

Ramps are notoriously difficult to cultivate. For the most part, they are a foraged food that is found and plucked in the wild. To ensure that the plant keeps growing requires foragers to leave their bulbs intact — problematic since most ramps are sold with their bulbs and roots attached.

So what do you do if you love them like I do? Should you stop eating them all together?

You don’t have to give up ramps as long as you stay committed to being a responsible consumer. If you forage for them, take no more than you can reasonably eat. If you can, just take the leaves and leave the bulbs in the ground. If you buy them, try to buy them from a farmer you trust. Talk to your farmer and make sure that their ramps are coming to you in a sensible and sustainable way. The Greenmarket NYC closely monitors and regulates foraged food to ensure that things like ramps will continue to be around in the future.

Celebrate their scarcity because that is what makes them special!

Once you get your hands on some sensibly-foraged ramps, this is a great way to prepare them for lunch or for a light supper. I hesitate to even call this a recipe since it is such a simple way to prepare them, but simple preparations are oftentimes the best way to showcase especially great ingredients.

Ingredients:

Thickly-sliced bread, as many pieces per person as you like

1 garlic clove

4 ramps per person, cleaned and bulbs split in half if they are on the large side

1 egg per person

Olive oil

Butter

Salt and black pepper

How to prepare:

1. Generously brush both sides of your bread with olive oil. Broil the pieces until they are golden brown. Rub a garlic clove on both sides of the bread, including the edges.

2. In a large skillet, heat some olive oil over medium heat. Add the ramps to the pan when the oil begins to shimmer. When the leaves have wilted and the bulbs have begun to turn translucent, shape the ramps into a circle and crack an egg into the center. Add a knob of butter to the pan. When the butter has melted, begin spooning the hot fat over the egg yolk as it cooks. When the whites have set, use a spatula to gently remove the egg and the ramps from the pan to a plate. Season the egg and ramps with salt and freshly ground black pepper.

Serve with the garlic-rubbed toast.