Sautéed Fiddlehead Ferns with Garlic and Lemon


I have a food confession to make: I have been so busy that I haven’t been to the Greenmarket at all this season. Blame it on work, blame it on the incessant rain, blame it on the suffocating heat and humidity, but the real blame goes to me.

I have been a very lazy eater of late.

But spring vegetables are an excellent reason to get off of my duff. Since I missed ramp season (argh!), I wasn’t going to let the fiddlehead fern pass me by.

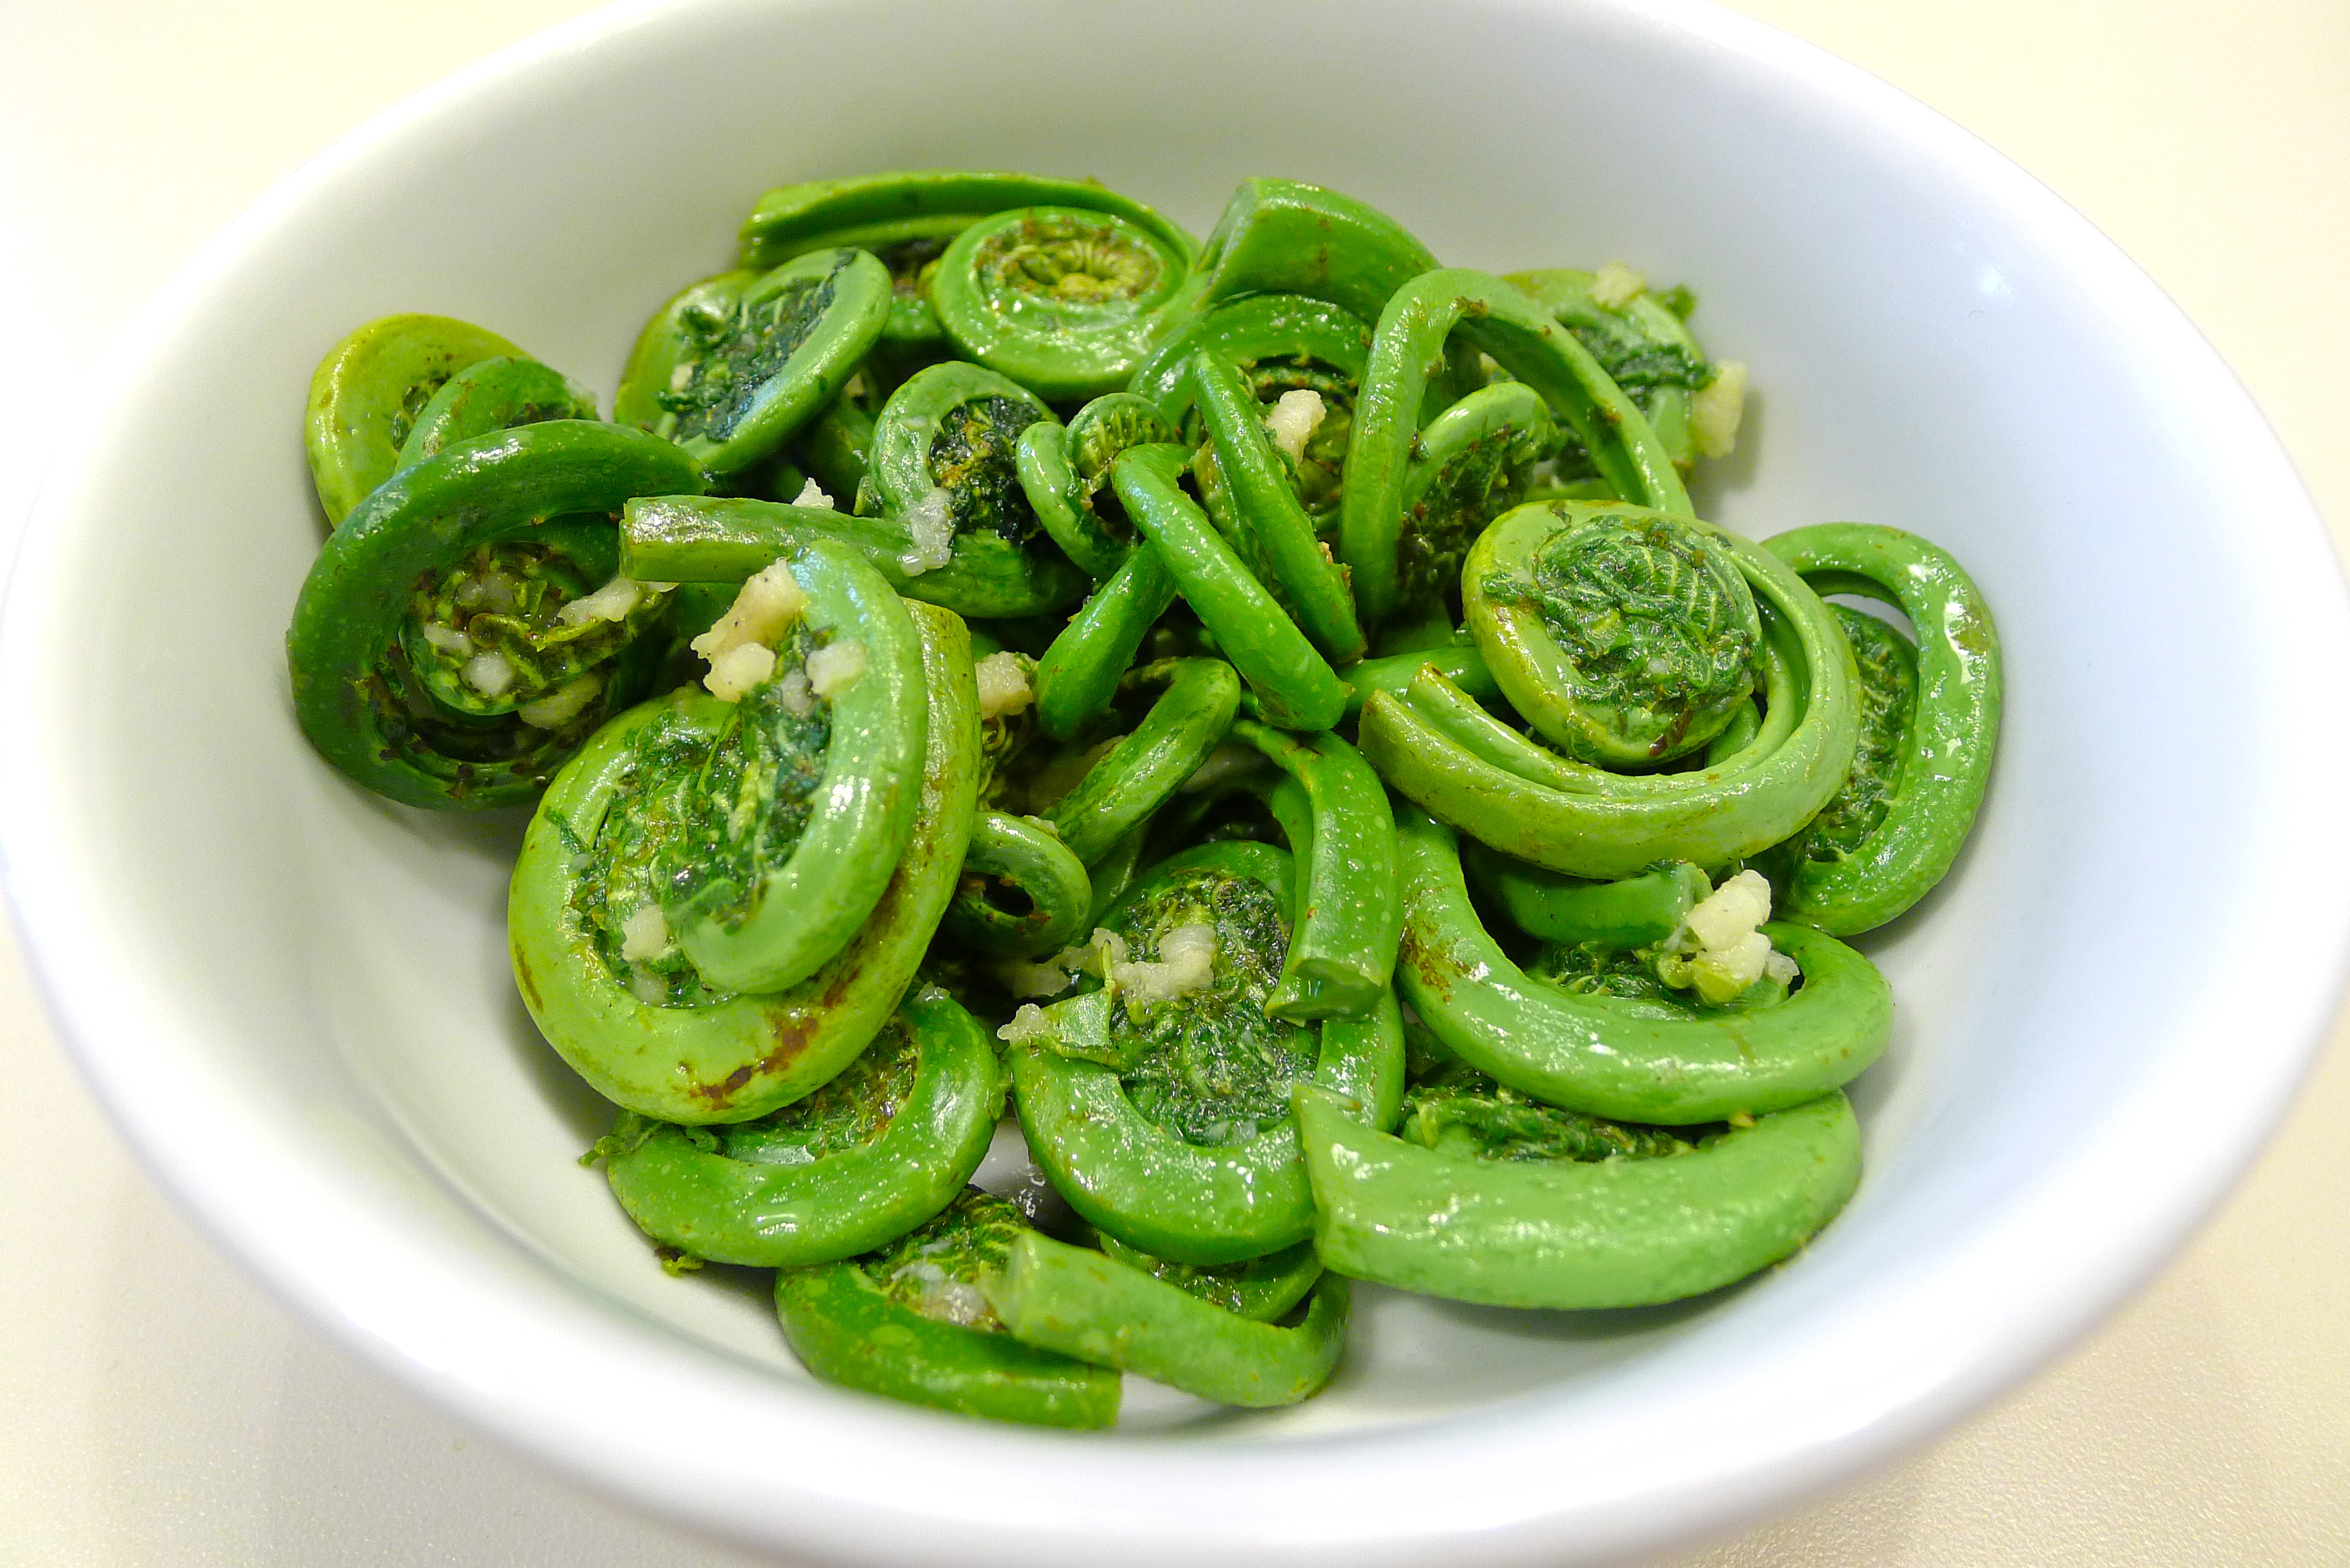
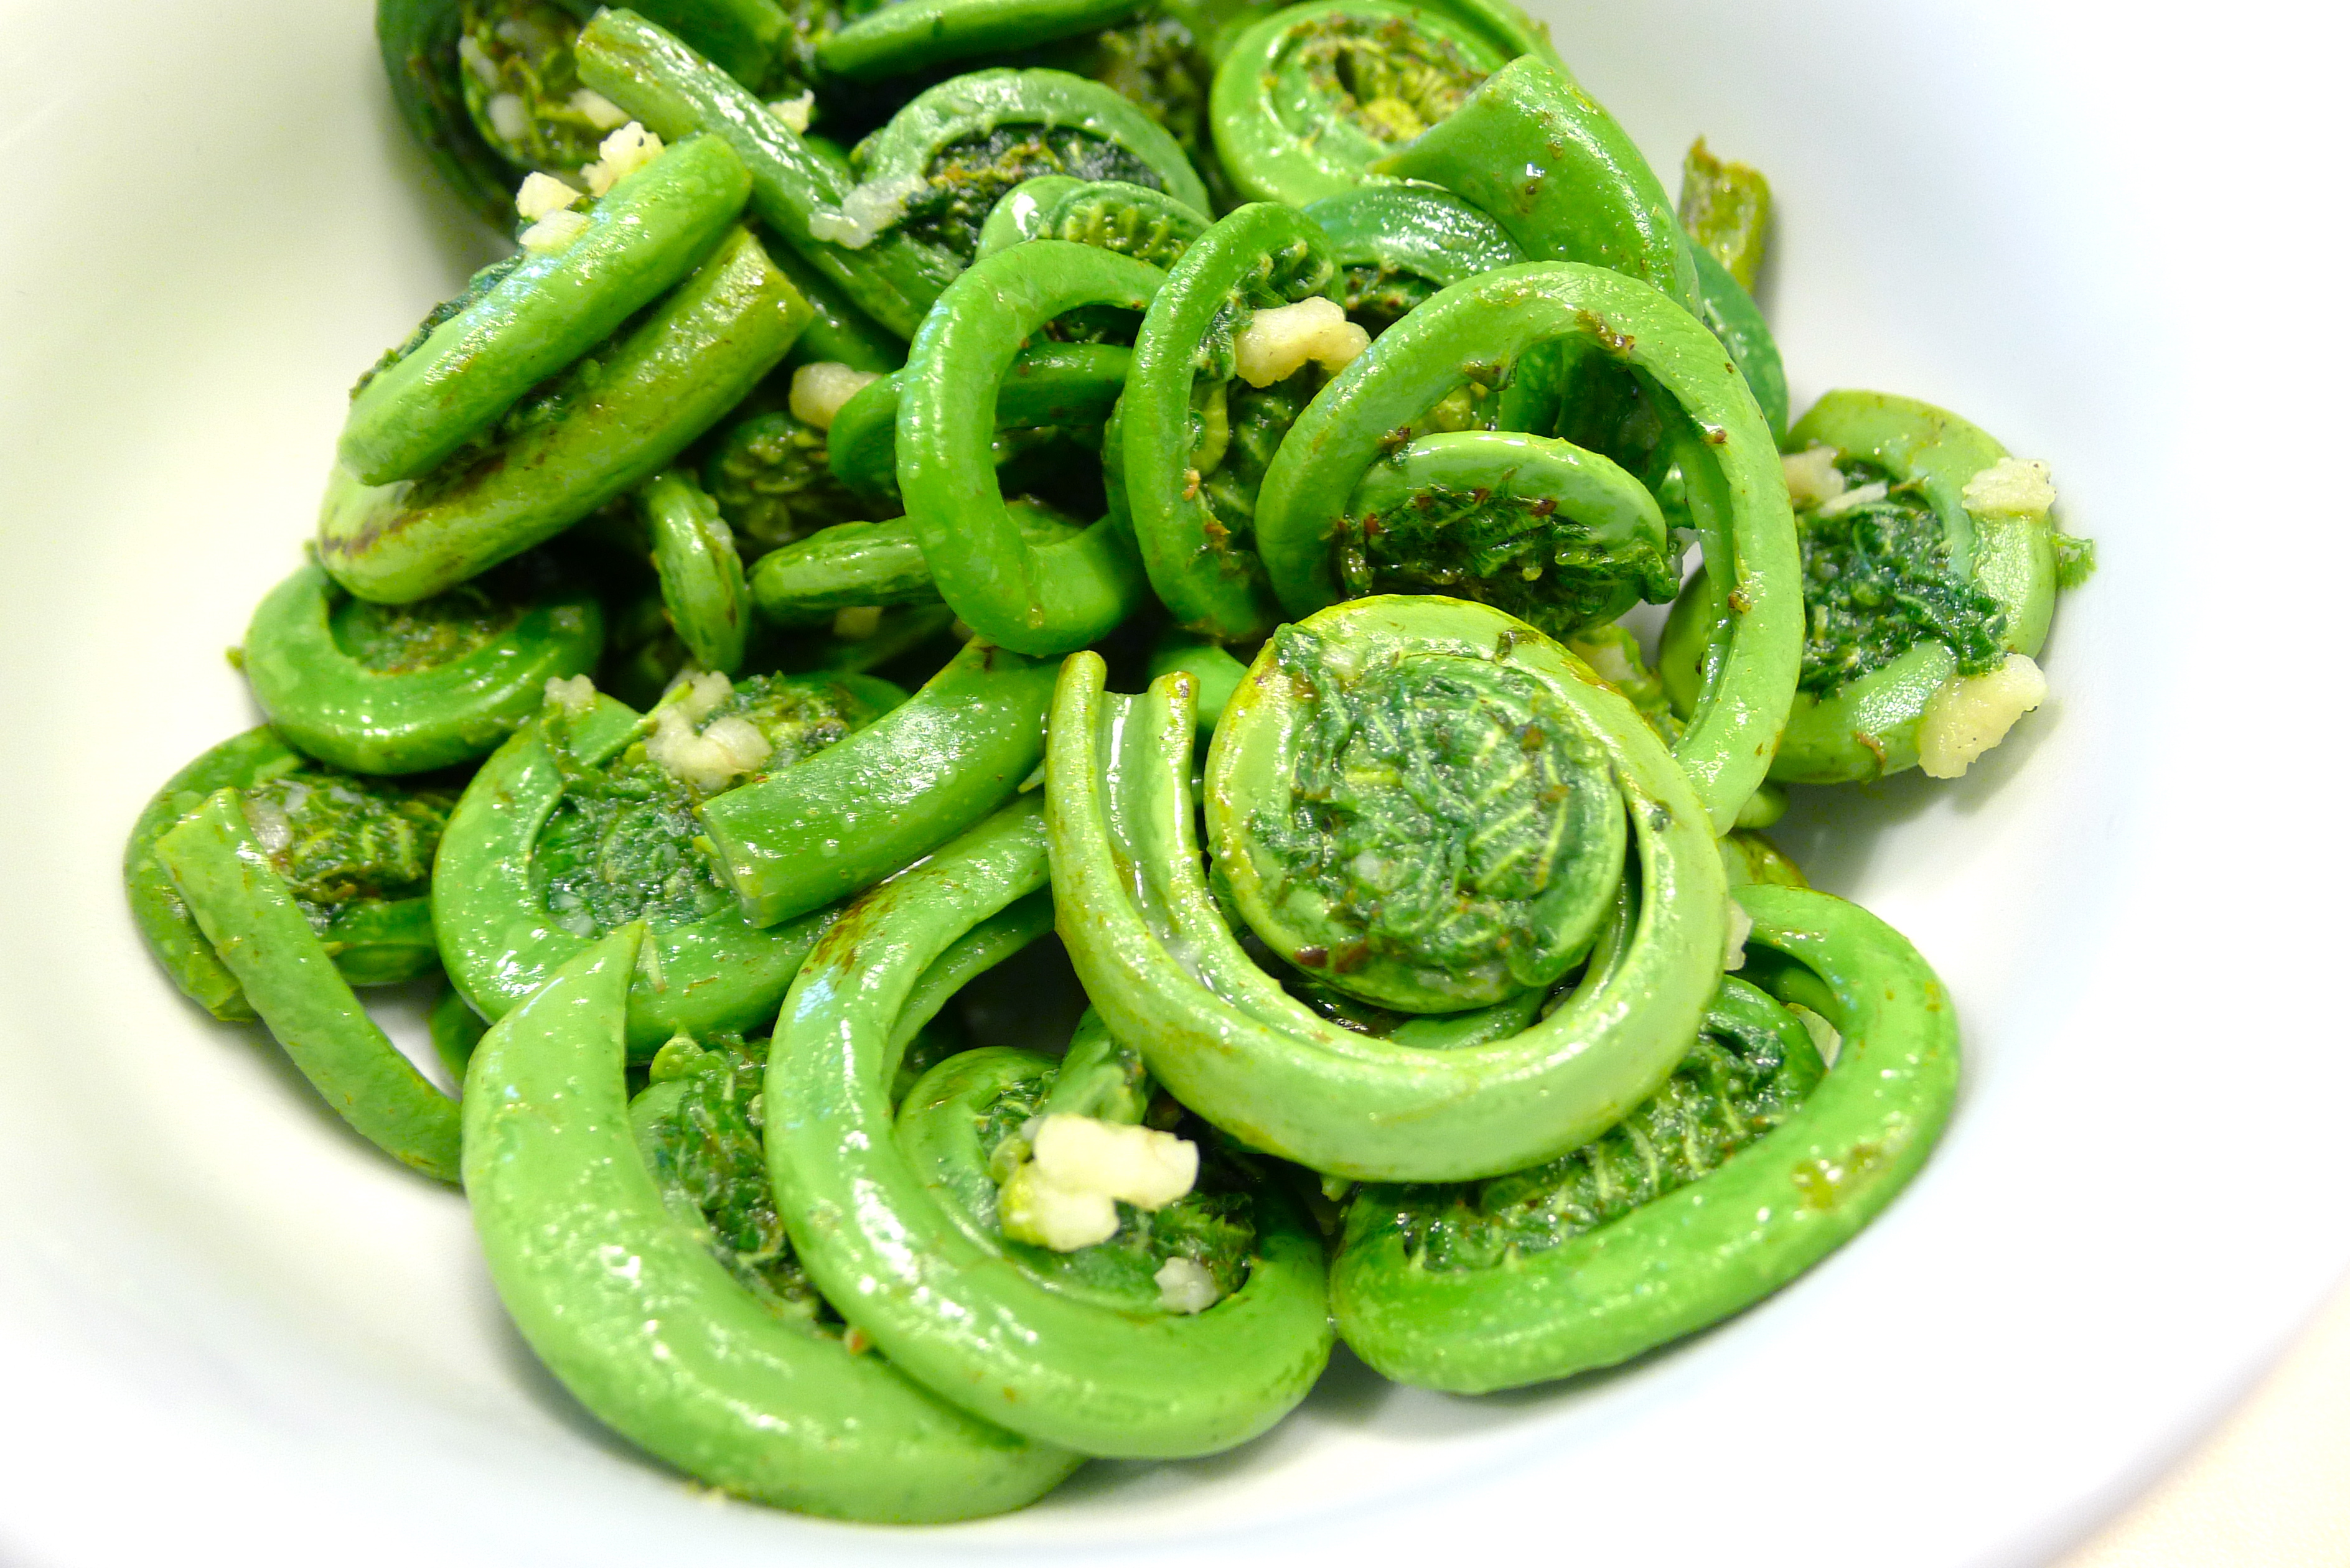
Fiddlehead ferns are the unfurled leaves of a young fern. They are harvested around this time, before they unroll and spread out as a new frond.

You blink and you miss the season.

So this is time-sensitive post, people!

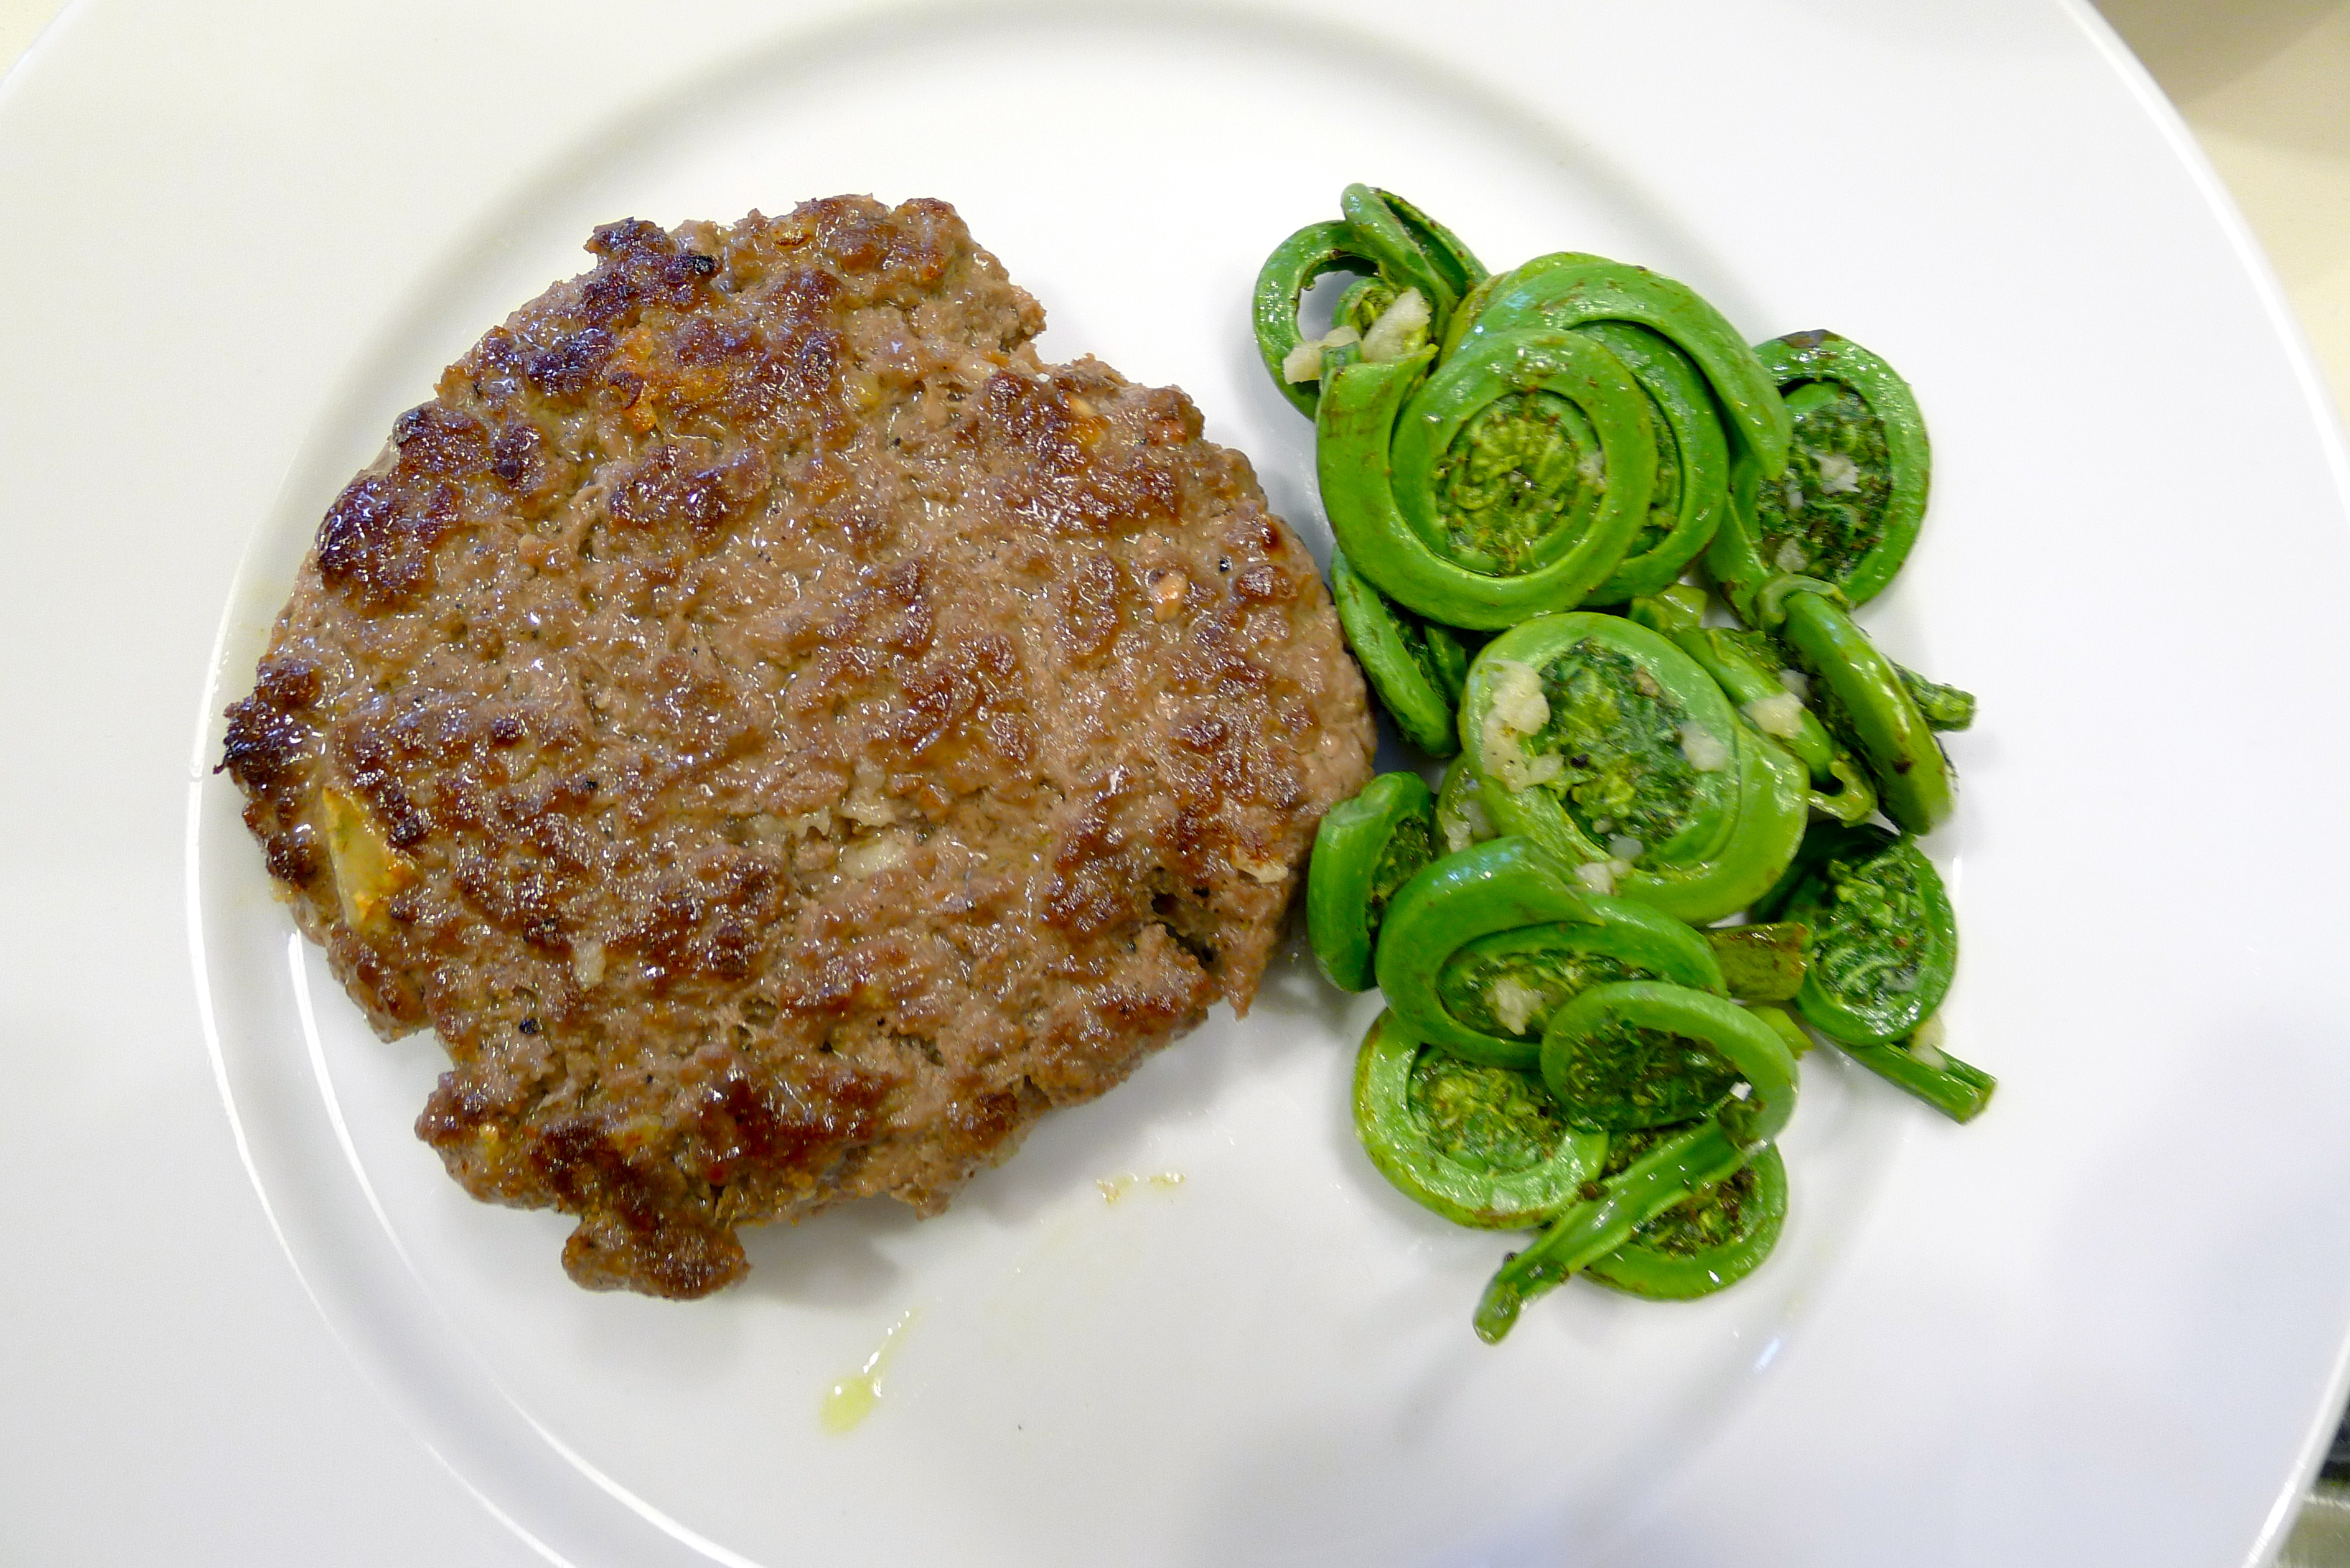
I love them simply cooked: blanched, sautéed in olive oil and butter with garlic, and spritzed with lemon before serving.

Be sure to clean the ferns well before blanching. Swish them around in a big bowl of water, trimming the ends a little if they need it. After boiling them briefly in salted water, plunge them into an ice cold bath to stop the cooking and preserve their wonderful color. As the fiddleheads drain, heat a little bit of olive oil with a small knob of butter in a sauté pan with some finely minced garlic. When the garlic begins to sizzle, add the ferns. Shower them with sea salt, and sauté them until they start to brown slightly. A quick squeeze of lemon over the top before serving. They are fabulous.

Oven-Roasted Asparagus


If I had to say what my absolute favorite way to cook vegetables was, it would be roasting.

I’ve roasted just about everything: beets, cauliflower, broccoli, mushrooms, parsnips, eggplant, zucchini, peppers, carrots, broccoli rabe, tomatoes.

There is something about roasting that concentrates flavors, makes everything taste better. Roasting turns eh-okay tomatoes into something great. Vegetables emerge from the oven with a little char, and a lot of attitude — the good kind.

Now that it is springtime, asparagus spears have been big at the market.

And I love roasted asparagus the most.

To roast any vegetable, I set my oven between 400° to 425°. I wash my vegetables well, cutting them up into relatively equal pieces so that they roast evenly. How big should the pieces be? The fabulous Judith Jones had the best suggestion for this: cut your vegetables into the size you want to eat.

She might have stolen that from Julia.

For asparagus, you will need to trim the woody, inedible bottom ends from the rest of the stalks. How do you this? Hold the base of the stalk firmly and bend. The stalk should snap right at the point between the tough end and the tender one. To visualize this, here is a handy video clip. Discard the ends.

Evenly spread the vegetables out on a parchment paper-lined baking sheet. Drizzle good olive oil over them. Sprinkle them liberally with with flaky salt (I like Maldon salt), and add a few turns of the pepper mill. With your hands, toss the vegetables together to make sure that they are all coated with the oil and the seasoning. Spread them back out in an even layer on the sheet.

The roasting time varies depending on what you are roasting, and how big your vegetable pieces are. Asparagus cooks fairly quickly, no longer than 10 minutes. You want to remove the stalks from the oven when they are slightly blistered and charred — that goes for all vegetables, except for eggplants, tomatoes, and mushrooms (you want those a little more roasted). I would say experiment. Check on your vegetables after every 7 or 8 minutes. You will figure out eventually what times work best for you.

After your vegetables are roasted, transfer them to another dish. The great thing about roasted vegetables is that you can even serve them at room temperature, which is great because you can roast them ahead of time and not worry about them while you are finishing cooking the rest of your meal.

Sometimes, I like to grate some Parmesan on top before serving, or add a spritz of lemon juice.

Spicy Miso Dip


I recently made dinner for Laura at her apartment. Saddled with overwhelming piles of work, she seemed on the verge of exhaustion and in much need of some TLC. As I like playing personal chef, I was more than happy to oblige.

I didn’t have much for lunch that day and was scrounging around in her fridge for something to nibble on while cooking. She directed me to some miso dip that she had made earlier, and a nice little mound of snow peas. Maybe she hadn’t thought that I would eat all of her snow peas and inhale the dip like air . . . but I did.

Sorry, Laura.

This recipe is a riff on her riff on a recipe posted by blogger extraordinaire, Heidi Swanson. Heidi’s website (she has a cookbook too), 101 Cookbooks, is a treasure trove of delicious, healthy recipes that taste great and make you feel good. As the weather gets oh-so-slowly warmer, eating more fruits and vegetables sounds like a welcome and wholesome idea.

Ingredients:

3 ounces of white miso paste

3 ounces of red miso paste

1/4 cup of sake

1/2 cup of mirin

4 tablespoons of agave syrup

Red chili pepper flakes to taste

How to prepare:

1. Combine the miso pastes, the sake, the mirin, and the agave in a small saucepan. Bring the mixture to a boil over. Once the mixture has started to boil, reduce the heat and simmer it for about 20 minutes, whisking occasionally. You want the dip to thicken a bit.

2. Once it has thickened, add the chili pepper flakes. Remove the dip from the heat and let cool. The dip will keep in the refrigerator for between 1-2 weeks. Serve with fresh vegetables, blanched asparagus, anything really!

Strawberries Dipped in Chocolate Caramel Sauce


Chocolate-covered strawberries get a bad rap. It’s perhaps not so surprising: the majority of ones in this country are sold in February, when strawberries are completely out-of-season.

Now I have nothing against partaking in enrobed fruit for Valentine’s Day, but strawberries bought in the middle of winter are usually shipped from South America, freakishly oversized, and stunningly tasteless despite their glossy red exteriors.

The chocolate sarcophagus they come in isn’t always very appetizing either.

But it is finally springtime — officially the start of strawberry season. Now is the time to see that chocolate-covered strawberries done right can be a sinfully sloppy mess.

How can you tell if a strawberry is ripe?

Smell it. Does it smell like a strawberry? No? Put it down. Walk away. Yes? Is it a full-on, luscious, musky strawberry-smell? Buy. Now. Buy buckets of them.

This sauce is fantastic. So easy and so versatile. Dredge fruit in it, or even better, drizzle warm gobs of it over vanilla-bean gelato. Or just eat it out of the pot. It’s fabulous.

Ingredients:

1 pint of ripe strawberries, washed and gently patted dry

1/4 cup of sugar

1/2 cup of heavy cream

2 ounces of semi-sweet chocolate (no more than 70% cacao), broken into smaller pieces

1/8 teaspoon of sea salt

How to prepare:

1. Cook the sugar in a small dry saucepan over moderately high heat, undisturbed, until it begins to melt, about 2 minutes. Continue to cook, tipping the pan from one side to the other, until the sugar has melted into a deep golden caramel, about 1 to 2 minutes. To help visualize this, here is a handy profanity-free video with Gordon Ramsay.

2. Remove the caramel from the heat and carefully pour in the cream. The cream will steam and bubble vigorously. Once the bubbles begin to subside, return pan to moderately low heat and cook, stirring or whisking constantly, until the caramel has dissolved. If the caramel does not seem to dissolve completely, add 1 to 2 teaspoons of water at a time, stirring, until it has dissolved.

3. Turn off the heat and continue to stir or whisk the caramel to cool it down a little bit. Add the chocolate and the salt. Stir or whisk the chocolate into the caramel. The sauce should be thick and glossy when you are finished.

4. Dip the strawberries in the sauce and arrange them on a plate. Serve them to someone you want to make happy.

Pan-Roasted Shitake Mushroom-Topped Bruschetta


When guests come over for dinner, I usually like to give them something to nibble on while I am finishing up in the kitchen. Bruschetta is my preferred MO. First of all, bruschetta is always more impressive than a big bowl of olives — even very, very nice olives. Second of all, you can set up basically everything ahead of time, and assemble the toasts right before your guests breeze through the door.

Bruschetta is technically defined as any kind of grilled bread — brushed with olive oil and rubbed with garlic — with some kind of topping. In the flip-floppy way that we do things here, bruschetta has come to refer to the topping rather than the bread.

Ingredients:

One demi-baguette or small ciabatta loaf, cut into 1/2-inch slices

About one pound of shitake mushrooms, sliced

About 2 tablespoons of olive oil, plus one tablespoon

2 cloves of garlic, finely minced, plus one clove of garlic, smashed

2 tablespoons of fresh Italian parsley, finely chopped

The juice of one small lemon

Salt and pepper to taste

How to prepare:

1. In a large cast-iron pan, heat two tablespoons of olive oil over medium heat until the oil just begins to smoke. Add the mushrooms. Toss the mushrooms in the hot oil and spread them out evenly over the bottom of the pan. Cook them, stirring occasionally, for about 8 minutes. As the mushrooms cook, they will release a fair amount of water. Don’t worry, the water will evaporate as the mushrooms start to become golden.

2. When the mushrooms begin to brown, add the finely minced garlic to the pan. You want to make sure the garlic is evenly distributed throughout the mushrooms, but you don’t want it to burn. Cook the garlic and mushrooms together for about a minute.

3. Transfer the cooked mushrooms to a separate mixing bowl. Add the parsley and the lemon juice. Stir everything together to combine. Adjust the seasoning with salt and pepper to taste.

4. Brush the bread slices with the remaining tablespoon of olive oil and toast them until they are golden brown. Rub the slices with the smashed garlic clove before topping each one with a heaping spoonful of the mushroom mixture. Arrange the bruschetta on a plate and serve.

Vanilla Bean Crème Brûlée


This was one of the first desserts that I learned to make in Paris. It’s quick, easy, elegant, and tastes better than anything you have ever tried in a restaurant.

The recipe will fill four 4.5 ounce ramekins.

Ingredients:

1 cup of whole milk

1 cup of heavy cream

1 whole vanilla bean

4 egg yolks

1/4 of white sugar

Enough butter to butter the ramekins

1/4 cup of light brown sugar

How to prepare:

1. Preheat your oven to 325°.

2. Split the vanilla bean lengthwise. Using a paring knife, scrape the vanilla beans from each half of the pod. Here is a good video to show you how if you haven’t done this before.

2. Heat the milk, the cream, the vanilla beans, and the vanilla pod halves over medium-low heat in a medium saucepan until the mixture just begins to boil. Turn off the heat and let the vanilla bean infuse the milk and cream mixture for anywhere between 10-30 minutes.

3. In a separate mixing bowl, whisk the egg yolks and the white sugar together until the mixture is pale and creamy, about 30 seconds. Remove the vanilla bean pod halves from the milk and cream mixture. Now you need to temper the egg yolks. This is important because if you add all the hot liquid to the egg yolks at the same time, you will be on you way to making scrambled eggs.

To temper, add a spoonful of the warm milk-cream mixture to the eggs. Stir quickly to incorporate the liquid into the egg and sugar mixture. Continue to add the liquid a little bit at a time, whisking everything until the mixture has become pale yellow and slightly foamy.

5. Carefully divide and pour the mixture into the buttered ramekins. Gently set the filled ramekins in a baking dish. Fill the dish with water until the water level comes halfway up the side of the ramekins. Bake the crèmes in the oven for about 45 minutes. The centers should be jiggly, but not watery.

6. Remove the crèmes from the oven and cool them on the countertop for about 10 minutes before chilling them the refrigerator for about 3 hours.

7. Before serving, heat your broiler element. Sprinkle the brown sugar evenly over the top of each crème. Broil the crèmes under the broiler until the brown sugar has become hard and crackly. Serve immediately.

Tomato and Parsley Bruschetta


I love this. I usually only ever make it when we have guests, but today I decided to spoil myself. It is so easy and so tasty. It will be even better once it’s summer and tomatoes are in season.

Ingredients:

1 pint of grape tomatoes

2 tablespoons of fresh Italian parsley, finely chopped

1 small clove of garlic, finely minced

Olive oil

Maldon salt

1 baguette or ciabatta loaf

How to prepare:

1. Preheat the oven to 450°.

2. Cut each grape tomato into eights. You can also dice up about a pound of any tomato that you want — just be sure to seed the tomatoes before dicing them.

3. Combine the tomatoes, parsley, and garlic in a bowl. Drizzle with very good extra- virgin olive oil. Shower with a generous sprinkle of Maldon salt. Toss everything together and let the mixture sit for about 5 minutes.

4. In the meanwhile, cut the bread into 1/2 inch-thick slices. Brush one side with olive oil. Toast the bread in the oven until the slices are golden brown. Remove the bread from the oven and let the slices cool.

5. Once the bread has cooled off, mound the tomato mixture on top of each slice. Serve.

Potato Salad with Fresh Herbs


When I conceived of this salad, I was living in Paris, nursing a killer craving for big American picnic food: fried chicken in Tupperware, carrot salad with raisins, tart lemonade with sprigs of fresh mint.

What I really, really wanted was potato salad. Mounds of it smothered unapologetically in Hellmann’s mayonnaise.

But this was Paris, and Hellmann’s was nowhere to be found (actually, it was but it cost you 12 euros at a specialty shop). As the hot, late July air blew through my French windows, making my own mayonnaise with raw eggs just so that I could tote my nice, dressed salad out to a sunny park sounded like tempting fate.

So I thought to dress my potatoes up with a super lemony vinaigrette, tossing in whatever else was in my kitchen that day (radishes and celery in my case). It turned out to be delicious.

I have made this salad many times over the years. Recently, I unearthed my original scribblings from France, hastily scrawled on supermarket circular. Only then did I realize how different the potato salad that I was making New York was from that one made on that warm Parisian day.

No matter. Whether you add this, or that, or not, you will have something wonderful to eat. Picnic-safe too.

What I make now:

Ingredients:

2 pounds of waxy red potatoes, unpeeled and cut into 1-inch cubes

2 tablespoons of minced fresh herbs (thyme, parsley, rosemary, oregano, and/or dill)

Basic Mustard Vinaigrette:

Juice of one lemon, which should be about 2 tablespoons of lemon juice

1/2 cup olive oil

1 tablespoon of good grainy Dijon mustard

Salt and pepper to taste

How to prepare:

1. Boil the potatoes in a large pot of heavily salted water. You should be able to easily pierce a cube with a paring knife when they are done. Drain the potatoes and let cool.

2. Make the vinaigrette. Pour the vinaigrette over the still warm potatoes (you might want to do this a little bit at a time to avoid dousing them in dressing — something that fat-and-salt-loving me has a hard time not doing). Add the fresh herbs and toss until everything is evenly incorporated.

What I made then:

Ingredients:

1 pound of small Yukon gold potatoes (peeled, quartered, boiled, and cooled)

2-3 stalks of celery, chopped

4-5 small radishes, sliced very thin

2 minced shallots

2 tablespoons of minced fresh dill

Basic Mustard Vinaigrette:

Juice of one lemon

1/2 cup olive oil

1 tablespoon of Dijon mustard

Salt and pepper to taste

How to prepare:

1. In a large bowl, combine all ingredients together. Using a wooden spoon to stir, smash some of the potatoes against the side of the bowl to create texture. Keep stirring until all ingredients are well incorporated. Serve on a bed of lettuce. Can be made a day in advance.

White Bean Dip with Sizzled Sage


Friends are coming over in 15. Need a snappy dip quick! A hurried perusal of the cupboard reveals a can of cannellini beans. Hooray! With an effortless prep, a whiz of the hand-held blender, and a finishing touch of sizzled sage, the party is saved.

Ingredients:

1 can of cannellini beans (or any other kind of white bean), rinsed

Chicken stock

Some fresh or dried herbs (rosemary, sage, and/or thyme) to taste

1-2 cloves of garlic, sliced

Salt and pepper to taste

1 tablespoon of fresh sage, chopped

2 tablespoons olive oil

Special equipment:

A hand-held stick immersion blender

How to prepare:

1. In a small saucepan, combine the beans, the herbs, and the garlic. Add enough chicken stick until the beans are just barely covered. Simmer the beans over medium heat until they are tender and no longer gritty to taste. Remove the pan from the heat. Purée everything in the pan with a hand-held stick immersion blender until the dip is nice and smooth.

2. In a small skillet, heat the olive oil over medium heat. When the oil is not quite smoking, add the sage. Sizzle the leaves quickly in the oil, being careful not to burn them. Add the sizzled sage to the bean dip. Stir to combine. Adjust the seasoning and serve. You can also make this ahead of time and chill it in the refrigerator until you are ready to eat.

Rick Bayless’s Roasted Tomato and Jalapeño Salsa


Can anyone resist a big crunchy pile of chips and a bright red bowl of salsa?

I can’t.

It’s my weakness; I find the crunchy saltiness of the chips and the spicy sloppiness of the cool salsa irresistible.

Like everything else, I have been on the hunt for that perfect version.

This doctored-up Rick Bayless recipe comes darn close. It’s really better the next day too.

Ingredients:

2 pounds of plum tomatoes

3 jalapeño peppers, stemmed

1 medium white onion, sliced into thin rings

4 fat cloves of garlic

1 1/2 teaspoons of apple cider vinegar

The juice of 4 limes (maybe 5)

1 bunch of fresh cilantro, chopped (about 1 loosely packed cup)

1 small white onion, minced

Salt to taste

How to prepare:

1. Turn on your oven’s broiler.

2. While the broiler is heating up, spread the tomatoes and the jalapeño peppers out on a cookie sheet. Do not brush them with any oil. Broil them until their skins are blackened in spots and blistered in some parts. Turn the tomatoes and peppers throughout the cooking to make sure that all their sides are evenly colored. Remove the pan from the oven and let everything cool.

3. Set the oven to 425°. Spread the onions out on another cookie sheet, separating the rings. Tuck the garlic underneath the onions and roast in the oven until the onions are soft and starting to brown.

4. Using a food processor, process the onions, garlic, peppers and tomatoes together.

5. In a large bowl, combine the processed mixture with the remaining ingredients. You may want to add more lime juice, depending on how it tastes. Adjust the seasoning and serve.