Shredded brisket and pappardelle

P1070430

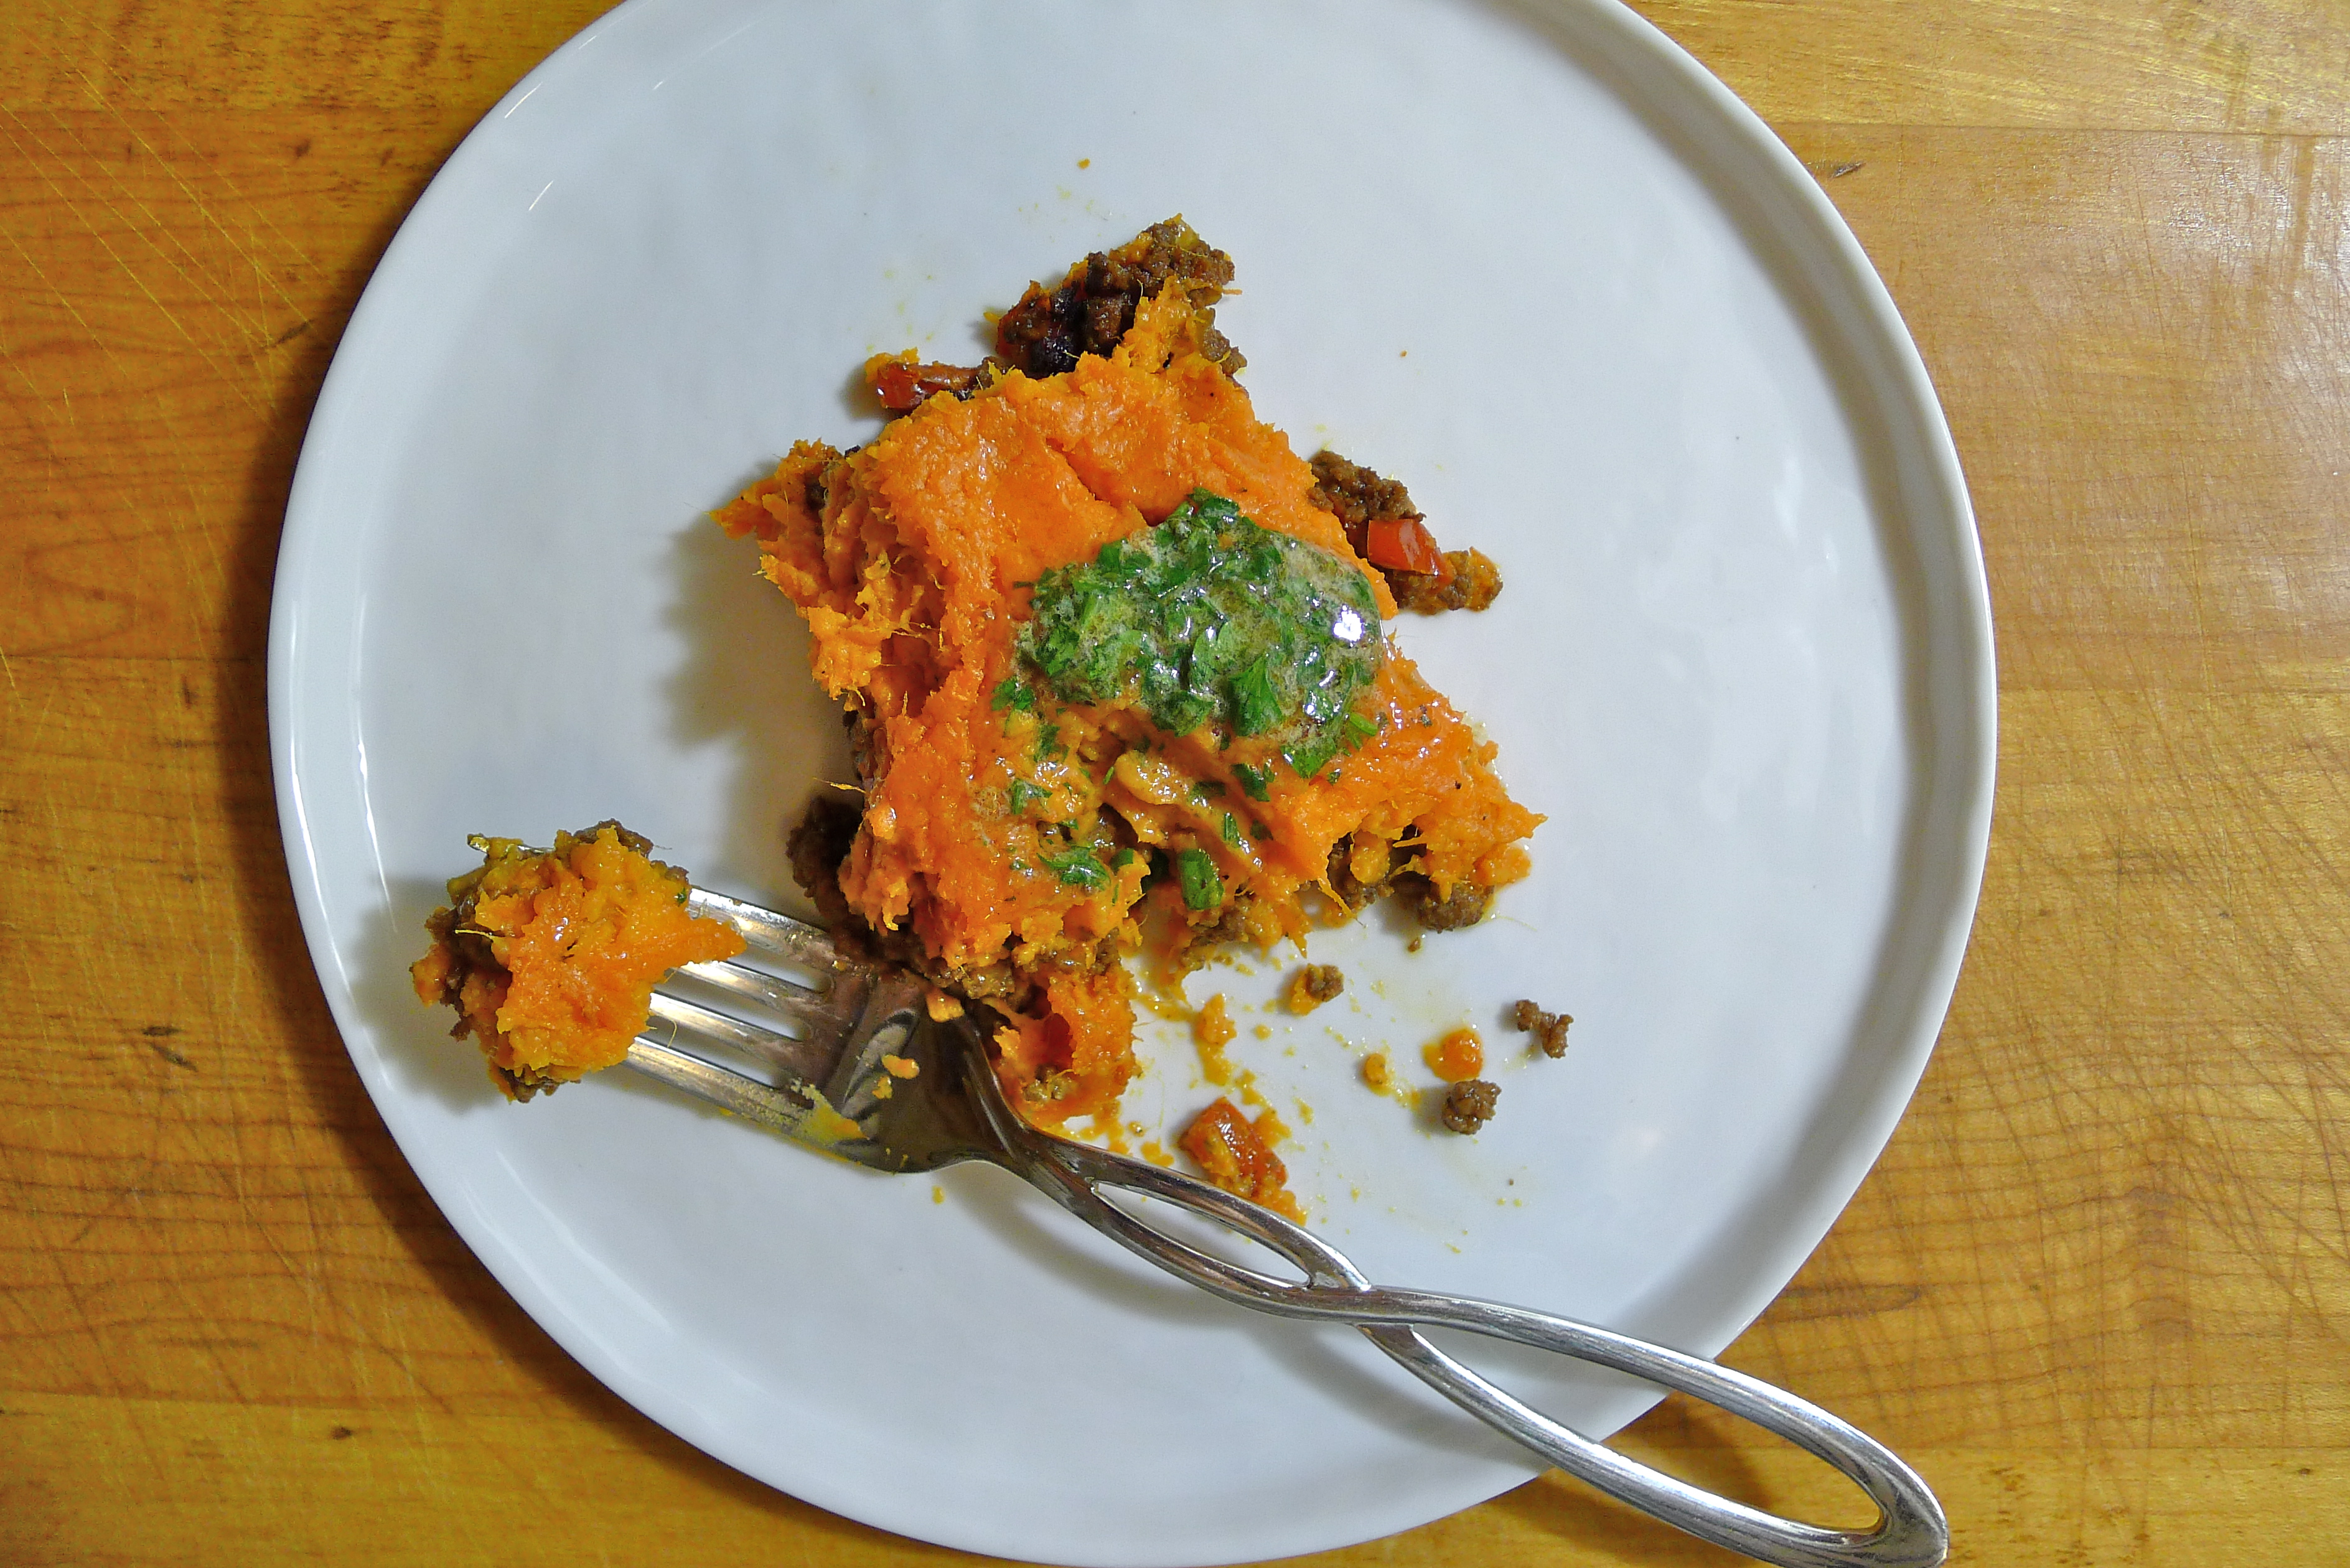
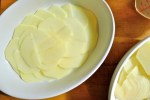
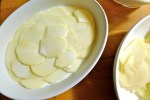
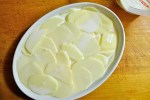
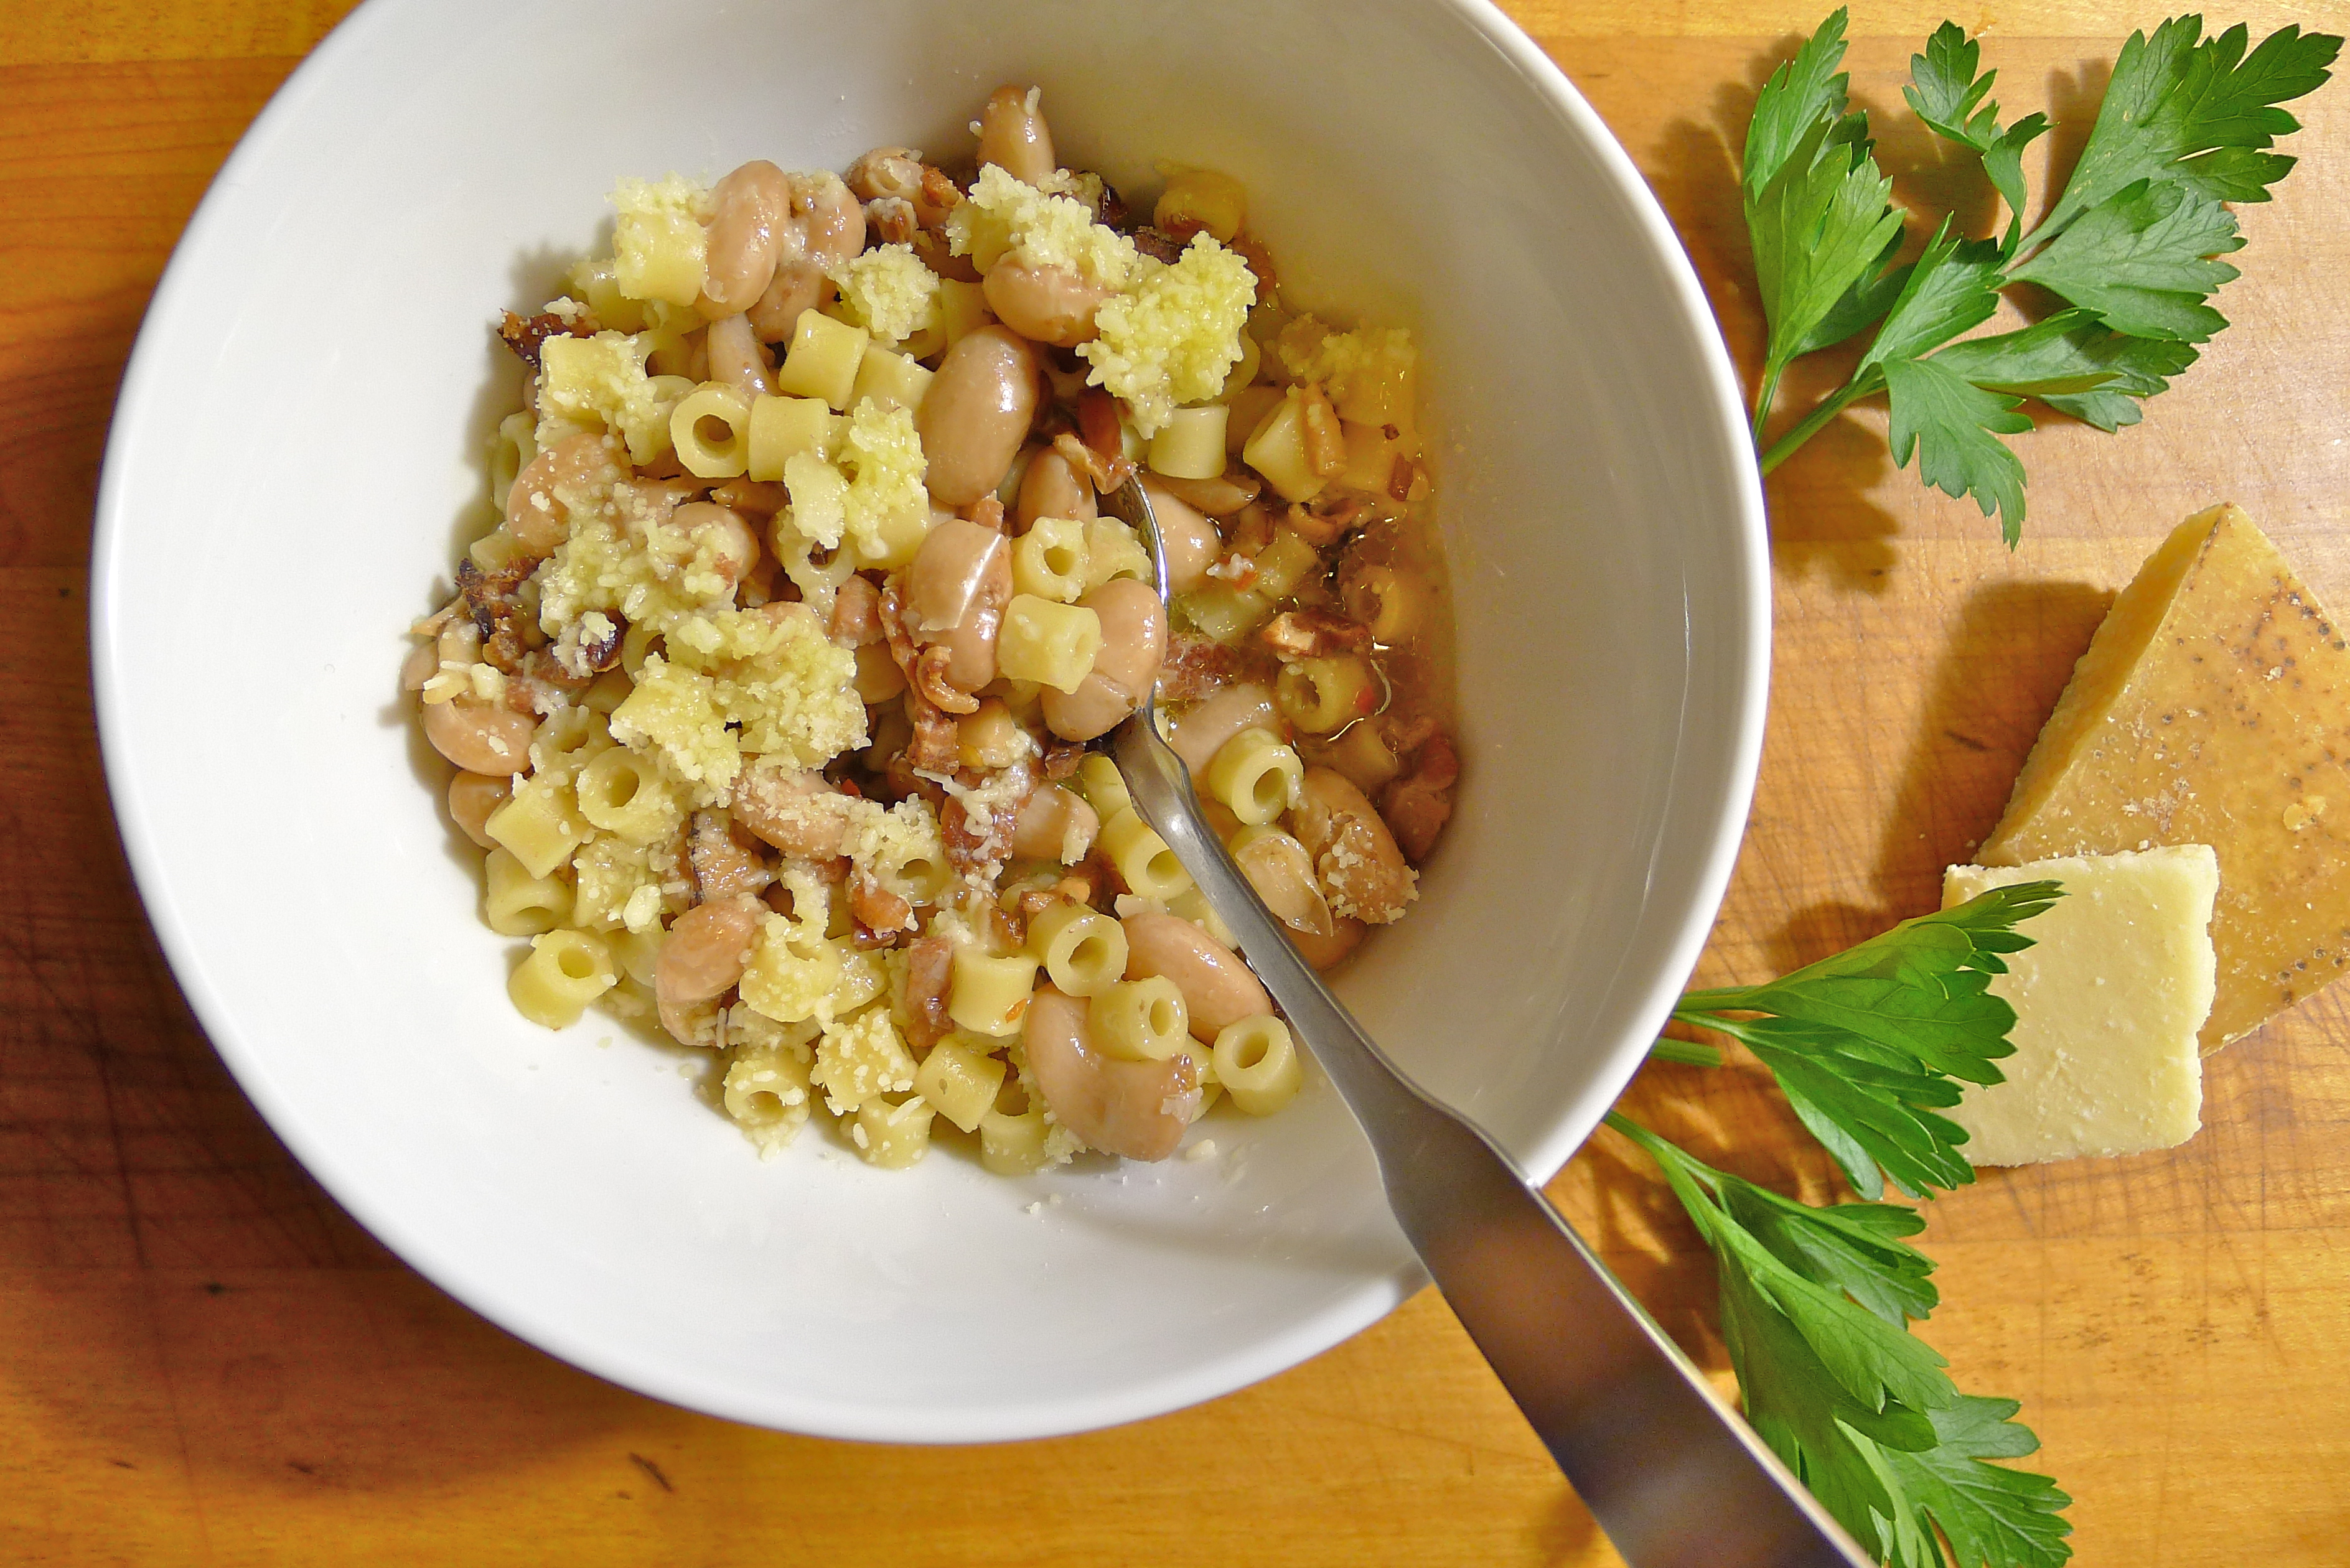
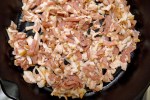
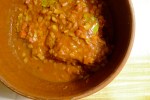
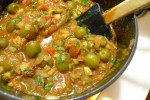
Now this, I thought to myself as I dined at Rosette with a friend, is what you should eat in the summertime. I wasn’t referring to the glorious mess of shredded brisket and pappardelle that you see above. No, I was thinking about the crunchy, raw asparagus spears that I was dipping into dukkah-dusted walnut tahini.

I made that giant batch of shredded brisket back in February, when the weather was arctic and I continued to hope that I would finally ween myself off Seamless and cook for myself.  How little I cook during the academic year has become a common lament on this blog. This past semester, it was really close to zero unless you count putting slices of steak (leftovers from a dinner with my mother at BLT Steak) on top of stale Ritz crackers and eating them over the sink as cooking. From that same steak house dinner, there were also leftover hen-of-the-woods mushrooms that I scrambled with eggs and piled on top of of pasta because I had run out of bread.

Even though the semester has been over for about a month, there still hasn’t been much cooking. It hasn’t felt like much of a vacation either. First, my mother decided that the final exam period would be the perfect time to come to visit (it’s not; it never is). After she left, I was practically comatose for about a week from the visit and the end of the semester. Then, my almost 91-year old grandfather took a tumble in the garden and hit the back of his head (the sun’s fault, he claims). I had to stay with him for a couple of nights per the doctor’s (unnecessary, in Grandpa’s opinion) orders.

My dad: “How is Grandpa doing?”

Me: “Um, a little unstable on his feet.”

Dad: “Maybe be had a mini-stroke. Is he favoring one side more than the other?”

Me: “No. Doesn’t seem like it.”

Dad: “What is he doing now?”

Me: “He is using a pair of kitchen shears to pry open a key ring that he says is too small.”

Fall or no fall, Grandpa’s fine motor skills seem more or less intact. However, that does not mean that he has completely recovered. This summer, he seems frailer and more fragile. His legs get weak — which scares me. He forgets more things more often and is sometimes confused. It is to be expected at his age, but that doesn’t make it any less frustrating for him and emotionally draining for us.

Doctors’ appointments and follow-up appointments have been frequent, sometimes unexpected, and long. Thankfully, my friends have been wonderful at keeping me out of my apartment in the evenings so that I get to eat something decent and think about something else. I did desperately want to get away to Europe this summer, but unfortunately failed to get organized early enough to afford airfare. And although Grandpa continues to live on his own and be very independent, his health has put some restraint on any vacation plans. Still, it would be nice to get away somewhere like . . . Gourmandistan 😉

(Dearest Michelle and Steve, I promise you a visit! The summer isn’t over yet!)

Does this shredded brisket with pappardelle look good? It is damn good, but I would hold off on making a dish like this until the fall unless you have a very powerful air-conditioner and money is no object in terms of electric bills. For those dear readers south of the equator, this is the perfect late fall and wintertime warmer.

This recipe has been heavily adapted from one on Epicurious. You can find the original here.
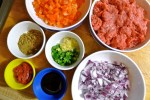
Ingredients:

2 carrots, peeled and cut into 1/2-inch pieces

2 ribs of celery, cut into 1/2-inch pieces

1 red onion, roughly chopped

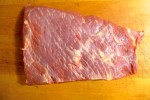
1 beef brisket (about 1.5 pounds), trimmed of excess fat and silver skin

Salt and freshly ground black pepper

Olive oil

4 cloves of garlic, finely minced

2 cups of veal or beef stock

1 16-ounce can of crushed tomatoes

2/3 of a cup of red wine

2 bay leaves

Pappardelle

Special equipment:

A large Dutch oven or another oven-safe casserole with a lid

How to prepare:

1. Preheat your oven to 325°. You may need to lower or adjust your oven racks so that you can fit your Dutch oven or casserole in it easily.

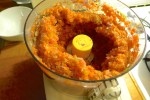
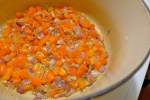
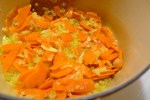
2. Using a food processor, pulse the carrots, celery, and onion together until they are finely chopped.

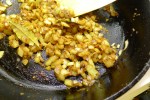
3.  Pat the brisket dry with paper towels and generously season it on all sides with salt and pepper. Heat about two tablespoons of olive oil in the bottom of a large Dutch oven or casserole over medium-high heat until it begins to just smoke. Sear the brisket on all sides. If your brisket is too large to sear at once, you may need to cut your brisket in half and sear each half individually.

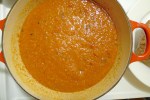
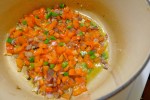
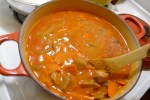
4. Remove the brisket to a plate. Lower the heat to medium and in the same Dutch oven or casserole, sauté the chopped vegetables and finely minced garlic until they give up their liquid and just begin to brown. Add the stock, the chopped tomatoes, the red wine, and the bay leaves. Stir to combine before adding the seared brisket back to the liquid. Make sure that the brisket is completely covered by the liquid before covering the Dutch oven with its lid and transferring it to the oven. Let the covered brisket cook slowly for about 3 hours. After 3 hours, the brisket should be fork-tender. Remove the pot from the oven and carefully skim off any fat from the top of the sauce.

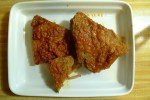
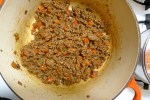
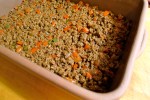
5. Remove the brisket from the sauce and use two forks to gently shred it. Add the shredded brisket back to the sauce and stir to re-incorporate it. Adjust the seasoning.

6. In a large pot of salted water, cook the pappardelle to package directions. When the pasta is al dente, drain it but reserve some of the pasta cooking water. Add the pappardelle to the shredded brisket sauce along with some of the pasta cooking water if needed. Toss to combine, adjust the seasoning, drizzle with olive oil, and serve.

Advertisement

Victoria’s Maple Syrup and Garlic-Roasted Chicken with On-Ke’s Coconut Oil-Roasted Sweet Potatoes

Seriously good food.
No one likes to admit weakness, but I will here: after years of heavy teaching loads and graduate school stress, I am prone to burn out. I used to think that I was invincible, a survivor who overcame those horrible stretches of apathy by plowing straight through them. In reality, I was only papering over my needs and making the situation worse.

Today things are different. I recognize the signs of burn-out more easily, those dark twinges that hang just outside of my metaphysical peripheral vision. Unlike then, I realize now that if I don’t take care of myself, I’m no good to anyone: family, friends, students, and colleagues alike. So I draw boundaries at the end of each semester, knowing that I need to take some precious time to recharge my batteries so to speak.

One thing that always helps me recuperate and regain my joie de vivre is food, particularly cooking. When life gets hectic and the stacks of papers that I need to grade grow higher, I pretty much cease to cook at home — an obvious mistake as cooking calms me and the food that I prepare nourishes both my body and spirit. I love trying new recipes and cooking from new cookbooks, but when I am really aching for something soul-sustaining, what I love most are recipes from family and friends. Those recipes and dishes are the ones that are really special because they make me feel as if that person is in the kitchen with me even though they may be thousands of miles away.

I’ve been spatchcocking a lot of chickens lately. Partly because I’ve finally invested in a good pair of very sharp, spring-loaded shears, and also because I like how evenly and quickly the chicken cooks. The white meat emerges tender and moist from the oven, the dark meat is rich and succulent, and the skin comes out crispy, burnished, and golden.

For this particular chicken, I finally got around to trying a maple syrup-kissed rub/marinade that Victoria over at Bois de Jasmin mentioned in the comment thread of her post on Hot and Spicy Cranberry Sauce. Many people think of Bois de Jasmin as a perfume blog, but I always consider it much more than that: a celebration of life and of all things fragrant, including food and drink. Given that the olfactory and the gustatory are so intimately intertwined, is it surprising that many perfume lovers happen to be fine gastronomes as well?

Victoria calls this chicken an improvisation, but I call it genius. The chicken feels infused with a terrific depth of flavor. The maple syrup caramelizes to a sticky, burnt sugar-like glaze. Victoria uses a mortar and pestle to render the garlic cloves into a smooth paste. I would have done the same if I had one. However, as I do not, I made do with a garlic press. Regardless of which technique you choose, the garlicky chicken roasting in the oven will make your kitchen smell mouthwatering good. I used a pinch of cayenne pepper in place of a pinch of paprika, but Victoria also suggests a little bit a garam masala added to the mix — a delicious idea that I look forward to trying as soon as I get back to NYC.

As for the coconut oil-roasted sweet potatoes, I never would have tried a so-called Paleo recipe if not for On-Ke, who had recently completed 30 days of eating Paleo along with her daughter Siobhan and her family. I had initially gotten to know Siobhan through her wonderful blog Garden Correspondent. When we finally met in person, it was as if I had known her for years. Laughing and chatting animatedly over Italian coffee and pastries, Siobhan decided that she needed to introduce me to her mother, another “culture vulture” who lives rather conveniently around the corner from me. Needless to say, we hit it off right away and have spent this past fall terrorizing the city in a good way: museum visits, perfume sniffing outings, theater performances, and always food, glorious food! Siobhan, you are missed!

One afternoon, On-Ke served me a roasted and roughly cut up kabocha squash that was rubbed with coconut oil, seasoned with salt, and studded with cracked black peppercorns. Super classy woman that I am, I devoured what must have been half a pumpkin in one sitting. I couldn’t help it; there was something about that subtle coconut flavor that made that roasted kabocha squash even more irresistible. Ever since that afternoon, this has been my preferred way to cook just about any squash or yam. As I thought about a perfect complement for Victoria’s chicken, I couldn’t come up with a better one than these sweet potatoes roasted in the same way.

Special Equipment:

A good, sharp pair of cooking shears

One half-size sheet pan

One wire rack to fit the sheet pan

Ingredients:

For the sweet potatoes:

2 large sweet potatoes, peeled and cut into 1-inch pieces

2 tablespoons of coconut oil (I prefer unrefined coconut oil because the coconut flavor is stronger)

Salt and freshly ground pepper to taste

For the roasted chicken:

1 whole chicken

1 tablespoon of dark amber maple syrup

3-4 cloves of garlic, finely minced or even better, pulverized using a mortar and pestle with a little course salt

2 tablespoons of good olive oil

A pinch of cayenne pepper, paprika, or garam masala

1 teaspoon of kosher salt

Freshly ground pepper to taste

How to prepare:

1. Preheat the oven to 400°.

2. While the oven is warming up, you can begin to prep the chicken. To spatchcock any bird, flip the bird over so that its breast is facing down on the cutting board and its back is facing upright. Using a good, sharp pair of sturdy kitchen shears, remove the backbone by cutting along either side of it. Remove any excess skin that is dangling from the neck hole. Turn the bird breast-side-up. Remove the wishbone with a sharp knife. Now with the heel of your hand, press directly down on the breast bone until you hear a crack. Congratulations! You have just spatchcocked a bird! To finish, tuck the wings behind the breast. For the legs, you can make small slits in the skin on either side of where the tail used to be and push the ends of each respective leg through them. You can also leave the wings and legs as they are. Your chicken will taste the same either way, but as a firm believer in trussing, I like to have everything looking neat. To help visualize this, here is a video.

3. Combine the maple syrup, garlic, olive oil, cayenne pepper, salt and pepper in a small bowl. Rub the mixture evenly all over the chicken. Lay the chicken out on a rack-lined sheet pan and let it marinate uncovered on the counter for about 40 minutes to an hour.

4. While the chicken is marinating, use your hands to rub each piece sweet potato with coconut oil. Season the pieces liberally with flaky salt and freshly ground black pepper, and spread them out in an even layer over another baking tray or in the bottom of a cast iron pan. I like my roasted sweet potatoes to be on the very roasted side, not exactly burnt, but just so that the surface sugars are caramelized. This should take about 40 minutes or so. If you prefer yours to be less roasted, you can remove them from the oven when they are softened and can be easily pierced with the point of a sharp knife.

5. When the sweet potatoes are done, remove them from the oven. Put the chicken in the oven and carefully pour about 2 to 2 1/2 cups of water into the bottom of the sheet pan. The water should not touch the bottom of the wire rack. Roast the chicken until it reaches an internal temperature of 165°, this should take between 1 hour and 1.5 hours depending on how big your chicken is. If at any point you notice that the garlic is beginning to burn, you can loosely tent the chicken with a sheet of aluminum foil, removing it when the it is almost done so that the skin can brown. When the chicken is done, take it out of the oven and let it rest for 10-20 minutes before carving.

Serve the chicken with the roasted sweet potatoes.

Texas-Style Cottage Pie with Roasted Sweet Potatoes and A.1. Compound Butter

Flavors are bolder in Texas.
Considering the extent of my bacon advocacy, most people are surprised to find out that I used to be a vegetarian. That was not a choice based on any kind of moral imperative. Instead, it was the best way that my 14-year-old self think of to annoy my mother. Now you would think that vegetarianism would have gotten old after a couple of weeks, but I was stubborn teenager and persisted in my gastronomic rebellion for twelve long and meatless years.

I didn’t just annoy my mother, I baffled my relatives who had never heard of Tofurkys until they were forced to procure them. My friends would collectively roll their eyeballs heavenward each time that I complained about the lack of vegetarian options on a restaurant menu. I irritated significant others to no end because it frankly sucks to not share food that you are really enjoying.

So it stands to reason that on the night before my undergraduate commencement ceremony, I would have my vegetarian graduation celebration at a barbecue restaurant.

Yes, you read that correctly.

What prompted such a paradoxical decision? You see, one of the last classes that I took at my alma mater was a cultural anthropology course on food — which ended up being a prescient choice since many of the books on that syllabus found their way into the bibliography of my dissertation. I had an amazing professor who had a number of terrific guest speakers come to talk to the class, one of first of which was Chris Schlesinger who was still at the East Coast Grill (he has since sold it to the former head chef, now chef/co-owner Jason Heard).

Until that class, I had never really thought that much about food apart from how much I liked to eat it. It never occurred to me that you could craft an approach to food that could be just as thoughtful, complicated, and elegant as any in literature, or that taste — both sensory and esthetic — could be a marker of identity, a beginning of a journey, or an end to one.

In any case, Schlesinger’s passion, dedication, and approach to big, bold American flavors made quite the impression. I also remember how he wasn’t adverse to vegetables being on a barbecue menu, which is how my friends and my family ended up at his restaurant graduation eve.

I don’t remember exactly what I ate that night (probably macaroni and cheese), but I do remember that the food was good and my dad was happy that he wasn’t forced to eat another avocado burrito in a New Age-y bookstore that smelled like patchouli, incense, and beans.

This recipe is adapted from Schlesinger’s How to Cook Meat, published the same year that I graduated. I bought the book to remember that night despite not cooking nor eating meat at the time. Who would have known how useful it would turn out to be a few years later when I was no longer a vegetarian and really did want to know how to cook meat!

I must admit that the first time that I made this dish, I wasn’t impressed; I found it too sweet and the flavors a little too weird. However, after years of vegetarianism, I probably just had no idea what I was doing. Now things are different (or back to “normal,” depending how you think about it). I find the combination of flavors to be complex, rich, and deeply satisfying on cold nights like the ones that we have been having here on the East Coast.

I’ve tinkered with the recipe over the years, making it a little less sweet (tomato paste substituted for ketchup; blackstrap for plain old molasses), and deepening the flavors a little more (roasting instead of boiling the sweet potatoes). The recipe easily doubles as the one given below is the proportions of the original halved.

Like any recipe that you have made your own, its evolution is indicative of where you come from and where you are going. In essence, that is the wonderful thing about recipes in general: they all tell a story and this is one of mine.

Ingredients:

For the compound butter:

1 stick of unsalted butter at room temperature

1 tablespoon of A.1. Steak Sauce

1 tablespoon of fresh parsley, finely chopped

Flaky salt and freshly ground pepper to taste

For the cottage pie:

2 large sweet potatoes

1/2-2/3 of a cup of half-and-half

1 tablespoon of butter

2 tablespoons of olive oil

1 large red onion, chopped

1 red bell pepper, cored, seeded, and diced small

2-3 garlic cloves, minced

1 small jalapeño pepper, seeded and minced

1/2 a tablespoon of ground cumin

1/2 a tablespoon of ground coriander

A scant pinch of ground cinnamon

1 pound of ground beef

1 tablespoon of tomato paste

1 tablespoon of blackstrap molasses

How to prepare:

1. Preheat the oven to 400°.

2. To make the A.1. compound butter, combine the room temperature butter, the steak sauce, and the chopped parsley in a small bowl. Season the butter with flaky salt and freshly ground pepper to taste. Spoon the butter onto a piece of parchment or waxed paper, roll it into a cylinder, and refrigerate it until firm.

3. Prick the sweet potatoes all over with a fork. Place them directly on the wire racks of your oven and roast them until they can be easily pierced with a knife, about 40 minutes.

4. While the sweet potatoes are roasting, heat the olive oil in a large sauté pan or Dutch oven set over medium heat. Sauté the onions and diced bell pepper until the onions begin to turn golden, about 8 minutes. Add the garlic, the minced jalapeño, and the spices. Let them sizzle them for about 1 minute before adding the ground beef. Cook the ground beef until it is browned, crumbly, and no longer pink. Pour off any excess fat in the pan before stirring in the tomato paste and the blackstrap molasses. Adjust the seasoning.

5. When the sweet potatoes are cooked through, remove them from the oven and let them rest. Lower the temperature of the oven to 350°.

6. When the sweet potatoes are cool enough to handle, peel them and discard the skins. Mash them with a tablespoon of butter and 2/3 of a cup of half-and-half. As the mixture should be on the loose side, add more half-and-half if needed. Season with salt and pepper.

7. Spread an even layer of the ground beef mixture over the bottom of a casserole or baking dish. Gently top the ground beef mixture with the mashed sweet potatoes. Bake until the filling is bubbly, about 40 minutes.

8. Remove the casserole dish from the oven and let it rest for about 5-10 minutes. To serve, you can either dot the top of the casserole with the compound butter before dividing it into portions, or you can top each individual serving with a slice of the compound butter.

Classic Gratin Dauphinois (Potato Gratin)

Classic potato gratin
The best gratin dauphinois that I have ever had was made many years ago by a woman in the Dordogne.

The future stepmother of my companion at the time had a chateau in the Périgord. It had been years since she had been there herself and taking advantage of our position in Paris, she asked us to take a weekend off and go down to check on the property for her. After a long drive from Paris that was made even longer by a detour forced by an errant herd of sheep, we arrived at the property famished and exhausted. The chateau itself was uninhabitable. In lieu, we stayed in the caretaker’s home — a crumbling stone house in need of many repairs, the least of which was a new roof.

Dark, dusty, and overrun with audible mice, the house was inhabited by a desperately lonely woman who not only feared the state of the only home she had known for more than 20 years, but had also become increasingly worried about her precarious life. What would happen if the owner decided to sell the property? What would happen if the owner came back and forced her out? She had nowhere to turn and no income to speak of besides her limited state pension.

Communication between her and the stepmother was so poor that she initially thought we were sent to kick her out. Once it was established that we most certainly were not, she relaxed and began to list everything that needed to be fixed. Unfortunately, there was nothing that we could really do besides listen and watch her gnarled fingers expertly reduce a pile of meager potatoes into thin slices with a dull paring knife. She continued to fret while we ate that divine gratin. In the heat of the fire (yes, the stove was a wood one) the potatoes had collapsed into a silky smooth cake; the individual layers had become indistinguishable from the whole. This was all washed down with a dozen small glasses of homemade walnut liquor made from nuts that had fallen from the trees surrounding the property.

It was a delicious meal, albeit a very sad one.

I never knew what happened to the woman. The stepmother tossed away the caretaker’s worries with nothing more than a soupçon of concern and my relationship didn’t survive the move back to New York. Consequently, I never followed up on the story.

However, ever since that meal, I have tried literally hundreds of recipes for gratin dauphinois in the hopes of recreating that recipe-less dish that was probably as natural for that woman to make as it was for her to breathe. I have made gratins with liters of heavy cream and piles of Alpine cheeses. I have added truffles and more butter. I have tried different varieties of potatoes soaked in milk, not soaked in milk, and even parboiled in milk and cream. I have tried slicing the potatoes paper thin with mandolines. I’ve tried Julia Child’s recipe.

After all that experimentation, nothing has come close. However, this recipe comes the closest.

Like all dishes born out of need and necessity, gratin dauphinois is best simple — not gussied up with an excess of cream, butter, and cheese. Although the urge to be decadent is strong when it comes to French farmhouse dishes, the best ones are made with only whole milk, some stock, and the gentlest kiss of cheese. The allure of excess is not rewarded as richly as the alchemical reaction of humble ingredients and time.

Ingredients:

1-2 sprigs of fresh thyme

1-2 sprigs of fresh rosemary

1-2 sprigs of savory

2 bay leaves

3 smashed garlic cloves, plus one more

5-6 black peppercorns

Freshly grated nutmeg

Salt

1 cup of chicken stock

1 cup of whole milk (or light cream if you must)

4 smallish waxy potatoes, peeled and cut into 1/8-inch slices

1/2 cup of grated Gruyère

1 tablespoon of unsalted butter

How to prepare:

1. Preheat the oven to 350°.

2. In a medium-sized saucepan, cover the herbs, the black peppercorns, and three of the smashed garlic cloves with the milk and the stock. Season with salt and freshly grated nutmeg to taste. Over a medium-low flame, gently heat the mixture until it just comes to a boil. Turn off the heat, cover the pan, and let the herbs and garlic steep.

3. While waiting for the milk mixture to cool, rub an oven-proof dish with the remaining smashed clove of garlic. Generously butter the dish.

4. Strain the milk mixture. I like to do this into a measuring cup with a spout as it makes it easier to build the gratin later.

5. In the bottom of the gratin pan, make an even, single layer of potato slices. Pour just enough of the milk mixture to cover the slices and then add another layer on top. Top that layer with just enough of the milk mixture to cover the slices. Scatter a little bit of the grated cheese on top. Continue to build the gratin with a little bit of grated cheese in-between every other layer, and with each layer covered with the milk mixture. Reserve just enough cheese to scatter on top near the end of baking. The final layer at this point should be just potatoes. Use your hand and press down on top of the gratin. Add more milk mixture if needed, but leave about 1/2-inch of clearance from the top of the gratin dish.

6. Dot the top of the gratin with butter and cover it with a piece of parchment paper cut to fit.

7. Bake the gratin for about 30 minutes before removing the parchment paper. Continue to bake the gratin uncovered for about 15 minutes. Sprinkle the remaining cheese over the top and continue baking for 15-20 minutes until the top of the gratin is golden and the potatoes are soft. This is very important: let the gratin rest for about 10 minutes before serving.

Our Growing Edge

This blog post is my second contribution to the amazing Genie De Wit’s Our Growing Edge. Our Growing Edge is a monthly event that aims to connect food bloggers, broaden our horizons, and encourage us to try new things.

The month is just starting and anyone can be a part of the party! For more information, please go to the page Genie has set up on her blog Bunny. Eats. Design.

This month’s host is Leah from Sharing the Food We LoveThank you so much for hosting, LeahTo take a look at the participating bloggers this month, click here.


Jonathan Benno’s Pasta e Fagioli

Don't be a fool, eat yo' pasta fazool!
Nigella does what?!”

Steve from Gourmandistan shook his head incredulously and made a face.

She tells you to put all the fresh herbs in the foot of a nylon stocking and to leave the whole thing in simmering stock for an hour!

“Doesn’t it melt?!”

“Yeah. You would think!”

“That is disgusting.”

Agreed.

A few weeks ago, Steve was in town for the Roger Smith Cookbook Conference and we were talking “food blogger shop” at Roberta’s over craft beer and aioli-coated fried sweetbreads.

Shop that night included pasta e fagioli,

I love pasta e fagioli, affectionately known on these close-to-Jersey shores as pasta fazool. Translated simply as pasta and beans, the name of this humble Italian dish belies its power to soothe and satisfy. Pure alchemy occurs when the nuttiness of the beans Vulcan mind-melds with the pasta in rich rosemary and bay-scented broth. It is warm, wonderful comfort in a bowl and in these waning days of winter, it is the perfect dish.

My current favorite version of pasta e fagioli is from Mario Batali, who starts off his recipe by asking you to mash up a wad of fatback with the back of a spoon until you have a nice and smooth porky paste. Very Italian.

The subject of our mutual alarm was from British celebrity chef Nigella Lawson — not Italian at all. Although I like her writing, her recipes leave me cold . . . and extremely skeptical. Like this one for pasta e fagioli in which she asks you to use a “popsock” — also known as a knee-high nylon stocking — as a herb sachet instead of good, old-fashioned, food-safe, heat-resistant, and dependable cheesecloth.

Now I see the utility of bundling the aromatics used to perfume pasta e fagioli in a sachet; it makes it much easier to remove the spent herbs from the soup if you have them together. It saves you from the futilely fishing around for the gray and bitter spindles of rosemary leaves. However, I draw the line at rooting around in my sock drawer for kitchen essentials. Furthermore, Nigella includes the following sentence in her recipe: “Chuck out the corpsed popsock and its contents [after the beans are tender].”

Not yummy-sounding at all.

I am always on the lookout for a new variation on pasta e fagioli. Recently, New York Magazine published one from Jonathan Benno in which he solves the fresh-herb-removal problem by infusing the stock with Parmesan rinds and aromatics and then straining them all out before use. 

Brilliant!

Benno recommends soaking the dried beans for two days in the refrigerator instead of just one day on the countertop. I’m not sure if the additional day of soaking affects the taste, but I did notice that the beans cooked faster and more evenly. The beans were also creamier.

Heirloom beans are best, but regular old beans work just as well. Traditionally, borlotti beans — also called cranberry beans — are used in pasta e fagioli, but cannellini beans are a good substitute.

To Benno’s recipe, I have added bacon. Because I can never resist adding bacon to everything 🙂 You can omit it and the soup will still be delicious.

Ingredients:

2 cups of dried beans (preferably heirloom beans like borlotti beans or cannellini beans)

2 quarts of chicken stock (about 8 cups)

1 cup of Parmesan rinds

2 sprigs of fresh rosemary

2 sprigs of fresh thyme

2 sprigs of fresh sage

5 fresh or dried bay leaves

1 pound of bacon ends, chopped (optional)

1 teaspoon of dried oregano

1 teaspoon of crushed red pepper flakes

Salt and pepper to taste

1 1/2 cups of dried ditalini or another kind of small tubular pasta like macaroni

Extra-virgin olive oil

Freshly grated Parmesan

How to prepare:

This soup is not difficult to prepare. However, it does require some advanced planning. Be sure to read the recipe closely before beginning.

1. In a bowl large enough to fit the beans comfortably, cover them with about two inches of cold water. Soak the beans in the refrigerator for two days.

2. When the beans are done soaking, drain them.

3. Combine the chicken stock, the Parmesan rinds, the fresh herbs, and the bay leaves in a large pot. Simmer everything together for about an hour. Do not the let stock boil. Strain the stock and discard the Parmesan rinds and herbs.

4a. If using, brown the chopped bacon ends in a large skillet until most of the fat has rendered. Drain the bacon bits on paper towels.

4b. Add the soaked and drained beans, the bacon if desired, the dried oregano, and the crushed red pepper flakes to the strained stock. Gently simmer the beans for between 1-2 hours. When the beans are done, they will be creamy in the center. Do not let the liquid come to a boil or the skins can burst. Skim the surface of the soup if and when necessary. Adjust the seasoning.

5. When the beans are tender, add the dried pasta to them. You may need to add more stock or water if the level of the liquid in the pot is too low. When the pasta is al dente, turn off the heat.

To serve, heap a generous spoonful of freshly grated Parmesan on top and finish the soup with a drizzle of good extra-virgin olive oil.

Mustard-Butter Chicken and Roasted Savoy Cabbage

Thank you, Hannah!
I cannot take credit for this meal; that distinction belongs to the amazing Hannah over at Inherit the Spoon. For about a year now (or maybe it has been longer — I’m getting forgetful), I have been following this her adventures in life and in the kitchen. I have admired her commitment to eating local, and providing a nutritious and delicious table for her family.

Recently, she published recipes for roasted Savoy cabbage and mustard-butter chicken. The minute I read them, I knew that I had to make them soon.

The meal was incredible and incredibly easy. If I wasn’t smitten with Hannah’s blog before, I definitely am now!

As I cannot write better than Hannah herself, I will direct you to her post here for step-by-step instructions on how to prepare both the cabbage and the chicken. I agree with Hannah that you should take your time and let the cabbage get dark and crispy; it really is best that way.

Thank you, Hannah!

A Holiday Tradition from Me to You: Ye Olde Sizzling Bacon Yule Log


How many of you remember The Yule Log Show on television?

To those unfamiliar with it, the Yule Log Show was a program traditionally aired on American network television on Christmas Day from about 9am to 2pm. It was perfectly timed to coincide with sitting around the tree and opening presents. The entire show consisted of a Yule log burning in a fireplace. No dialogue. Just Christmas music and the pleasant crackle and pop of a toasty fire in someone else’s fireplace

Initially conceived as a way for fireplace-less New Yorkers to at least enjoy the visual delights of a roaring fire, the Yule Log Show was a tradition in my house growing up.

So imagine how delighted I was to see the folks at Applegate Farms improve on the original 🙂

Dear Friends, it doesn’t matter if you are bereft of a fireplace this year or if you have one. I invite you all to set your computer or laptop somewhere everyone can see it and open your presents while bacon sizzles the the background.

The video is a glorious 31-minutes long and can be set on repeat.

Happy Holidays to you all from NYC!

The Daring Kitchen December Cooks’ Challenge: Pâté Chinois

Looks good, eh?
As some of you know, I have been participating in The Daring Kitchen’s Challenges for about a year now. For those of you unfamiliar with the name, The Daring Kitchen is an online community of cooks and bakers who commit to making one dish — the month’s challenge — and posting their results on their blogs on the same day.

I took a hiatus from the Daring Cooks (there is a corresponding Daring Bakers group) during and following my dissertation. In the interim, I missed out on some pretty great challenges. I especially regretted missing the Brazilian Feijoada and the Paella challenges. In addition, there were many more that passed me by as I just watched and salivated on the sidelines. This month, after a period of decompression and relaxation, I finally felt ready to jump back in and cook something new.

So imagine my reaction when I pulled up December’s challenge PDF for a mysteriously named dish called Pâté chinois and saw that . . .

Pâté chinois is essentially shepherd’s pie with a layer of canned creamed corn in-between the meat and the mashed potatoes.

That’s it.

And its traditional accompaniment is ketchup.

Yes. That’s it.

As Pâté chinois generally calls for ground beef, it is perhaps more accurate to say that it is a variation of cottage pie not shepherd’s pie. However, the more pressing question is why is it called Pâté chinois considering there is not much in it that can be either construed as pâté (ground meat alone does not a pâté make) or Chinese.

According to Wikipedia, the origins of Pâté chinois are rooted in the assumption that the name refers to Chinese cooks who came to Canada to serve the workers who built the North American railroad system in the late 19th century. These cooks were instructed by their railway bosses to prepare and serve something that was not only inexpensive, but that the railway workers would recognize and therefore eat As wood ear fungus and black chicken soup was probably out of the question, the Chinese cooks put together a version of cottage pie using canned creamed corn in place of the more expensive gravy.

Of course, this is all anecdotal. Alternatively, the name Pâté chinois might also refer to a variation of hachis Parmentier, which is basically cottage pie too. This is a dish that French-speaking families in Maine would refer to as Pâté chinois in reference to the towns where they ate it: China and South China, Maine.

I also read somewhere that Pâté chinois could also be an allusion to the dish’s preparation. When I read about the possible connection to Chinese immigrants, this was actually my first thought. Much like how chop suey is inauthentically Chinese and refers instead to the chopped items in the dish, I imagined that Pâté chinois got its name from the chopped meat and corn kernels that could be commonly found in Chinese stir-fry.

Regardless of when, where, and how Pâte chinois came to be, it is one of those quintessential Québecois comfort foods that everyone is familiar with, yet it is unknown to outsiders as it is hardly ever served outside of the home.

If you understand French (or even if you don’t), this is an truly awesome Youtube clip about Pâté chinois in Québec. It is narrated by a man with the dang coolest Québecois accent ever.

Given that I have made cottage pie numerous times (and even blogged about it here), I thought this challenge would be a easy one.

Wrong! Can you believe it, dear Readers? My first attempt at Pâté chinois was a dismal failure!

First of all, my fancy schmancy neighborhood supermarket does not carry canned creamed corn. Oh the class warfare! Consequently, I was forced to improvise with frozen corn and fresh heavy cream. Although my homemade version of creamed corn looked and tasted superior, it completely separated while cooking. To my horror, my cottage pie had morphed into a cream of potato soup with little bits of hamburger floating in it.

In my defense, it tasted amazing, but anything that is more than 50% heavy cream is almost always guaranteed to taste amazing.

Back to the drawing board! Still no creamed corn in a can. This time, instead of blending the corn with heavy cream, I put some corn kernels with a little bit of milk in the food processor. Once puréed, I folded in more corn kernels for better texture. The result was a mass of corn about the same consistency of my mashed potatoes.

The final result yielded three distinct and yummy layers. Pâté chinois is still a fairly bland dish, which explains the predominant use of ketchup to kick it up a notch. However, since I find ketchup generally too sweet for my tastes, I substituted a healthy squeeze of Sriracha. Can’t go wrong with that 🙂

Many thanks to this month’s host, Andy of Today’s the Day and Today’s the Day I Cook!, for the challenge. I had a so much fun learning about Canadian comfort food. Your challenge was also a great reminder that it doesn’t matter how many times you make something, there is always something more to learn!

Blog-checking lines:

Our Daring Cooks’ December 2012 Hostess is Andy of Today’s the Day and Today’s the Day I Cook! Andy is sharing with us a traditional French Canadian classic the Paté Chinois, also known as Shepherd’s pie for many of us, and if one dish says comfort food.. this one is it!

Ingredients:

4 Yukon Gold potatoes (5 if they are small), peeled and cut into 1-inch cubes

2 tablespoons of butter

Milk

Salt and pepper

1 pound of frozen corn kernels, thawed and divided in half

Milk or heavy cream

One medium onion, finely chopped

1 pound of lean ground beef

1 teaspoon of paprika

1 pinch of cayenne pepper

Worcestershire sauce

1 cup of shredded Gruyère or Comté cheese

Sriracha or ketchup

How to prepare:

1. Preheat the oven to 350°.

2. Put the potatoes in a large saucepan and cover them with water. Generously add salt. Bring the water to a boil and cook the potatoes until they are tender. You will know that they are ready to mash when you can crush a potato piece easily against the side of the pan with a wooden spoon. Drain the potatoes. In the same pan, mash them with the butter. Add the milk a 1/4 cup at a time until you get the right consistency. You don’t want the potatoes to be dry, but you don’t want them to be soupy either. Aim for a texture that is loose enough to spoon out, but not so loose that the potatoes add a lot of excess water to your dish. Adjust the seasoning.

3. While the potatoes are cooking, purée half of the corn kernels in a food processor with about a quarter cup of milk. Add more milk if the mixture looks too dry, but not so much that you end up with a corn slurry. The texture of the puréed corn should match that of the mashed potatoes. Turn the puréed corn out into a large bowl and fold in the remaining whole kernels. Adjust the seasoning.

4. Heat some olive oil in a large skillet over medium-high heat. Sauté the onions until they are translucent and begin to brown. Add the ground beef to the pan, breaking up bigger chunks of ground beef with your wooden spoon as it cooks. Continue to cook the beef until there is no longer any visible pink. Sprinkle it with the paprika, cayenne pepper, Worcestershire sauce to taste. Cook everything until the sauce has thickened, about another two to three minutes.

5. In an oven-proof dish, spread the ground beef out in an even layer on the bottom. Carefully spread the corn mixture on top of the beef. Gently spoon the potatoes on top of the corn. Sprinkle the shredded cheese evenly over the top and bake until bubbly, about 20-30 minutes.

6. Let it rest for about 20 minutes before serving with Sriracha or ketchup.

Smoky Chorizo and Chickpea Soup


Have you ever looked outside your window at the overcast sky and realized that the weather has officially turned chilly? That’s how I felt today when the cold morning light began filtering through my shades.

I always think that this kind of weather inspires a taste for spices and hot liquids. This soup, adapted from Food & Wine, certainly satisfies those cravings.

There is something about Spanish food that feels perfect for this season. Maybe it’s the colors, or the strong flavors of garlic and sherry. Maybe it’s the liberal use of pimentón, whose rich and smoky heat seems to combat the gloom of gray skies.

Pimentón is basically the Spanish version of paprika and comes in three varieties of varying heat: dulce (sweet), agridulce (bittersweet), and picante (hot). For general cooking purposes, I find agridulce to be just perfect, neither too mild nor too bitter.

For this recipe, I used chorizo from my CSA. Given that most of the sausages from my CSA are fairly lean, I didn’t cook the chorizo beforehand. However, if you have particularly fatty links, you might wish to sauté the chorizo pieces and drain them before adding them to the soup.

I also love how the recipe uses puréed chickpeas as a thickener. Sometimes I find that using flour to thicken soups, stews, stocks, and gravies can lead to slightly gluey results, and using tapioca is just weird.

Ingredients:

Olive oil

1 large yellow onion, finely chopped

2 large carrots, peeled, halved lengthwise and thinly sliced

2 fat garlic cloves, thinly sliced

3 teaspoons of pimentón or smoked paprika

1/4 teaspoon of cayenne pepper

4 tablespoons of tomato paste

1 pound of fresh chorizo, cut into 1/2-inch pieces

3 cans of chickpeas, drained, rinsed, and divided into two equal portions

4 cups of beef broth

Lemon wedges

Fresh parsley sprigs

How to prepare:

1. Purée the half of the chickpeas in a food processor until they are smooth. They will act as a thickener in the soup and give the broth a wonderful nuttiness.

2. In a large Dutch oven, heat about two tablespoons of olive oil over medium heat. When the oil begins to shimmer, add the onions and cook them until they just start to turn translucent. Toss in the carrots and the garlic. When the garlic becomes fragrant, add the pimentón, cayenne pepper, and tomato paste to the vegetables. Combine everything together, taking care not to burn the spices. Once the vegetables are evenly coated with the tomato paste and the spices, add the chorizo, the puréed chickpeas, the remaining whole chickpeas, and the beef broth. Adjust the seasoning.

3. Simmer the soup until the whole chickpeas are nice and tender. You will want to skim the surface of the soup periodically. Adjust the seasoning for a final time. Serve the soup in warm bowls, topped with fresh sprigs of parsley and lemon wedges on the side.

Moroccan-Style Brisket with Green Olives and Preserved Lemons


When I was an undergraduate, I had friends who could subsist on Cheerios and skim milk for the whole semester. I could never do that. First of all, I didn’t want to contract scurvy, beriberi or any other kind of disease caused by a vitamin deficiency. Secondly, the combo of cold cereal and low-fat milk remains heartbreakingly depressing and just plain unsatisfying to this day. Even after eating a big bowl of it, I still feel hungry.

Of course, those friends grew up and graduated to slightly more mature versions of “quick” meals like spaghetti and jarred sauce, or something with boneless, skinless chicken breast.

I don’t consider those to be very appealing either.

I like a meals. Real meals with real foods and real fats.

Having never been much of a snacker, I look forward to my two big square meals a day. I say two only because I still struggle to fit breakfast into my daily routine.

Believe me, if I were to have breakfast, it would be a square meal too!

What is a real meal to me? It doesn’t necessarily have to be a hot meal, but it has to be satisfying in a way beyond filling my empty stomach. I’m not looking for just the sensation of fullness. I want to feel fulfilled.

Lately, work has been overwhelming. My dissertation deadline is pretty much set for early August, which leaves me little time for much else but my good friends, weekly dim sum with my grandfather, and my parents.

But I will always make time for good food, cooking and even some blogging. Food is my passion. Cooking is how I decompress. Blogging keeps me social. Without it, I fear that I will start slinking around corners, stroking my pages and covetously purring, “MY PRECIOUS!”

Any LOTR fans out there 😉

In this period, I see nothing wrong with making something big and elaborate just for me. I can eat it for a week and feel nourished in both body and soul. This Moroccan-style brisket fit the bill this week. Preserved lemons give the brisket’s crowning sauce a distinctly delicious North African flavor. Preserved lemons can be a strong, but their strength mellows over time. This is why I would recommend that you make the sauce a day before serving the brisket. That way, the ingredients have time to meld together and their flavors can become rounder. Preserved lemons can now be found in many supermarkets and specialty stores. You can also order them online, but they are also ridiculously easy and inexpensive to make. Just remember to budget between 1-3 weeks of preservation time before they are usable. There are many recipes available online. This one and this one are good places to start.

Also, like any braised or stewed meat, brisket gets better over time. If you can resist the temptation of eating it straight out of the oven, let it cool and sit overnight in the fridge. It is also much easier to remove any fat from the surface of the sauce the next day.

This recipe is freely adapted from Joan Nathan‘s Foods of Israel Today. Her original recipe can be found more or less in its entirety here. It includes another recipe for preserved lemons.

Ingredients:

For the brisket:

1 3-3 1/2 pound beef brisket

3 cloves of garlic, thinly sliced into slivers

Salt and pepper

Olive oil

2 small onions, finely diced

1/2 teaspoon of ground turmeric

1/2 teaspoon of ground cinnamon

1 tablespoon of freshly grated ginger

2 bay leaves

1/2 cup of red vermouth

1 14.5-ounce can of crushed tomatoes

2 tablespoons of honey

1/2 cup of water

For the green olive-preserved lemon sauce:

2 small onions, finely diced

Olive oil

1 14.5-ounce can of crushed tomatoes

1/2 cup of water

6 ounces of pitted green olives

2 tablespoons of parsley, finely chopped

2 tablespoons of cilantro, finely chopped

2-3 preserved lemons, rinsed, flesh discarded, and peels finely chopped

Salt and pepper

How to prepare:

1. Blot the brisket dry with paper towels. If needed, trim the brisket of any excessive fat. Using the sharp point of a small paring knife, make shallow cuts all around the brisket and push slivers of garlic into the slits. Let the brisket sit uncovered on a wire rack for about 30 minutes.

2. Preheat the oven to 350°.

3. Season the brisket on both sides with salt and freshly ground black pepper. Heat about two tablespoons of olive oil over medium-high heat in a very large skillet. When the oil begins to shimmer, sear the brisket well on both sides. Remove the brisket to a large casserole or baking dish. Reduce the heat to medium and add the two finely diced onions to the skillet. While sautéing the onions, be sure to scrape up any tasty brown bits stuck to the bottom of the pan. When the onions begin to turn translucent, stir in the turmeric, the cinnamon, the ginger and the bay leaves. Cook the spices until they are fragrant (be careful to not let them burn). Deglaze the pan with red vermouth. Wait until most of the alcohol has cooked off before adding the tomatoes, the honey and half a cup of water. Let everything simmer together until it has thickened into a sauce. Adjust the seasoning and pour it over the brisket.

4. Cut a piece of parchment paper to just fit your casserole or baking dish. Completely cover the brisket with it and make a tight seal by pressing the paper down onto the meat and onions. Roast the brisket for about 3 hours, or until the meat is tender.

5. When your brisket is tender, remove it from the oven and let it cool completely in its sauce. If you can delay gratification, let it sit in the fridge overnight. This will make it much easier to remove any fat from its surface the next day. If that isn’t a possibility, try to skim as much fat as you can before moving forward.

6. While the brisket is cooling, make the green olive-preserved lemon sauce. In a large saucepan, heat about two tablespoons of olive oil over medium-high heat until the oil begins to shimmer. Sauté the onions until they begin to turn translucent. Add the tomatoes and half a cup of water. Reduce the heat and simmer the sauce until it has thickened. Add the olives, the chopped herbs and the preserved lemons to the sauce. Let everything simmer together until the flavors begin to come together, about 5-6 minutes. Adjust the seasoning.

7. When the brisket has cooled completely, slice it thinly on a diagonal against the grain. Return the sliced meat to its casserole or baking dish and recover it with its sauce. Before serving, heat your oven to 350°. Cover the casserole or baking dish with aluminum foil and bake the sliced brisket for about 30 minutes, or until warmed through.

Serve the brisket on couscous and topped with the green olive-preserved lemon sauce.