Anthony Bourdain’s Mushroom Soup from the Les Halles Cookbook


I am always puzzled when I see bloggers declaim against those who try out and post recipes from other sources. It just feels kind of snobbish to me. Most, if not all food people read recipes. Food people tend to read a lot of recipes. Food people tend to own a lot of cookbooks too. A lot of food people also watch a lot of food TV.

This is not uncommon, and it strikes me as strangely inauthentic when people deny it. Furthermore, what’s so bad about it? Trying recipes from other people is a good way to learn different cooking techniques. Blogging about your experience lets others learn from you, just like you learned from them. Don’t you like the feeling that you are joining and contributing to the larger conversation? I do.

Also, there are a lot of recipes out there. What’s wrong with bringing some of those to the attention of another audience? I mean, don’t go out and plagiarize. Don’t pass off recipes that are not yours as your own. But why look down on people who properly attribute and discuss their results?

We all blog and write because we generally want to share our knowledge and experience. I personally would be thrilled if someone made and wrote about something that I posted so long as they did it respectfully — and I think that most bloggers would be pretty darn chuffed too.

Yeah, I know. I just used a British-ism.

More importantly, if you are trying your hand at writing recipes, looking at other sources is a great way to learn how to order ingredients and write directions in a way that is clear, concise, and consistent. Recipe writing is like any other kind of writing: you get better the more you do it, and the more you read.

To those who think that their recipes are completely original, well, please excuse my bluntness, but hardly any recipes are really original nowadays unless you are some molecular gastronomist making perfectly good food into weird foamy, jellied things.

Furthermore, no one I know who cooks ever sticks to any recipe as published anyway. I’ll confess: most of the time, I don’t. I’ll breezily skim the ingredients list, and cockily cook them in the order and manner that I feel works best, passing on anything that sounds untasty to me, and adding anything that I feel was an egregious omission.

How’s that for food snobbery?

For example, I remember the first time that I read this recipe from the Les Halles Cookbook. I remember poo-pooing Anthony Bourdain‘s admonition to blend carefully. I cavalierly shrugged off his archly written, “Do I have to remind you to do this in stages, with the blender’s lid firmly held down, and with the weight of your body keeping that thing from flying off and allowing boiling hot mushroom purée to erupt all over your kitchen?

Pshaw, I remember thinking. Not quite hogwash, but I had blended tons of thick soups, all at once without incident. I certainly wasn’t going to alter my MO now.

Then I remember the blender’s lid flying off — just like TV Tony said it would — and the kitchen being sprayed with hot soup and spongy bits of mushroom.

I remember having to google, “martha stewart how to clean hot mushroom soup off the ceiling.”

After cleaning everything up, I made a mental note to always read recipes straight through before cooking, and always respect any warnings the recipe writer may give.

I learned the messy way that recipe writers do not write warnings for their benefit, but ours. If Bourdain was making a point to tell me to keep a tight lock on the blender, it’s because he very likely sprayed his kitchen with mushroom soup too, cursing the other cookbook writer who failed to mention in their recipe to keep a hold on the blender lid while blending.

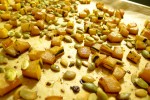
If you love mushrooms, this soup is not only super easy, but very, very delicious. The original recipe calls for onions, but I always prefer the ultimate combo of butter, shallots, and booze — which is one of the ways I adapted his recipe. Be sure to use a good sherry, not a cooking sherry for the soup. If you have time, you can roast a couple shitake mushrooms in the oven for garnish. I accidentally left mine in the oven for too long, ending up with mushroom chips that taste (amazingly) just like bacon. No complaints here!

I also use an immersion blender now, so no more flying blender lids for me!

Ingredients:

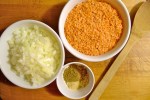
4 tablespoons of butter

2 shallots, thinly sliced

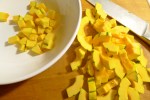
14-15 ounces of mixed mushrooms (you can even use all white button mushrooms if you want), cleaned, trimmed, and sliced

4 cups of chicken stock

2-3 sprigs of thyme

2 ounces of good quality sherry (I used a dry oloroso)

Special equipment:

A hand-held immersion blender

How to prepare:

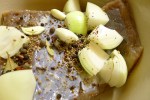
1. In a large Dutch oven, melt two tablespoons of the butter with a little bit of olive oil over medium heat. Add the shallots and thyme. Keep track of how many sprigs of thyme you add so you know how many stems you need to remove before puréeing the soup. Sauté the shallots until they begin to turn translucent.

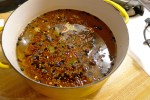
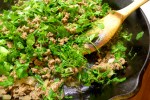
2. Add the mushrooms and the remaining 2 tablespoons of butter. Let the mixture sweat for about 6-8 minutes. The mushrooms should begin to give up most of their liquid at this point. Be careful to not let the shallots brown. Season with salt and pepper. Add the stock, and bring everything up to a boil. Reduce the temperature, and simmer the soup covered for about an hour.

3. After an hour, remove the stems of the thyme sprigs. Using an immersion blender, carefully purée the soup. Adjust the seasoning. Bring the soup back up to a simmer and mix in the sherry. You want to just simmer the soup long enough enough to cook off the alcohol in the sherry. Serve immediately with some good bread.

Trending: Super Bowl Snack Stadiums


I did not make this Snack Stadium. I didn’t take the picture either, but gosh darn it, I sure do wish I had!

It doesn’t even need to be said, but the Super Bowl is tomorrow. Ever since the Giants beat the 49ers, I started to see two food items pop up with greater and greater frequency.

The first is obvious: wings.

The second? SNACK STADIUMS.

Yes, entire miniature football stadiums made out of Super Bowl party food!

Did you know that Americans will eat one billion dollars’ worth of snack food tomorrow?

I wonder how much of that will go into making snack stadiums . . .

For more images of snack stadiums, click here.

And Serious Eats does a nice how-to slideshow here if you are ambitious enough to try to construct your own.

AND if you are feeling particularly evil (and kind of suicidal), Jimmy Kimmel has challenged fans to unplug the TV at a crucial moment during the game, film what happens, and upload it to Youtube with the title, “Hey Jimmy Kimmel, I unplugged the TV During the Game.”

I personally do not recommend that you do it.

Home-Made Corned Beef with Buttered Cabbage and New Potatoes


The idea was first planted in my head after reading a post that SweaterMeat put up on Ugly Food Tastes Better back in November: corned beef. Fatty, salty, flavorful corned beef. Yum.

But then came the holidays and that thought got buried under a bunch of other food thoughts: pumpkin pie, bourbon pecan pie, rice congee with leftover roasted turkey, glazed ham, ham fried rice, almond cookies.

Then Jen over at Fresh and Fabulous put up her post about corned beef, and I thought, “Well, now I really got to get me some of that.”

The problem was that I didn’t have any corned beef . . . yet. I did have brisket from my CSA, and as Jen reminded me, corned beef is essentially brisket that has been brined with different spices. There is no corn in corned beef. The “corn” in question refers to the large crystals of salt that used to be rubbed into the meat to cure and preserve it for long voyages at sea.

Brining has pretty much replaced salt curing for making corned beef — which brings us back to Jen’s post in which she adapts Tyler Florence’s recipe for brining brisket. That recipe was very similar to the one I ended up adapting from Saveur, but the one in Saveur includes one other curious ingredient: pink salt.

Pink salt, as I found out in a panic as you will soon read, is not Himalayan Pink Salt. Himalayan Pink Salt is a very pretty finishing salt. Pink salt is also known as Prague Powder #1, and it is a combo of table salt + sodium nitrite.

It is dyed pink so you won’t mistake it for regular table salt and accidentally kill yourself.

Because sodium nitrite in not-so-large quantities is poisonous. But it also inhibits bacterial growth and botulism, making it a common food additive along with sodium nitrate.

I didn’t know any of this when I decided to brine my brisket for 5 days (most recipes that I have seen put brining time anywhere between a relatively safe 6 hours to 14 scary-sounding days — with 5-10 days being the most common).

Once, I accidentally over-brined a turkey and was left with a pretty toxic carcass whose smell was described to me as something that we have evolved to recognize as hazardous to our health.

So admittedly, I freaked out. Oh my gosh, I thought, I am going to eat this beef petri dish and die of botulism. Or listeria.

I googled everything: was it okay to brine brisket for 5+ days without the pink salt? Shouldn’t the salt solution inhibit bacteria growth without the sodium nitrite? Sodium nitrite is pretty nasty, did I really want to cook with it anyway? Was I going to die? Did the Pilgrims have sodium nitrite? Oh crap, tons of them died!

(from my neurotic ramblings, can you tell I live in New York?)

In the end, I put my trust in Michael Ruhlman (when in doubt . . .), who assured me that even though my brisket would probably not be pinky-pink, I certainly wasn’t going to die from botulism or listeria. Besides, Ruhlman said, any excessive bacterial growth would essentially be rendered harmless from prolonged exposure to heat, ie. cooking anyway.

And he was right. I didn’t die, Sharon didn’t die, and the corned beef was really, really good.

Ingredients:

1 2-2.5 pound beef brisket, trimmed of any excess fat

1 1/2 teaspoons of whole allspice berries

1 1/2 teaspoons of whole cloves

1 1/2 teaspoons of whole coriander seeds

1 1/2 teaspoons of crushed red pepper flakes

1 1/2 teaspoons of whole mustard seeds

1 1/2 teaspoons of whole black peppercorns

3/4 cup of kosher salt

2 tablespoons of Himalayan Pink Salt (very optional, see above post)

1/2 cup of sugar

2 cloves of garlic

1 small onion, peeled and cut into large pieces

1 small head of Savoy cabbage, cored and shredded

2 tablespoons of butter

The juice from one lemon

Salt and pepper

1 lb of small potatoes, peeled

How to prepare:

1. Combine all the spices in a small skillet. Toast them over medium heat until they are fragrant. Be sure to swirl the pan constantly so that the spices do not burn. Transfer about 3/4 of the mixture to a 2-quart saucepan. Keep the remaining toasted spices in a tightly sealed jar in the refrigerator.

2. To the spices in the saucepan, add 4 cups of water, the salt, and the sugar. Bring everything up to simmer. Turn off the heat, and let the brine cool to the point that you can put it in the fridge to chill overnight.

3. In the morning, double up two gallon-sized Zip-loc bags. Position the trimmed brisket in the inner bag, and add all the brine. Squeeze out as much air as you can. Seal both bags. Arrange the bagged brisket in a large dish and refrigerate it for 5 days, turning it over every other day.

4. On the last day of brining, remove the brisket and rinse it off well. Put it in a large Dutch oven with the remaining toasted spices, the cut-up onion, and the garlic cloves. Cover the brisket with water and simmer it until it is tender. I only simmered mine for an hour, but really I could have cooked it for much longer. When the brisket is nice and tender, remove it to a plate and cover it with foil.

5. In the meanwhile, boil the peeled potatoes in a pot of salted water until they are easily pierced with a knife. Drain them and set them aside.

6. Put the cabbage in a large pot set over medium heat. Add the lemon juice, about 1/2 a cup of water, and 2 tablespoons of butter to the cabbage. Cover the pot and cook the cabbage, stirring every now and then, until it is tender. This should take about 30 minutes. Adjust the seasoning.

7. To serve, cut the corned beef into thin slices across the grain. Serve the slices warm, with a few potatoes and some of the cabbage. And as Jen points out, any leftovers make terrific corned beef hash!

Video: Making Italian Macaroons with NYC Food Report

Want to learn how to make some amazingly easy and super delicious macaroons?

Check out this fantastic video made by fellow blogger Lior over at NYC Food Report, who was awesome enough to invite me over to his apartment to make a big mess in his sun-filled, immaculate kitchen.

The macaroon recipe is also available in Lior’s site.

PS. Lior is being exceptionally kind and generous in calling me a chef — which I am clearly not. I am only a girl who likes to eat. A lot.

Sad Food News: Milk Thistle Organic Dairy Farm Has Closed


As just reported in the New York Times’ Diner’s Journal blog, Milk Thistle Farm has closed
.

For supporters of local farms, this is such a loss and very sad news indeed. The Hesse Family produced the sweetest, creamiest, and most wonderful milk in the world.

It was like pure childhood in a glass.

You will be very missed.

Warm Wilted Kale Salad with Red Quinoa and Candied Delicata Squash


In Britain, there is a variety of kale called “Hungry Gap,” named after that period at the end of winter and in the beginning spring when there is little in the way of fresh produce.

Here in the Northeast, we are in the Hungry Gap, but sadly there is no local kale yet. When one begins to tire of tubers, squash and bulbs, sometimes you just have to bite the bullet and buy other things, even if they come from far away.

As leafy greens go, kale is fairly hearty. It can hold up to heat — both in terms of temperature and strong flavors. Kale is a great addition to winter salads, providing a bright and cleanly bitter counterpoint to warmed grains and roasted squashes.

Ingredients:

1 delicata squash, seeded and cut into small dice

1/4 cup of packed brown sugar

2 tablespoons of balsamic vinegar

Olive oil

Salt and pepper

1/3 cup of pumpkin seeds, shelled

1 large bunch of lacinato kale, ribs removed and leaves cut into 1-inch pieces

1 cup of red quinoa, uncooked

The juice and zest of one lemon

2 tablespoons of pumpkin seed oil (or olive oil)

Freshly grated Parmesan

How to prepare:

1. Preheat the oven to 425°.

2. In a medium-sized bowl, combine the brown sugar, the balsamic vinegar and the delicata squash. Drizzle it with olive oil, sprinkle it with salt, and toss everything together until the squash is evenly coated with the balsamic-olive-oil-sugar mixture. Spread the squash out in a single layer on a parchment paper-lined cookie sheet. Roast it until it just begins to soften and the edges begin to caramelize, about 15-17 minutes. Spread the pumpkin seeds over the top of the squash, and continue to roast everything for about 2-3 minutes more. When the pumpkin seeds are nicely toasted, transfer everything to a large bowl.

3. Rinse the quinoa if needed. In a separate saucepan, combine the quinoa with about two cups of water and a hefty pinch of salt. Bring everything to a boil, and then reduce the heat. Simmer the quinoa over low heat until all the water is absorbed, and the quinoa is tender. Fluff it with a fork when it is done.

4. In the meanwhile, wilt (or steam) the kale in a separate pan. When the kale is wilted, remove it to a colander. Once the kale is cool enough to handle, gently press as much liquid as you can out of the leaves without squeezing them.

5. Add the kale and the quinoa to the candied squash. Toss the salad together with two tablespoons of pumpkin seed oil and the juice and zest of one lemon. Adjust the seasoning. Before serving, grate a nice fluffy mound of Parmesan cheese on top.

Dean & Deluca’s Middle Eastern Red Lentil Soup with Yogurt and Lemon


Lentil soups are great this time of year when the season is lean, and fresh local produce consists mostly of tubers and squash. Lentils are extremely economical. Added bonuses: they cook up quickly, and have a wholesome, delicious nuttiness.

This soup is adapted from one in the Dean and Deluca Cookbook. If you keep the spices and lentils on hand, you can quickly pull it together after school or work.

Start to finish, the soup should take you about 30 minutes to make.

Actually, it will take you about 20 minutes (I added an extra 10 minutes for you to enjoy a glass of wine).

Ingredients:

1 tablespoon of olive oil

1 tablespoon of butter

1 medium onion, finely chopped

1 1/2 teaspoons of ground coriander

1 1/2 teaspoons of ground cumin

1/2 teaspoon of ground ginger

1/2 teaspoon of mustard powder

9 ounces of red lentils

4 cups of chicken or vegetable stock + 1 cup of water

The juice and the zest of one lemon

1 cup of whole milk Greek yogurt, divided

1/4 cup of fresh parsley, chopped

Aleppo pepper for garnish (you can also use sweet paprika as a substitution)

How to prepare:

1. In a large Dutch oven, melt together the butter and the olive oil over medium heat. Add the onion and cook it until it begins to turn translucent. Add the spices to the onions, stirring frequently to make sure that the spices toast, but do not burn. Continue to cook the onion until it begins to turn golden.

2. Toss the lentils with the onions and the spices. Add the stock, the extra cup of water, and a heavy pinch of salt. Bring everything to a boil, and then reduce the heat to a simmer. Simmer the lentils until they are tender, about 15 to 20 minutes. Once the lentils are tender, add the lemon zest and half of the yogurt to the soup. Continue to simmer everything together until the consistency is nice and smooth. Adjust the seasoning.

3. In a small bowl, combine the remaining yogurt with the lemon juice and the parsley. Stir everything together until the consistency is smooth and silky.

4. Ladle the soup into bowls. Top each serving with a swirl of the yogurt mixture and a sprinkle of Aleppo pepper.

Individual Beef and Green Herb Pies with Yeasted Whole Wheat Crust


This recipe finds its origins in another recipe from Deborah Madison. As some of you know, when I was a vegetarian, I cooked my way through her Vegetarian Cooking for Everyone. I learned so much from that book: how to prep, how to cook vegetables (trickier, I think, than meat), how to not be afraid of trying things I had never eaten before (cardoons? sorrel anyone?), and how to improvise (the most important lesson of all).

In 2001, the Times released a collection of recipes gathered from its most popular chef contributors, including Madison. The Chefs of the Times is a great cookbook to have, not just because the dishes are all terrific, but because each one is prefaced by a short introduction in which the chefs talk about how they got to the final versions of the recipes found in the book, from inspiration to execution.

It was here that I found Madison’s interpretation of the traditional Tuscan torta d’erbe. A torta d’erbe is, in essence, a very rustic dish normally comprising of whatever greens or vegetables you have one hand, bound together with beaten eggs, ricotta, and/or parmesan, and baked in a pastry crust.

Madison does a different take on the traditional pastry by cutting the amount of fat in the dough, and using yeast to lighten it and make it flaky. In the published recipe, she had you make a covered pie in a tart tin. However, when I started making it, I would just divide the dough in two and make a great big free-form tart.

Now I go one step further and made individual hand pies. I also use just olive oil for the crust (instead of butter, or a mixture of butter and olive oil), and do a mix of whole wheat and all-purpose flour.

These hand pies are the year’s real first stab at something a little healthier to eat. They are full of good things that are good for you.

To turn the recipe back into a vegetarian one, simply omit the ground beef, and double the amount of ricotta. In either case, if you would like to make the pies a little richer, you can add about 3 ounces of grated parmesan, or crumbled feta cheese to the filling.

Ingredients:

1 package of active dry yeast (about 2 1/4 teaspoons)

1/2 teaspoon of sugar

1 cup of warm whole milk

Salt

3 eggs

8 tablespoons of olive oil

1 cup of all-purpose flour

2 cups of whole wheat flour

1 medium onion, chopped

1 pound of very lean ground beef

1 cup of fresh parsley, chopped

1/2 cup of fresh dill, chopped

1/2 cup of fresh cilantro, chopped

2 bunches (about 6 cups) of spinach, roughly chopped

1 bunch of trimmed chard (about 3 cups), roughly chopped

1/2 a cup of whole-milk ricotta

The zest of one lemon

Freshly ground black pepper

How to prepare:

1. In a small bowl, combine the yeast with the warm milk and the sugar.

2. In a large bowl, mix the 2 flours together with a hefty pinch of salt. Make a well in the center of the flour for the olive oil and just one of the eggs. Using your hands, combine the flour with the oil and the egg until the mixture is nice and crumbly. Add the yeast-milk mixture all at once, and knead the dough together by hand until it is relatively smooth. Place the dough in a lightly oiled bowl. Cover it with plastic wrap, and let the dough rise in a warm, dark place for about an hour.

3. In the meantime, sauté the onion in a large skillet with a little bit of olive oil over medium-high heat until it is no longer opaque. Once the onion begins to turn golden, crumble the ground beef into the skillet. Cook the meat until it is no longer pink. When the ground beef begins to brown, add the herbs to it. Continue to cook everything until most of the water has evaporated. The herbs should be softened, but still bright. Using a slotted spoon, transfer the meat mixture to large bowl, leaving behind as much liquid as possible. If there seems to be a lot of liquid, drain the beef mixture as best as you can. Adjust the seasoning.

4. To the same skillet, add the spinach. Cook it over medium heat until it wilts. Remove it to a colander. Repeat the process with the chard. When the spinach and the chard are cool enough to handle, use your hands to press as much liquid as possible out of the leaves to remove the moisture.

5. Combine the meat and herb mixture, the wilted greens, the lemon zest, the ricotta and one egg. Adjust the seasoning, and divide the mixture into 8 equal parts.

6. Preheat the oven to 375°.

7. When the dough is ready, divide it into 8 equal parts. Roll each part into a ball. Flatten out each ball of dough with your hands before rolling it out into a round about to an 1/8th of an inch thick, and about 6 to 7 inches in diameter. You can do this on a lightly floured surface if needed, but because of the olive oil, the dough shouldn’t be very sticky. Mound a portion of filling in the center of the dough. Fold the dough over the filling, making a half-moon shape. Lightly press the air out of the filling as you seal the pie around its edges. Trim the pie so that there is about a half-inch border all the way around. Use the tines of a fork to make impressions around the pie. Cut three even slits into the top. Repeat these steps for the remaining 7 pies.

8. Evenly position the hand pies on a large baking sheet lined with parchment paper. You may need more than one baking sheet. Beat the last remaining egg. Using a pastry brush, gently brush each pie with the beaten egg. Bake the pies for about 35 minutes.

Serve hot, room temperature, or cold.

Irish Bacon, Reserve Farmstead Cheese and Chive Drop Biscuits


Okay, I swear that I am going to start this new year right and get myself in the gym this week.

Many of my friends would be shaking their heads in disbelief mildly surprised to learn that I have a gym membership. I actually never talk about it because the last time that I went to the gym was in June. Yes, you read that correctly: June. My gym is open 24/7 during the week, and when I was going, I liked to slink in about 11pm or midnight when it was completely empty. That way, I could do as little as possible without feeling self-conscious about it.

But I digress . . .

I made these drop biscuits with the other wedge of CSA cheese (we get two different kinds at every pick-up), and the remaining Irish bacon from my CSA. The texture of home-made biscuits is always better than anything you could buy. Plus, they are so easy to pull together and so quick to bake, that you will want to make them all the time.

And I promise to get in better shape . . . as soon as I polish off these biscuits.

* This post was actually written the day after the Horseradish Cheddar and Irish Bacon Mac & Cheese one. However, in the whole hubbub following the Daring Cooks’ challenge, I haven’t had time to post it until today. In the meanwhile, amazingly awesome SweaterMeat posted her Cheesy Breakfast Biscuit Sandwiches on her blog, Ugly Food Tastes Better. If you haven’t already dropped by, check out blog and her biscuits!

The point being that there must be something in the air right now about drop biscuits!

Ingredients:

2 1/4 cups of all-purpose flour

2 1/2 teaspoons of baking powder

3/4 teaspoon of baking soda

1 teaspoon of salt

6 tablespoons of butter, cubed

6.5 ounces of reserve farmstead cheese (or really any kind of aged cheese), grated

1/2 cup of chives, chopped

1/2 pound of cooked Irish bacon, cut into 1/2-inch strips

1 1/2 cups of whole milk or buttermilk

How to prepare:

1. Preheat the oven to 450°.

2. Combine the flour, the baking powder, the baking soda, and the salt together in a large bowl. Add the cubes of butter. Using your fingertips, blend the butter into the dry ingredients until the mixture resembles a coarse meal.

3. Stir in the grated cheese, the chives, and the bacon. Add the milk or the buttermilk all at once. Continue to stir until all the ingredients are just combined.

4. Drop the dough in twelve equal mounds about an inch or two apart on a large baking sheet lined with parchment paper. Bake the biscuits until they are golden, about 18 to 20 minutes.