The Daring Kitchen November Cooks’ Challenge: Chinese Tea Eggs

About a month or so ago, I heard about the Daring Kitchen from another blogger who writes Live the London Life. The basic premise is this: The Daring Kitchen comprises of two groups, The Daring Bakers and the The Daring Cooks. You can sign up for one or both (I am just signed up for The Daring Cooks). Once you sign up, you will be tasked with cooking one recipe each month from what the monthly host has selected as the cooking or baking challenges. Everyone posts their dishes on their blogs on the same day (also known as the reveal day).

So today is the big reveal day for my first challenge: Cooking with Tea.

I’ve never cooked with tea before, with the exception of maybe duck breast a long, long time ago. So long ago that it doesn’t count anymore. Of the three dishes I could have chosen from, I perhaps chose the easiest (the other options were a green tea noodle soup, and a beef and sweet potato stew made with rooibos).

But hey, I made the decision right after I whacked into my thumb with that folding knife!

And sometimes the simplest recipes are the most challenging . . . or at least that is what I am telling myself 😉

So here are the blog-checking lines: 

Sarah from Simply Cooked was our November Daring Cooks’ hostess and she challenged us to create something truly unique in both taste and technique! We learned how to cook using tea with recipes from Tea Cookbook by Tonia George and The New Tea Book by Sara Perry.
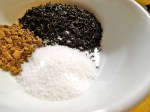
Ingredients:

6 eggs

2 tablespoons of loose black tea, or four tea bags (I used loose Keemun)

2 teaspoons of Chinese Five-Spice Powder

1 tablespoon of coarse salt

Sesame seeds for garnish

How to prepare:
(taken from The Daring Cooks’ November Challenge PDF)

1. In a large enough pot to avoid overcrowding, cover the eggs with cold water. Bring to a boil over medium heat and simmer for twelve minutes.

2. Remove the eggs with a slotted spoon and keep the cooking water.

3. With a spoon, tap the eggs all over until they are covered with small cracks. This can also be done by tapping and rolling the eggs very gently on the counter.

4. Return the eggs to the pan and add the tea leaves or bags, Chinese five spice powder, and salt. Cover the pan.

5. Heat gently and simmer, covered, for one hour.

6. Remove the pan from the heat and let the eggs cool down in the liquid for 30 minutes.

7. Remove the eggs from the liquid. Peel one egg to check how dark it is; the others can be returned to the liquid if you wish to have the web-like pattern darker. Allow the eggs to cool fully.

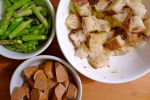
8. To serve, peel and slice the eggs in halves or quarters. Sprinkle with toasted sesame seeds.

Mini All-Beef Corn Dogs

Ever since we got all-beef hot dogs in our CSA shares, I have been wanting to make corn dogs. Maybe it was all this talk in late August and the beginning of September of state fairs. As we all know, “state fair” is a euphemism for “fried food on a stick” — just about the best two things ever combined.

If I had any reason to go to Iowa, it would be for the Iowa State Fair. The Iowa State Fair (tagline, “Nothing Compares”) website features a ticking count-down to the next fair (August 9-19, 2012). Whoa! More importantly, the fair historically features over 200 food vendors, most of which are selling something fatty and super-calorific. And if the food alone doesn’t induce visions of cardiac arrest, there is always, of course, the famous butter cow sculpture — which I imagine is awe-inspiring. The viewing experience is likely enhanced by checking out the sculpture while consuming fried butter on a stick. In all honesty, I couldn’t dream of anything better to eat when taking in a life-sized representation of of cow rendered in its own product (this all seems very un-kosher . . .).

The best part about the Iowa State Fair website is the food page, which features an entire directory devoted to foods on a stick, most of which are fried.

So in honor and appreciation of all things State Fair, I give you DIY mini-corn dogs, CSA-style. Probably the best corn dogs out there for you. No, seriously! These hot dogs are made from grass-fed beef and are packed with omega-3’s!

Ingredients:

1 cup of yellow corn meal

1 cup of all-purpose flour

1 teaspoon of baking powder

1/4 of baking soda

1/2 of cayenne pepper

2 teaspoons of kosher salt

1 1/2 cups of milk (has anyone every tried beer?)

1 pack of all-beef hot dogs (we get 8 in a pack from the CSA)

8 six-inch wooden skewers

1 liter of any kind of oil that you can use for deep-fat frying (peanut, canola, etc.)

Good coarse-grain mustard

How to prepare:

1. In a large bowl, deep enough to dip the skewered dogs in easily, combine the cornmeal, the flour, the baking powder, the baking soda, and the cayenne pepper. You can tinker with the spices if you like, substituting maybe paprika for cayenne, or maybe adding some Old Bay. Because I just kind of want the ultimate plain corn dog experience, I keep the flavorings to a minimal. Why distract yourself from the pure, unadulterated taste of fried?

2. Add the milk and stir it in gently with a fork. The batter should be thick and lumpy —like pancake batter. Let the batter rest for 10 minutes while you prep the hot dogs.

3. Cut each hot dog and each skewer in half. For the skewers, I tried breaking them in half, but then I didn’t like the look of the ragged ends that my sorry stick-snapping skills left. So I used a pair of wire cutters. I know. So food-safe! But they did the job!

Insert a skewer about a third to halfway through the end of each hot dog-half.

4. In a large Dutch oven, heat the oil over medium-high heat. It might take a while for the oil to get up to the right temperature. You don’t want the oil to smoke, but you want it to be nice and hot. You can check the oil temperature with a thermometer (it should register between 350-375°), or you can just do what I did and drop a little bit of the batter into the oil to check. If it starts frying up beautifully, your oil is at the right temperature. Just be careful to not let your oil burn. If you are lucky enough to own a deep fat fryer, this is even easier.

5. Holding the stick, dip each skewered dog into the batter. The batter should be thick enough to coat each dog evenly, but not so thick as to be stodgy. If it seems too thick, you can thin it out with just a little more milk. Carefully drop the corn dogs — sticks and all — into the boiling oil. Be careful not to overcrowd them or the oil’s temperature will drop, and your corn dogs will come out greasy instead of crispy. I fried no more than four or five at a time.

6. Line a colander with paper towels. Let the corn dogs fry until they are nice and golden. Using a pair of tongs, remove each dog by the stick when it is done. Let them drain upright in the colander.

7. Serve them with some good mustard, or anything else you like with your corn dogs like ketchup, relish, Cheez-Whiz . . .

Note:

Now that you are done frying, what the heck do you do with all this oil? Well, according to Cook’s Illustrated, you can reuse it without it tasting stale or rancid as long as you freeze it. Let the oil cool down completely. Carefully strain it into a clean, dry bottle (I use an empty plastic bottle, or a wine bottle). To strain, I pour the oil through a coffee filter. Freeze. Before reusing, be sure to smell or taste it. If it smells “fishy,” or tastes off, toss it. When in doubt, throw it out!

Meat Week NYC Starts Today!

Organized by our friends over at Jimmy’s 43, Meat Week NYC kicks off today with a Meat and Cocktails party at City Winery. General tickets are $45, but include lots of goodies like duck liver-beef brisket boudin balls and beer, and crispy pan seared polenta crostini topped with braised buffalo short ribs and Cabernet Franc. A complete list of nibblies and drinks can be had here.

There are also tons of other great events going on throughout the week, should tonight not work out for you.

Go to Meat Week NYC’s official site for more information.

I’ll be at the event tonight, as well as at the Sustainable Meat Panel and the Film Screening at Jimmy’s to represent High Point Farms!

So that means you should definitely come out 🙂

Sign-up for High Point Farms Winter CSA!

High Point Farms still has space for more members! Sign up today for their Winter CSA, beginning December 14 and running until February 22.

This is a fantastic opportunity to plan ahead for delicious dishes for the holidays, Valentine’s Day (nothing says lovin’ like red meat), and the Superbowl (mini-meatballs? nachos? chili?).

Plus, you get that warm, wonderful feeling knowing that you are supporting sustainable local farming and Earth-friendly agricultural practices!

This season there are three pick-up locations:

In the East Village:

Jimmy’s 43 (43 E. 7th Street between Second and Third Avenues)

In Williamsburg: 

CrossFit Virtuosity Williamsburg (221 North 8th St, between Driggs and Roebling)

In Fort Greene:

Five Spot Soul Food (459 Myrtle Ave)

The pick-up dates for this distribution cycle are:

• December 14
• December 28
• January 11
• January 25
• February 8
• February 22

Pick-up time:

4:30PM to 7:00 PM, every other Wednesday

Two share options are available:

• Beef, chicken, and pork
• Beef and chicken

There are also absolutely amazing eggs and cheese too!

Sign up and come meet your meat! Also, download our flier and help us spread the word about the farm! Click, print, and get the word out!

Grilled Delmonico with Mashed Potatoes and Sautéed Spinach


After about 3 weeks of kitchen hiatus, it feels so good to be back to cooking again.

I busted out my grill pan — which had been languishing in the back of my cabinets for years. Really years.

Why haven’t I used it? I don’t know. It was kind of an out-of-sight, out-of-mind kind of thing. Pretty ironic, actually, given all the meat in my freezer.

But now that it is out, I am putting it to good use!

Delmonico steaks are also known as boneless rib-eye steaks. The cut famously refers to Delmonico’s Restaurant in NYC, where the cut originated around 1830 as the house steak. In terms of tenderness, it is like a filet mignon, however a proper Delmonico is more marbled, and juicier as a result.

My grill pan has allowed me to get back in touch with grill marks, or cross-hatching.

Cross-hatching, also fancily know as quadrillage, is created by positioning your steak on the grill at roughly the 10 o’clock position, and then rotating it to the 2 o’clock position after about one or two minutes, depending on the thickness of your steak.

To help visualize this, here is the fabulous David Leite from Leite’s Culinaria. Click here for the video.

Some great tips for successful steak + how to use a stove top grill pan:

1. Take your meat out of the fridge about half an hour before you want to cook it. You want the steak to come up to room temperature before grilling so that it cooks evenly. This doesn’t mean that your steak should be warm; it should be cool to touch, but not fridge temperature.

2. Season your steaks well. Salt makes flavor pop.

3. Get the grill hot, man. Once the meat is on the grill, you can turn down the heat if it seems like it is cooking too fast.

Perhaps one reason why I stopped using my grill pan was that every time that I cooked on it, my fire alarm went off and the apartment was filled with smoke. Recently, I realized that I just never learned how to use it properly. Now, it hardly makes any mess and a bare minimum of smoke, even when brushed with olive oil. And it still tastes like grilled food. Not outdoor grilled food, but I accept the limitations of a grill pan.

The keys to not simulating a house fire? Make sure your meat is not fridge temperature when you put it on the grill. Brush your cast-iron pan (they shouldn’t even sell non-stick grill pans; once cast-iron is properly seasoned, it is effectively non-stick) lightly with oil. Too much oil = too much burning oil. Heat your pan until it is hot. Once the pan starts to smoke, put your meat on. I never leave the temperature as high as it was to heat the pan in the first place. I generally lower the heat to medium, particularly for thicker cuts because I want the interior to cook before the outside burns. That was the biggest lesson that I learned about using a stove-top grill pan: it shouldn’t be smokin’ hot for the entire duration of cooking. For more tips, click here.

4. Resist the urge to mess with the steak once it’s on the grill before it is ready to turn. You can monitor the doneness by touching the top of the steak with your finger or a pair of tongs. You don’t actually need a thermometer to do this. Make a really tight fist. Now with your other hand poke the fleshy part of your fist between your index finger and your thumb. That bouncy hard resistance that you feel is what a super well-done steak would feel like if you poked it. Open your hand and make a super loose fist. Touch the same part. That’s what really, really rare feels like. Now, aim for somewhere in-between.

5. Let it rest a little bit before serving.

Irish Bacon and Cabbage Soup


From the archives!

As I am currently a little out-of-commission, I decided to revisit some meals that I have made in the recent past, but haven’t blogged about yet.

This soup is one of them. A few months ago, I got some Irish bacon in my CSA. What is the difference between Irish bacon and regular ol’ streaky bacon? Well, according to Wikipedia — the be-all, end-all arbiter of everything — regular bacon is made from pork belly (which is why it’s so nice and streaked with fat). Irish bacon, on the other hand, is made from center-cut pork loin — which is along the backside of the pig. Because this kind of bacon is not from the belly, it tends to be much leaner. There is usually a narrow band of fat that rings the edge, but each slice is generally more pork than fat. Similar to Canadian bacon, Irish bacon isn’t supposed to get crispy like belly bacon. It still has incredible flavor though, and holds up well to things like thick soups and stews. This recipe, adapted from Epicurious, makes a warm, wonderful, and traditional stick-it-to-your ribs kind of meal. Perfect for the rain and newly arrived cold weather. Ingredients: 1 pound of sliced Irish bacon 3 tablespoons of butter 1 medium onion, chopped 2 large Yukon Gold potatoes, peeled and diced 1 quart of chicken stock 2 bay leaves 1/2 of a small head of Savoy cabbage, cored and thinly sliced Salt and pepper Special equipment: 1 hand-held immersion blender How to prepare: 1. Place the bacon in a medium saucepan, and cover it with about two inches of cold water. Bring the water to a boil. Reduce the heat so that the water is at an even simmer, skimming any foam that rises to the surface. Cook the bacon for about 7 minutes. Drain the bacon, and when it is cool enough to handle, cut it width-wise into 1/2-inch strips. 2. In a large casserole, melt the butter over moderate heat. When the butter begins to bubble, add the chopped onions. Sauté the onions, stirring often, until they begin to soften and turn slightly translucent. Add the potatoes to the onions, and sauté everything together for about 2-3 minutes more. Add the stock and the bay leaves. Adjust the seasoning, and bring everything to a boil. Reduce the heat and simmer everything together until the potatoes are soft and tender, about 8 to 10 minutes. 3. When the potatoes are ready, add the cabbage to the pot. Simmer the cabbage until it is soft too, about 5 minutes. Fish out the bay leaves and discard them. Don’t forget . . . like I did! 4. Once you find and remove the bay leaves, blend the soup together until it is smooth. If the soup is really thick, you may want to add some water to it to thin it out a little. If you don’t have an immersion blender, you can use a regular blender or a food processor, working in batches if necessary. Once the soup is puréed, stir in the bacon. Adjust the seasoning for the final time, and rewarm the soup if needed before serving.

Roasted Miso-Curry Delicata Squash with Pork

Yet another recipe adapted from Heidi Swanson’s Super Natural Every Day. This dish is a marvelous mixture of flavors and textures. It also shows off some of the first of Fall’s bounty: the gorgeous Delicata squash.

Oblong and streaked with golden yellow, forest green, and ivory, Delicata squash have a thin and delectable skin that does not need to be peeled. It cooks quickly, and yields a sweet, pure taste.

Though Swanson’s original recipe, like all of her recipes, is vegetarian, I find that the addition of thinly sliced pork goes well with the miso-curry sauce.

Ingredients:

A scant 1/4 cup of white miso

A scant 1 tablespoon of Thai red curry paste

Olive oil

1 Delicata squash

About 1 pound of small red potatoes, quartered or cut into even chunks

1 boneless pork chop (about 1/2 a pound), cut into 1/4 inch-thick slices

1-2 handfuls of shelled pepitas

Half a bunch of roughly chopped lacinato kale, stems removed

2/3 cup cilantro, roughly chopped

The juice of 1 limes (2 if the limes are small)

How to prepare:

1. Heat your oven to 400°.

2. In a small bowl, whisk together the white miso, the red Thai curry paste, and about a 1/4 cup of olive oil with a fork. Add more oil to loosen up the mixture if it seems too thick.

3. Trim both ends of the Delicata squash. Cut it in half lengthwise. Scoop out all of the seeds and discard them. Cut each half into 1/2-inch half moons.

4. In a medium bowl, combine the squash and the potatoes with about half of the miso-curry mixture. Toss the vegetables together with your hands until they are evenly coated. Turn the vegetables out onto a parchment paper-lined rimmed baking sheet. Spread them out in a single layer, and bake them for about 20 minutes.

5. In a small bowl, toss the pork with half of the remaining sauce. After the potatoes and the squash have roasted for about 20 minutes, evenly scatter the pork and the pepitas over the tops of them. Continue to roast everything until the pork is cooked and the potatoes are done, about 15 minutes more.

6. In a large bowl, combine the kale, the cilantro, the remaining miso-curry, and the lime juice. Add the roasted pork and vegetables to them. Toss everything gently together. Serve and enjoy.

Ricotta-Topped Rigatoni with Tomato, Sausage, and Kale Sauce


I have a new love: Jersey Farms Crushed Tomatoes.

I can eat them straight out of the can. Seriously. They just taste so rich and, well, tomatoey.

All of the tomatoes come from just 6 cooperative farms in New Jersey. Once picked, they are canned within 24 hours with no added water or preservatives, only a little salt. The crushed tomatoes are thick, but not too thick. They are perfect. Just perfect. You almost don’t need any seasoning at all. You practically don’t even need to cook them.

But if you do cook with them, whoa golly, are you in for a treat. These tomatoes make the best pizza sauce. The best anything, really.

Using some mild beef sausage from my CSA, I made a quick sauce with just garlic, olive oil, and some extra kale I had in the fridge. After rolling some al dente rigatoni in it for a couple of minutes, I topped everything with a sloppy spoonful of creamy, locally-made ricotta. A little drizzle of olive oil to add an extra bit of luster.

And I tell you, it was delicious.

Ingredients:

2 cloves of garlic, finely minced

1 tablespoon of olive oil

1 pound mild Italian beef sausage, casings removed

Red pepper flakes to taste

1 28-ounce can of crushed tomatoes (preferably Jersey Farms Crushed Tomatoes)

2 cups of kale, chopped with the ribs removed

Salt and pepper

1 pound of rigatoni

Whole milk ricotta cheese

More olive oil for drizzling

How to prepare:

1. Heat the olive oil over medium heat in a large casserole, or Dutch oven. When the oil begins to shimmer, sauté the garlic in it until it is fragrant. The garlic should just begin to have a little bit of color, but not too much. Crumble the sausage into the oil, and cook it until it is evenly browned (be sure to break up larger pieces of sausage with the edge of your spoon as you cook). Add as many red pepper flakes as you like. Toss the red pepper flakes with the browned sausage for about a minute before adding the tomatoes.

2. Carefully pour in the crushed tomatoes. If the sauce seems too thick to you, you can add some water to thin it out a little bit. Stir everything together. Lower the heat, and let the sauce simmer for about 15-20 minutes before adding the kale.

3. In the meanwhile, bring a large pot of salted water to boil. When the water begins boiling, add the pasta and cook it until it is al dente.

4. Let the kale wilt in the sauce while the pasta cooks. Adjust the seasoning.

5. When the pasta is done, drain it well. You will add about a ladleful of sauce per 1/4 pound of pasta. Toss everything together, and then divide the pasta into warmed bowls.

6. Top each serving of pasta with a nice, fat dollop of ricotta cheese. Drizzle some olive oil on top of everything. Before eating, be sure to mix the ricotta into the pasta with your fork!

Pan-Seared New York Strip Steak with Butter and Soy Sauce


Is there Tom Colicchio backlash? The Top Chef judge is everywhere these days, opening and closing Crafts across the country, and thoroughly saturating the New York market with ‘wichcraft sandwiches.

You kind of want to hate him, or in the very least wonder sneeringly if he is actually ever in a kitchen these days. In any case, Sifty, in his recent re-review for the New York Times, did re-bestow 3 stars on Craft . . . so does that mean it never lost them after over a decade of dining?

Possible backlash aside, I have to admit that I love Colicchio’s book Craft of Cooking: Notes and Recipes from a Restaurant Kitchen. The book is not for the faint of heart. He does not give you “easy” recipes. They are dead simple, but they are very precise and suffer a little bit from Thomas Keller Syndrome, meaning that to execute some of them you feel the pressure to raise and snuggle a piglet from birth, feeding it only milk proteins and ambrosia until it reaches market weight.

Many times, I go over the recipes and think about how I can do it faster.

Not better, but lazier.

I inevitably find, though, that Colicchio’s way is the best way.

One of my favorite ways to prepare steak is how they did it at Craftsteak: in a hot pan continually bathed in butter to finish.

I also love my friend Tomoko’s suggestion to add a hefty splash of soy sauce to the end. The soy and butter marry beautifully together, giving a lusciously heady hit of umami to an already rich grass-fed steak.

Colicchio gave away his steak technique in an Esquire magazine article a while back, so this is just to summarize:

You will need:

A cast-iron skillet

Steak, a nice thick cut

Salt and pepper

About a tablespoon of canola oil

About 3 tablespoons of butter

Good soy sauce

How to prepare: 

1. For all successful steaks, make sure your meat is about room temperature before cooking. Take it out of the fridge about an hour before you want to eat it.

2. Season the steak heavily with salt and pepper on both sides.

3. Heat the canola oil in the cast-iron skillet over high heat. When the oil is almost smoking, sear the meat on both sides until it is brown and crusty. Please note that the steak will be seared, but it will NOT be done.

This is important because . . .

4 . . . after you have seared both sides, reduce the heat to medium-low. Let the pan cool a bit before adding the butter (you don’t want the butter to sizzle and burn on contact). Using a spoon, continually baste the steak with butter, flipping it halfway through to ensure even cooking.

5. Continue basting until it is not quite at the level of doneness that you desire. Right before that point, add a good, hefty splash of soy sauce to the pan. Keep basting the steak in the butter and soy until it is done. Alternatively, I guess you could add the butter and soy at the same time.

Ideally, a medium-rare steak will have a internal temperature of about 135°, but you can also gauge the doneness by touching its surface.

You don’t actually need a thermometer to do this. Make a really tight fist. Now with your other hand poke the fleshy part of your fist between your index finger and your thumb. That bouncy hard resistance that you feel is what a super well-done steak would feel like if you poked it. Open your hand and make a super loose fist. Touch the same part. That’s what really, really rare feels like. Now, aim for somewhere in-between.

6. Let the steak rest for a few minutes before serving.

Asparagus with Chorizo and Croutons


Have you ever made something from memory, and then gone back to the original recipe to find that you mixed it all up?

That’s what happened here, but that is not to say that the results are not still delicious.

This is sort of one of Jacques Pépin’s Fast Food recipes. I’m sure that his is better, but the basic combination of chorizo, asparagus, and croutons is delicious — with or without the almonds.

I adore Jacques Pépin. If I had to pick anyone living or dead to have a meal with, it would be him. Famously frugal, I saw him once on PBS make adorable garnish mice out of basically garbage. He can do that and I would eat it because he’s Jacques Pépin. Unbelievably awesome.

The man is a walking legend.

Ingredients:

1/2 pound of chorizo, cut into 3/4-inch pieces

1/2 pound of asparagus, trimmed and cut into pieces

2 cups of day old bread, cubed

1/2 cup of Parmesan cheese, grated

Salt and pepper

Olive oil

How to prepare:

1. Place the cubes of bread in a large bowl. Drizzle them with olive oil, and season them with salt and pepper. Sprinkle them with the Parmesan and toss everything together again until the bread cubes are evenly coated.

2. Heat about 1 to 2 tablespoons of olive oil in a large skillet set over medium-high heat until it begins to shimmer. Add the chorizo, the asparagus, and the bread to the skillet. Toss and stir everything together for about 5 to 6 minutes. You want the chorizo to brown, the bread to toast, and the asparagus to cook through.

Adjust the seasoning and serve immediately.