Avocado Fudge Pops

P1080161

A few years ago, I used to help coordinate a CSA in Manhattan. For those of you unfamiliar with CSA’s or farm share models, in brief, they are a way for farmers to sell directly to consumers without pesky middlemen or distributors. Standing for “Community-Supported Agriculture,” you generally agree to pay your local farmer a set fee up front for the season. This amount can vary between a couple hundred dollars to several hundred dollars. Known as a membership fee, your membership entitles you to “shares” of the harvest over the course of the season. These shares are usually picked up once a week from a designated location like a church or another community-friendly site.

If you can manage the up-front fee, a CSA is a win-win for both you and the farmer. The farmer gets more money to work with, and in exchange, you get a much better and better tasting product. The majority of CSA’s are either fruit or vegetable CSA’s, but of course my CSA was all about the meat: cows, pigs, chickens, sometimes lamb, sometimes duck. Basically anything cute with a face 😉

Running a meat CSA, you meet a lot of people: bankers, academics, writers, publishers, editors, lawyers, non-profit organization directors, retirees, beer distributors, you name them. It was also the first time that I ever encountered people on the Paleo diet, a modern diet that basically aims to mimic what our paleolithic ancestors ate.

I know.

At the time, I asked myself the same thing: is this a group of carrion-eaters that spends most of its time starving and the rest of its time fearfully living in caves? 

Nope! Apparently, what “going Paleo” really means avoiding processed food, lowering the amount of carbohydrates you eat, increasing how many fresh fruits and vegetables you consume, hunting and gathering in the bulk foods section of the Park Slope Co-Op, and eating a lot meat.

A. Lot. Of. Meat.

Now in all honesty, avoiding processed foods and being more mindful of what we consume are things that we could all do. But a few of these members kind of scared me.

There was the guy who asked me multiple times on multiple occasions if it was okay to eat raw sausage — it’s not. I mean, you can. You won’t die, but I’m pretty sure that it tastes better cooked.

There was another guy who told me that he went through 8 dozen eggs a week because he had a twelve-egg-omelette-a-day habit.

There was the guy who called his personal trainer in a panic because I wasn’t sure if our CSA beef was just grass-fed, or grass-finished (it turned out that it was grass-finished).

A few outliers notwithstanding, for the most part, our Paleo members were a great bunch of super-enthusiastic home cooks who were really into being conscious about what they put in their bodies, and being strong advocates for local farming and agriculture. I loved hearing what they did with their shares and would eagerly trade tips and recipes with them at each pick-up.

Chocolate avocado pudding is one of those freaky Paleo food experiments that I was always curious about, but never tried out of skepticism. Then, one day over the summer, two things serendipitously coincided:

Given that my inner 50’s house-wife cannot abide by wasted food, I thought that now would be the time to see if whizzing avocado and melted chocolate together in a blender would indeed be the dairy-free pudding of feverish vegan dreams.

It was high summer too, so I had to freeze it 🙂

How was it?

If this is what it’s like to eat like a fringe-y food cult member who likes lifting kettle bells for fun, set my place at the table 🙂

This recipe is truly fantastic. The result is not overly sweet, and the intensity of the chocolate really shines. The avocado adds a vague fruitiness to the pudding, but it gives it a texture that is as smooth as silk. It’s great as a pudding, and even better as a pop. Be warned though: you can freeze it in a tub, but you will need to remove it a good amount of time before you serve it. Otherwise, it will be very hard to scoop.

Ingredients:

1 can of coconut milk

A pinch of salt

1/3 of a cup of honey

3.5 ounces of dark chocolate (discs or bars broken into pieces)

1/3 cup of Dutch process cocoa powder (I used Valrhona)

2 very ripe avocados, pitted, peeled, and cut into cubes.

Equipment:

A blender

Popsicle molds

How to prepare:

1. In a medium-sized sauce pan, gently heat the coconut milk until it just begins to boil. Turn off the heat and add the chocolate pieces or discs. Whisk everything together. Once the chocolate is completely melted, whisk in the cocoa powder, the honey, and the pinch of salt.

2. Pour the chocolate mixture into a blender (I used a blender bullet) and add the avocado. Whizz everything together until the mixture is soft and shiny. You should not be able to see any more avocado. The mixture should be smooth and even.

3. Carefully spoon the mixture into popsicle molds and freeze.

Advertisement

Y Tu Mango También: Mango-Lime-Tequila Sorbet with Mexican Chili Seasoning

Go Shorty, It's Sherbert Day!

Summer is ending too soon. The weather is still warm, but college students are already filtering back into the city and the streets are starting to fill with people who have been out of town. Despite not having gotten away, this summer has been a great one. I’ve seen good friends and made a few new ones. I’ve eaten, drank, and danced. There have been rooftop parties, intimate dinners, and a lot of laughter. As a bonus, the weather has been unusually clement, so this summer has been a pleasure instead of a hot, sticky pain. All in all, it has been the best stay-cation that I could have asked for — and a sorely needed one at that.

Before work resumes and teaching takes over my life again, I want to fit in a few more blog posts, so …

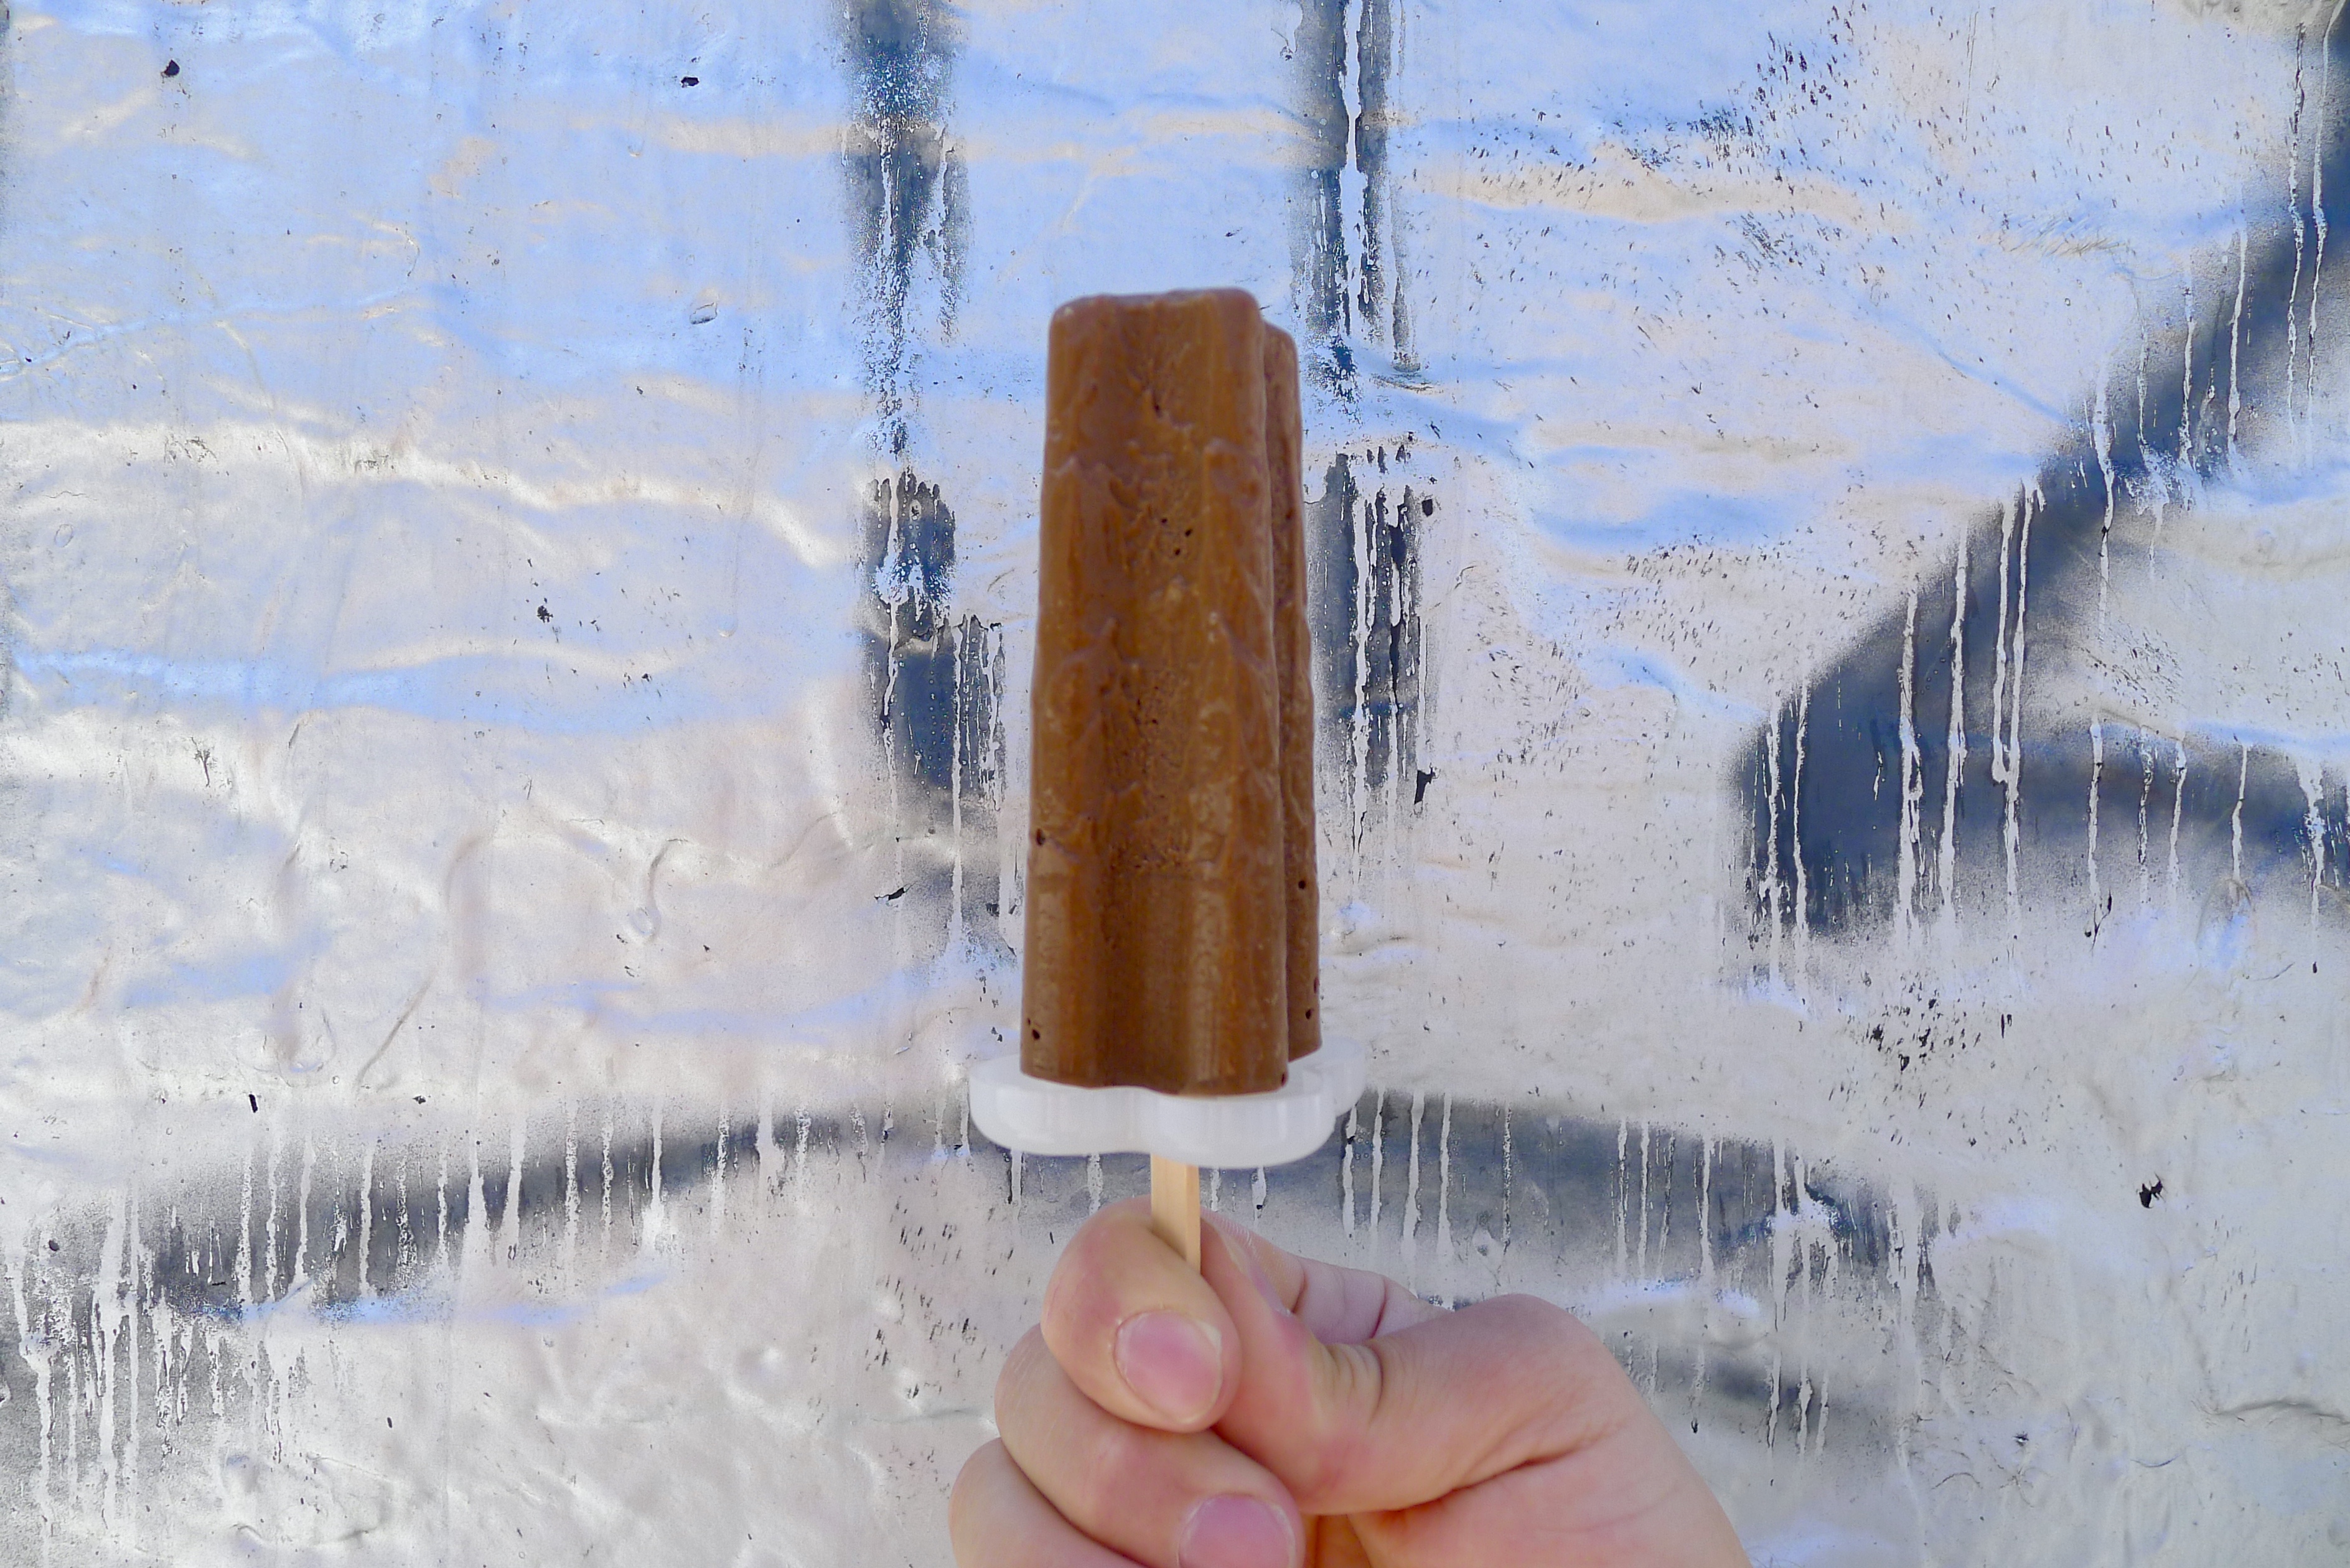
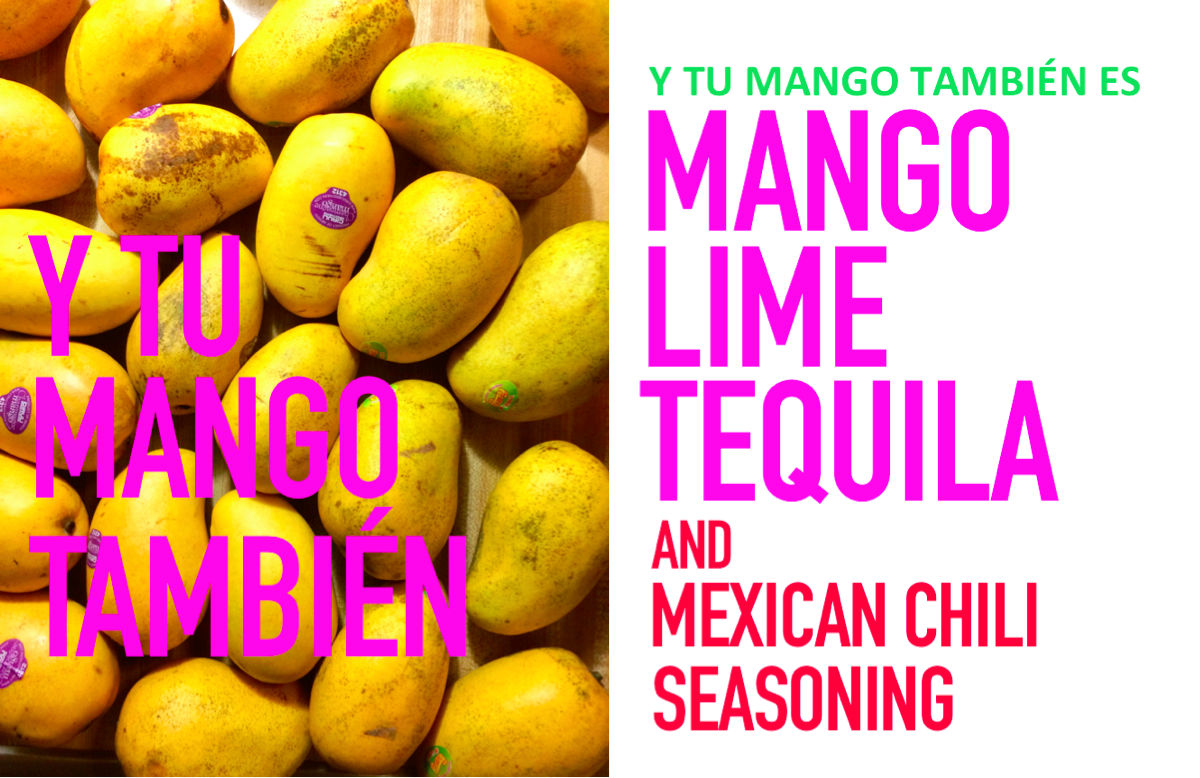
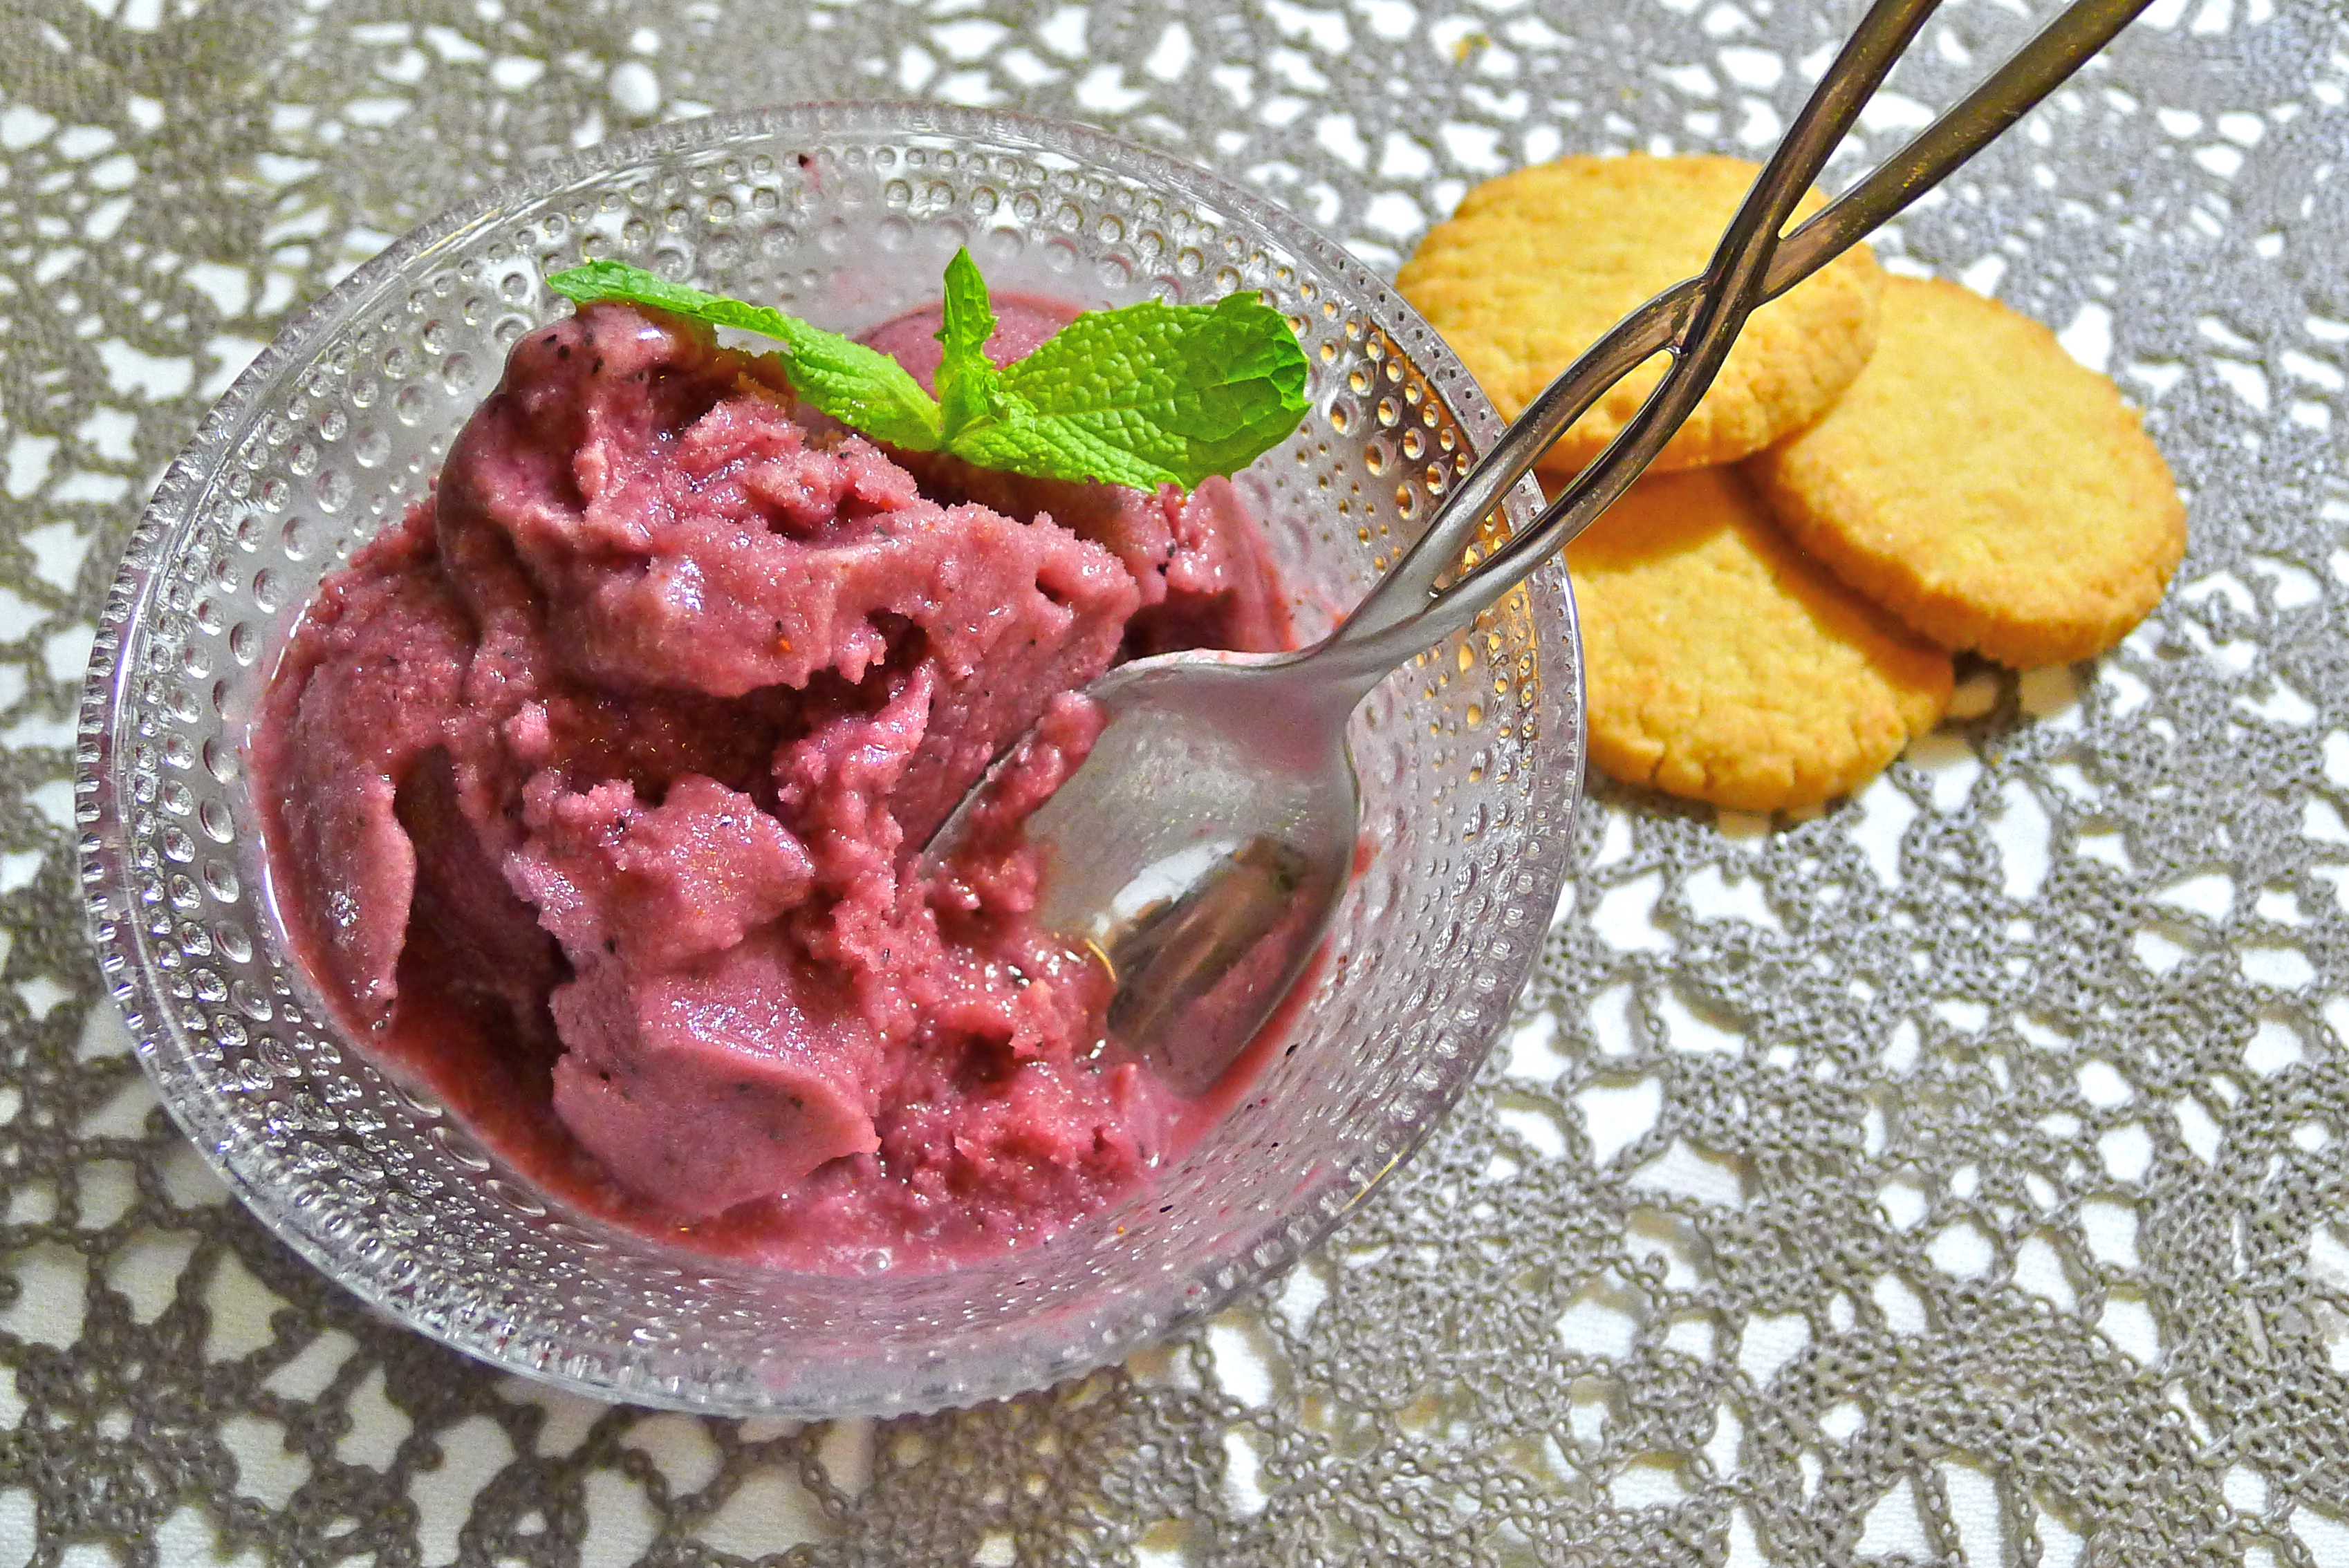
Here is my write-up of this year’s Brooklyn Ice Cream Takedown and the recipe for my  Mango-Lime-Tequila Sorbet with Mexican Chili Seasoning.

How did I come up with the idea?

In terms of flavors, I had two in mind: a tomato sorbet resembling frozen gazpacho, and a tart and juicy mango sorbet with limes and tequila.

I personally thought that a tomato sorbet would be amazing, but the general consensus was that it might be a little too weird for the competition.

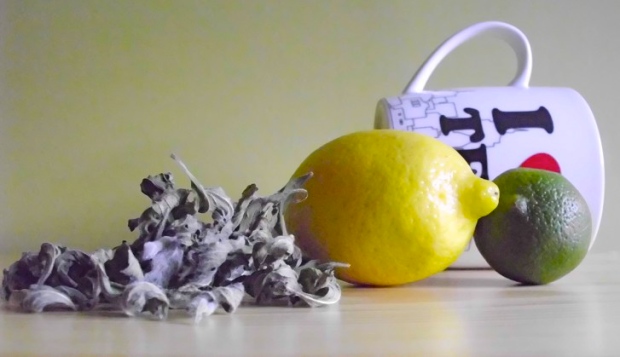
My vision for a mango sorbet? I wanted it to taste just like those sliced mangoes topped with either hot sauce or dried Mexican chili seasoning. The kind that you get in plastic bags sold from pushcarts by those mango ladies in and around the city.

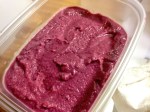
And that is exactly what I made 😀

Kitchen stories of triumph over adversity are terrific, but this is not one of those. This story is actually pretty humdrum because after the drama leading up to last year’s Brooklyn Ice Cream Takedown, I swore that I would never again:

This isn't like some paper that you can write the night before!– Grossly underestimate how long it takes to prepare 2 gallons of ice cream at home.
– Fail to read the directions accompanying any new equipment in advance.
– Not have enough equipment to begin with.
– Wait until the last minute to start recipe testing.
– Have no back-up plan in case my freezer doesn’t get cold enough and/or my air-conditioner stops working.

I am happy to report that I took all the lessons I learned last year and this year, I started and finished early with (almost) no tears and minimal stress! Hooray!

What I have learned since the 2013 Brooklyn Ice Cream Takedown:

1. Start early.  Those stupid insulated bowls — which never really work that well to begin with — need at least 24 hours to freeze hard enough to churn your ice cream satisfactorily. So make room in your freezer, lower the temperature as much as you can, and park those things in the very back of it until they are frozen rock solid.

2. Buy all of your ingredients at the same time. Don’t wait. Don’t come back later. Just get them all when you see them. And buy enough to make an extra batch. Trust me. Once I had settled on a recipe and calculated how much I needed to buy in terms of ingredients, I realized that I would need 36-38 mangoes and about 80 limes. Does anyone want to haul home that much squishy fruit all at once without a car? No. What did I do? I only bought half of what I needed.

Can you guess what happened? When I went back to the store THEY WERE SOLD OUT OF THE COMPACT, SUPER SMOOTH, BUTTERY, FRAGRANT, AND AMBROSIAL CHAMPAGNE MANGOES FROM MEXICO THAT I WAS USING AND ALL THAT WAS LEFT WAS THOSE GIANT GREEN, RUBBERY, AND  COMPARATIVELY FLAVORLESS KENT MANGOES.

I went to 4 different Whole Foods before finally being directed to one of the buyers who told me that, sadly, the season was over. There were no more Champagne mangoes.

As tears began to prickle the backs of my eyelids, I asked him if he could suggest another variety.

“Those Champagne mangoes,” he sighed and shook his head. His eyes went soft and dreamy, “You can make anything with those mangoes.”

He jabbed his finger towards the current display, “Not like these green rocks.”

This is one of those moments when I am so thankful that I live in New York. After calling almost every specialty fruit vendor in the city, I tracked down one of the last pallets in town.

Marry me, Manhattan Fruit Exchange.

3. K.I.S.S. Keep It Simple, Stupid. I agonized over this one after doing just one test run and loving the results. But a single test batch? Was it possible to find the one after just one try? There were a ton of super creative, delicious, and mind-blowing ice creams at the Takedown like Chicken and Waffles, Cherries and Sour Cream, Blueberry Pancakes with Hot Maple Syrup.

But I know my limitations and, more importantly, the limitations of my kitchen.  I would have loved to have done a crazy flavor, but making it in a kitchen the size of a shoebox would have driven me crazy.

“Maybe it’s not wacky enough?” I asked myself.

Maybe that’s fine.

4. Use a stabilizer. Unless you are playing with liquid nitrogen, you will need something to smooth out the texture and prevent your ice cream or sorbet from having an icy or chalky mouthfeel. Stabilizers are additives to frozen treats that work to inhibit the formation of bigger ice crystals. Within that category, you can use guar gum or xanthan gum. However, a stabilizer does not necessarily need to be so exotic. You can use gelatin, alcohol, fat, sugar, and invert sugars such as glucose, honey, maple syrup, agave syrup, and corn syrup.

5. Ripe ripe, Baby. If you are making a fruit sorbet, you want your fruit to be very ripe — verging on overripe. How will you know if your fruit is ripe enough? It will feel like . . . well . . . let’s try to keep this forum as family-friendly as we can.

6. Strain. Evenly-textured ice cream and sorbet doesn’t just happen. Smooth base in = smoother frozen dessert out.

7. A watched ice cream maker never churns. Ari watched me swear and smack my stupid ice cream maker on the side after it failed to churn sorbet after . . . 5 minutes.

“Daisy, it says it will take ‘as little as 25 minutes’ on the box. It hasn’t been 25 minutes!”

She was right. Go, go watch an episode of 30 Rock and come back later.

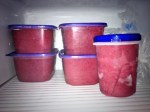
8. So your ice cream maker fails to churn satisfactory frozen dessert and you have a slushie instead of a sorbet. This is what happens when your freezer bowl is not cold enough, your kitchen is too hot, or the freezer bowl is so overfilled that it loses chill faster than it can churn your ice cream or sorbet. This is when you get creative. This is when you let the ice cream set up more in the freezer, stick your handy stick immersion blender in it, and use it to break up the ice crystals before letting it freeze the rest of the way. Do this a few times as it continues to set up and you will be rewarded with some super smooth sorbet.

An important word on stick immersion blenders:

THEY LOOK INNOCUOUS, BUT THEY WILL MESS YOU UP IF YOU ARE NOT CAREFUL.

One only needs to google “immersion blender accidents” to be scared.

The worst kitchen accident that I have ever had did not involve an immersion blender (knock on wood). I had put a saucepan in a hot oven and after about an hour, I reached in, grabbed the handle and hefted it onto the stovetop. As I had been cooking all summer, I had “kitchen hands,” tough, calloused paws that didn’t register that the handle was over 350° until it was too late. I left some skin from my palm and my fingers on that handle. I spent the rest of the week with my hand in a tub of arnica cream.

In any case, when dealing with immersion blenders, TREAT THEM WITH RESPECT AND ALWAYS UNPLUG THEM WHEN THEY ARE NOT IN ACTIVE USE!

Although I realize that some of these pointers are most applicable if you are churning out a massive amount for something like an ice cream competition, I think that many of them are equally as valid for smaller batches

A word on the recipe that follows: What is that chili powder stuff on top?

Tajín is the brand name of a Mexican fruit seasoning consisting of only three ingredients, three flavors: a chili spice blend, salt, and dehydrated lime juice. As the components are few, I imagine that you could probably hack the recipe pretty easily using a basic Mexican chili spice blend, salt, and either dried, powdered lime zest or squeezing lime juice on top before serving. That being said, Tajín is so darn inexpensive (mine was $1.25) that it seems silly to hack it. I got mine at the Mexican supermarket, but I have also seen online forum posts about people seeing it at Walmart, Target, and at their neighborhood supermarket in the “Ethnic Foods” aisle. For a few bucks more, you can also score it on Amazon.

Of course, this sorbet tastes amazing without it, but the seasoning really does make a difference. It is definitely worth seeking out! You can also use it on just about any kind of fruit or vegetable (delicious on corn).

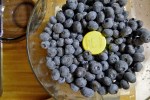
Another word on the recipe that follows: Why are there so many mangoes in the pictures?

As I have scaled the recipe down from the one that I used for the competition, you will see more fruit and more ingredients in the photos than are listed below. My competition recipe was for 2-quart batches and this scaled down recipe given will make a third of that. To make a full 2-quarts, simply triple the recipe. For example, instead of 2 mangoes, you will need 6, etc.

Ingredients:

2 very ripe Champagne mangoes

1/4 cup of water

1/2 cup of cane sugar

1 tablespoon of agave syrup

1 tablespoon of tequila (I used Olmeca Altos Plato)

1/2 cup of freshly squeezed lime juice (from about 4-5 limes), strained

Tajín Clásico Seasoning

How to prepare:

1. Gently peel the mangoes with a sharp paring knife and cut the flesh away from the pit. Do this in a bowl so you don’t lose any of the precious juice.

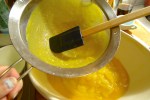
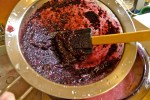
2. Purée the mangoes with 1/4 cup of water in a blender or using an stick immersion blender. Press the purée through a fine-mesh sieve with a silicon or flexible plastic spatula. Discard the solids.

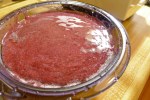
3. In a large bowl, combine the mango purée with the cane sugar, agave syrup, tequila, and strained lime juice. Stir until the sugar has completely dissolved.

4. Churn the mango sorbet mixture in your ice cream maker according to the manufacturer’s instructions. If your sorbet fails to set up properly, churn it as best as you can in the machine, transfer it to a sturdy container, and let it harden in the freezer. After 45 minutes, use an immersion blender to blend the sorbet and break up any larger ice crystals. You can do this a few times to ensure that you have a really nice texture. When the mixture is smooth, return it to the freezer to harden completely.

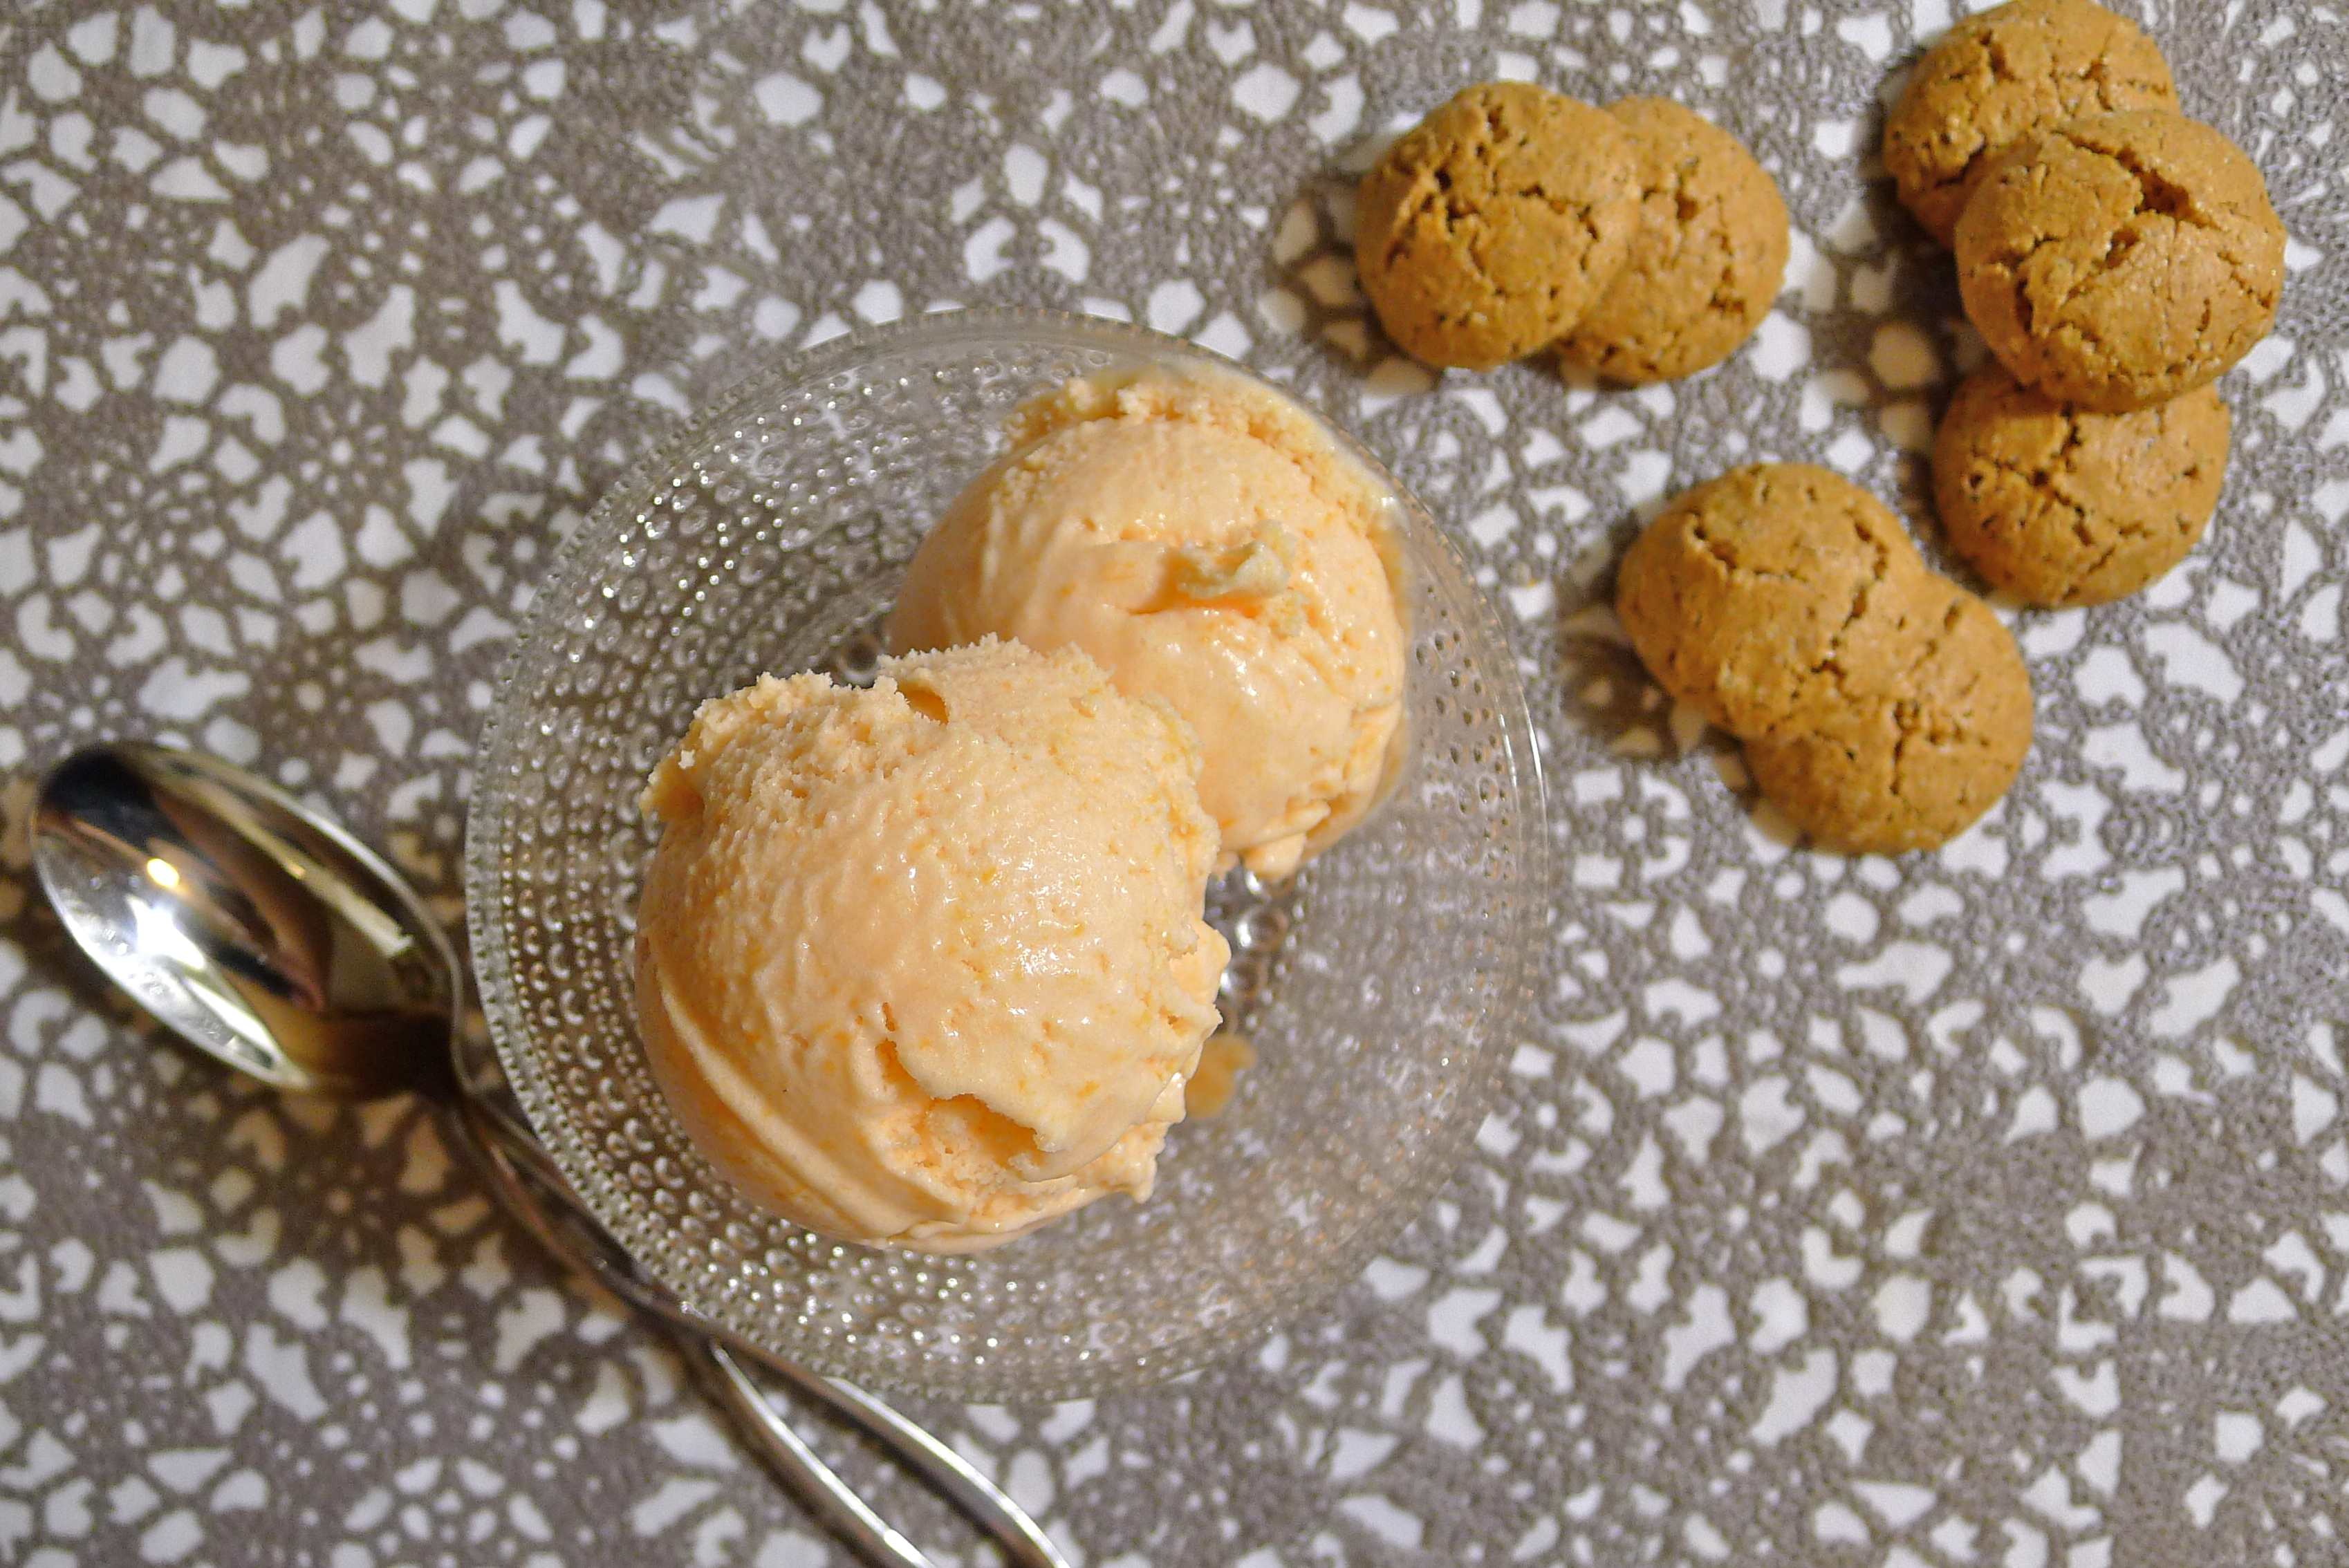
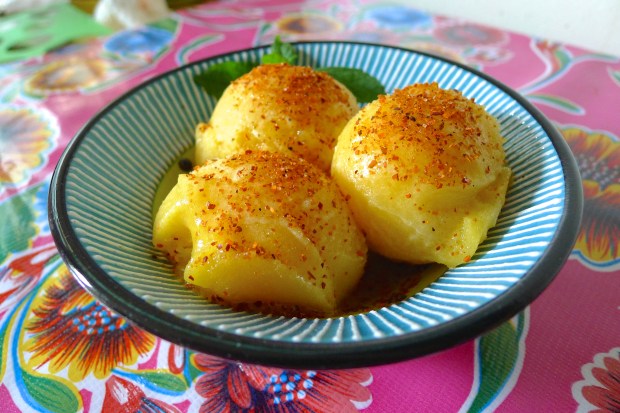
5. To serve, scoop the mango sorbet into bowls and sprinkle liberally with Tajín.

Our Growing EdgeThis blog post is another contribution to the Genie De Wit’s Our Growing Edge. Our Growing Edge is a monthly event that aims to connect food bloggers, broaden our horizons, and encourage us to try new things. I am so happy to see Genie’s project grow and reach a larger and larger audience of bloggers and readers! Anyone can be a part of the party! For more information, please go to the page Genie has set up on her blog Bunny. Eats. Design.

This month’s host is Lindsey from Sneaks & Sweets. Thank you so much Lindsey! To take a look at the participating bloggers this month, click here.


Brooklyn Ice Cream Takedown Update: “Y Tu Mango También” takes 1st Place! The People Chose Me!

¡Y Tu Mango También!

Yeah, the Brooklyn Ice Cream Takedown was a week and a half ago.

Yeah, it was okay.

Oh, who am I kidding?

IT WAS FREAKIN’ AWESOME, YA’LL! I GOT TO SEE SO MANY FRIENDS AND BY THE WAY I ALSO GOT A KITCHENAID STAND MIXER, AN ANOLON PAN, A WÜSTHOF KNIFE, A MICROPLANE GRATER, AND A LUCA & BOSCO GIFT CERTIFICATE BECAUSE . . .

THE PEOPLE CHOSE ME! FIRST PLACE BABY, YEAH!

A big write-up to is to follow but in the meanwhile, I would like to extend a giant thanks and many hugs to my friends who came out to the to support me. Thank you for letting me feed you full of frozen treats! Thank you as well to everyone who voted. It is such an honor! Thanks as well to all my fellow Takedowners! You guys make me excited for every event!

David Langkamp, you are the best ice cream bitch helper ever! Thank you for hauling all of my sorbet and for being the world’s best scooper!

And to Matt Timms, organizer extraordinaire, thank you and never stop rocking!

Recipe to follow soon!

Fresh Apricot and Amaretto Sorbet

Tart and refreshing!
The first time that I ever had the combination of almonds and apricots was at a brunch in Paris. It was in the form of pitted fresh apricot halves stuffed with crushed amaretti biscuits, dotted with butter, sprinkled with sugar, broiled until tender, and finally drizzled with heavy cream. The dear friend who served them to me has gone on to open a wildly successful barbecue restaurant in London, leaving small indulgences such as those apricots behind.

However, I never forgot them.

I thought of them again as I contemplated what to do with a container full of apricots that I picked up at the store. I had initially intended to make something Moroccan with them, but then they got too squishy to eat and I earmarked them for sorbet. After waiting too long to do even that, they got downgraded (or upgraded, depending on how you see it) to jam. Finally, life interfered with the cooking once again and the poor things had to be tossed. So I got myself another container of apricots, resolving to not let them go to waste like I had the others (I hate throwing food out).

This recipe is adapted from David Lebovitz‘s Fresh Apricot Ice Cream recipe. Although fairly faithful versions of it can be easily found via any internet search, I would highly recommend purchasing his book The Perfect Scoop. It is a must for anyone wanting to tinker around more with homemade ice creams and sorbets.

The original recipe calls for almond extract, but as amaretto — that sweet, almond-flavored Italian liqueur — is often made from crushed apricot pits, it seems even more fitting to use it instead of the extract. The addition of heavy cream makes this sorbet feel rich and indulgent, yet it is still tart and refreshing to eat. I have also kept Susan‘s suggestion to use an invert sugar; I agree that it really does improve the texture and mouthfeel of homemade sorbet. For a better and more convincing argument than I could ever write, I refer you to Susan’s amazing blog post here.

Ingredients:

1-1.25 pounds of fresh, ripe apricots (approximately 10-15 of them)

1/2 cup of water

1/2 cup of sugar

1 1/2 tablespoons of glucose or another invert sugar such as golden syrup or honey

1 cup of heavy cream

2 tablespoons of amaretto

The juice of one lemon

How to prepare:

1. Split the apricots into halves and remove the pits. Cut each half into quarters.

2. In a medium saucepan, combine the apricot quarters with the water and the sugar. Cook over medium heat until the apricots just begin to soften. This should take between 6-8 minutes. Turn off the heat, stir in the glucose, and let everything cool to room temperature.

3. Once the apricots have cooled, purée them in a food processor. Press the purée through a fine-mesh sieve with a silicon or flexible plastic spatula. Discard the solids. Chill the strained purée overnight in the fridge.

4. Once the purée is properly chilled, add the heavy cream, the amaretto, and the lemon juice.

5. Churn the mixture in your ice cream maker according to the manufacturer’s instructions. When the mixture is smooth, return it to the freezer to harden.

The sorbet should keep for about two weeks in the freezer.

Backwoods Blueberry Buttermilk Sherbet

The final product!
Have you ever made a claim and promptly regretted its utterance? I often jinx myself with these kinds of pronouncements, also known as “famous last words.” Usually, when I begin a sentence with “I won’t” followed by “get lost,” “be late,” “cut myself,” “fall off this box,” “regret this tattoo,” or “take an unreasonable amount of time to finish graduate school,” I basically ensure that I will.

If you google the phrase “famous last words,” you’ll find the following Urban Dictionary explanation: to say “famous last words” out loud is to invoke “a warning that following the course of action just mentioned will result in impending doom.”

But this is not a story about doom. No, wait. I take that back. It is a story about doom! It is also a story about setbacks, humility, learning, redemption, and WINNING TWO FREAKIN’ ICE CREAM MAKERS BECAUSE I’M FREAKIN’ AWESOME YA’LL!

I offer you Daisy’s long overdue Brooklyn Ice Cream Takedown Diary:

Thursday, June 27: I return to NYC after visiting my parents for 10 days and spend the next 4 days drinking heavily decompressing.

Monday, July 1: I finally get around to buying an ice cream maker for the Brooklyn Ice Cream Takedown on July 7th. Having the choice between a $59.99 machine, an $89.99 machine, and a $400 machine, I go for the least expensive model. “Frozen Treats in 20 Minutes or Less!” is prominently advertised on the box.  Feeling buoyant and unstressed, I am unconcerned by having never used an ice cream maker before (prior to this experience, I had only made ice cream the old school way by dumping the ice cream mixture into a metal pan, putting the metal pan in the freezer, and stirring it every 30-45 minutes to break up the ice crystals). I am certain that the ice cream maker will make this Takedown a cinch. I leave it unopened on the floor of my apartment.

Tuesday, July 2: I confidently “chat” with Eryn at Ugly Food Tastes Better. She is in the competition too and is fretting about her freezer on the fritz. I mention that I am excited for the Takedown, especially given that the ice cream only takes 20 minutes to churn. I stretch and envision this being a walk in the park, a mere breeze after the HOURS spent baking 250 cookies for the Cookie Takedown or wrapping 250 little bacon candies until my fingers were aching and sore. True, I have to make two gallons of ice cream and the machine only churns 1.5 quarts at a time, but at 20 minutes a batch, I am confident I can knock out all 8 quarts on Saturday afternoon, the day before the competition.

In comparison, this will be so much easier, I say. Then I add the cursed phrase: “Famous last words, right?”

“Hahaha yeah!” Eryn laughs. Then she drops the bomb that shatters my smug peace and calm: “This one is time consuming because you have to refreeze the bowl 24 hours between batches.”

Omg. WHAAAAAAAAAAAAATTTTTTTTT????????????

I open up ice cream maker and swear that the i’s in “Cuisinart” are middle fingers.

The ice cream maker now sits in pieces on floor. There is the machine element, the freezer bowl, and the plastic dome that covers it all. I only have this one freezer bowl and it is not frozen. I also have a freezer so full of meat that I cannot even fit that one bowl in it. I officially freak out. I am in full panic mode.

At 4:30 am, I cave and order two more freezer bowls from Amazon. Overnight delivery. I pray that Amazon’s overnight delivery is really overnight delivery. When my neighbor across the hall wakes up later in the morning, I transfer the entire contents of my freezer to her freezer, shove the insulated bowl in it and wait.

Wednesday, July 3: The extra freezer bowls arrive in the morning and after a whole day in the freezer, only one of the three seems to be frozen. I hear no sloshing when I pick it up and shake it. I attempt my first test batch around midnight, figuring that I can only do two, maybe three tests before having to pick a final recipe. Sadly, there is no time for tinkering, no time for research, no more time for consulting fellow bloggers and friends.

I decide on a custard based ice cream and my inaugural flavor will be Peach Bourbon Jalapeño.

After much stirring, scorching, sieving, and saving, I come to the horrible realization that custard takes FOREVER to make! Worse, when I finally pour the ice cream mixture into the machine and turn it on, it churns for 20 minutes and produces no ice cream, only soup. It is not even the consistency of a smoothie.

Worst of all? The taste. My Peach Bourbon Jalapeño ice cream tastes like peanut butter-covered pepper jack cheese.

There is no peanut butter or pepper jack cheese in the recipe.

I start crying.

Thursday, July 4: I decide to start fresh in the morning with a different custard base. Test batch #2 is to be a fresh strawberry, balsamic vinegar, and black pepper ice cream. The custard tastes good. I pour it into the machine and turn it on. It churns for 20 minutes. I have soup. Again.

At least it’s delicious soup 😦

Three hours before needing to leave to meet up with Tomoko for fireworks on her rooftop, I decide it’s triage time. I don’t have any time left to set up two gallons worth of custard base. I basically don’t have time for anything cooked. My downstairs neighbor Niki lends me a copy of Martha Stewart Living with a special section on ice cream — the last resort. I thumb despondently through it and my eyes fall on a recipe for Blueberry Buttermilk Sherbet that requires no cooking. The buttermilk catches my attention because being so lean (buttermilk is mostly water), I know it will freeze hard and fast. Blueberries are in the market too, which is fantastic since there are so few elements in a sherbet that you want the best fruit you can find. Best of all? No cooking required.

I do a quick test batch. It sets up better than the custard based ice creams since there is hardly any fat (things that inhibit freezing are gelatin, alcohol, stabilizers such as invert sugars, fat, and sugar). Unfortunately, it is still way too slushy.

As for the taste? The sherbet is a pretty color, but there are too many seeds (blueberries have tons). It’s also too sweet. The lemon zest has clumped unattractively around the ice cream paddle and looks like something found in a drain.

I throw the test sherbet in the freezer and cry all the way to the Upper West Side. At Tomoko’s, we troubleshoot and decide that given the time constraints, a sherbet is still the way to go. We also conclude that the freezer bowls are not getting cold enough to freeze the mixture properly. It does not help that my apartment is too warm and the bowls are loosing chill faster than the ice cream can churn. I go home, throw out everything that can be tossed from my fridge, turn the temperature setting as low as it can go, and hope for the best.

Friday, July 5: After staying up doing research and reading about how to achieve a good, smooth texture, I do the following:

1. I get myself a freezer thermometer. It costs a whopping $2 and tells me exactly what I suspected it would tell me: my freezer doesn’t get cold enough to completely chill the ice cream maker’s insulated bowls 😦

2. I figure that since the ice cream maker can only make slush, the best way to break up the giant ice crystals produced is to churn it as best as I can, let it sit in the freezer for about an hour, stick an immersion blender in the half-set ice cream, whizz it to get a smoother consistency, and let the freezer freeze it the rest of the way. I think I got the idea from Southern Living, but I frankly don’t remember anymore.

3. Contrary to Martha’s recipe, I decide to sieve the blueberry purée twice. If I had the time and patience, I probably would have done it once more on top of that.

4. I add booze. Specifically moonshine. I briefly consider vodka but think moonshine is more interesting. Besides, nothing beats a hillbilly-themed table!

5. I add more lemon juice. The forecast for the Takedown is sunny and hot, and I want something tart and refreshing.

6. I follow Susan’s recommendation and add a stabilizer to enhance mouthfeel and improve texture. She recommends glucose and thankfully, Niki’s candy business has her swimming in glucose. I cadge a couple of cups off my neighbor and hope that the combination of alcohol and invert sugar will prevent crystallization and keep my ice cream stable in the heat.

I put together my boozy blueberry buttermilk mixture, pour it into the machine, and lo and behold . . .

Houston, we have sherbet 🙂

I crank out 4 quarts and put the bowls back in the freezer to refreeze.

Saturday, July 6: I crank out the remaining 4 quarts and collapse.

As for the competition results the following day? I am pleased to report it went well 🙂

Read more about it here.

* A very special thanks to Eryn for the heads-up about the machine! I would have been in serious trouble if not for you!

The next stand mixer I win is yours, Babe! 

And everyone should check out Eryn’s blog on which she has posted her recipe for Honeysuckle Tres Leches Ice Cream with Tres Harinas Cake Crumb and Red Fruit Compote. Delicious!

Special equipment:

A 1-1.5 quart ice cream maker

A fine-mesh sieve

A stick or immersion blender

Ingredients:

2 pints of fresh blueberries

1 cup of sugar

1 tablespoon of glucose or of another invert sugar such as light corn syrup (optional)

2 cups of buttermilk

2 tablespoons of moonshine or vodka

The juice of 3 lemons, strained

How to prepare:

1. In a food processor or blender, purée the blueberries with the sugar and the invert sugar if using. Press the purée through a fine-mesh sieve with a silicon or flexible plastic spatula. Discard the solids and pass the purée through the sieve a second time to get the remaining seeds. You can even choose to sieve the purée a third time if you would like an even smoother texture.

2. Combine the purée with the buttermilk, the moonshine or vodka, and the strained lemon juice.

3. Churn the mixture in your ice cream maker according to the manufacturer’s instructions. If your sherbet fails to properly set up like mine did, churn it as best as you can in the machine, transfer it to a sturdy container, and let it harden in the freezer. After 45 minutes to an hour, use an immersion blender to blend the sherbet and break up any larger ice crystals. When the mixture is smooth, return it to the freezer to harden.

The finished sherbet will keep for about two weeks in the freezer.

Our Growing Edge

This blog post is also my first contribution to the amazing Genie De Wit’s Our Growing Edge. Our Growing Edge is a monthly event that aims to connect food bloggers, broaden our horizons, and encourage us to try new things.

Anyone can be a part of the party! For more information, please go to the page Genie has set up on her blog Bunny. Eats. Design.

This month’s host is Stacey from The Veggie Mama. Thank you so much Stacey! To take a look at the participating bloggers this month, click here.

Guest Post from Lucas: Fresh Mint Tea, Chemist in the Bottle-Style

I Heart Tea!
A note from Daisy: For many of you, Lucas needs no introduction. For those who don’t know him yet, he is the wonderful Polish blogger and outstanding cosmetic chemistry student behind Chemist in the Bottle. Although he writes primarily about perfume, he is also a hardcore foodie. It has been meltingly hot and humid lately and to help beat the heat, I have asked him to share his refreshing recipe for mint tea. It is a bit different from how I prepare it here in the States (i.e., brew something potent, pour it over ice, add more ice), but I love learning about how people elsewhere keep cool via what they eat and what they drink.

As my parents are still visiting, I am very happy to hand the blog over to Lucas this week! I hope that you enjoy his post as much as I do. 

By Lucas

Summer is an amazing season. Once the school year is over and children begin enjoying their vacation, people become more relaxed and everyone seems to be much happier than just a few months ago. Clear skies and sunshine are what give us endorphins, the hormones of happiness. However, when the temperature rises to dangerous levels, summer is no longer so much fun. The constant heat is hard to enjoy — especially when you have to sit in an office building or you don’t have air conditioning (or even a fan).

To counter the heat, I’d like to share a couple variations on my recipe for fresh summer mint tea. It’s a really refreshing drink that is very easy and fast to make.

You will need:

  • Fresh mint leaves
  • Lemon
  • Lime
  • Salt

Let’s make a cold mint tea first! There are two methods to make it:

METHOD 1 – hot brew – cold drink

Take two fresh mint leaves if you’re making a single cup, or 5-6 leaves if you want to prepare a liter’s worth of tea. Put the mint leaves into your cup or pot. Boil some water. When the water is hot, pour in just enough to drown the leaves. You only want to cover the bottom of your cup or pot. Let it sit until the water is cool. During this time, the leaves will transfer their flavor and a little bit of their color to the water. Next, add enough cold water to fill your cup or pot and put it in the fridge to chill. After about 2-3 hours, your icy mint tea should be almost ready. Now you can add a slice of lemon and lime to add a citrus taste to your drink. Voilà! The tea is ready!

METHOD 2 – cold brew – cold drink

Take the same amount of fresh mint leaves and crush them with a mortar and pestle. If you don’t have a mortar and pestle in your kitchen, simply chop the leaves roughly with a knife or use scissors to cut them into smaller pieces. Fill the pot with the water and leave it in the fridge overnight. The next day, your water will have a light green tinge. The color will be more intense than if you had used the hot brew method, as cutting the leaves helps the pigment and flavor to transfer more easily to the water. Pouring hot water over cut or crushed leaves will cause your tea to taste more intense and be darker. This is called infusion. Add a slice of lemon and/or lime for an even more refreshing twist. For this cold beverage, ice cubes are optional. Please be aware that if you add a lot of them, the tea will be more diluted. I rarely add ice to my cup but when I do, it’s usually only 2 ice cubes. Neither of these methods (infusion or hot brew) make a very strong tea so you don’t want to lose the charming flavor of fresh mint by adding more frozen water to it.

METHOD 3 – hot brew – hot drink

Both of the methods above produce a cold drink. However, you must believe me when I say that it’s sometimes good to drink something hot when it’s hot outside. This might sound ridiculous and ridiculously unappealing (I mean, who wants to have a hot drink when it’s scorching outside?) but I have found that when it’s 35°C (that’s 95°F) outside, you can feel refreshed and less tired of the heat after you treat yourself to a hot liquid.

Once again, take 2 fresh mint leaves, 5 for a pot’s worth, and cover them with hot, but not boiling water. Wait about 10 to 15 minutes for the tea to be properly infused. Toss in a slice of lemon, lime, or both and enjoy your hot beverage. Did you notice that the heat isn’t so tiring now? 🙂

As a matter of taste, I have to mention something about lemons and limes: if you prefer your tea to be less bitter, cut off the rind of your slice before you add it into your mint tea. The limonene present in citrus fruits is at its highest concentration in the yellow, orange or green rinds. If you have nothing against tasting a refreshing bitterness, feel free to include the rind. Its limonene and tannins are responsible for the sensation that you are enjoying.

One more thing: did you notice sodium chloride, or salt in the ingredients? On super hot days, you should always add a tiny bit into your tea. We sweat more when it’s hot out and our bodies lose their necessary minerals faster. Just a few crystals of salt will help to keep the balance of chloride anions and sodium cations in your body. Cl- are especially important in our body cells. For just a cup of tea, a pinch is enough (that should be just a couple of grains, no more!) For a liter, add about a ¼ teaspoon salt. Regardless of how you brew your tea, the salt should be added at the end, either with lemon or lime, or right afterwards. Don’t forget to stir your tea to ensure that all the crystals are properly dissolved.

In Poland, mint is a pretty seasonal garden plant so when I get some leafy sprigs of mint, I like to keep some fresh and dry the rest on my balcony in the sun. If you have fresh mint, you can do this too and enjoy your mint tea made from fresh leaves even after the summer months are over. If you dry your own leaves, remember that you should use a hot brew preparation for them. A cold method will take ages for the dried leaves to infuse the water.

If you can’t get fresh mint, you can use regular mint tea packed in bags or sachets. Use one sachet for one cup and two for the pot. If using tea bags or sachets, the hot water method of making iced tea is better. The cold infusion method works well too, but it will take longer — around 24 hours — and will give a very light brew with gentle flavor. This is not a bad thing. In fact, it is ideal for summer evenings when you want something calming before going to sleep.

I hope you enjoyed this post and will enjoy your homemade fresh summer mint tea, which is delicious and all natural. Let me know in the comments if you decide to prepare it. I would also love to hear what you think after you drank a cup or two!

One last note from Daisy: All these photos are courtesy of Lucas! I’m sure you’ll agree with me that if he ever decides to drop out of school, he could be one heck of a great photographer and/or food stylist 🙂 Thank you so much, Lucas!

Brooklyn Ice Cream Takedown Update: Blueberry Buttermilk Moonshine Sherbet Takes Home 2nd Place Twice!

They're taller than I am!
Dear Friends,

Here is the update on the Brooklyn Ice Cream Takedown last Sunday! As many of you know, this was my third Takedown, the first being the Brooklyn Bacon Takedown and the second being the Brooklyn Cookie Takedown.

Needless to say, I think that I have become addicted to the adrenaline rush of coming up with a recipe and prepping massive amounts (250+ samples) of it for a day filled with old and new friends, large quantities of booze, and lots of fun!

In all honesty, the event is kind of a blur to me since the participants had a head start on the open bar before the doors opened to the public. Once people started pouring in, I was drunkenly scooping like a fiend! There were so many people coming to the table at once that I didn’t even notice that Tyra Banks was there! In my hurry to get everyone served, I just plunked a sample cup on her plate, said that it was Blueberry Buttermilk Moonshine Sherbet, and waved her on.

Only afterwards did someone say, “Daisy, you just threw sherbet at Tyra Banks!”

Whoa!

The decision to make a sherbet was a last minute one, forced by an uncooperative freezer and a look at the weekend forecast which predicted a RealFeel afternoon temperature of 107°. Full details to be revealed when I post the recipe, hopefully later this week.

Unpacking at the venue, I was certain that my entry was too simple and too plain to attract much attention — even with the moonshine.* Win or lose, I thought, I learned so much about making frozen desserts and being surrounded by so many talented and creative home cooks was gravy. That made the experience well worth it.

In the end, guess who was awarded second place by the judges AND by the people? Me 🙂

What did I win? More ice cream makers!

Just what I need 🙂

Even though I didn’t come in first place, I was the only one to win in both categories and the only one to take home two machines! However, I do have to give a shout-out to all the other incredible cooks. The team next to me actually made 275 cannoli shell ice cream cones. Isn’t that amazing? Other contestants make jam toppings and delicious drizzles in squeeze bottles. As for the two first place winners? Angie Anicgacz’s Lemon Meringue Pie Ice Cream and Russell and Karen Berger’s Butterscotch Beatdown were truly divine!

So what about those two ice cream makers? I kept one and gave one to my ice cream bitch helper and good friend, David. He earned it for coming to my apartment early and schlepping all my stuff to the event like a trooper!

Then I went home and collapsed.

The Takedowns are the brainchild of my friend, the incredibly gracious Matt Timms. He is certainly the host with the most and it has been wonderful to see him and his events get such great press. I’ve never known anyone to walk away from a Takedown unhappy and this event was no exception. Thank you, Matt!

For those of you who are interested, here are some links with much better write-ups than my own!

Wall Street Journal Metropolis Blog
Second article in the Wall Street Journal
Local Bozo
Jennifer Baker: A Baker with an Appetite for Writing
Brooklyn Exposed
Serious Eats

* Yes, there was real moonshine in the sherbet! No, I did not make it. Yes, you can absolutely buy corn whiskey. It comes in Mason jars 🙂

The Daring Kitchen July Cooks’ Challenge: Papillotes de pêches et framboises à la vanille (Peaches and Raspberries Cooked in Parchment Paper with Vanilla Bean)


The dissertation has been pretty overwhelming lately. This is the big push before the defense so I haven’t had much time for all the things that I love like spending time with my friends, cooking, blogging, eating out and drinking.

I miss the drinking. I ran an errand the other day and saw some nice people drinking wine in the shade. I remember jealousy thinking, “I bet they don’t even appreciate that wine!” Suddenly, I was overcome with the desire to grab their glasses out of their hot little hands and go sprinting down the street.

I didn’t do it, but I sure wanted to.

No way did I think that I was going to be able to participate in the Daring Kitchen challenge this month either until I saw the challenge: cooking en papillote.

En papillote is a fancy schmancy way of saying that you cook something in a paper envelope. We’re not talking about any old paper here; we’re talking about parchment paper, also known as bakery release paper or greaseproof paper. Cooking in parchment is a terrific way to cook delicate things quickly without fear of them drying out. You can also roast food en papillote as the paper allows just enough steam to release so that potato skin, for example, gets nice and crispy while the insides gently steam to perfection.

You could use aluminum foil instead of parchment paper — also known as a hobo pack — but I find that the results lack the finesse and elegance of cooking in paper. I might also be too negatively affected by the word “hobo,” and too seduced by the phrase “en papillote“!

It’s true that this month’s Daring Kitchen assignment wasn’t really a challenge for me since cooking en papillote is one of my favorite cooking methods. On this blog, I have posted a recipe for roasted tiny potatoes en papillote and roasted salmon with mango and Bird’s Eye chiles. However, it was completely new for me to use this cooking method to make a something sweet instead of something savory.

This dessert recipe was inspired by one that I saw months ago on Elle à table, the companion cooking site of French Elle Magazine. I kept the primary components — parchment, peaches and raspberries — and changed the rest. The original recipe has you peel the peaches. However, if the peaches are nice and ripe, this step seems fussy. It also seems like it would be a big waste of precious juice. The Elle à table recipe also calls for lime zest and juice, whereas I only used the zest for fear that the extra juice would have made the dessert too watery. Instead of a lime, I used a lemon. I also swapped out the cinnamon for vanilla bean, and shortened the cooking time so that the fruit would stay more intact.

Just like there is more than one way to roast a chicken, there is more than one way to make a parchment paper packet. Traditionally, you take a large piece of parchment paper, fold it in half, and cut out a heart — just like how you did as a child. After you position your food on the paper, you seal up the packet by folding or crimping the edges shut. To give you an example of how to seal up a parchment paper packet, here is a video with Chef Paul Prudhomme — who can pronounce papillote any dang ol’ way he pleases in Cajun country.

Alternatively, you can arrange your food in the center of a square of parchment paper, pull two of the sides up, fold them down, and then tie off the ends with cooking string. For some more examples of parchment paper packets, I direct you to this month’s Daring Cooks’ Challenge PDF.

In the end, it doesn’t really matter how you seal up the parchment paper as long as you make sure that your packets are snug, but not too tight around your food.

I made two different kinds of packets for this challenge. You can see them both in the photo gallery below. This challenge didn’t take up too much of my time since I had the fruit already (it’s high peach season here). Most importantly, it reminded me of how valuable it is to not give up those things in life that give you pleasure at those moments in life when you feel most stressed out.

A big thank you to Sarah from All Our Fingers in the Pie for the terrific challenge 🙂 In terms of mandatory items, you only asked that we cook in parchment. As suggestions, you gave us some amazing savory ones like beef, lamb or rabbit. I chose a gourmand take on cooking en papillote, which I hope still keeps with the spirit of the challenge even though it might not have been as challenging!

Mandatory blog checking lines: Our July 2012 Daring Cooks’ host was Sarah from All Our Fingers in the Pie! Sarah challenges us to learn a new cooking technique called “Cooking En Papillote” which is French and translates to “cooking in parchment”.

* The reveal date for this month’s French cooking challenge happens to fall on Bastille Day: le 14 juillet 🙂 Bonne fête, tout le monde!

Ingredients:

4 beautifully ripe yellow peaches

1 vanilla bean pod, split into four pieces

1 punnet of raspberries*

Cane sugar

The zest of 1 lemon

Cold butter

How to prepare:

1. Pre-heat your oven to 400° F.

2. Defuzz the peaches by very gently rubbing as much of the peach fuzz off as you can under cold running water. Cut the peaches into slices that are a little more than a quarter-inch thick.

3. Evenly divide the peach slices between 4 parchment paper sheets. You will use about one peach’s worth of slices per packet. Tuck one split vanilla bean pod in-between the peach slices. The vanilla should perfume the fruit, but not overwhelm it. Arrange a small handful of raspberries over the peaches. Sprinkle the fruit with cane sugar. Grate a little lemon zest over the top. Dot the fruit with about a 1/2 tablespoon of cold butter cut into small pieces

4. Crimp or tie off your parchment paper parcels and arrange them on a large baking sheet. Bake them between 8-10 minutes. Remove them from the oven and carefully open them (they will be steamy). Find and discard the vanilla bean pods.

You can serve the peaches and raspberries straight from the paper, or you can transfer the fruit to a small bowl to top with a scoop of vanilla ice cream or gelato.

* Although punnet is a Britishism, but it’s a pretty useful word for those little plastic or molded paper baskets intended for berries. We don’t seem to have any equivalent in American English (the closest approximation is a pint basket). Furthermore, punnets for raspberries are generally smaller than the containers used for pints of strawberries . . .

Cherry Clafoutis


Clafoutis is the classic dessert of the Limousin, the northwestern part of the Massif Central in the middle of France. Traditionally, it is baked in a buttered dish and is more or less a flan with ripe black cherries. Sometimes, other red fruits like prune plums, red plums or blackberries are used. Done correctly, it is lovely.

When I was doing my internship, the chef taught me a great recipe for clafoutis that was simple and foolproof. We would schedule it for days when we had cooking students who had little or no experience in the kitchen. Not to be trusted with knives, we knew that we could put cherry pitters in their sweaty little hands without fear of accidents. Better yet, since clafoutis tastes best when you leave the cherries unpitted (a little more onerous to eat, but worth it), sometimes the students wouldn’t even get cherry pitters, just whisks!

Try to take an eye out with those!

At home, I reliably depended on that recipe any time I needed to deliver a perfect clafoutis. It worked every time — even when I was a little short or too generous with the cherries, and even when I ran low on sugar, flour, milk or all three.

Then I moved back to New York. Suddenly, the recipe that worked so marvelously in Paris became a total dud. I can’t tell you how many heavy, lumpy, pathetic clafoutis I turned out. I was making clafoutis that tasted more like lightly sugared cherry omelets — every bit as unpleasant as it sounds.

I even inflicted them on friends, like poor Tomoko who had to pick her way around my rubbery pâte and gray (yes, gray) cherries last summer.

“What did you do to them?” she asked.

I had no idea. I could only think of something a friend in Paris repeated to me, something that she had overheard at a dinner party. Faced with the prospect of ingesting one more morsel of clafoutis after a lengthy and generous meal, one of the guests declared himself cla-foutu — a French play on words that roughly means cla-f***ked.

Well, my New York clafoutis were definitely their own kind of cla-foutus.

You always hear people who say that the definition of crazy is doing the same thing over and over again and expecting a different result. When I saw gorgeous cherries at the Greenmarket this week, I decided to get off the Crazy Train and stop trying to make my Parisian recipe. It was time to get back to Julia.

Julia Child, that is 🙂

Compared to what I was making, I think this clafoutis is a beauty. Sure, it rose much higher on one side than the other (I should have turned it halfway through cooking. Stupid un-calibrated oven). Yeah, it cracked (I over-cooked it. I should have taken it out of the oven sooner).

But I feel like I am getting my clafoutis-groove back on.

This recipe is adapted from Mastering the Art of French Cooking, Volume I. Julia calls for three cups of cherries, and if I had three cups, I would have used them 🙂

For the original recipe, click here.

Special equipment:

A stick immersion blender

Ingredients:

Butter

2-3 cups of ripe cherries, pitted . . . or not!

1/3 cup of sugar

1 and 1/4 cup of whole milk

5 pullet eggs or 3 large eggs

1 tablespoon of vanilla extract

A pinch of salt

2/3 cup of all-purpose flour

Powdered sugar

How to prepare:

1. Preheat the oven to 350°.

2. Butter a baking dish and arrange the cherries in a single layer on the bottom.

3. In a large bowl, use the immersion blender to blend together the milk, the eggs, the vanilla extract, the salt and the flour for 1 minute. The batter should be nice and frothy.

4. Set the baking dish on a baking sheet. Use a ladle to carefully pour the batter over the cherries. Bake for about an hour. The clafoutis will be done when the sides are puffed and golden, and when a knife or a skewer inserted in the center comes out clean. The clafoutis will be like a souffle when you remove it from the oven. Let it settle completely — it will sink down as it cools — before serving. Dust the clafoutis with powdered sugar right before cutting it into wedges.

Mascarpone-Polenta Cake with Rhubarb and Meyer Lemon


I wish that I was more of a baker. Unfortunately, my baking past is littered with all kinds of baking misfortunes: lumpy cakes, leaden cakes, cracked cakes, dry cakes, lopsided cakes, burned cakes, burned cakes with runny centers, runny cakes with charred tops. The list is unfortunately long!

I think it must be related to the fact that, when it comes to recipes, I am incorrigible: I rarely follow them to the letter. It doesn’t help that I am generally inclined to eyeball amounts instead of dirtying up another measuring cup or spoon. This is fine for regular cooking, but kind of disastrous when it comes to baking.

So when I decided to try to come up with my own recipe for a polenta cake with mascarpone that would make use of the first of this season’s rhubarb, I was pretty nervous.

Thankfully, it came out beautifully. The cake had a wonderfully moist and tangy crumb that beautifully complemented the rhubarb’s tartness. The idea of arranging the fruit (or vegetable? I guess rhubarb actually a vegetable) on the top of the cake batter comes from Nigel Slater’s Blueberry-Pear Cake from his Kitchen Diaries.

One more thing: be sure to remove any leaves from your rhubarb stalks before cooking. Only the stems are edible. The leaves contain oxalic acid that can make you pretty sick. It goes without saying to keep your animals away from rhubarb. More for you, I say. What a delicious way to live dangerously!

Ingredients:

About 2 1/2 cups of rhubarb, washed, trimmed and sliced into 1/2 inch pieces

1 cup of brown sugar, plus an additional 1/4 cup

8 tablespoons of butter (1 stick), softened

1 egg

3/4 cup of mascarpone

The zest and juice of one Meyer lemon

1 cup of all-purpose flour

1 cup of yellow corn meal

3/4 teaspoon of salt

1 teaspoon of baking powder

1/4 teaspoon of baking soda

How to prepare:

1. Line the bottom of a 9-inch springform pan with parchment paper. Butter the sides.

2. In a medium-sized bowl, toss the rhubarb with 1/4 cup of brown sugar. Let the rhubarb sit for about 30 minutes.

3. Preheat the oven to 350°.

4. Sift the dry ingredients (the flour, the corn meal, the salt, the baking powder and the baking soda) together into a large bowl.

5. In another large bowl, cream together the remaining cup of brown sugar and the softened butter. Add the egg, followed by the mascarpone, the lemon zest and the lemon juice. Continue beating the mixture until it is nice and fluffy. Beat in the dry ingredients, a little bit at a time, until they are well-incorporated into the batter.

6. Spread the batter out as evenly as possible onto the bottom of the springform pan. It will be thick. Arrange the rhubarb by pressing each piece into the batter in concentric circles. Bake the cake for about 1 hour and 30 minutes, until the top is golden and the center has set.

Let cool before slicing and serving.