 As many of you know, I signed up a few months ago to participate in the The Daring Kitchen‘s monthly challenges. The basic premise of the Daring Kitchen is that you sign up for one of two groups: The Daring Bakers or The Daring Cooks. Once confirmed, you will be tasked with either a baking or a cooking challenge (depending on which group you joined), and given one month to complete the challenge. All members upload their completed dishes to their blogs on the same day.
Well, today is the day, and this month’s challenge was tamales.
I love tamales. I have always wanted to try them at home, but never have because I was always intimidated by how much work everyone said they were to make.
“Pain in the ass,” said one friend.
“Why don’t you just buy them?” asked another.
“You don’t have enough room to make tamales!” exclaimed yet another friend.
Well, now I can tell you that you can make tamales in a studio apartment kitchen without an army of willing friends and family to help.
I know because I just did it!
This blog post is a little different from my normal recipe posts. First of all, I am going to show you the recipe step-by-step with photos. This will make the post a lot longer, but I hope that it will also give me a chance to walk you through the challenge and show you what I did, why I did it, what I thought worked, and what I would have done differently knowing what I know now.
But before we get started, I need to include the monthly challenge’s mandatory blog-checking lines: “Maranda of Jolts & Jollies was our January 2012 Daring Cooks hostess with the mostess! Maranda challenged us to make traditional Mexican Tamales as our first challenge of the year!”
For Maranda’s challenge, a lot of freedom was given to us to choose our own tamale recipe and improvise as we saw fit. This was a little different from some other cooks’ challenges that I have seen, but after making tamales, I see that it made a lot of sense. For me, some ingredients were not that easy to find. I can imagine for others that a lot of substitutions would be pretty much necessary. Also, like a lot of people, I didn’t want to buy any special equipment. Thankfully, as I found out, there are as many ways to steam a tamal as there are ways to roast a chicken.
Tamales are not difficult to make, but they are very time-consuming. You will probably need to set aside a whole day to pull them together. Be sure to read the recipe ahead of time. What takes the most time is just waiting for different components of the tamales to cook, soak, rest, etc.
That being said, let’s get on with it.
Ingredients:
For the red chili pork filling (adapted from Rick Bayless):
1/3 of a cup of good-quality chili powder, preferably without salt
3/4 teaspoon of salt if the chili powder has no salt (omit this if salt is included in the spice powder)
1 pound of boneless pork shoulder
2 tablespoons of masa harina
1/4 cup of golden raisins, chopped
1/4 cup of pitted green olives, chopped
Salt
For the poblano chili and cheese filling (adapted from Diana Kennedy):
3 fresh poblano peppers
10 ounces of Queso Chihuahua, or Monterey Jack if Chihuahua cheese is not available
About 1/2 cup of salsa verde
For the rest:
2 to 3 3-ounce packages of dried corn husks
10 ounces of rendered leaf lard, or vegetable shortening if lard is unavailable, softened but not runny
1 1/2 teaspoons of baking powder
3 1/2 cups of dried or instant masa harina for tamales
2 1/4 cups of hot water
1 to 1 1/2 cups of chicken broth
Salt
How to prepare:
1. Find all your ingredients.
This alone took about a day of calling around town and shopping. You would think that living in New York City would make it relatively easy to procure ingredients for tamales, but the truth is that though the size of the Mexican community is growing, it is still not particularly sizable compared to other ethnic populations in the city.
I could have gone all the way up to Corona to the very excellent Tortilleria Nixtamal for fresh masa, but Corona is super far from the East Village. So dried, or instant, masa it was going to be.
Luckily, I do live relatively close to Zaragoza Mexican Deli and Grocery on Avenue A. If you have never been to Zaragoza, I would highly recommend it. Outside, it looks like any other deli. Let’s admit it: inside it doesn’t look like much either. “Deli and Grocery” is a bit of a generous statement too given that when you walk in, the “deli” part consists of a two-foot long counter packed with cigarettes and lottery tickets. The “grocery” looks like a crammed wall of dimly lit cans. You would totally be amazed, though, at what they have. It’s almost like magic; rarely have I asked for something that they didn’t stock.
In the back of the deli, there are a few tables set up for food. Zaragoza does homemade tacos, sandwiches, rice and beans, and soup. It’s all very fresh and really delicious — which is why I opted to buy a quart each of their salsa roja and salsa verde instead of making my own.
Tamales are enough work on their own without my having to worry about making sauces too. Plus, Zaragoza’s salsas are really fantastic.
The other challenge was procuring the lard. Lard is relatively easy to find, but I always think that if there is any animal product that reveals most distinctively what the animal ate and how the animal was treated, it’s the animal’s fat. So I wanted to buy good lard.
And I wanted someone else to render it for me because I don’t like rendering fat very much.
Yeah, I’m a pussy like that.
That took me to Dickson’s Farmstand Meats in Chelsea Market. They stock rendered leaf lard — the highest quality lard you can get, made from the soft, visceral fat that surrounds kidneys and loins of the pig. It is pure, pillowy, snowy whiteness, and smells like the cleanest, most pristine pork rind ever.
While I was there, I picked up a pound of pork shoulder. Had I more time, I would have defrosted some awesome pork shoulder from my CSA. Unfortunately, I didn’t plan ahead so I had to buy it. Not only did the butcher at Dickson’s cut me .8 of a pound instead of a full pound, but about half of that was fat and connective tissue. After cooking, I think that I had less than half a pound of pork for tamal filling.
And no, the butcher did not show me the meat before wrapping it up. I know. I should have asked, but I was in a hurry.
To Dickson’s Farmstand Meats: BOO! #BUTCHERFAIL!
To Manhattan Fruit Exchange, also in Chelsea Market, thank you for stocking Chihuahua Cheese and poblano peppers.
To any Daring Cooks out there: did anyone use bacon fat instead of lard?
2. Soak your corn husks.
For my tamales, I was torn between using the eminent Diana Kennedy’s recipe, or Rick Bayless’ recipe. In the end, I used a little bit from both, with sprinkles of tricks and suggestions from a bunch of Youtube clips.
But the tamal dough recipe that I used is Bayless’ because Kennedy’s recipe frankly scared me: she asks for you to take the wide, white corn used for pozole, soak it overnight, use your fingers to rub the skin off each individual kernel, let the kernels dry in the sun for two days, grind the corn in a mill, sift it, and then grind and sift it again.
No joke. That is seriously hard core.
His recipe is for 26 tamales, and he suggests buying about 8 ounces of corn husks. I bought 3 packages of corn husks that weighed 3 ounces each. I had a ton of corn husks left over, but I reasoned that it was better to be on the safe side and have too many than too few.
Bayless recommends soaking the corn husks in hot water for a couple of hours, but I would recommend doing it for much longer if not overnight. I soaked mine for about 4, and some were still not completely pliable.
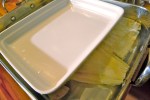
• Take a large roasting pan and arrange the corn husks in it. Cover them with hot water until they are completely submerged. Weight them down with a heavy plate or dish for about 4 hours, or even overnight.
3. Make the red chili pork filling.
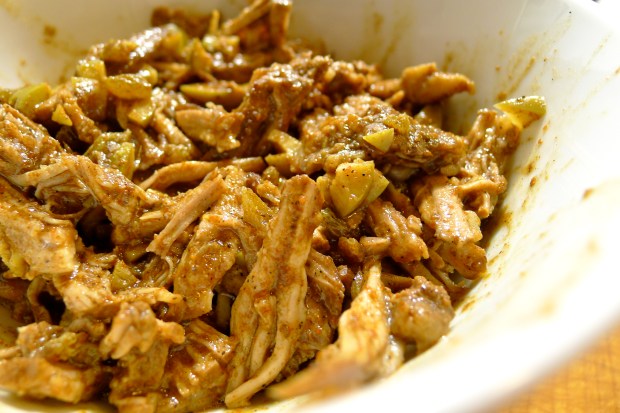 • In a medium sauce pan, whisk the chili powder and the salt if needed with about 3 cups of water. Add the pork shoulder to the pan and bring the liquid up to a boil. When the liquid is boiling, reduce the heat to medium-low and simmer the pork, partially covered, for about an hour. The meat should be falling-apart tender. Let the meat cool slightly in the broth before removing it to a plate. Do not get rid of the cooking liquid.
• In a separate bowl, mix 2 tablespoons of masa harina with about 1/2 a cup of water to make a slurry. Bring the remaining cooking liquid to a simmer over medium-high heat. Strain the masa slurry. Discard the solids, and whisk the strained liquid into the remaining cooking liquid. Continue to simmer the sauce until it has reduced by about half and has thickened. Be sure to skim the surface of any fat or foam as the sauce cooks down.
• As the chili sauce reduces, use two forks to break up the pork shoulder into shreds. In a bowl, toss the pork with the chopped raisins and olives. Add the reduced sauce, little by little, until the pork is well-moistened and evenly coated. The pork should not be swimming in liquid. You can use any leftover sauce to serve your tamales.
• Adjust the seasoning.
4. Prep the poblano chilies and the cheese.
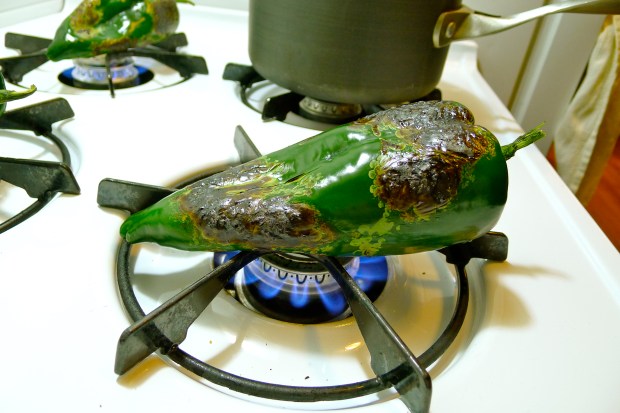 • If you have a gas range, set the poblano peppers directly onto the gas burners with the heat on high. Turn the peppers periodically to make sure that their skins char evenly. Poblano peppers have relatively thin skins compared to bell peppers, so watch them carefully as they will char quickly.
If you have an electric range, rub the peppers with olive oil and place them on a cookie sheet set underneath the broiler. You can also rub the peppers with olive oil and pop them into a 450° oven. Remove them when their skins are blistered and blackened.
• When your peppers are nice and charred, put them in a clean plastic grocery bag or a small paper bag and wait for them to cool. When they are cool enough to handle, you should be able to gently rub off all the charred skin from the pepper using a paper towel. Seed the peppers, and discard the seeds and stems. Cut the peppers into strips.
• Cut the cheese into small bars, about 1/2 an inch thick and about 2 1/2 inches long.
5. Prepare the tamal dough.
 The first thing you need to do if you do not have fresh masa is to reconstitute dried or instant masa harina for tamales. Bayless recommends 3 1/2 cups of masa harina to 2 1/4 cups of hot water.
I did this by stirring in the water with a wooden spoon, which I really feel was a mistake because the dough was so stiff and hard to manipulate that I felt it three days later.
I think I have tennis elbow now.
Only after I made the tamales did I see that someone had suggested mixing the hot water into the masa flour with your hands, like bread dough.
Now they tell me!
So even though I haven’t tried it myself, it is what I would suggest that you do.
• In a large bowl, using your hands, mix the masa harina with the hot water until the dough begins to pull together into a large mass.
Now it takes a lot of lard to make tamales. However, in lard’s defense, it is probably much better for you than vegetable shortening. Furthermore, Diana Kennedy points out that despite the scary amount of lard needed to make tamal dough, “it is absorbed by the husk and transpires into the water.”
So it just disappears?! All that lard just disappears?!?! Oh my gosh. It’s FREAKIN’ MAGIC!!!
Regardless whether or not you believe Kennedy, for the absolute best tasting tamales, you should use lard.
I suppose that there are some people out there who like their tamales dense as rocks. I prefer the masa soft and airy. The best way to achieve this is to really whip that lard until it is light and fluffy, like creaming butter for a cake.
I would not recommend you do this by hand.
• If you have a Kitchenaid mixer, use that. If not, use a hand blender. Cream together the softened lard, the baking powder, and the salt on high speed until it is light in texture.
• When the lard is fluffy, keep the mixer running and add the reconstituted masa a handful at a time. Once all the masa is incorporated, add about 1 cup of chicken broth. Continue beating the mixture for about another minute or two. Bayless says that the texture should be like a soft, but not runny, cake batter, but I think it’s more like a super fluffy cookie dough.
Ideally, a dollop of tamal dough it will float in a glass of water when you have achieved tamal dough perfection. This didn’t happen to me the first time that I tested it, and I figured out it was because I had added too much water to the reconstituted masa. It was only after I added more masa flour, a little bit at a time to compensate for the extra moisture, that I got it right.
• Cover the bowl with plastic wrap, and let the tamal dough rest in the refrigerator for about an hour. After an hour, rebeat the tamal dough, adding a little more chicken broth if it needs it. Retest it by seeing if a dollop of the dough floats.
• Adjust the seasoning.
6. Form the tamales.
 Now we’re in the home stretch!
I must say that I watched a lot of Youtube clips to get this right. Most recipes that I read said to use a spoon or a spatula to spread the dough over the corn husks. That is what Zarela Martinez did, and well, she’s Zarela Martinez!
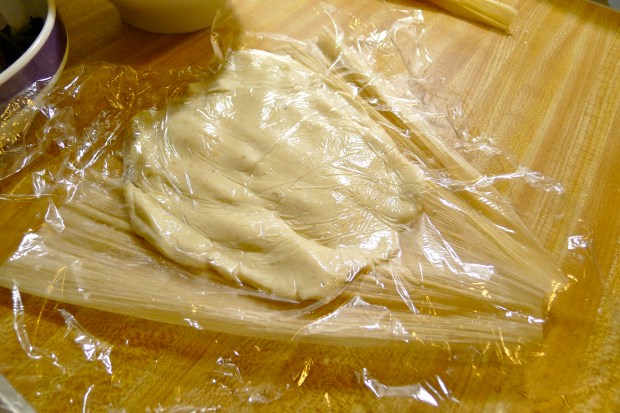
However, I proved to be some kind of tamale-making flunky and couldn’t manage to spread the dough thinly across the corn husks without tearing them. After a few ruined attempts, I checked out this brilliant Youtube clip that showed how to lay a piece of plastic wrap over the masa to smooth it out gently without any tearing.
Whoever you are in Youtube land, you are amazing.
• Rinse the soaked corn husks (there might be some dead bugs stuck to them), and shake them dry before rolling your tamales.
• Lay a corn husk out so that it fans away from you. Drop a dollop of about 1/4 cup of tamal dough in the middle of the upper center of the husk. Lay a piece of plastic wrap over the top of it, and use your hands to smooth the dough out in a thin layer. Make sure the dough goes all the way to the top edge, but be sure to leave a “border” of corn husk on either side. The spread-out dough should be roughly in a 4-inch square shape.
I watched a several different ways to fold tamales. I tried two ways, one of which I would recommend, and the other one I wouldn’t. The most common way that I saw online was to start on one side of the corn husk and roll the tamal like you would a jelly roll. This is what Zarela Martinez shows in her Youtube clip.
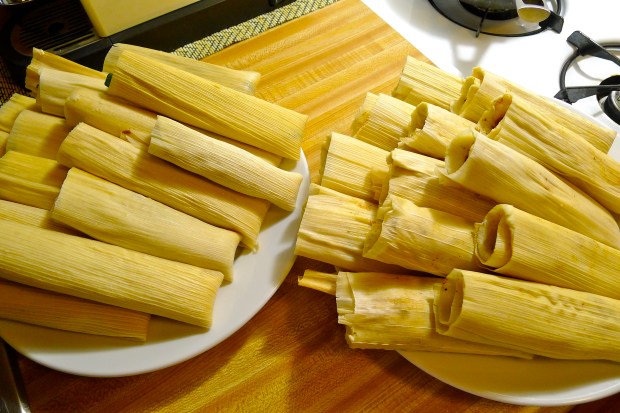
 Rolling a tamal like a jelly roll is just a terrible idea because when you unwrap the tamal after it has steamed, instead of a nice compact shape, you have the potential for a sloppy mess. The tamales shown in the picture above were rolled this way. These two held their shape a little better than some of the others, but not nearly as well as the ones I rolled in the way recommended by Bayless (which are shown in the first picture of this blog post).
I kind of wish I had done them all Bayless’ way.
Bayless recommends that you after you spread the tamal dough over the upper center of the corn husk, you pick the tamal up by its two long edges to bring the sides in together. Tuck one edge in under the dough, and wrap the other edge around the tamal.
To help visualize this, here is a handy Youtube clip.
Instead of piecing two smaller corn husks together, as you might have to do if you had bought just enough, Bayless asks that you buy extra corn husks so that you can pick out the biggest and prettiest ones to roll.
 • Once the dough is smoothed out in a thin layer that extends all the way to the edge of the top of the husk, it is time to fill the tamal. For the pork tamales, mound a good spoonful of filling along the center of the dough. For the chili and cheese tamales, Put about a teaspoon of salsa verde down the center of the dough. Lay 3 poblano chili strips down on top of the salsa, followed by a piece (or two) of cheese.
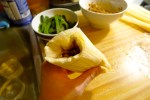
• Now bring the two long edges of the corn husk together. This will cause the tamal dough to surround the filling. Gently pinch or push together the opposite sides of the dough so that you make a good seam. Tuck one edge of the corn husk under the tamal, and wrap the other side over the whole thing — kind of like swaddling a baby. Finally, fold up the empty “tail” of the tamal, leaving the top open.
7. Steam your tamales.
Bayless’s recipe should make about 16 red chili pork tamales, but given that I didn’t have much meat to work with, I ended up with only twelve. His tamal dough recipe should be enough for 26 tamales. As I had to add more flour to make up for the extra liquid that I added, I ended up with 29 tamales. Pretty accurate, Rick!
 You can buy tamale steamers, which are pretty darn inexpensive (about $20), but I certainly don’t have the room to store any more specialized cookware. Moreover, I didn’t want to spend money for what is basically just a stock pot and a metal insert.
There are many different ways to steam tamales. You could use those Chinese bamboo steamers, or one of those fancy electric steamers. I even saw some Youtube clips of people steaming them in rice cookers.
I used a tall stock pot and one of those inexpensive pop-open steamer baskets, about $7. If you don’t have a steamer basket, you can improvise by coiling up a kitchen towel or crumpling up a large piece of aluminum foil into a flattened sphere, placing that on the bottom of your pot, and leaning your tamales up against it.
To visualize this, here are two handy Youtube clips:
Steaming Tamales: Louis D. Garcia explains his way
Zarela Martinez’s Tamales 1, 2, 3
The only disadvantage to doing it this way is that the bottom of your tamales will be submerged in water. But at least you didn’t have to buy anything!
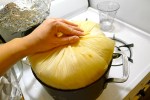
• Place your stainless steel basket steamer in the bottom of a large stock pot. Add about two to three cups of water. The water should come up about an inch from the bottom of the pot, but it should not touch the bottom of the basket. Most steamer baskets have little “feet,” but if yours doesn’t, you can rest the steamer basket on either a ring of aluminum foil, or on little balls of aluminum foil to keep it elevated.
• Set the tamales in the pot vertically. To make this easier, you can tie three to four tamales together (folded tails facing in) with kitchen string, and then set them in the steamer in groups. Or you can just be stubborn like me and fiddle around with them until you get all the tamales in there. If you find that there is a lot of space between your tamales, you can ball up more aluminum foil and insert the balled up foil in-between the tamales and the sides of the pot.
• Tuck some leftover corn husks in-beween the pot and the tamales. Fold them over the top of the tamales like flower petals.
• At this point, if you are able to cover your pot with its lid, do so. If you cannot put the lid on the pot, improvise by wrapping a few large pieces of aluminum foil over everything and very tightly around the pot. Make sure there are no gaps or holes.
• Turn the heat on medium-low. Steam the tamales for about 1 hour and 15 minutes. Some recipes suggest only about 40 to 45 minutes of steaming time. However, I think with tamales, the extra time is needed so that the super-absorbent masa swells in the steamer and not in your stomach. After an hour and 15 minutes, your tamales will not be overcooked or mushy. They will be perfect.
8. Invite friends over to eat your tamales.
 • When your tamales are done steaming, carefully remove the lid or the aluminum foil. Beware of hot steam. Peel the corn husks away from the center. Let the tamales stand in the steamer for about 15 minutes to firm up before serving.
I made these tamales on New Year’s Eve. Start to finish, they took me roughly 7 hours. Most of that time was spent just waiting for things to finish soaking, cooking, resting, etc.
Thank you to Joseph and Sharon for being my tamale guinea pigs, and for ringing in the New Year with me! Here’s to 2012!
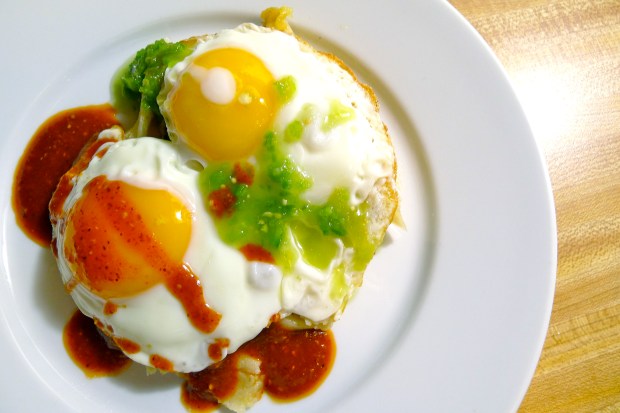
9. Eat leftover tamales the next day with fried eggs on top.
 Tamales for
 breakfast lunch late lunch are the best ever. You can reheat them by either steaming them until they are heated through, or throwing them in the microwave for a minute or two if you are super hungover lazy like me. Serve them with a couple of fried eggs on top for a very delicious meal.
 And that is how I made tamales for New Year’s. Thank you Maranda at Jolts & Jollies for the amazing challenge. I loved the idea, as well as being able to start the new year by cooking something new.
Now onto the next one!







Where do I begin? Thanks for this post! I have been wanting to attempt tamales for a year, and now I have no choice but to push forward. Thank you for all your great tips in the recipe.
Also, thanks for turning me on to The Daring Kitchen…can’t wait to start on the next challenge!
Aw, thanks! You should definitely try it. I think now that I have done it once, it will be much faster the next time around!
I can’t wait for the next challenge either! Whoo-hoo!
This is great post on the step by step process of making the tamales.
Thanks! I really enjoyed this challenge. I feel like I am going to learn a lot from participating in these things!
A++ for effort. Wow! I had no idea how time consuming they were. They sure do look yum-o-licious!
They were so good! Definitely worth it. When I make them next time, I might plan ahead better and try to do things in steps (like soak the husks before I go to bed, or prep the fillings the night before). It feels like the start of a New Year’s Eve tradition, though!
I have never tried a tamale, but the ingredients seem to me to be good comfort food. I’m hesitate to make anything that I haven’t tasted from a pro first so I know what I’m shooting for. I’m afraid that if I don’t like what I’ve made, I won’t know if it’s my cooking or tamales.
I’ve been wanting to try tamales for a long time now but I haven’t seen anyone that sells them here in New Zealand or even any corn husks for sale. Leaf lard sounds very interesting! Do you use it to make anything else?
Also, do you freeze your tamales when you are done?
Tamales are terrific comfort food! I too am a little hesitant to make something without having tasted it first. I did see on a few blogs that people had attempted it without having a reference to how it might end up. That would scare me a little, but it is also kind of exciting!
Tamales are hard to find here in New York too! Sometimes you have to call ahead, or special order them. You can use corn husks, but there are other parts of Mexico that use banana or plantain leaves which are maybe more easily found since most Asian supermarkets stock them frozen. I don’t know if I would use parchment paper, or plastic wrap (wouldn’t that melt?) as suggested by the Daring Cooks’ pdf . . .
I have some leftover leaf lard sitting in my freezer. I am thinking pie crust?
You can certainly freeze tamales too! Most people do since they are so much work that people make tons of them in one go. In the fridge, they keep for about a week. But in the freezer, they will obviously keep much longer!
Thanks for the comments and the questions! Btw, I am loving your blog!
Like everything in New York.. you gotta know who to call and always get referrals from as many vendors/ you meet. They always know where to find regional dishes :). I love how your tamales turned out though. They look amazing
So true. Once I got a recommendation for the best Ethiopian Yrgecheffe coffee in town. I would have had to go to a complete stranger’s apartment to pick it up and have them show me the best way to brew it. My friends wouldn’t let me go. I suppose it didn’t sound like the safest scenario, but I always think of the cuppa’ that got away!
Thanks for comment about the tamales!
These look amazing. I absolutely love tamales but I have yet to take on such a major undertaking. These look like they were well worth the work! Yum!
They were definitely worth it. I was eating tamales for a week. Weirdly enough, I didn’t get tired of them!
OMG you are seriously my hero! I have yet to attempt tamales, they scare the crap out of me for some reason. Thanks for posting this one, I am saving it!
I know! I was so intimidated to make them. I think that if if not for the Cooks’ challenge, I never would have! But it was actually a ton of fun, and a great learning experience. I would definitely recommend giving it a try!
Just connected to your site via Dashboard. Great step by step for making tamales and the morning after breakfast look amazing. Yum!
Great site and stop on by mine if you have a chance. It’s a gluttonous combination of sports, food, etc. 🙂
cheers,
Jed
Thanks! Nothing beats tamales and fried eggs for breakfast! Except maybe chorizo and fried eggs . . . maybe chorizo tamales and fried eggs!
Your blog is great! It is a gluttonous combo that I look forward to keeping up with. Thanks again for the comment!